
Related Manuals for Kogan SMARTERHOME KAWFSAC52UA


Summary of Contents for Kogan SMARTERHOME KAWFSAC52UA
- Page 1 KOGAN SMARTERHOME™ AIR PURIFYING SPLIT SYSTEM INVERTER AIR CONDITIONER (2.6KW, 7.0KW & 8.0KW) KAWFSAC26UA, KAWFSAC52UA, KAWFSAC70UA & KAWFSAC80UA...
-
Page 2: Table Of Contents
Contents Safety & Warnings Overview Remote Control Overview Installation Operating Instructions Connect to SmarterHome™ App Google Home control Amazon Alexa control Cleaning & Care Troubleshooting... -
Page 3: Safety & Warnings
SAFETY & WARNINGS WARNING! This air conditioner uses R32 flammable refrigerant. Note: Air conditioner with R32 refrigerant, if roughly treated, may cause serious harm to the human body or surrounding things. • The room space for the installation, use, maintenance and storage of this air conditioner should be greater than 5m •... - Page 4 Symbol Note Explanation This symbol shows that this appliance uses a flammable refrigerant. If the refrigerant is leaked WARNING and exposed to an external ignition source, there is a risk of fire. (Only for the AC with CE-MARKING) This symbol shows that this appliance uses a flammable refrigerant.
- Page 5 WARNING This appliance can be used by children aged from 8 years and above and persons with reduced physical, sensory or mental capabilities or lack of experience and knowledge if they have been given supervision or instruction concerning use of the appliance in a safe way and understand the hazards involved.
- Page 6 • Don't use air conditioner in lightning storm weather. Power supply should be cut in time to prevent the occurrence of danger. • Don't put hands or any objects into the air inlets or outlets. This may cause personal injury or damage to the unit. •...
- Page 7 CAUTION • Do not open the windows and doors for long time when the air conditioner is running. Otherwise, the cooling or heating capacity will be weakened. • Do not stand on the top of the outdoor unit or place heavy things on it. This cloud cause personal injuries or damage the unit.
- Page 8 Remote control precautions • Before first time use of the remote controller, install the batteries and ensure that the “+” and poles are correctly positioned. • Ensure the remote controller is pointed to the signal receiving window and that there is no obstruction in between and the distance is 8m at the maximum. •...
-
Page 9: Overview
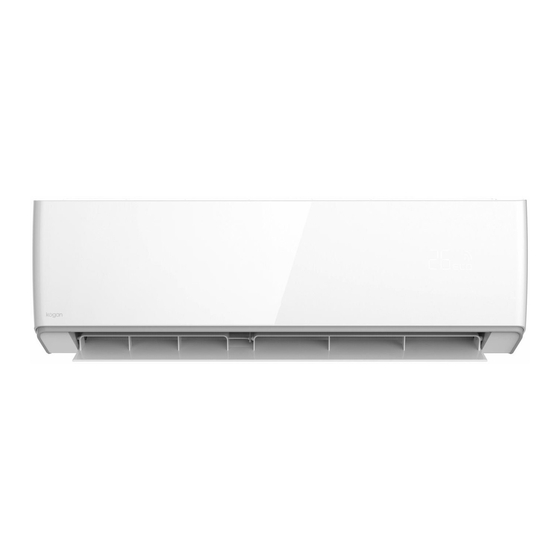
OVERVIEW Indoor Unit Air inlet Force switch Air inlet grille Panel Pipe filter protection ring Air louvre Air outlet Air vent Remote control... - Page 10 Outdoor Unit Power cable Air outlet grille Connecting pipe Drain hose Air outlet Note: All the illustrations in this manual are for explanation purpose only. Your air conditioner may be slightly different. Design and functions are subject to change without notice for future improvement...
-
Page 11: Remote Control Overview
REMOTE CONTROL OVERVIEW Remote Buttons Description Note: The remote controller displays all symbols during power-on and only those corresponding to current operation the rest of the time. - Page 12 1. ON/OFF • Press this button to turn on/off the unit. • This will clear the existing timer and SLEEP settings. 2. SPEED • Press this button, you can select the fan speed as follows: High Auto Note: AUTO air speed is not available in FAN mode. 3.
- Page 13 6. WIFI / iCLEAN WIFI • Press this button 8 times consequtively to enter pairing mode during Kogan SmarterHome™ connection. iCLEAN • Press this button with the unit OFF, the remote controller will display “CL” and the unit will automatically clean dust off the evaporator and dry it, to increase the cooling and heating efficiency.
- Page 14 11. SWING • Press this button to activate up/down swing and press it again to fix the swing position. 12. ANTI-F • The Anti-F functions when the unit is turned off with the remote controller in COOL, DRY or AUTO mode. •...
-
Page 15: Installation
INSTALLATION Important Notices • Before installation, please contact with local authorized maintenance centre, if unit is not installed by the authorized maintenance centre, the malfunction may not solve, due to discommodious contact. • The air conditioner must be installed by professionals according to the national wiring rules and this manual. - Page 16 • Keep electric appliance, power switch, plug, socket, high temperature heat source and high static away from the area underneath sidelines of the indoor unit. • The air conditioner shall be installed in an accessible location to installation and maintenance, without obstacles that may block air inlets or outlets of indoor/outdoor units and shall keep away from heat source, inflammable or explosive conditions.
- Page 17 • The mounting rack and its load carry surface shall be able to withstand 4 times or above the weight of the unit or 200kg, whichever is heavier. • The mounting rack of the outdoor unit shall be fastened with expansion bolt. •...
- Page 18 Requirements for operations at raised height • When carrying out installation at 2m or higher above the base level, safety belts must be worn and ropes of sufficient strength be securely fastening to the outdoor unit, to prevent falling that could cause personal injury or death as well as property loss.
- Page 19 Packing list of the outdoor unit Name Quantity Unit Outdoor Unit Plastic Strap Roll Pipe Protection Ring Luting (putty) Packet Note: Interconnection cord is optional accessories. All accessories shall be subject to actual packaging material, and if there is any difference, please understand. Connection pipe sold separately.
- Page 20 Wall-through Hole Make a hole with an electric hammer or a water drill at the predetermined position on the wall for piping, which shall slant outwardly by 5°-10°. To protect the piping and the cables from being damaged running through the wall and from the rodents that may inhabit in the hollow wall, a pipe protecting ring shall be installed and sealed with putty.
- Page 21 Connecting Connecting pipe drain pipe drain hose and hose and cables cables Outlet Fig 1 material Fig 2 preparation Drain pipe connection Remove the fixed part to pull out pipe of indoor machine from the case. Screw the hexagon nut in the left of the joint to the end with your hand. Connect the connecting pipe to the indoor unit: Aim at the pipe centre, tighten the Taper nut with fingers and then tighten the Taper nut with a torque wrench and the direction is shown in diagram on the right.
- Page 22 Tightening torque table The size of pipe (mm) Quantity Ø 6/ Ø 6. 35 15-25 Ø 9/ Ø 9. 52 35-40 Ø 12/ Ø 12. 7 45-60 Ø 15. 88 73-78 Ø 19. 05 7 5-80 Wrap the Piping Use the insulation sleeve to wrap the joint part the indoor unit and the connection pipe and then use insulating material to pack and seal insulation pipe, to prevent generation of condensate water on the joint part.
- Page 23 Fixing the Indoor Unit Hang the indoor unit on the peg board and move the unit from left to right to ensure that the hook is properly positioned in the peg board. Push toward the lower left side and the upper right side Interconnection cord installation a.
- Page 24 Signal cable Interconnection cord Remove the wire clip; connect the interconnection cord to the wiring terminal according to the wiring diagram; tighten the screw and then fix the interconnection cord with wire clip. Notes: The diagram is for reference only. If the entity is difference with this wiring diagram, please refer to the detailed wiring diagram adhered on the unit which you purchased.
- Page 25 Put wiring cover back and then tighten the screw. Close the panel. Panel Screw b. After installation check The screws whether have been fixed effectively and there is no risk of loosening. Connector of display board whether put in the right place and do not touch the terminal board.
- Page 26 Left installation feet Right installation feet Air inside Air outside Installation outdoor unit bolt Outdoor Unit Size of Shape Model A(mm) B (mm) W1(W2)*H*D) (mm) KAWFSAC26UA 800(860) x 545 x 315 KAWFSAC70UA 890(950) × 700 × 350 KAWFSAC80UA 970(1044) x 803 x 395 Install the connection pipe Connect the Outdoor Unit with Connecting Pipe: •...
- Page 27 Piping length Amount of refrigerant to be added Amount of refrigerant for the unit ≤5M Not needed CC≤12000Btu 16g/m ≤1kg 5-15M CC≤12000Btu 24g/m ≤2kg Notes: • This table is for reference only. • The joints shall not be reused, unless after re-flaring the pipe. •...
- Page 28 Wiring Connection Loosen the screws and remove E-parts cover from the Connect the cables respectively to the corresponding terminals of the terminal board of the outdoor unit (see the wiring diagram) and if there are signals connected to the plug, just conduct butt joint. Ground wire: Remove the grounding screw out of the electric bracket, cover the grounding wire end onto the grounding screw and screw it into the grounding hole.
- Page 29 Notes: • This manual usually includes the wiring mode for the different kind of air conditioner. We cannot exclude the possibility that some special type of wiring diagrams is not included. • The diagram is for reference only. If the entity is difference with this wiring diagram, please refer to the detailed wiring diagram adhered on the unit which you purchased.
- Page 30 Outdoor condensation drainage (Heat pump type only) When the unit is heating, the condensing water and defrosting water can be out reliably through the drain house. Installation: Install the outdoor drain elbow in 025 hole on the base plate and joint the drain hose to the elbow, so that the wastewater formed in the outdoor unit can be drained out to a proper plate.
-
Page 31: Operating Instructions
OPERATING INSTRUCTIONS Check after installation Electrical Safety Check: If the supply voltage is as required. If there is any faulty or miss connection in each of the power, signal and grounding wires. If the grounding wire of the air conditioner is securely grounded. Installation Safety Check: If the installation is secure. - Page 32 • Install batteries in remote control. Note: Make sure that the ventilation is good before testing. Test Operation method: Turn on the power and push the ON/OFF switch button of the remote controller to start the air conditioner. Select COOL, HEAT (not available on cool-only models), SWING and other operation modes with the remote controller and see if the operation is ok.
- Page 33 Notes for heating • The fan of the indoor unit will not work immediately when the heating is started to avoid blowing out cool air. • When it is cold and wet outside, the outdoor unit will develop frost over the heat exchanger which will increased the heating capacity.
- Page 34 Airflow direction adjustment Use up-down swing and left-right swing buttons on the remote controller to adjust the airflow direction. Refer to the operation manual of the remote controller for detail. For models without left-right swing function, the air vent has to be moved manually.
- Page 35 Battery Usage Fix Batteries: Slide to open the cover according to the direction indicated by the arrowhead. Insert two brand new batteries (7#) and position the batteries to the correct polarity (+/-). Replace the cover. Automatic operation mode Press the “MODE” button, select the automatic operation mode. By pressing the “SPEED”...
- Page 36 Fan operation mode Press the “MODE” button, select the fan operation mode. By pressing the "SPEED” button, you can select the fan speed from LOW, MID, HIGH. Press the “ON/OFF” button, the air-conditioner starts to operate. Press the “ON/OFF” button again, the air-conditioner. Note: In the fan operation mode, the temperature settings is non-effective.
-
Page 37: Connect To Smarterhome™ App
Install App Download the “Kogan SmarterHome” app from the Play Store (Android) or App Store (iOS). Register If you do not have a Kogan SmarterHome™ account, register or sign in with a verification code sent by SMS. To register: Tap to enter registration page. - Page 38 Set device in pairing mode Set the device in pairing mode by pressing the Wi-Fi button on the remote control 8 times. The air conditioner will beep twice when it is ready to connect. If the air-conditioner does not beep, repeat this step. If no action taken in 10 minutes, or if the Wi-Fi connection is not completed in that time, the device will automatically exit pairing mode.
- Page 39 Select “AP Mode” for the set-up type. Ensure that the device is in pairing mode and tap “Confirm”. Enter your Wi-Fi details. It is important that your SmarterHome™ device and the app are connected to the same Wi-Fi network during setup.
- Page 40 10. Follow the in-app prompts to continue AP Mode connection, which will pair your mobile phone to the device’s Wi-Fi hotspot to ensure a connection. Note: If the Wi-Fi hotspot does not appear on your phone in the list of available networks, your device may not be set in AP Pairing Mode correctly.
-
Page 41: Google Home Control
13. From the home page of the Google Home app, select the “+” icon to access the ‘Add and manage’ page. 14. Select ‘Set up device’, then under the Works with Google banner, select ‘Have something already set up?’ 15. Select the search bar and type ‘Smarter Home’ to locate the Kogan SmarterHome™ service. - Page 42 16. Tap ‘Authorise’ to grant Google permission to access the SmarterHome™ app and your devices. 17. From here, you will be prompted to sign into your SmarterHome™ account using either your email or mobile phone number, depending on which method you used to register your account.
- Page 43 19. Tap on any of the devices to view a list of available commands. Note: Please note that Google Home can only control the base/core functions of any compatible SmarterHome™ devices. To make full use of this product’s smart functionality, please use the Kogan SmarterHome™ app.
-
Page 44: Amazon Alexa Control
AMAZON ALEXA CONTROL Note: You will need to have set up an Alexa account prior to linking your Kogan SmarterHome™ device. Adding “SmarterHome” to the Alexa app From the home page of the Alexa app, select the “ ” icon in the top-right and select Skills &... - Page 45 Tap ‘Enable to Use’ to add the Kogan SmarterHome™ skill to Alexa. From here, you will be prompted to sign into your SmarterHome™ account using either your email or mobile phone number, depending on which method you used to register your account.
- Page 46 SmarterHome™ account. When your devices have successfully connected to the Alexa app, you will be able to control your Kogan SmarterHome™ devices via Alexa’s voice commands. Note: Please note that Alexa can only control the base/core functions of any compatible SmarterHome™...
-
Page 47: Cleaning & Care
CLEANING & CARE • Before the cleaning of the air conditioner, it must be shut down and the electricity must be cut off for more than 5 minutes, otherwise there might be the risk of electric shocks. • Do not wet the air conditioner, which can cause an electric shock. Make sure not to rinse the air conditioner with water under any circumstances. - Page 48 Clean the Air Filter: Use a vacuum cleaner or water to rinse the filter and if the filter is very dirty (for example, with greasy dirt), clean it with warm water (below 45˚C) with mild detergent and then put the filter in the shade to dry in the air.
- Page 49 Maintain after using Cut off the power source of the air conditioner, turn off the main power switch and remove the batteries from the remote controller. Clean the filter and the unit body. Remove the dust and debris from the outdoor unit. Check whether there is damage in the mounting bracket of the outdoor unit and if any, please contact our local service centre.
- Page 50 Operating Procedures General work area: All maintenance staff and others working in the local area shall be instructed on the nature of work being carried out. Work in confined spaces shall be avoided. The area around the workspace shall be sectioned off. Ensure that the conditions within the area have been made safe by control of flammable material.
- Page 51 Where electrical components are being changed, they shall be fit for the purpose and to the correct specification. At all times the manufacturer’s maintenance and service guidelines shall be followed. If in doubt, consult Kogan.com for assistance. The following checks shall be applied to installations using flammable refrigerants: •...
- Page 52 (using cut-off valve). Before and during the welding, use OFN to purify the entire system. Contact kogan.com for all assistance. Do not perform this maintenance yourself. Removal and Vacuum Pumping Make sure there is no ignited fire source near the outlet of the vacuum pump and the ventilation is well.
- Page 53 Procedures of Charging Refrigerants As a supplement to the general procedure, the following requirements need to be added: • Make sure that there is no contamination among different refrigerants when using a refrigerant charging device. The pipeline for charging refrigerants should be as short as possible to reduce the residual of refrigerants in it.
- Page 54 10. After the completion of the tank filling and the end of the operation process, you should make sure that the tanks and equipment should be removed quickly and all closing valves in the equipment are closed. The recovered refrigerants are not allowed to be injected into another system before being purified and tested.
-
Page 55: Troubleshooting
TROUBLESHOOTING WARNING: Do not repair the air conditioner by yourself as wrong maintenance may cause electric shock or fire or explode, please contact the authorized service centre and let the professionals conduct the maintenance, and checking the following items prior to contacting for maintenance can save your time and money. - Page 56 Mode setting is incorrect and the temperature and wind (cont’d) The wind blows out, speed settings are not appropriate. Please re-select the but the cooling/heating mode and set the appropriate temperature and wind effect is too weak. speed. If there is odour, it may be due to accumulation of the The indoor unit blows out odour in the environment.
- Page 57 Immediately stop all operations and cut off the power supply, contact our kogan.com in following situations: • Hear any harsh sound or smell any awful odour during running. • Abnormal heating of power cable and plug occurs. • The unit or remote controller has any impurity or water.
- Page 58 NOTES...
- Page 59 NOTES...
- Page 60 Need more information? We hope that this user guide has given you the assistance needed for a simple set-up. For the most up-to-date guide for your product, as well as any additional assistance you may require, head online to help.kogan.com...
Need help?
Do you have a question about the SMARTERHOME KAWFSAC52UA and is the answer not in the manual?
Questions and answers