
Subscribe to Our Youtube Channel
Related Manuals for otometrics Madsen Midimate 602


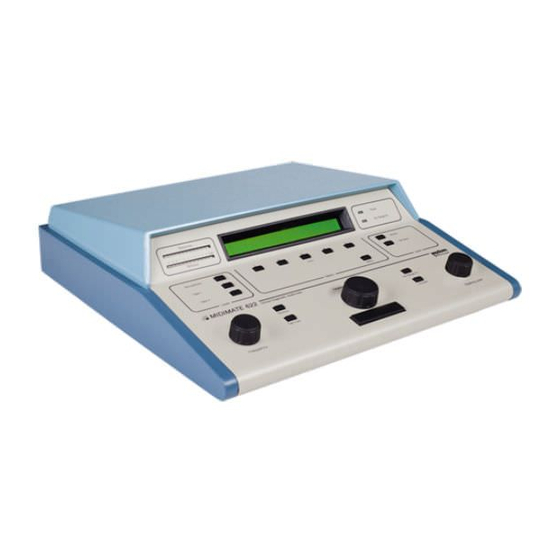
Summary of Contents for otometrics Madsen Midimate 602
- Page 1 602 & 622 Diagnostic Audiometers Quick Guide Doc no. 7-50-0070/01 Part no. 7-50-00700 0 4 5 9...
- Page 2 Printed in Denmark by GN Otometrics A/S, Denmark All information, illustrations, and specifications in this manual are based on the latest product information available at the time of publication. GN Otometrics A/S reserves the right to make changes at any time with- out notice.
-
Page 3: Table Of Contents
MIDIMATE 602 & 622 Diagnostic Audiometers Contents Introduction ........................5 Standards and safety precautions................5 About this manual ....................6 1.2.1 Not covered in this manual ................6 1.2.2 Abbreviations and terms ................. 6 Installing the MIDIMATE 602/622................7 Rear panel ......................... 7 2.1.1 Connecting transducers and other devices ........... - Page 4 MIDIMATE 602 & 622 Diagnostic Audiometers...
-
Page 5: Introduction
MIDIMATE 602 & 622 Diagnostic Audiometers 1 Introduction Standards and safety precautions Standards. The MIDIMATE 602/622 complies with the following standards for audiometers: EN 60645–1, –2; ANSI S3.6. The MIDIMATE 602/622 and this manual are CE-marked according to the Medical Devices Directive 93/42/EEC. The MIDIMATE 602/622 is marked with this symbol to indicate compliance with Type B requirements of EN 60601–1. -
Page 6: About This Manual
MIDIMATE 602 & 622 Diagnostic Audiometers About this manual This manual is intended for audiologists, audiological assistants and health care staff in related professions performing audiological tests on patients. 1.2.1 Not covered in this manual Some MIDIMATE 602/622 functions are not covered in this manual. This includes changing a fuse, changing the supply voltage, some power-on options, calibration, some print setup, printout trouble-shooting, on-line operation to a personal com- puter (except patient ID), and tables of setup structures and procedures, as well as... -
Page 7: Installing The Midimate 602/622
MIDIMATE 602 & 622 Diagnostic Audiometers 2 Installing the MIDIMATE 602/622 Rear panel 2.1.1 Connecting transducers and other devices Before you switch on the electric power, connect the following, as required, to the Rear Panel (or elsewhere, where described): • Data Interface (MIDIMATE 622 only). -
Page 8: Connecting The Electric Power Supply
MIDIMATE 602 & 622 Diagnostic Audiometers 2.1.2 Connecting the electric power supply Before switching on the MIDIMATE 602/622, read the following: Warning! Before you connect the power cable, make sure that the voltage from the electrical outlet matches the voltage shown on the Voltage Selector located beside the Power switch. -
Page 9: Setting Up Test Parameters
MIDIMATE 602 & 622 Diagnostic Audiometers 3 Setting Up Test Parameters Use the MIDIMATE 602/622 to test patients with one of five pre-programmed User Tests (§3.1), or with a manual setup by menu (§3.2). MIDIMATE 622 may be set up to store and display for viewing and/or print out thresholds as described in §8.2. - Page 10 MIDIMATE 602 & 622 Diagnostic Audiometers 8. To set the Tone Switch so that it gives a minimum of 1.5 s stimulus when it is pressed, press Softkey 3 to display the Options Menu and toggle Softkey 1 un- til 1.5s On is displayed. Wait 5 sec or press Menu to return to test mode. 9.
-
Page 11: Pure Tone Testing
MIDIMATE 602 & 622 Diagnostic Audiometers 4 Pure Tone Testing Air Conduction thresholds 4.1.1 Preparing for the test Before you test the Air Conduction thresholds of a patient, make the following preparations: 1. Connect the patient response handswitch, the headphones, the optional monitor headset (or the optional monitor adaptor with talkover microphone and monitor loudspeaker), and the optional patient talkback microphone. -
Page 12: Testing Patients With Large Threshold Differences
MIDIMATE 602 & 622 Diagnostic Audiometers 6. Fit the headphones on the patient, with the red phone on the right ear. 7. If required, test the level of the operator’s monitor or talkover microphone on the patient. If needed, adjust by pressing and holding down the Microphone key in the left-hand Level section of the front panel, or the Talk Over key and turning any of the rotary wheels. -
Page 13: Correcting A Threshold Invalidated By Contralateral Bone Conduction
MIDIMATE 602 & 622 Diagnostic Audiometers If the patient can still hear the tone, this is the valid threshold. If the patient cannot hear the tone, this is because the threshold determined without masking has been invalidated by contralateral bone conduction to the better ear. How to obtain the valid threshold is described in §4.1.4. -
Page 14: Bone Conduction Thresholds
MIDIMATE 602 & 622 Diagnostic Audiometers Bone Conduction thresholds Masking is always necessary when Bone Conduction thresholds are tested because of the reduced level of contralateral attenuation. 4.2.1 Masking with TDH39 headphones The procedure for testing the patient’s Bone Conduction thresholds differs from that for Air Conduction as follows: 1. -
Page 15: Free-Field Thresholds
MIDIMATE 602 & 622 Diagnostic Audiometers other. This is to avoid “false” contralateral masking caused by the high masking level required in the weaker ear. The test procedure is similar to that described in §4.2.1. Free-Field thresholds Free-field pure-tone testing, with loudspeakers instead of headphones, is used pri- marily when the patient for instance is a child who dislikes wearing headphones. -
Page 16: Testing With Speech
MIDIMATE 602 & 622 Diagnostic Audiometers 5 Testing with Speech Live speech testing 5.1.1 Setting up the test To set up a test of a patient’s live voice threshold, do as follows: 1. Connect either the monitor headset with boom microphone or a monitor loud- speaker and talkover/live voice microphone via the monitor adaptor to Monitor on the rear panel. -
Page 17: Testing Speech Discrimination
MIDIMATE 602 & 622 Diagnostic Audiometers 2. If possible, select the better ear to test first by toggling L/R Shift. 3. Read from the list while you turn the Hearing Level wheel to find the lowest level at which the patient can still repeat each word correctly. 4. -
Page 18: Testing With Free-Field Speech
MIDIMATE 602 & 622 Diagnostic Audiometers 3. If you are using recorded speech for testing, a high-quality talk back microphone, amplifier and headset are required. If they are not used, there may be discrimi- nation loss because it will be difficult to hear the patient repeat the words. The microphone should be uni-directional and should be placed close to the patient. - Page 19 MIDIMATE 602 & 622 Diagnostic Audiometers 8. If you have selected Ext masking, set the masking reference level. To do so turn any of the rotary wheels while you hold down the Tape 2 key on the front panel until a deflection of 0 dB is shown on the Stimulus VU indicator. 9.
-
Page 20: Special Tests
MIDIMATE 602 & 622 Diagnostic Audiometers 6 Special Tests To go to the Select special Test menu, press Menu until the Select Func- tion menu is displayed and then press Softkey 3, Special. The SISI test The SISI test (Short Increment Sensitivity Index) shows whether a patient can detect small variations in intensity lasting 200 ms. -
Page 21: Fowler's Test
MIDIMATE 602 & 622 Diagnostic Audiometers 15. Turn the Frequency wheel to select the desired test frequency. 16. Toggle Softkey 2 to display 1-5dB and reduce the increment to 1 dB. 17. Press Tone Switch to start the test. 18. Press Softkey 5, Stop, to reset or continue the test. During the test, the running total of Presentations is displayed on the screen. -
Page 22: Stenger's Test
MIDIMATE 602 & 622 Diagnostic Audiometers Stenger’s test If, for instance, a patient falsely claims that his hearing is impaired in one ear, this can be established by performing Stenger’s test. This test determines the air conduc- tion threshold in the ear of the patient. Since Stenger’s test involves simultaneous tone stimulus of both Left and Right ears, make sure that the patient is wearing the headphones correctly, with the red phone on the right ear. - Page 23 MIDIMATE 602 & 622 Diagnostic Audiometers 5. Instruct the patient in how to use the patient response handswitch. 6. Press Menu until the Select Function menu is displayed. 7. Press Softkey 3, Special. 8. Select Rainv. from the Select special Test menu by pressing Softkey 4. 9.
-
Page 24: Programming A User Test
MIDIMATE 602 & 622 Diagnostic Audiometers 7 Programming a User Test Accessing user test programming mode To access User Test programming, do as follows: 1. Switch off the MIDIMATE 602/622. 2. Press Softkey 3 while you switch on the power until the User Progr. Pa- rameters menu is displayed. -
Page 25: Data Interface
MIDIMATE 602 & 622 Diagnostic Audiometers 8 Data Interface Entering patient ID You can enter an identification number for the patient when the MIDIMATE 602/622 is on-line to a computer database. Do as follows: 1. Toggle the Menu key on the front panel to display the Select Function screen. -
Page 26: Viewing Stored Test Results
MIDIMATE 602 & 622 Diagnostic Audiometers The display shows Printing ... during printout. In MIDIMATE 622, versions 3.0 and 3.1, the Ext. Range HL lamp flashes during printout. 8.2.3 Viewing stored test results To view the stored thresholds, do as follows: 1. - Page 27 MIDIMATE 602 & 622 Diagnostic Audiometers 6. Press Softkey 1, Disable, if MIDIMATE is to be used online to a PC instead of a printer. Press Softkey 2, Zodiac, to print out via a ZODIAC 901. (This will work only at 9600 baud.) Press Softkey 3 or 4 to print out via a standard printer. Soft- key 3, Std.H, is for hardware control with busy high on the DSR line, and Soft- key 4, Std.L, is for busy low.
- Page 28 MIDIMATE 602 & 622 Diagnostic Audiometers...
Need help?
Do you have a question about the Madsen Midimate 602 and is the answer not in the manual?
Questions and answers