
Related Manuals for otometrics Aurical Hit


Summary of Contents for otometrics Aurical Hit
- Page 1 AURICAL HIT and the OTOsuite HIT Module Reference Manual Doc. No. 7-50-1150-EN/06 Part No. 7-50-11500-EN...
- Page 2 Copyright notice © 2012, 2017 GN Otometrics A/S. All rights reserved. ® Otometrics, the Otometrics Icon, AURICAL, MADSEN, ICS and HORTMANN are registered trademarks of GN Otometrics A/S in the U.S.A. and/or other countries. Version release date 2017-03-12 (153432) Technical support Please contact your supplier. Otometrics - AURICAL HIT...
-
Page 3: Table Of Contents
Testing the hearing instrument with OTOsuite HIT 3.9.1 How to perform a standard test 3.9.2 How to test the directional microphone HIT FreeStyle testing Navigating in HIT FreeStyle Cleaning, Repair and Calibration Cleaning 5.1.1 Cleaning the device Otometrics - AURICAL HIT... - Page 4 5.3.1 How often is calibration necessary? 5.3.2 Environment Report Procedure 5.3.3 Calibrating the coupler microphone The battery simulator Troubleshooting Standards and Safety AURICAL HIT Warning notes The OTOsuite HIT Module Manufacturer 7.4.1 Responsibility of the manufacturer Technical specifications Index Otometrics - AURICAL HIT...
-
Page 5: Introduction
It is assumed that the user has a basic knowledge of how to compare the results of the hearing instrument tests with the specifications from the hearing instrument manufacturer and to detect typical malfunctions of the hearing instrument. Otometrics - AURICAL HIT... -
Page 6: Typographical Conventions
Indicates that you should take special notice. • 1.2.1 Navigating this manual Menus, icons and functions to select are shown in bold type, as for instance in: Set options Tools Options • Click the icon on the toolbar or select > Otometrics - AURICAL HIT... -
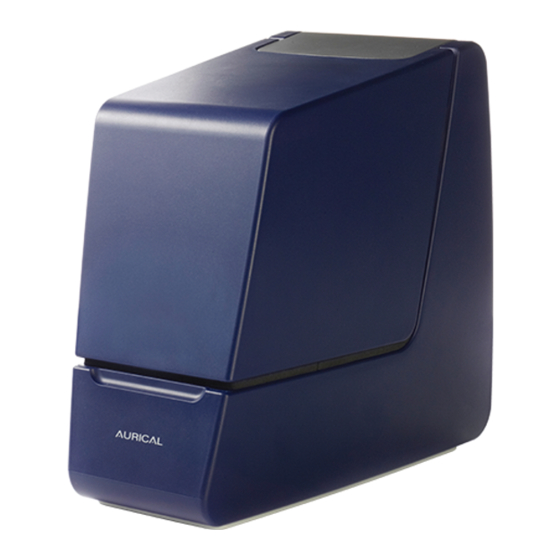
Page 7: Aurical Hit
Calibrating the reference microphone ► 15 Calibration ► 34 Calibration procedures and general recommendations about calibration are described in The test chamber Using AURICAL HIT and positioning hearing instruments in the test chamber are described in Testing hearing instruments ► 15 Otometrics - AURICAL HIT... - Page 8 Battery simulator ► 11 Cable groove ► 11 Elevation plate ► 11 Coupler microphone sockets ► 12 Sound absorbing foam lining ► 12 Main loudspeaker ► 12 Rear loudspeaker ► 12 The AURICAL HIT lid ► 12 Telecoils ► 12 Otometrics - AURICAL HIT...
-
Page 9: Reference Microphone
The coupler assembly The coupler assembly consists of the following parts: A. Coupler adapter B. Coupler cavity C. Coupler microphone Coupler adapter The Accessory Box provides a range of adapters for easy positioning of different types of hearing instruments. Otometrics - AURICAL HIT... - Page 10 B. ITE, RIE, thin-tube testing - High coupler position The Accessory Box Connect the mini-jack cable from the Accessory Box to the mini-jack socket under AURICAL HIT, and insert the coupler microphone in the microphone socket in the Accessory Box. A. Wireless hearing instrument testing Otometrics - AURICAL HIT...
-
Page 11: Battery Simulator
• To use the plate, lift it up from its recess and place it in the high-position coupler socket. Otometrics - AURICAL HIT... -
Page 12: Coupler Microphone Sockets
To close the lid, place your hand on the lid and press gently until the closing mechanism takes over the action. 2.3.12 Telecoils 4 induction loops are fitted in AURICAL HIT for testing telecoil functioning: BTE testing ITE testing Otometrics - AURICAL HIT... -
Page 13: The Aurical Hit Handle
The handle is designed for carrying AURICAL HIT. Caution If you carry AURICAL HIT by its handle, do not use your other hand to support it by the lid, as this may • cause the lid to open and squeeze your fingers. Otometrics - AURICAL HIT... -
Page 14: The Accessory Box
The Accessory Box serves as holder for the coupler micro- phone for testing hearing instruments outside The coupler assembly ► 9 AURICAL HIT. See Caution Do not place the Accessory Box inside • AURICAL HIT during transportation. Otometrics - AURICAL HIT... -
Page 15: Testing Hearing Instruments
Testing a hearing instrument involves the following main tasks: Calibrating the reference microphone Otometrics recommends that you calibrate the reference microphone daily or weekly. Set up the interval to suit your pur- Calibrating the reference microphone ► 15 poses. See... -
Page 16: Positioning The Hearing Instrument For Testing
• directional microphone test. Positioning the hearing instrument – Angle or turn the hearing instrument so that the front microphone (1) faces the main loudspeaker as it would when worn on a person’s ear. Otometrics - AURICAL HIT... - Page 17 As a rule of thumb, position the reference microphone as close as possible to the front microphone of the hearing instrument without actually touching it. Maximum permitted distances are: Vertically (Y axis) 8 mm (above) Sideways (X axis) ±12 mm Back-to-front (Z axis) ±3 mm Otometrics - AURICAL HIT...
-
Page 18: Using The Battery Simulator
1. Select a battery simulator and insert it in the hearing instrument. With AURICAL HIT you receive a set of color-coded battery simulators, which are used to power the hearing instru- ment. They are also used as probes for measuring the power consumption. Color code Size ANSI PR63 7012ZD Otometrics - AURICAL HIT... -
Page 19: Coupler Adapters
• HA-2 (BTE) Traditional BTE hearing instruments ► 20 • HA-1 (ITE, RIE, thin-tube) Thin-tube hearing instruments ► 21 ITE hearing instruments ► 22 Thin-tube hearing instruments ► 21 • Otometrics - AURICAL HIT... -
Page 20: Traditional Bte Hearing Instruments
3. Click the adapter with hearing instrument into place on the coupler and place the coupler in the low position in AURICAL HIT. Otometrics - AURICAL HIT... -
Page 21: Thin-Tube Hearing Instruments
6. If you place some acoustic putty on the receiver wire, this will shift its resonance frequency and prevent the wire from vibrating and creating feedback during testing. 7. Click the adapter with hearing instrument into place on the coupler and place the coupler in the high position in AURICAL HIT. Otometrics - AURICAL HIT... -
Page 22: Ite Hearing Instruments
In the Canal). General guidelines for positioning the hearing Positioning the hearing instrument for directional testing is described in instrument ► 16 1. Wrap a thin roll of acoustic putty around the receiver end of the hearing instrument. Otometrics - AURICAL HIT... - Page 23 4. Align the microphones along the loudspeaker axis. 5. Position the reference microphone as close as possible to the front microphone of the hearing instrument without touching. 6. Close the lid. You are ready to start testing. Otometrics - AURICAL HIT...
-
Page 24: Telecoil Testing
Traditional BTE hearing instru- ments ► 20 Thin-tube hearing instruments ► 21 ITE hearing instruments ► 22 . Leave the hearing instru- ment placed on the coupler assembly in AURICAL HIT. 2. Set the hearing instrument to FM+HI mode. Otometrics - AURICAL HIT... - Page 25 For FM transmitter with lapel microphone: – If the FM transmitter is equipped with a lapel microphone, run the cable into the test chamber and fix the microphone to the elevation plate. Otometrics - AURICAL HIT...
-
Page 26: Body-Worn Hearing Instruments
IEC standards. You can also customize the available options and save them as user tests or start-up settings. The procedure 1. Launch the fitting software for the hearing instrument so that you can control its parameters. 2. Launch OTOsuite and select in the Navigation panel. Otometrics - AURICAL HIT... -
Page 27: How To Test The Directional Microphone
This is done automatically when you start a directional test. The signal used for this test is a flat spectrum Broad Band Noise, band-pass filtered between 750 Hz and 5 kHz, and presented at 70 dB SPL. Otometrics - AURICAL HIT... - Page 28 The numerical dir- Measurements ectionality result shown in the table indicates the average front/back difference in the measured frequency range. Measurements table also includes the adaptation interval used in seconds. Otometrics - AURICAL HIT...
-
Page 29: Hit Freestyle Testing
> Customizing the test table 1. You can customize different measurement tables which you can save and reload as user tests. This also allows you to start a sequence of measurements. Otometrics - AURICAL HIT... - Page 30 You can click any existing measurement in the table to load its settings. You can then repeat the measurement by starting it at the bottom of the table. Deleting a measurement Delete Curve To delete the existing measurement, right-click the measurement and select . Note that for predefined sequences, the cleared test will remain in the table. Otometrics - AURICAL HIT...
- Page 31 Gain axis Gain You can display the measurement gain by clicking the check box in the measurement table. The gain is calculated as the difference between the coupler microphone and the reference microphone in the test cham- ber. Otometrics - AURICAL HIT...
-
Page 32: Cleaning, Repair And Calibration
5.1.2 Cleaning accessories Adapters If needed, remove any acoustic putty residue, and use an alcohol based wipe to clean the adapter. Otometrics - AURICAL HIT... -
Page 33: Service And Repair
7. Calibrate the coupler microphone using a 94 dB calibrator. See Calibrating the coupler microphone ► 36 5.2.3 Replacing floor lining Remove the old floor lining from the base area, and place a new lining in the same position. Otometrics - AURICAL HIT... -
Page 34: Calibration
This will help meet standards, and will ensure continued reliability and accuracy. Reference microphone Otometrics recommends that you calibrate the reference microphone daily or weekly. Set up the interval to suit your pur- Calibrating the reference microphone ► 15 poses. - Page 35 (2), along the Z axis. You can ensure this by looking at the test chamber from the side when you adjust the reference microphone position for validation. 5. Close the lid. 6. Select Tools > AURICAL HIT Calibration > More > Environment Report Start 7. Click . The test lasts less than 1 minute. Otometrics - AURICAL HIT...
-
Page 36: Calibrating The Coupler Microphone
5 Cleaning, Repair and Calibration The report 5.3.3 Calibrating the coupler microphone Coupler microphone calibration must be performed by a certified service technician. What you need to calibrate • 94 dB sound level calibrator • ½ in microphone adapter Otometrics - AURICAL HIT... -
Page 37: The Battery Simulator
Five different battery pills are available as optional accessories (see for details). Voltage range 0 to 3.5 V Current range 0 to 50 mA Ω Source impedance range 0 to 25.5 Battery supply Ring Sense voltage Shield Ground Otometrics - AURICAL HIT... -
Page 38: Troubleshooting
If noise enters the test chamber via the table or stand, try adding a heavy-duty mounting mat or replace the table or stand with a more suitable support. • If needed, place the PC and any other equipment on a separate table to prevent noise and vibrations from influencing sensitive tests. Otometrics - AURICAL HIT... -
Page 39: Standards And Safety
This requirement applies in the European Union. Do not dispose of these products as unsorted municipal waste. You can return your device and accessories to Otometrics, or to any Otometrics supplier. You can also con- tact your local authorities for advice on disposal. -
Page 40: The Otosuite Hit Module
The equipment must com- ply with IEC 60950. The OTOsuite HIT Module Complies with Medical Devices Directive 93/42/EEC and RoHS Directive (2011/65/EC). Otometrics - AURICAL HIT... -
Page 41: Manufacturer
The electrical installation to which the equipment is connected complies with EN/IEC requirements. • The equipment is used in accordance with the instructions for use. The manufacturer reserves the right to disclaim all responsibility for the operating safety, reliability and performance of equipment serviced or repaired by other parties. Otometrics - AURICAL HIT... -
Page 42: Technical Specifications
8 Technical specifications Technical specifications Type identification AURICAL HIT is type 1082 from GN Otometrics A/S. Acoustic stimulus generation In closed test chamber Frequency response, re. 1 kHz, main loud- 125 to 200 Hz: ± 3.0 dB speaker (equalized) 200 to 2000 Hz: ± 1.5 dB 2000 to 5000 Hz: ±... - Page 43 Coupler set, including 2cc coupler, and snap-on adapters HA-1 (ITE), HA-2 (BTE), and body-worn • Elevation plate • Reference microphone • Coupler microphone • Accessory Box • Battery Probe Kit • Accessory Box microphone cable • USB cable Otometrics - AURICAL HIT...
- Page 44 8 Technical specifications • Acoustic putty • Ear simulator • AURICAL HIT Reference Manual • AURICAL HIT User Guide Otometrics - AURICAL HIT...
-
Page 45: Index
33 replace foam lining 33 safety 39 Description standards 39, 43 Accessory Box 14 technical specifications 42 AURICAL HIT lid 12 test chamber 7 Battery simulator 11 transport and storage 43 BTE adapter tube 9 weight 43 cable groove 11... - Page 46 ITE testing 22 phone 17 positioning 16 replace coupler microphone 33 standard test 26 replace reference microphone 33 telecoil testing 24 testing 15 testing in OTOsuite HIT 26 NOAH testing wireless integration 5 transmitters 24 thin-tube testing 21 Otometrics - AURICAL HIT...
- Page 47 16 USB connection 42 reference microphone 17 weight 43 Telecoil Rear loudspeaker specifications 42 description 12 telecoils in AURICAL HIT 12 RECD testing 24 introduction 5 Test chamber Reference microphone Accessory Box 14 calibration 15 battery simulator 11...
- Page 48 HA-1 adapter 21 Thin tube adapter 19 Transport and storage 43 Troubleshooting 38 active screen disappears 38 ambient noise 38 incorrect test results 38 specifications 42 Warning notes AURICAL HIT 39 Weight 43 Wireless transmitters testing 24 Otometrics - AURICAL HIT...
Need help?
Do you have a question about the Aurical Hit and is the answer not in the manual?
Questions and answers