
Related Manuals for arcelik beko B13


Summary of Contents for arcelik beko B13
-
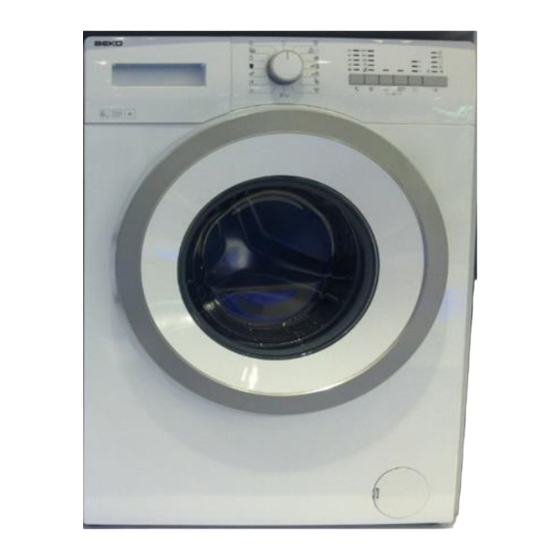
Page 1: Door
B13 B7S B7SLED WASHING MACHINE SERVICE HAND BOOK SERVICE HANDBOOK NO:1 B13 B7S-B7SLED CONTROL SYSTEM WASHING MACHINE SERVICE HANDBOOK... -
Page 2: Table Of Contents
B13 B7S B7SLED WASHING MACHINE SERVICE HAND BOOK 1. DOOR 2. Contents 1. DOOR………………………………………….………..………………………………..1 DOOR ..............................2 CONTENTS ............................... 2 SECURITY WARNINGS ..........................5 3.1............................ 5 ENERAL ECURITY 3.1.1. Electrical safety ..........................5 3.1.2. Product safety ..........................5 3.2............................ - Page 3 B13 B7S B7SLED WASHING MACHINE SERVICE HAND BOOK 6.1......................33 LEANING THE DETERGENT DISPENSER 6.2..................... 34 LEANING THE OADING OOR AND THE 6.3....................34 LEANING THE BODY AND CONTROL PANEL 6.4......................35 LEANING THE WATER INLET FILTERS 6.5.
- Page 4 B13 B7S B7SLED WASHING MACHINE SERVICE HAND BOOK 12.20............................99 12.21.............................. 99 ULLEY 12.22............................. 99 OTOR 12.23..........................100 OWER ABLE 12.24........................100 PPER OUNTERWEIGHT 12.25........................100 OWER OUNTERWEIGHT 12.26..........................101 ISCHARGE POWER CIRCUIT DIAGRAM ........................102 PRODUCTS WITH BUILT-IN DRAINING SIPHON SHUT-OFF SYSTEM ............
-
Page 5: Security Warnings
B13 B7S B7SLED WASHING MACHINE SERVICE HAND BOOK 3. Security Warnings This section includes security instructions which may help prevent the injuries and material damage risks. All kinds of warranties shall be invalid if these instructions are not observed. 3.1. General Security ... -
Page 6: Intended Use
B13 B7S B7SLED WASHING MACHINE SERVICE HAND BOOK Always make the Authorized Service perform installation and repair procedures. Manufacturer cannot be held responsible for any damages which might arise due to the operations performed by unauthorized persons. If the power cord is damaged, it should be replaced by the manufacturer, after- sale service or a similarly qualified, certified person (preferably an electrician) or a person to be designated by the importer, in order to prevent the risk. -
Page 7: Packaging Information
B13 B7S B7SLED WASHING MACHINE SERVICE HAND BOOK 3.5. Packaging information Packaging materials of the product are manufactured from recyclable materials in accordance with our National Environment Regulations. Do not dispose of the packaging materials together with the domestic or other wastes. - Page 8 B13 B7S B7SLED WASHING MACHINE SERVICE HAND BOOK Check the power cord and plug of the serviced product. If its power cord or plug is faulty, replace the power cord group completely with a new group. Please make sure that the cables are not shortened, snapped, stripped, hardened and plug ends are not broken, cracked, oxidized or loosened.
-
Page 9: Product Installation / Installation Rules / Settings
B13 B7S B7SLED WASHING MACHINE SERVICE HAND BOOK 4. Product Installation / Installation Rules / Settings Apply to the nearest Authorized Service agent for the installation of your product. In order to make your machine ready for use, before calling the authorized service, make sure that electrical installation, clean water installation and water drain are appropriate by checking the user manual. -
Page 10: Removing The Package Support
B13 B7S B7SLED WASHING MACHINE SERVICE HAND BOOK 4.2. Removing the Package Support Tilt the machine backwards in order to remove the package support. Remove the packaging reinforcement by pulling the ribbon. Figure 4.1 4.3. Removing the Transport Safety Bolts WARNING: Do not remove the transport safety bolts before removing the packaging support. -
Page 11: Connection To The Supply Water
B13 B7S B7SLED WASHING MACHINE SERVICE HAND BOOK 3. Attach the plastic covers supplied in the User Manual bag into the holes on the rear panel. (P) Figure 4.4 Keep the transportation safety bolts in a safe place to reuse when the washing machine needs to be moved again in the future. -
Page 12: Connection To The Water Drain
B13 B7S B7SLED WASHING MACHINE SERVICE HAND BOOK WARNING: Make sure that the hot and cold water taps are connected correctly when the product is being installed. Your laundry may come out hot at the end of the washing cycle and wear out. 2. -
Page 13: Adjustment Of Legs
B13 B7S B7SLED WASHING MACHINE SERVICE HAND BOOK If the hose is placed at floor level or near to floor (less than 40 cm) and heightened later on, water drain becomes difficult and laundry may come out extremely wet. Therefore, follow the heights described in the figure. ... -
Page 14: Electrical Connection
B13 B7S B7SLED WASHING MACHINE SERVICE HAND BOOK Figure 4.10 Tighten all lock nuts by hand again. Figure 4.11 WARNING: Do not use any appliance or tool to loose the lock nuts. Otherwise, they may be damaged. 4.7. Electrical connection Plug the product into a grounded outlet protected by a 16-ampere fuse. - Page 15 B13 B7S B7SLED WASHING MACHINE SERVICE HAND BOOK Never transport the machine unless its transport safety bolts are installed! WARNING: Packaging materials may be dangerous for the children. Keep the packaging materials out of the reach of the children.
-
Page 16: Use Of Product And Byproducts
B13 B7S B7SLED WASHING MACHINE SERVICE HAND BOOK 5. Use of Product and Byproducts 5.1. Preparation 5.1.1. Sorting the Laundry Sort laundry according to type of fabric, color, and degree of soiling and allowable water temperature. Always obey the instructions given on the garment tags. Figure 5.1 Washing Symbols... -
Page 17: Preparation Of The Garments To Be Washed
B13 B7S B7SLED WASHING MACHINE SERVICE HAND BOOK 5.1.2. Preparation of the garments to be washed Laundry items which contain accessories such as support wire, buckle or metal button may damage the washing machine. Remove the metallic parts or wash the laundry by putting them into a bag or pillow case. -
Page 18: Things To Do For Energy Saving
B13 B7S B7SLED WASHING MACHINE SERVICE HAND BOOK 5.1.3. Things to do for energy saving Following information will help you use the product in an ecological and energy- efficient manner. Operate the machine with the highest capacity permitted by the program you selected and do not over load it. -
Page 19: Laundry Loading
B13 B7S B7SLED WASHING MACHINE SERVICE HAND BOOK 5.1.5. Laundry loading Open the laundry cover. Put the garments into the machine in a loose manner. Push and close the loading cover until you hear the locking sound. Make sure that the garments do not get pinched between the door. Loading door gets locked when operating. - Page 20 B13 B7S B7SLED WASHING MACHINE SERVICE HAND BOOK If you are using detergent bag or dosage ball, do not select a prewash program. Place the detergent bag or dosage ball directly among the garments in the machine. If you are using liquid detergent, do not forget to place the liquid detergent container into the main wash compartment (compartment number “2”).
-
Page 21: Figure 4.5 Use Of Liquid Detergent Container
B13 B7S B7SLED WASHING MACHINE SERVICE HAND BOOK Figure 4.5 Use of liquid detergent container If the product does not have a liquid detergent container In a prewash program, do not use liquid detergent for prewash. Liquid detergent leaves stains on your items when delayed start function is used. Do not use liquid detergent if you will use Delayed Start feature. -
Page 22: First Use
B13 B7S B7SLED WASHING MACHINE SERVICE HAND BOOK Use a small amount of bleach (1/2 tea glass-approx. 50 ml) and rinse the laundry well since bleach will cause skin irritation. Do not pour the bleach onto the laundry and do not use it with the colored items. ... -
Page 23: Control Panel
B13 B7S B7SLED WASHING MACHINE SERVICE HAND BOOK 5.2. Control panel B13 B7S Introduction of LED Control System Temperature Speed Level Auxiliary Auxiliary Time Delay LEDs (3 Program Level LEDs (may LEDs Function_1 Function_2 LEDs as 3, 6, 9 hours) Monitoring not be available LED i... -
Page 24: Preparing The Machine
B13 B7S B7SLED WASHING MACHINE SERVICE HAND BOOK B13 B7S Introduction of LED Control System Temperature Speed Level Auxiliary Auxiliary Time Delay LEDs (3 Program Level LEDs (may LEDs Function_1 Function_2 LEDs as 3, 6, 9 hours) or Monitoring not be available LED i LED i Auxiliary Function_3... -
Page 25: Program Selection And Tips For Correct Washing
B13 B7S B7SLED WASHING MACHINE SERVICE HAND BOOK 5.4. Program selection and tips for correct washing 1. Select the programme suitable for the type, quantity and soiling degree of the laundry in accordance with the "Programme and consumption table" and the temperature table below. -
Page 26: Main Programs
B13 B7S B7SLED WASHING MACHINE SERVICE HAND BOOK 5.5. Main Programs Depending on the type of fabric, use the following main programs. Cottons Use this programme for your cotton laundry (such as bed sheets, duvet and pillowcase sets, towels, bathrobes, underwear, etc.). Your laundry will be washed with vigorous washing action for a longer washing cycle. -
Page 27: Special Programs
B13 B7S B7SLED WASHING MACHINE SERVICE HAND BOOK Mini Use this programme to wash your lightly soiled cotton clothes in a short time. Quick 14 Use this programme to wash your little amount of lightly soiled cotton clothes in a short time. -
Page 28: Auxiliary Function Selection
B13 B7S B7SLED WASHING MACHINE SERVICE HAND BOOK 5.9. Auxiliary function selection Select the auxiliary functions before starting the program. Furthermore, you may also select or cancel auxiliary functions that are suitable to the running programme without pressing the Start / Pause button when the machine is operating. For this, the machine must be in a step before the auxiliary function you are going to select or cancel. - Page 29 B13 B7S B7SLED WASHING MACHINE SERVICE HAND BOOK Crease reduction This function ensures that the laundry is creased less when being washed. Drum rotation movements are lessened and spinning speed is limited in order to reduce the crease level. In addition to them, wash is performed at a high water level. Rinse Hold If you are not going to unload your clothes immediately after the programme completes, you can use rinse hold function to keep your laundry in the final rinsing...
-
Page 30: Starting The Program
B13 B7S B7SLED WASHING MACHINE SERVICE HAND BOOK Canceling the Delayed Start function If you want to cancel the delayed start countdown and start the programme immediately: 1. Set the Delayed Start period to zero or turn the Programme Selection knob to any programme. -
Page 31: Progress Of The Program
B13 B7S B7SLED WASHING MACHINE SERVICE HAND BOOK In addition to the method above, to deactivate the Child Lock, switch the Programme Selection knob to On / Off position when no programme is running, and select another programme. Child Lock is not deactivated after power failures or when the machine is unplugged. -
Page 32: Cancellation Of Program
B13 B7S B7SLED WASHING MACHINE SERVICE HAND BOOK 1. Press Start / Pause button to switch the machine to pause mode. The programme follow-up light of the relevant step during which the machine was switched into the pause mode will flash. 2. -
Page 33: Maintenance And Cleaning
B13 B7S B7SLED WASHING MACHINE SERVICE HAND BOOK 6. MAINTENANCE AND CLEANING Service life of product extends and frequently experienced problems will be reduced if it is cleaned at regular intervals. 6.1. Cleaning the detergent dispenser Clean the detergent drawer at regular intervals (every 4-5 washing cycles) as shown below in order to prevent accumulation of powder detergent in time. -
Page 34: Cleaning The Loading Door And The Drum
B13 B7S B7SLED WASHING MACHINE SERVICE HAND BOOK 2. Wash the dispenser and the siphon in the lavatory with an ample amount of lukewarm water. In order to prevent the residues to contact your skin, clean it with an appropriate brush by wearing a pair of gloves. 3. -
Page 35: Cleaning The Water Inlet Filters
B13 B7S B7SLED WASHING MACHINE SERVICE HAND BOOK Use only a soft and damp cloth to clean the control panel. 6.4. Cleaning the water inlet filters There is a filter at the end of each water intake valve at the rear of the machine and also at the end of each water intake hose where they are connected to the tap. -
Page 36: Fi̇gure 6.4 Cleani̇ng The Fi̇lter - 1
B13 B7S B7SLED WASHING MACHINE SERVICE HAND BOOK In order to clean the soiled filter and drain the water: 1. Unplug the machine and disconnect the power. WARNING: Temperature of the water inside the machine may rise up to 90 ºC. In order to avoid the burning risk, filter should be cleaned after the water inside the machine is cooled down. -
Page 37: Fi̇gure 6.6 Cleani̇ng The Pump Fi̇lter - 3
B13 B7S B7SLED WASHING MACHINE SERVICE HAND BOOK Figure 6.6 Cleaning the pump filter - 3 d. Turn and remove the pump filter. Discharging the water when the product does not have an emergency draining hose: Figure 6.7 Cleaning the pump filter - 4 Figure 6.7 Cleaning the pump filter - 5 a. - Page 38 B13 B7S B7SLED WASHING MACHINE SERVICE HAND BOOK c When the water in the machine ceases, turn the pump filter and remove it fully. 4. Clean the residues inside the filter as well as the lint, if any, around the propeller. 5.
-
Page 39: General Operating Principle
B13 B7S B7SLED WASHING MACHINE SERVICE HAND BOOK 7. . GENERAL OPERATING PRINCIPLE 7.1. Water Intake Profile B13 B7S WATER ALGORITHM CONDITIONS FOR HOT WATER INTAKE • Hot water intake from hot water valve is applicable at temperatures at 60 or higher. -
Page 40: Figure 7.2 Top Closure Algorithm
B13 B7S B7SLED WASHING MACHINE SERVICE HAND BOOK 1. Water intakes in all programmes are realized by water level sensor. Whether or not the water level has dropped below levels determined according to the steps is checked by the water level sensor. If the water level has dropped, water will be intaken against checking the the water level sensor. -
Page 41: Heating Profile
B13 B7S B7SLED WASHING MACHINE SERVICE HAND BOOK 7.2. Heating Profile Hysteresis profile is used for all programmes. Information about the amount of hysteresis according to the programme is included in the variable file. In programmes where there is risk of damaging textiles such as woolens or hand wash, hysteresis value is maintained high. -
Page 42: Foam Detecting And Extinguishing Algorithm
B13 B7S B7SLED WASHING MACHINE SERVICE HAND BOOK Discharge the water inside the machine after main washing step is finished. (If additional water is taken without discharging water, foam overflow will occur.) Movement in discharging 80 rpm – 12 s on – 10 s off) ... -
Page 43: Programme Flows
B13 B7S B7SLED WASHING MACHINE SERVICE HAND BOOK 7.5. Programme Flows TIME VALVE TEMPERATURE SPIN SPEED STEPS Check up Drain Prewash Valve prewash Drain Prewash Valve Top Closure Main Wash Valve Cold washing Main Wash Valve Soaking Main Wash Valve Soaking Heating Main Wash Valve... -
Page 44: Figure 8.4 Programme Flow Example
B13 B7S B7SLED WASHING MACHINE SERVICE HAND BOOK Final Spin Figure 8.4 Programme flow example Woole Cottons Eco Cottons Synthetics Delicate Programme steps Finishing Woole Cottons Eco Cottons Synthetics Protection Control ... - Page 45 B13 B7S B7SLED WASHING MACHINE SERVICE HAND BOOK At full load;if Tset=60C then step will be bypassed if Tset = 40C then step will be run. At half load;if Tset=60C then step will be bypassed. If Tset=40C then Drain step will be run.
- Page 46 B13 B7S B7SLED WASHING MACHINE SERVICE HAND BOOK Spinni AquaPerfec Hand Wash Shirts Rinse Mini 14 Mini Programme 40°C 40 steps Spinni Hand Wash Cottons Rinse Mini 14 Mini Control ...
- Page 47 B13 B7S B7SLED WASHING MACHINE SERVICE HAND BOOK Hand AquaPerfec Shirts Rinse Mini 14 Mini Wash Programme steps 40°C 40 Hand Cottons Rinse Mini 14 Mini Wash Drain ...
-
Page 48: Component Working Principles
B13 B7S B7SLED WASHING MACHINE SERVICE HAND BOOK 8. COMPONENT WORKING PRINCIPLES 8.1. Electronic Control and Visual Card By means of the control and visual card which is designed to have a single face and manufactured by ARÇELİK; the wash programs which are written onto the microprocessor, washing and spinning motor profiles, protection algorithms and components (motor, heater, pump, valves, door safety lock, ntc, water level selection switch, spinning/temperature selection potentiometer) are controlled. -
Page 49: Safety Switch (Door Lock)
B13 B7S B7SLED WASHING MACHINE SERVICE HAND BOOK 8.2. Safety Switch (Door Lock) Rated Operating Voltage : 250V 50-60Hz Operating Current : 10-50 mA PTC Resistance : Min. >=50 ohm Contact Locking time : <=8s Contact Engaging time : 35...70s Operating Temperatures : T85 Picture 8.2 Safety switch... -
Page 50: Heater
B13 B7S B7SLED WASHING MACHINE SERVICE HAND BOOK Picture 8.3. Motor 8.4. Heater It is used to heat the water inside the drum. Since it is an electronically controlled machine, there is a double thermocouple at each of the heater inlets. When the heater operates dry, the overheated thermocouple open circuits the heater. -
Page 51: Ntc
B13 B7S B7SLED WASHING MACHINE SERVICE HAND BOOK 8.7. It is a component which is used to measure the water temperature inside the drum and resistance of which decreases when the temperature increases. When the water temperature reaches to the adjusted temperature, heater is disabled by means of the heater relay on the card. -
Page 52: Picture 8.7 Water Level Sensor
B13 B7S B7SLED WASHING MACHINE SERVICE HAND BOOK There are basically 2 capacitors, 1 coil and an inverter circuit on itself or the control system to which it is connected. Pressure increase pushes a ferrite part inside the sensor into the coil. Therefore L (inductance) value of coil winding changes and the output value of the sensor –... -
Page 53: Service Function Test
B13 B7S B7SLED WASHING MACHINE SERVICE HAND BOOK 9. SERVICE FUNCTION TEST Following points should be paid attention to during service test: Entrance Method to Service Mode: By pressing the “Start/Pause” button, you can switch to “Service” mode when you turn the button to the first program from the rotary “ON/OFF”... - Page 54 B13 B7S B7SLED WASHING MACHINE SERVICE HAND BOOK If there is no "Error Code" then all LEDs should be turned off. Next step is taken by pressing the "Start/Pause" button; 2) "Error Code" and other information stored in EEPROM (point to resume) are deleted from EEPROM and in 7S models 3-digit software version is displayed, and to switch to the next step "Start/Pause"...
- Page 55 B13 B7S B7SLED WASHING MACHINE SERVICE HAND BOOK Meanwhile, "7", which is the service mode step number is displayed on screen of 7S Models; In Models with LED, of the "Programme Tracking LEDs" above the "Start/Pause" button the 2nd and 3rd LEDs from the bottom will be turned on (weight of orders from bottom to top are 20=1, 21=2, 22= 4, 23 = 8, 24 = 16);...
- Page 56 B13 B7S B7SLED WASHING MACHINE SERVICE HAND BOOK power which is consumed by WM and check heater. ii) On a machine with "Main Wash Flow Meter": "Main_Wash_Flow_Meter" will be checked to see if it is higher than "50" or not. If it is higher than 50, then Flow_Meter is operating correctly; HEATER will turn on automatically and a 52rpm right turn will be applied.(In models with flow meter, there is motor movement) If it is below 50, then the Flow_Meter is faulty and therefore the heater will not be "DRIVEN"...
-
Page 57: B13 B7S B7Sled Failure Flow Diagram
B13 B7S B7SLED WASHING MACHINE SERVICE HAND BOOK B13 B7S B7SLED FAILURE FLOW DIAGRAM Revizyonlar: Revisions: Rev.01 07.10.2012 Rev. 01 07.10.2012... - Page 58 B13 B7S B7SLED WASHING MACHINE SERVICE HAND BOOK...
- Page 59 B13 B7S B7SLED WASHING MACHINE SERVICE HAND BOOK CONTENTS Revision page 1 Contents page 2 Starting up page 3 Error codes page 4 page 5 page 6 page 7 page 8 page 9 page 10 page 11 page 12 E9 and E10 page 13 E11_1 page 14...
- Page 60 B13 B7S B7SLED WASHING MACHINE SERVICE HAND BOOK PICTURE ilk_1:program selection switch socket Listen to the removed. Supply Voltage is being measured. customer's complaint Close the machine door if opened. Switch to service mode. To switch to service mode, move program selection switch to CANCEL position.
- Page 61 B13 B7S B7SLED WASHING MACHINE SERVICE HAND BOOK * My machine continuously takes *It starts suddenly *Program lasts * Poor washing by *Does not heat in and discharges during washing Machine is boiling long. the machine water. water. cycle. *Moves for LIKELY the water.
- Page 62 B13 B7S B7SLED WASHING MACHINE SERVICE HAND BOOK * Poor washing by Is there E1 error? the machine * Machine does not heat water * Program lasts PICTURE E1-1: There are NTC and Level sensor long. cables on the KN2 socket. Attach KN2 socket.
- Page 63 B13 B7S B7SLED WASHING MACHINE SERVICE HAND BOOK *Does not heat water. *Machine boiled Is there E2 error? the water once, but now it does not heat at all. PICTURE E2-1: Heater socket on PICTURE E2-2: KN8 tacho socket is removed. the KN5 card is removed.
- Page 64 B13 B7S B7SLED WASHING MACHINE SERVICE HAND BOOK Machine is boiling the water. PICTURE E2-1: Heater socket on the KN5 Laundry comes card out very hot; they are worn. Is there E3 error? * Heater continuously active error Important Note: The washing machine makes cold washing and ends the program before the heater is activated in NTC open circuit / short circuit...
- Page 65 B13 B7S B7SLED WASHING MACHINE SERVICE HAND BOOK * My machine continuously takes in and discharges water. * No wash movement action Is there E4 error? * Door jammed * Program does not come to an end. Is the machine taking water continuously? * Valve triac short circuit...
- Page 66 B13 B7S B7SLED WASHING MACHINE SERVICE HAND BOOK *Program lasts long. *The machine Is there E5 error? does not drain water. *The machine does not spin Check machine supply voltage. If there is low supply voltage, the pump will not work. *Pump triac open circuit error *Pump clogged error *Pump triac diode error...
- Page 67 B13 B7S B7SLED WASHING MACHINE SERVICE HAND BOOK *It starts suddenly during washing cycle. *Moves for a few times and finishes the program. *Program is not completed. Is there E6 error? * Motor triac Start the spin program short circuit error *Motor triac in diode mode...
- Page 68 B13 B7S B7SLED WASHING MACHINE SERVICE HAND BOOK * Machine discharges every time it is turned * Program does start. Is there E7 error? PICTURE E7-1: The socket on the level sensor must be fitted. Are the Level Sensor socket (Picture E7-1) and the Repair the socket and cables control card KN2 socket fitted (KN2 socket Picture E7-2)
- Page 69 B13 B7S B7SLED WASHING MACHINE SERVICE HAND BOOK *Program lasts long. *Machine does not finish the PICTURE E8-2: KN3 connector program. Is there E8 error? connector on the card *Machine does not take in water. *Machine does not work. *It does not spin and drain. *Machine continuously drains.
- Page 70 B13 B7S B7SLED WASHING MACHINE SERVICE HAND BOOK * Machine gives bad wash results. * Washing comes to an end before the displayed washing time Is there E9 error? elapses. * Program is not completed. * Machine leaves water inside. Laundry comes out with detergent.
- Page 71 B13 B7S B7SLED WASHING MACHINE SERVICE HAND BOOK * Program is not completed. * Machine makes sudden startups. * Machine drum Is there E11 error? does not rotate. Start the spin program *Motor open circuit error *Tacho open circuit error Machine is turned off.
- Page 72 B13 B7S B7SLED WASHING MACHINE SERVICE HAND BOOK PICTURE E11-12: 8-pin motor connector IMPORTANT: First connector on the 8-pin motor connector is empty. This connector is also counted. Picture E11-12 PICTURE E11-6: Motor coil resistance is being PICTURE 11-4: Motor coil resistance is being checked over the 10-pin motor measured over the 8-pin motor.
- Page 73 B13 B7S B7SLED WASHING MACHINE SERVICE HAND BOOK Cont'd from Are there 120 secs. between motor motions? Check the error code again when the machine PICTURE E11-8: Tacho resistance is being program is measured over the card. terminated. Machine is turned off and the KN8 connector on the card is removed to check over the socket if the resistance between the Tacho...
- Page 74 B13 B7S B7SLED WASHING MACHINE SERVICE HAND BOOK * Machine did not spin. * Time extended. * Machine did an additional rinse although I did not select the extra rinse. Is there E17 error? *Program terminated error without rinsing because of foam Check if the main wash and prewash valves are properly connected to the related compartment of the detergent drawer.
- Page 75 B13 B7S B7SLED WASHING MACHINE SERVICE HAND BOOK * Machine did not spin. * Time lengthened. Is there E18 error? *Program terminated error without spinning because of unbalanced Explain the customer the load following unbalanced load preventive actions. Reasons for ending the program without spinning as a result of unbalanced load detection 1) Laundry may pile up on one side of the drum when you run your machinewith less laundry.
- Page 76 B13 B7S B7SLED WASHING MACHINE SERVICE HAND BOOK Program selection switch does not function. Or the selected program and the running program are not identical some programs cannot be selected. For example, although spinning is selected, the machine takes in water. Replace the control card.
- Page 77 B13 B7S B7SLED WASHING MACHINE SERVICE HAND BOOK Takes in water from the wrong detergent compartment Are the valves connected to KN6.2 - common (white) Correct the connections. Check KN3.3 - Main wash (blue) through a function test. KN3.4 - Prewash (yellow) KN3.5 - Hot washing (red) ends? Perform a function test on the...
- Page 78 B13 B7S B7SLED WASHING MACHINE SERVICE HAND BOOK Make sure that water is not Is the machine continuously coming upon the control card, blowing the fuse and is there motor, heater, pump, door lock not an error code? and valves of the machine. Remove the heater sockets to check if there is heater short circuit.
- Page 79 B13 B7S B7SLED WASHING MACHINE SERVICE HAND BOOK ERROR Error code is shown on Spin speed adjustment LEDs error display (speed LEDs the screen in case of are used to show error codes in models not equipped 7_segment display. with 7_segment display) Nothing is shown on the speed indication LEDs.
-
Page 80: List Of Equipment/Apparatus To Be Used In Component Assembly / Disassembly
B13 B7S B7SLED WASHING MACHINE SERVICE HAND BOOK 11. List of Equipment/Apparatus to be used in Component Assembly / Disassembly 11.1. Shock Absorber Pin Punching Apparatus Shock absorber pin punching apparatus Picture 11.1 Shock Absorber Pin Punching Apparatus Before the shock absorber is punched into its place, practice is performed at the bushings. - Page 81 B13 B7S B7SLED WASHING MACHINE SERVICE HAND BOOK Only softener is applied onto the shock absorber pins. Picture 11.4 Pin is attached onto it. Picture 11.5 Punching gun is seated onto the bracket and pin. Picture 11.6 Punching gun is squeezed and assembly is completed.
-
Page 82: Pi̇cture 11.8
B13 B7S B7SLED WASHING MACHINE SERVICE HAND BOOK Punching gun is squeezed to the very end and assembly is completed. Picture 11.8 It will be checked after assembly. Picture 11.9... -
Page 83: Component Assembly / Disassembly
B13 B7S B7SLED WASHING MACHINE SERVICE HAND BOOK 12. COMPONENT ASSEMBLY / DISASSEMBLY Front view of the machine is given in the Picture 12.1. Picture 12.1 General appearance 12.1. Upper Table Assembly / Disassembly 2 sheet metal screws fixing the upper table to the body are removed. Upper table is removed by being lifted to backwards and then upwards. -
Page 84: Front Door Group Assembly/Disassembly
B13 B7S B7SLED WASHING MACHINE SERVICE HAND BOOK Picture 12.3 Upper table Disassembly/Assembly Upper table is pulled back and removed from the tabs which are shown in the Picture 12.4. Picture 12.4 Upper table Disassembly/Assembly 12.2. Front Door Group Assembly/Disassembly Front door is opened. -
Page 85: Exterior Door
B13 B7S B7SLED WASHING MACHINE SERVICE HAND BOOK Picture 12.6 Front door Disassembly /Assembly Picture 12.7 Front door Disassembly /Assembly 12.2.1. Exterior Door The bolts connecting the exterior door and interior door are removed. Picture 12.8 Exterior door will be removed from the interior door manually. -
Page 86: Hinge
B13 B7S B7SLED WASHING MACHINE SERVICE HAND BOOK Picture 12.9 12.2.2. Hinge Exterior door is removed. After the exterior door is removed the hinge can be removed together with the bushing. Picture 12.10 Hinge 12.2.3. Handle cover The tabs (2 pieces) connecting the handle cover to the decorative cover is removed with a screwdriver. -
Page 87: Handle
B13 B7S B7SLED WASHING MACHINE SERVICE HAND BOOK Picture 12.12 Pry the handle cover from its corners and separate it from the decorative part. Picture 12.13 12.2.4. Handle The handle pin is removed as shown below removing the pin using a pliers. Figure 12.14 Handle 12.2.5. -
Page 88: Decorative Cover
B13 B7S B7SLED WASHING MACHINE SERVICE HAND BOOK It will be removed easily after the handle pin is removed. 12.2.6. Decorative cover It will be removed after removing the bolts connecting decorative cover and interior door and dismantling the tabs. Picture 12.15 Decorative cover Picture 12.16 12.2.7. -
Page 89: Front Wall Disassembly/Assembly
B13 B7S B7SLED WASHING MACHINE SERVICE HAND BOOK Picture 12.17 Pump cover Disassembly/Assembly 12.4. Front Wall Disassembly/Assembly Front door group is removed. Body bellows clamp fixing the drum bellows to the front door is removed by use of a special bellows clamp pliers. Door locking screws are removed. -
Page 90: Dispenser Panel
B13 B7S B7SLED WASHING MACHINE SERVICE HAND BOOK Picture 12.20 Front Wall Disassembly / Assembly Picture 12.21 Front Wall Disassembly / Assembly 12.5. Dispenser panel Dispenser is pulled backwards from the detergent compartment. Picture 12.22 Disassembly/Assembly of Detergent Dispenser... -
Page 91: Panel
B13 B7S B7SLED WASHING MACHINE SERVICE HAND BOOK Dispenser is removed by pressing on the area shown with arrow on the siphon. Picture 12.23 Disassembly/Assembly of Detergent Dispenser 12.6. Panel Dispenser is removed. Picture 12.24 Panel Disassembly/Assembly 3 pt screws which fix the panel to the panel reinforcement bracket and the detergent compartment and shown separately in the following pictures are removed. -
Page 92: Protective Foil
B13 B7S B7SLED WASHING MACHINE SERVICE HAND BOOK 3 pt screw fixing the panel to the panel reinforcement bracket is removed. Picture 12.26 Panel Disassembly/Assembly Pt screws on the areas shown with arrow sign are removed and card group is detached from panel. -
Page 93: Reflector
B13 B7S B7SLED WASHING MACHINE SERVICE HAND BOOK 12.8. Reflector Reflector is detached from its place on the card. Picture 12.29 Reflector Disassembly/Assembly 12.9. Program Control Card Card is detached from the tabs on the card holder shown with an arrow. Picture 12.30 Control card Disassembly/Assembly Picture 12.31 Control card Disassembly/Assembly... -
Page 94: Parasite Filter
B13 B7S B7SLED WASHING MACHINE SERVICE HAND BOOK Picture 12.32 Control card Disassembly/Assembly 12.10. Parasite Filter Upper table is removed. Parasite Filter cable terminals are removed. 2 screws, at the back of the body, attaching the terminal group to the body are removed. -
Page 95: Detergent Compartment Connection Group
B13 B7S B7SLED WASHING MACHINE SERVICE HAND BOOK 12.11. Detergent Compartment Connection Group Main Wash Prewash Picture 12.34 Detergent compartment connection group 12.12. Single Valve Upper table is removed. Single valve cable terminals are removed. Single Valve Hose clamp is pulled back over the hose. Hose is ejected from the end on the valve. -
Page 96: Safety Switch
B13 B7S B7SLED WASHING MACHINE SERVICE HAND BOOK Picture 12.35 Disassembly/Assembly of Two-way Valve 12.14. Safety Switch Door is opened by pulling from the handle. Drum bellows clamp fixing the drum bellows is removed. 2 screws fixing the safety switch to the front door are removed. Safety Switch cable ends are removed. -
Page 97: Pump
B13 B7S B7SLED WASHING MACHINE SERVICE HAND BOOK Picture 12.37 Disassembly/assembly of Heater 12.16. Pump Water inside the machine is drained. Front Wall is removed. Pump cable terminals are removed. Drum Filter Hose is removed from the pump. When the drum filter intermediate hose is being attached again, the marks on the pump and the hose should be aligned and hose should be attached so. -
Page 98: Drum Bellows
B13 B7S B7SLED WASHING MACHINE SERVICE HAND BOOK 12.17. Drum Bellows Front wall is removed. Spiral spring connecting the bellows to the drum is removed. Bellows is pulled and removed manually from the front door. Picture 12.39 Disassembly/Assembly of Drum Bellows 12.18. -
Page 99: Polyv Belt
B13 B7S B7SLED WASHING MACHINE SERVICE HAND BOOK 12.20. Poly V Belt Rear cover is removed. Poly V belt is turned and removed from over the drum pulley. Pulley Poly V belt Picture 12.41 Disassembly/assembly Poly V Belt 12.21. Pulley Rear cover is removed. -
Page 100: Power Cable
B13 B7S B7SLED WASHING MACHINE SERVICE HAND BOOK 12.23. Power Cable Cable Holder Screw is removed. Power Cord is removed with its terminals being detached from the parasite filter. Picture 12.43 Disassembly/assembly of Power Cable 12.24. Upper Counterweight Upper table is removed. Upper Counterweight is removed with its retaining bolts detached. -
Page 101: Discharge Hose
B13 B7S B7SLED WASHING MACHINE SERVICE HAND BOOK Picture 12.45 Disassembly/assembly of lower counterweight IMPORTANT: When the machine is required to be serviced by being tilted to the front, its transport safety bolts should be installed, if this is not necessary, lower counterweight bolts should not be fully removed. -
Page 102: Power Circuit Diagram
B13 B7S B7SLED WASHING MACHINE SERVICE HAND BOOK 13. POWER CIRCUIT DIAGRAM... -
Page 103: Products With Built-In Draining Siphon Shut-Off System
B13 B7S B7SLED WASHING MACHINE SERVICE HAND BOOK 14. Products with built-in Draining Siphon Shut-off System Siphon with the VDE QUALITY Label products Use of shut-off system Siphon support intermediate hose Siphon bracket Draining hose coming out of the draining pump is connected to the siphon bracket under the parasite filter. - Page 104 B13 B7S B7SLED WASHING MACHINE SERVICE HAND BOOK Search for boiler siphon hose pipe cutter 400 dv / min with a 4 mm drill bit and drill pneumatic motor. Parts belonging to siphon cutting system are shown in the following exploded group picture for better machines (1522-siphon cutting intermediate hose, 470- siphon bracket, 8355 and 471- draining hose group).
-
Page 105: Exploded Drawings
B13 B7S B7SLED WASHING MACHINE SERVICE HAND BOOK 15. EXPLODED DRAWINGS 15.1. Body Group 15.2. Control Group... -
Page 106: Water System
B13 B7S B7SLED WASHING MACHINE SERVICE HAND BOOK 15.3. Water System 15.4. Visual Group... -
Page 107: Front Wall Group
B13 B7S B7SLED WASHING MACHINE SERVICE HAND BOOK 15.5. Front Wall Group 15.6. Front door... -
Page 108: Driving Group
B13 B7S B7SLED WASHING MACHINE SERVICE HAND BOOK 15.7. Driving Group 15.8. 16.6. Isolation Group... -
Page 109: Part List
B13 B7S B7SLED WASHING MACHINE SERVICE HAND BOOK 16. Part List SAP should be taken as a basis for the part list. 17. List of Figures and Pictures FİGURE 4.1 ..............................10 FİGURE 4.2 ..............................10 FİGURE 4.3 ..............................10 FİGURE 4.4 .............................. - Page 110 B13 B7S B7SLED WASHING MACHINE SERVICE HAND BOOK PİCTURE 8.2 SAFETY SWİTCH .......................... 49 PİCTURE 8.3. MOTOR ............................. 50 PİCTURE 8.4 HEATER ............................50 PİCTURE 8.5 DRAİN PUMP ..........................50 PİCTURE 8.6 NTC ............................51 PİCTURE 8.7 WATER LEVEL SENSOR ........................ 52 PİCTURE 11.1 SHOCK ABSORBER PİN PUNCHİNG APPARATUS ................
- Page 111 B13 B7S B7SLED WASHING MACHINE SERVICE HAND BOOK PİCTURE 12.38 DİSASSEMBLY/ASSEMBLY OF PUMP ..................97 PİCTURE 12.40 DİSASSEMBLY/ASSEMBLY OF DRUM BELLOWS............... 98 PİCTURE 12.41 DİSASSEMBLY/ASSEMBLY POLY V BELT .................. 99 PİCTURE 12.42 DİSASSEMBLY/ASSEMBLY OF MOTOR ..................99 PİCTURE 12.43 DİSASSEMBLY/ASSEMBLY OF POWER CABLE ................ 100 18.
Need help?
Do you have a question about the beko B13 and is the answer not in the manual?
Questions and answers