Table of Contents
Advertisement
Advertisement
Table of Contents

Subscribe to Our Youtube Channel
Related Manuals for arcelik 8104 HE


Summary of Contents for arcelik 8104 HE
-
Page 1: Washing Machine
Washing Machine User's Manual 8104 HE 8103 HE... - Page 2 Please read this user manual first! Dear Customer, We hope that you get the best results from the product which has been manufactured in state- of-the-art plants and passed through a strict quality control procedure. Therefore, please read the entire user manual carefully before using the product and keep it as a reference for future use.
-
Page 3: Table Of Contents
TABLE OF CONTENTS 1 Your washing machine Additional programmes ... . 16 Temperature selection ... . . 17 Overview ......4 Spin speed selection . -
Page 4: Your Washing Machine
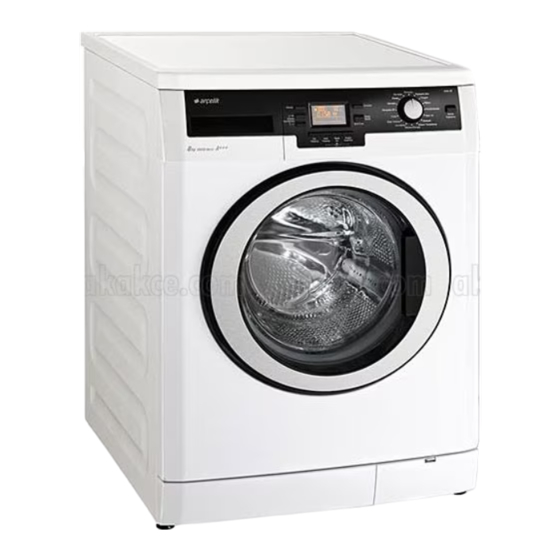
Your washing machine Overview 1- Power cable 5- Adjustable feet 2- Top panel 6- Loading door 3- Control panel 7- Detergent drawer 4- Filter cap 8- Drain hose... -
Page 5: Technical Specifications
Technical specifications Models (EN) Maximum dry laundry capacity (kg) Height (cm) Width (cm) Depth (cm) Net weight (±4 kg.) 220-240 V / 50Hz Electrical input (V/Hz) Total current (A) 2000-2350 Total power (W) 1000 1000 Spin speed (rpm max.) 1.40 1.40 Stand-by mode power (W) 0.20... -
Page 6: Important Safety Instructions
Important safety instructions • Do not force open the locked loading This section contains safety instructions that door. The loading door will be ready will help protect from risk of personal injury to open just a few minutes after the or property damage. -
Page 7: Installation
Installation Refer to the nearest Authorised Service Agent for installation of the product. To make the product ready for use, review the information in the user manual and make sure that the electricity, tap water supply and water drainage systems are appropriate before calling the Authorized Service Agent. -
Page 8: Connecting Water Supply
Keep the transportation safety bolts in a safe place to reuse when the washing machine needs to be moved again in the future. Never move the product without the Ensure that the cold and hot water transportation safety bolts properly fixed connections are made correctly when in place! installing the product. -
Page 9: Adjusting The Feet
excessively wet. Therefore, follow the heights described in the figure. • To prevent flowing of dirty water back into the machine and to allow for easy discharge, do not immerse the hose end into the dirty water or drive it in the drain more than 15 cm. -
Page 10: First Use
• Do not make connections via extension water and cleaning the pump filter". cables or multi-plugs. 4. Install transportation safety bolts in the Damaged power cables must be reverse order of removal procedure; see, replaced by the Authorized Service "Removing the transportation locks". Agents. -
Page 11: Preparation
Preparation Things to be done for energy saving Following information will help you use the product in an ecological and energy-efficient manner. Wash with sensitive, Washing water .short programmes • Operate the product in the highest temperature capacity allowed by the programme you have selected, but do not overload;... -
Page 12: Correct Load Capacity
When overloaded, machine's washing performance will drop. Moreover, noise and vibration problems may occur. Laundry types and their average weights in the following table are given as examples. Laundry type Weight (g) Bathrobe 1200 Napkin Duvet cover • Take out all substances in the pockets Bed Sheet such as coins, pens and paper clips, and Pillowcase... - Page 13 • Use concentrated detergents in the The detergent dispenser may be in two recommended dosage. different types according to the model of Using softeners your machine as seen above. Pour the softener into the softener Detergent, softener and other cleaning compartment of the detergent drawer.
- Page 14 dosage values. If there is not any instruction detergent, put the detergent first into on the package, apply the following. the compartment nr. "II" in the detergent drawer and wait until the detergent flows • If the gel detergent thickness is fluidal while the machine is taking in water.
-
Page 15: Operating The Product
Operating the product Control panel Spin Speed Adjustment button Display Temperature Adjustment button Programme Selection knob On / Off button Delayed Start buttons (+ / -) Auxiliary Function buttons Start / Pause / Cancel button Display symbols - Economy symbol - Delayed Start symbol - Door Locked symbol - Start symbol... -
Page 16: Main Programmes
Additional programmes Heavily soiled white cottons For special cases, additional programmes are and linens. (coffee table covers, available in the machine. 90˚C tableclothes, towels, bed sheets, Additional programmes may differ etc.) according to the model of the machine. Normally soiled, coloured, fade •... -
Page 17: Temperature Selection
compartment II. When the programme is It is suggested to use recommended over, leave the loading door ajar so that the detergents for curtains in this inside of the machine gets dry. programme. This is not a washing programme. It is a •... -
Page 18: Spin Speed Selection
Economy symbol Indicates the programmes and temperatures that provide energy savings. Economy symbol can not be selected in Intensive and Hygiene programmes since washing is performed in long times and at high temperatures in order to provide hygiene. Similarly, Economy symbol can not be selected in Baby, Refresh, Drum Cleaning, Spin and Rinse programmes as well. -
Page 19: Programme And Consumption Table
Programme and consumption table Auxiliary functions Selectable Programme (°C) temperature range °C Pamuklu 2.70 1600 • • • • • • 90-Cold Pamuklu 1.80 1600 • • • • • • 90-Cold Pamuklu 1.00 1600 • • • • • •... -
Page 20: Auxiliary Function Selection
Auxiliary function selection When you select this function, load Select the desired auxiliary functions before your machine with half of the maximum starting the programme. Furthermore, you laundry specified in the programme table. may also select or cancel auxiliary functions •... -
Page 21: Time Display
Time display 2. Set the desired delayed start time by pressing the Delayed Start + or - Remaining time to complete the programme buttons. appears on the display while the programme is running. Tim is displayed as “ 01:30 ” in hours 3. -
Page 22: Loading Door Lock
Softener flash. Softener symbol indicating that the softener 2. Wait until the Loading Door can be step has started appears on the display. opened. Spin 3. Open the Loading Door and add or take Appears at the beginning of the final spin out the laundry. -
Page 23: Cancelling The Programme
Cancelling the programme Press and hold Start / Pause / Cancel button for 3 seconds. Start symbol flashes. Symbol of the step at which the programme was cancelled remains lit. " End " appears on the display and the programme is cancelled. If you want to open the loading door after you have cancelled the programme but it is not possible to open the loading door... -
Page 24: Maintenance And Cleaning
Maintenance and cleaning Service life of the product extends and Use an anti-limescale suitable for the frequently faced problems decrease if washing machines. cleaned at regular intervals. After every washing make sure that no Cleaning the detergent drawer foreign substance is left in the drum. Clean the detergent drawer at regular intervals (every 4-5 washing cycles) as shown below in order to prevent accumulation of... -
Page 25: Draining Remaining Water And Cleaning The Pump Filter
2. Remove the nuts of the water intake hoses to access the filters on the water intake valves. Clean them with an appropriate brush. If the filters are too dirty, take them out by means of pliers and clean them. 3. - Page 26 a. Place a large container in front of the filter to catch water from the filter. b. Loosen pump filter (anticlockwise) until water starts to flow. Fill the flowing water into the container you have placed in front of the filter. Always keep a piece of cloth handy to absorb any spilled water.
-
Page 27: Troubleshooting
Troubleshooting Programme cannot be started or selected. • Washing machine has switched to self protection mode due to a supply problem (line voltage, water pressure, etc.). >>> Press and hold Start / Pause / Cancel button for 3 seconds to reset the machine to factory settings. (See "Canceling the programme") Water in the machine. - Page 28 Washing takes longer time than the one specified in the manual. • Water pressure is low. >>> Machine waits until taking in adequate amount of water to prevent poor washing quality due to the decreased amount of water. Therefore, the washing time extends.
- Page 29 Washing performance is poor: Laundry turns gray. • Insufficient amount of detergent was used over a long period of time. >>> Use the recommended amount of detergent appropriate for water hardness and the laundry. • Washing was made at low temperatures for a long time over a long period of time. >>> Select the proper temperature for the laundry to be washed.
- Page 30 Laundry became stiff after washing. • Insufficient amount of detergent is used. >>> Using insufficient amount of detergent for the water hardness can cause the laundry to become stiff in time. Use appropriate amount of detergent according to the water hardness. •...
- Page 31 Too much foam forms in the machine. • Improper detergents for the washing machine are being used. >>> Use detergents appropriate for the washing machine. • Excessive amount of detergent is used. >>> Use only sufficient amount of detergent. • Detergent was stored under improper conditions.
Need help?
Do you have a question about the 8104 HE and is the answer not in the manual?
Questions and answers