Table of Contents
Advertisement
Advertisement
Table of Contents

Related Manuals for arcelik 5063 F


Summary of Contents for arcelik 5063 F
- Page 1 Washing Machine User’s Manual 5063 F 5063 FY...
- Page 2 Please read this manual first! Dear Customer, We hope that your product which has been manufactured in modern facilities and passed through a strict quality control procedure will give you the best results. Therefore, we advise you to read through this manual carefully before using your product and keep it for future reference.
-
Page 3: Table Of Contents
TABLE OF CONTENTS 1 Your Washing Machine Changing the program after the program has started ....19 Overview ..... . .4 Child-proof lock . -
Page 4: Your Washing Machine
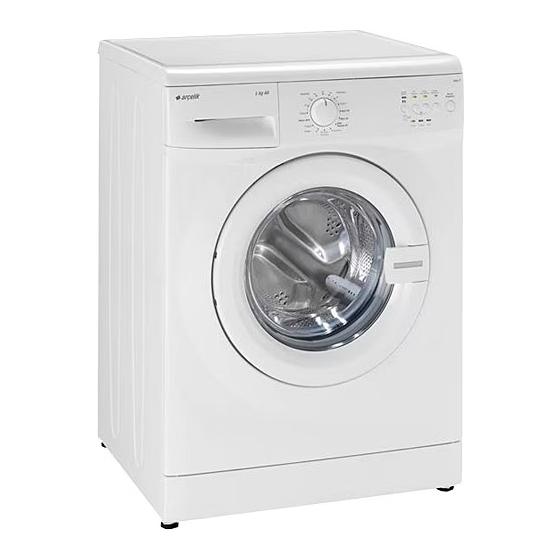
Overview 1 - Detergent Drawer 4 - Control Panel 2 - Door 5 - Filter Cap 3 - Top Lid 6 - Height-adjustable feet... -
Page 5: Specifications
Specifications Models 5063 F 5063 FY Maximum dry laundry capacity (kg) Height (cm) Width (cm) Depth (cm) Net Weight (±4 kg) Electricity (V/Hz.) 220-240 V / 50Hz 220-240 V / 50Hz Total Current (A) Total Power (W) 2000-2350 2000-2350 Spinning cycle (rpm max.) Specifications of this appliance may change without notice to improve the quality of the product. Figures in this manual are schematic and may not match your product exactly. -
Page 6: Warnings
Warnings Please read the following information. for 3 seconds to cancel the program Otherwise, there may be the risk of set in your machine before calling personal injury or material damage. the authorized service. Moreover, any warranty and reliability First Use commitment will become void. • To prepare your machine for General Safety washing, carry out your first washing • Never place your machine on a process without loading your carpet covered floor. Otherwise,... -
Page 7: Safety Instructions
for your machine. Turn off the machine, unplug it, turn • This appliance is not intended for use off the water tap and contact an by persons (including children) with authorized service agent. reduced physical, sensory or mental If there are children in your capabilities, or lack of experience and knowledge, unless they have house... -
Page 8: Installation
Installation Removing packaging C Keep the transportation safety bolts reinforcement in a safe place to reuse when the washing machine needs to be moved Tilt the machine to remove the again in the future. packaging reinforcement. Remove the C Never move the appliance without the packaging reinforcement by pulling the transportation safety bolts properly ribbon. -
Page 9: Connecting To The Water Supply
Connecting to the water machine is not in use. supply. Important: • The water supply pressure required to run the machine must be 1-10 bar (0,1 – 1,0 MPa). Attach a pressure- reducing valve if the water pressure is higher. • Connect the special hoses supplied with the machine to the water intake • Models with a single water inlet valves on the machine. -
Page 10: Electrical Connection
• In case the hose is elevated B The appliance must not be operated after laying it on the floor level or unless it is repaired! There is the risk close to the ground (less than of electric shock! 40 cm above the ground), water discharge becomes more difficult Destroying the packaging and the laundry may come out wet. material Therefore, the heights described in Packaging material can be dangerous to... -
Page 11: Initial Preparations For Washing
Initial preparations for washing Sorting the laundry • Empty pockets and remove all foreign objects such as coins, pens • Sort the laundry according to type and paper clips. If possible, turn of fabric, color, and degree of soiling pockets out and brush. and permissible water temperature. • Place small items like infants’ socks Always follow the advice on the and nylon stockings, etc. -
Page 12: Loading Door
examples. Detergent, softener and other cleaning agents Laundry type Weight (gr.) Add detergent and softener before Bathrobe 1200 starting the washing programme. Napkin Never open the detergent dispenser Duvet cover drawer while the washing programme is Bed Sheet running! Pillowcase When using a programme without Tablecloth pre-wash, no detergent should be put into the pre-wash compartment... - Page 13 Detergent quantity for prewashing 1/2 measure for main washing 1 measure an additional 1/2 with hard water measure Softener Put the softener into the softener compartment of the detergent dispenser. • Use the proportions recommended on the packet. • Never exceed the (> max <) level marking; otherwise, the softener will be wasted without being used. • If the softener has lost its fluidity, dilute dense softener with water before placing it in the detergent drawer.
-
Page 14: Selecting A Program And Operating Your Machine
Selecting a Program and Operating Your Machine Control panel 7 - On/Off Button 8 - Door Indicator * 9 - Program Follow-up Indicator 10 - Spin Speed Adjustment Knob * 11 - Temperature Adjustment Knob * 12 - Program Selection Knob 13 - Auxiliary Function Keys 14 - Start/Pause/Cancel Button * According to your machine’s model... -
Page 15: Turning The Machine On
Turning the machine on C Always select the lowest required temperature. Higher temperature You can prepare the machine for means higher power consumption. program selection by pressing the C For further program details, see, the “On/Off” button. When the “On/ “Program Selection Table” Off” button is pressed, the “Lid” light illuminates indicating that the door is Main programs unlocked. Press the “On/Off” button Depending on the type of textile, the again to shut down the machine. -
Page 16: Spin Speed Selection
make intermediate spinning compared In machines not equipped with a spin to the synthetic program. It must be speed selection knob, the machine will used for clothes for which sensitive spin in the maximum possible rpm in the washing is recommended. default setting of the selected program. -
Page 17: Program Selection And Consumption Table
Program selection and consumption table Programme Pamuklu 1.70 • • • • • • Pamuklu 60** 0.95 • • • • • • Pamuklu 0.65 • • • • • • Aktif 40 0.65 • • • Sentetik 0.90 • •... -
Page 18: Auxiliary Functions
Auxiliary functions Cancel” button for 3 sec. In the machines equipped with spin • Auxiliary function selection keys speed selection knob or button, you • Desired auxiliary function depending can spin by selecting the desired on the program is selected. spin speed and press “Start/Pause/ • Some combinations cannot be Cancel” button. selected together. As for machines not equipped with •... -
Page 19: Changing The Program After The Program Has Started
up indicator illuminates when “Start/ Press “Start/Pause/Cancel” button to Pause/Cancel” button is pressed after start the program. selecting the washing program. The C The program which is selected “Program finished” lamp illuminates and the “Wash” light will fade when the first will go on even if the program program comes to an end. The “Lid” selection button is moved and light flashes. Meanwhile, the door will another program mode is selected stay locked for your safety and when it while the machine is operating. You is safe to open, the “Lid” and “Program... -
Page 20: Child-Proof Lock
the door. If the “Lid” lamp does not will start flashing. light up continuously at the end of this • “Lid” lamp will light up continuously time, the water level in the machine when the door is unlocked. You can is not suitable and laundry cannot be select and start a new program. added. You can resume the program • If the program is cancelled in the by pressing the “Start/Pause/Cancel” middle of the process, “Wash” button again. -
Page 21: Quick Instructions For Daily Use
Quick instructions for daily use Preparation during a later step only if the water 1. Turn the tap on completely. Check if level is low enough to open the the hoses are connected tightly. loading door or if the temperature in 2. Place the laundry in the machine. - Page 22 3. Set the spin speed if spin speed adjustment is available on your machine. 4. Press “Start/Pause/Cancel” button. After the program is finished 1. “Program finished” lamp will light up on the program follow-up indicator. The lid can be opened after 2 minutes when the “Program Finished” and “Lid” lamps light up continuously. 2. Press the On/Off button to shut down the machine. 3.
-
Page 23: Cleaning And Care
Cleaning and care Detergent drawer such cases: Clean the drum with a stainless steel Remove any powder residue buildup in cleaning agent. Never use steel wool the drawer. To do this; or wire wool. 1. Press the dotted point on the siphon in the softener compartment and pull Outer cabinet and control towards you until the compartment panel is removed from the machine. -
Page 24: Draining Any Remaining Water And Cleaning The Pump Filter
• Take out the filters on the flat ends of the water intake hoses together with the gaskets and clean thoroughly under streaming water. • Replace the gaskets and filters carefully and tighten the hose nuts by hand. Draining any remaining water If it is composed of one piece, hold it and cleaning the pump filter from both sides and open it by pulling Filter system in your machine prevents out. - Page 25 the container by pulling out the plug into their positions and pushing the at the end of the hose. If the amount upper part of it. of water to be drained off is greater than the volume of the container, replace the plug, pour the water out, then resume the draining process.
-
Page 26: Solution Suggestions For Problems
Solution suggestions for problems Cause Explanation / Suggestion Programme cannot be started or selected. Machine may have switched to Bring your machine to factory settings by turning self protection mode due to an the programme selection knob. (see, Ending the infrastructure problem (such as line programme through canceling) voltage, water pressure, etc.). Water in the machine. There may be some water in your machine when you receive it. This is It is not harmful to your machine. - Page 27 The door is jammed. - Water level might be above the lower level of the door. - Machine might be heating up the water or it may be at the spinning - Run either the “Pump” or “Spin” programme. cycle. - Wait until the process is over. - Due to an electrical mechanism, - Wait until the process is over.
- Page 28 It continuously washes. Remaining time does not count down. - The machine will wait until there is sufficient In the case of a paused countdown amount of water to avoid poor washing results due while taking in water: to lack of water. Then the timer will start to count - Timer will not countdown until the down.
- Page 29 - Washing performance is poor: Oily stains appear on laundry. - Washing performance is poor: Bad odour - Such odours and bacteria layers are formed on the drum as a result of continuous washing at lower temperatures and/or in short programmes. - Oily accumulations on the drum may - Leave the detergent dispenser drawer as well have stuck to the laundry. as the loading door of the machine ajar after each - Oily accumulations on the drum may washing.
- Page 30 Clothes do not smell like the softener. - If the water hardness is higher, using insufficient amount of detergent can cause the laundry to become stiff in time. Use appropriate amount of detergent according to the water hardness. - Insufficient amount of detergent used. - If detergent is put in the prewash compartment - The detergent was placed into the although prewash cycle is not selected, machine...
- Page 31 The plug might not be Plug should be checked. plugged in the mains outlet. Machine does Fuse may have blown. Fuse should be checked. work. No light Electricity may be cut off. Power should be checked. is on. The “On/Off” button might This button must be pressed. have not been pressed. The machine did not start after the...
Need help?
Do you have a question about the 5063 F and is the answer not in the manual?
Questions and answers