Advertisement
WARNING:
This appliance is
equipped for (Natural and Propane)
gas. Field conversion is not permitted
other than between natural or
propane gases.
WARNING: IF THE INFORMATION IN THIS MANUAL IS NOT FOLLOWED
EXACTLY, A FIRE OR EXPLOSION MAY RESULT CAUSING PROPERTY
DAMAGE, PERSONAL INJURY, OR LOSS OF LIFE.
– Do not store or use gasoline or other flammable vapors and liquids in vicinity of
this or any other appliance.
WHAT TO DO IF YOU SMELL GAS
•
Do not try to light any appliance.
•
Do not touch any electrical switch; do not use any phone in your building.
•
Immediately call your gas supplier from a neighbor's phone. Follow the gas
supplier's instructions.
•
If you cannot reach your gas supplier, call the fire department.
– Installation and service must be performed by a qualified installer, service agency
or the gas supplier.
This is an unvented gas-fired heater. It uses air (oxygen) from the room in which it is
installed. Provisions for adequate combustion and ventilation air must be provided.
Refer to Air For Combustion and Ventilation section on page 9 of this manual.
INSTALLER: Leave this manual with the appliance. CONSUMER: Retain this manual
for future reference.
This appliance may be installed in an aftermarket, permanently located, manufactured
(mobile) home, where not prohibited by local codes. This appliance is only for use with
propane or natural gas. This appliance is equipped with a simple means to switch
between propane and natural gas. Field conversion by any other means including the
use of a kit is not permitted.
Questions about installation, operation, or troubleshooting? Before returning to your retailer, contact our
customer service department at 1-877-886-5989, 8:00 a.m.- 4:30p.m., EST, Monday-Friday or e-mail
customerservice@usaprocom.com.
CAUTION - FOR YOUR SAFETY
1
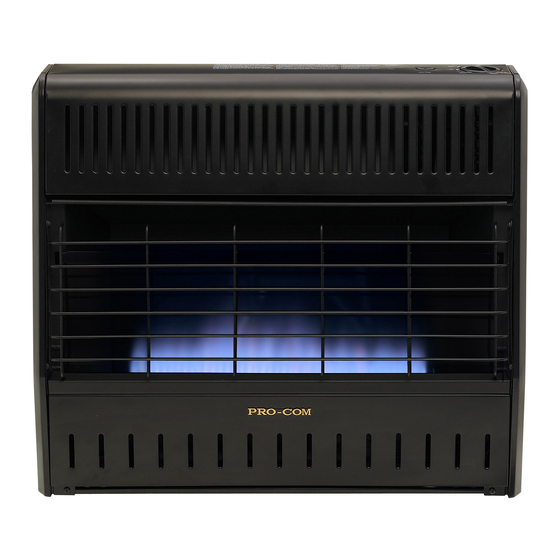
Vent-Free Gas Wall Heater
Model # MD100TBA
PC-MD100TBA-1103-B
Blue Flame
MD200TBA
MD300TBA
MD100HBA
MD200HBA
MD300HBA
MD200TBA-BB
MD300TBA-BB
MD200HBA-BB
MD300HBA-BB
Advertisement
Table of Contents

Subscribe to Our Youtube Channel
Related Manuals for Procom Blue Flame


Summary of Contents for Procom Blue Flame
- Page 1 Vent-Free Gas Wall Heater Blue Flame Model # MD100TBA MD200TBA WARNING: MD300TBA This appliance is equipped for (Natural and Propane) MD100HBA gas. Field conversion is not permitted MD200HBA other than between natural or MD300HBA propane gases. MD200TBA-BB MD300TBA-BB MD200HBA-BB MD300HBA-BB...
-
Page 2: Table Of Contents
TABLE OF CONTENTS TABLE OF CONTENTS Important Safety Information ..........................5 Product Features..............................7 Preparing for Installation.............................8 Air for Combustion & Ventilation.........................9 Installation ................................12 Operation .................................18 Care and Maintenance ..........................22 Troubleshooting ..........................23 Replacement Parts..........................26 WARNING: READ THE INSTALLATION & OPERATION INSTRUCTIONS BEFORE USING THIS APPLIANCE. IMPORTANT: Read this owner’s manual carefully and completely before trying to assemble, operate, or service this heater. - Page 3 PRODUCT SPECIFICATIONS MODEL MD100TBA MD200TBA MD300TBA BTU (available) 10,000 20,000 30,000 Gas Type Using Natural Gas Using Natural Gas Using Natural Gas Pressure Regulator Setting 4 in. W.C. 4 in. W.C. 4 in. W.C. Inlet Gas Pressure* (inches of water) * For purposes of input adjustment. Maximum 10.5 in.
- Page 4 PRODUCT SPECIFICATIONS MODEL MD200TBA-BB MD300TBA-BB BTU (available) 20,000 30,000 Gas Type Using Natural Gas Using Natural Gas Pressure Regulator Setting 4 in. W.C. 4 in. W.C. Inlet Gas Pressure* (inches of water) * For purposes of input adjustment. Maximum 10.5 in. 10.5 in.
-
Page 5: Important Safety Information
IMPORTANT SAFETY INFORMATION IMPORTANT SAFETY INFORMATION IMPORTANT: Read this owner’s manual carefully and completely before trying to assemble, operate, or service this heater. Improper use of this heater can cause serious injury or death from burns, fire, explosion, electrical shock, and carbon monoxide poisoning. - Page 6 5. If heater shuts off, do not relight until you have provided fresh, outside air. If heater keeps shutting off, have it serviced. Do not run heater: • Where flammable liquids or vapors are used or stored. • Under dusty conditions. 7.
-
Page 7: Product Features
PRODUCT FEATURES SAFETY PILOT This heater has a pilot with an Oxygen Depletion Sensing (ODS) safety shutoff system. The ODS/pilot shuts off the heater if there is not enough fresh air. PIEZO IGNITION SYSTEM This heater is equipped with a piezo control system. 2 GAS OPTIONS CAPABLE Your heater is equipped to operate on either Propane or Natural gas. -
Page 8: Preparing For Installation
PREPARING FOR INSTALLATION Before beginning assembly or operation of the product, make sure all parts are present. If any part is missing or dam- aged, do not attempt to assemble, install or operate the product. Contact customer service for replacement parts. Before installing heater, make sure you have the items listed below: (Not provided) •... -
Page 9: Air For Combustion & Ventilation
AIR FOR COMBUSTION AND VENTILATION WARNING: If the area in which the heater may be operated does not meet the required volume for indoor combustion air, combustion and ventilation air shall be provided by one of the methods described in the National Fuel Gas Code, ANSI Z223.1/NFPA 54, the International Fuel Gas Code, or applicable local codes. - Page 10 DETERMINING FRESH-AIR FLOW FOR HEATER LOCATION Determining if You Have a Confined or Unconfined Space Use this worksheet to determine if you have a confined or unconfined space. Space: Includes the room in which you will install heater plus any adjoining rooms with doorless passageways or ventilation grills between the rooms.
- Page 11 WARNING: If the area in which the heater may be operated does not meet the required volume for indoor combustion air, combustion and ventilation air shall be provided by one of the methods described in the NATIONAL FUEL GAS CODE, ANSI Z223.1/ NFPA 54, the INTERNATIONAL FUEL GAS CODE, or applicable local codes.
-
Page 12: Installation
INSTALLATION NOTICE: This heater is intended for use as supplemental heat. Use this heater along with your primary heating system. Do not install this heater as your primary heat source. If you have a central heating system, you may run system’s circulating blower while using heater. This will help circulate the heat throughout the house. In the event of a power outage, you can use this heater as your primary heat source. - Page 13 FASTENING HEATER TO WALL Mounting Bracket The mounting bracket is located on back panel of heater (see Figure 5). It has been taped there for shipping. Remove mounting bracket from back panel. Removing Front Panel of Heater 1. Remove two screws near bottom corners of lower front panel . 2.
- Page 14 Attaching to Wall Anchor Method For attaching mounting bracket to hollow walls (wall areas between studs) or solid walls (concrete or masonry): Drill holes at marked locations using 5/16-inch drill bit. For solid walls (concrete or masonry), drill at least 1 inch deep. Fold wall anchor as shown in Figure 8.
- Page 15 CONNECTING TO GAS SUPPLY WARNING: A qualified service technician must connect heater to gas supply. Follow all local codes. WARNING: This appliance requires a 3/8-inch NPT (National Pipe Thread) inlet connection to the pressure regulator. WARNING: Never connect heater to private (non-utility) gas wells. This gas is commonly known as wellhead gas. WARNING: Do not over-tighten gas connections.
- Page 16 Apply pipe joint sealant lightly to male threads. This will prevent excess sealant from going into pipe. Excess sealant in pipe could result in clogged heater valves. The installer must supply an external regulator. The external regulator will reduce incoming gas pressure. You must reduce incoming gas pressure to between 11 and 14 inches of water.
- Page 17 Figure 13 Figure 14 Figure 15 CHECKING GAS CONNECTIONS WARNING: Test all gas piping and connections for leaks after installing or servicing. Correct all leaks at once. WARNING: Never use an open flame to check for a leak. Apply a mixture of liquid soap and water to all joints. If bubbles form, there is a leak.
-
Page 18: Operation
Pressure Testing Heater Gas Connections Open equipment shutoff valve (see Figure 16). Open gas supply tank valve. Make sure control knob of heater is in the OFF position. Remove front panel. Check all joints from equipment shutoff valve to control valve (see Figure 16). Apply mixture of liquid soap and water to gas joints. - Page 19 LIGHTING INSTRUCTIONS MD100TBA & MD200TBA & MD300TBA & MD200TBA-BB & MD300TBA-BB STOP! Read the safety information on the side of the heater. Make sure equipment shutoff valve is fully open. Turn control knob clockwise to the OFF position. Wait five (5) minutes to clear out any gas. Then smell for gas, including near the floor. If you smell gas, STOP! Do not try to light any appliance.
- Page 20 LIGHTING INSTRUCTIONS MD100HBA & MD200HBA & MD300HBA & MD200HBA-BB & MD300HBA-BB 1. STOP! Read the safety information on the side of heater. 2. Check that gas supply to heater is on. 3. Push in gas control knob slightly and turn clockwise to the OFF position.
- Page 21 INSPECTING BURNER Check pilot flame pattern and burner flame pattern often. PILOT FLAME PATTERN Figure 20 shows a correct pilot flame pattern. Figure 21 shows a incorrect pilot flame pattern. The incorrect pilot flame is not touching the thermocouple. This will cause the thermocouple to cool, which shuts the heater off. If pilot flame pattern is incorrect: •...
-
Page 22: Care And Maintenance
CARE AND MAINTENANCE WARNING: Turn off heater and let cool before servicing CAUTION: You must keep control areas, burner, and circulating air passageways of heater clean. Inspect these areas of heater before each use. Have heater inspected yearly by a qualified service technician. Heater may need more frequent cleaning due to excessive lint from carpeting, bedding material, pet hair, etc. -
Page 23: Troubleshooting
TROUBLESHOOTING WARNING: If you smell gas: • Shut off gas supply. • Do not try to light any appliance. • Do not touch any electrical switch; do not use any phone in your building. • Immediately call your gas supplier from a neighbor’s phone. Follow the gas supplier’s instructions. •... - Page 24 TROUBLESHOOTING POSSIBLE CAUSE POSSIBLE CAUSE PROBLEM Burner orifice is clogged. Clean burner orifice (see Care and Maintenance, page 22) or replace Burner(s) does not light burner orifice. after ODS/pilot is lit. Burner orifice diameter is too small. Contact customer service. Inlet gas pressure is too low.
- Page 25 PROBLEM REMEDY POSSIBLE CAUSE 1. Ventilate room. Stop using odor causing 1. Heater is burning vapors from paint, products while heater is running. hair spray, glues, etc. See Heater produces IMPORTANT statement page 23. unwanted odors. Locate and correct all leaks (see 2.
-
Page 26: Replacement Parts
IMPORTANT SAFETY INFORMATION REPLACEMENT PARTS NOTE: Use only original replacement parts. This will protect your warranty coverage for parts replaced under warranty. PARTS UNDER WARRANTY Contact authorized dealers of this product. If they can’t supply original replacement parts, call Customer Service toll free at (877)886-5989 for referral information. - Page 27 PARTS LIST (MD100TBA) This list contains replaceable parts for your heater. When ordering replacement parts, follow the instructions listed under Replacement Parts on page 26 of this manual. PART PART # DESCRIPTION ML086-03 Glass MB09003 Lower Front Panel Assembly MB29003 Grill Guard RV83FI Pressure Regulator Assembly...
- Page 28 PARTS LIST (MD200TBA & MD300TBA) This list contains replaceable parts for your heater. When ordering replacement parts, follow the instructions listed under Replacement Parts on page 26 of this manual. MD200TBA MD300TBA PART DESCRIPTION PART # PART # ML086-02 ML086-01 Glass MB09002 MB09051...
- Page 29 PARTS LIST (MD100HBA) This list contains replaceable parts for your heater. When ordering replacement parts, follow the instructions listed under Replacement Parts on page 26 of this manual. PART PART # DESCRIPTION ML086-03 Glass MB09003 Lower Front Panel Assembly MB29003 Grill Guard RV83FI Pressure Regulator Assembly...
- Page 30 PARTS LIST (MD200HBA & MD300HBA) This list contains replaceable parts for your heater. When ordering replacement parts, follow the instructions listed under Replacement Parts on page 26 of this manual. PART MD200HBA MD300HBA DESCRIPTION PART # PART # ML086-02 ML086-01 Glass MB09002 MB09051...
- Page 31 PARTS LIST (MD200TBA-BB & MD300TBA-BB) This list contains replaceable parts for your heater. When ordering replacement parts, follow the instructions listed under Replacement Parts on page 26 of this manual. PART MD200TBA-BB MD300TBA-BB DESCRIPTION PART # PART # ML086-02 ML086-01 Glass MB09002 MB09051...
- Page 32 PARTS LIST (MD200HBA-BB & MD300HBA-BB) This list contains replaceable parts for your heater. When ordering replacement parts, follow the instructions listed under Replacement Parts on page 26 of this manual. MD200HBA-BB MD300HBA-BB PART DESCRIPTION PART # PART # ML086-02 ML086-01 Glass MB09002 MB09051...
- Page 33 WARRANTY INFORMATION Keep This Warranty IMPORTANT: We urge you to fill your warranty registration card within TEN(10) days of date of installation, complete with the entire serial number which can be found on the rating plate. Retain this portion of the card for your record. Always specify model and serial numbers when communicating with customer service.
Need help?
Do you have a question about the Blue Flame and is the answer not in the manual?
Questions and answers
I purchased a Procom 20,000 BTU Vent Free Propane Heater. After it was installed, it produced yellow-tipped flames, primarily when working in low mode. I contacted my propane supplier, and they sent a technician who installed a new regulator on my supply tank and adjusted the pressure between 12 to 14. It continued to produce yellow-tipped flames, and emitted an odor. I checked the air supply to the room and it has very good ventilation. The humidity level stays below 30%. I contacted ProCom customer service and described this situation, and they decided to replace the unit, which was purchased from Home Depot. I received and installed the replacement unit, and it is producing yellow-tipped flames, and an odor, exactly the same as the first unit that I purchased. Today, I had a technician from the propane company inspect the tank and regulator, and they confirmed that the pressure was between 12 to 14. The technician told me that the issue is not related to pressure, since he varied the pressure and inspected the unit during the process, and the yellow-tipped flames and odor persisted. Please advise. Sincerely, Mike Krumrine
Yellow-tipped flames and odor in a ProCom 20,000 BTU Vent Free Propane Heater after replacing the unit could be caused by:
1. Gas leak – Check all gas connections and correct any leaks.
2. Low fuel supply – Refill the propane supply tank.
3. Not enough fresh air – Open a window or door for proper ventilation.
4. Low line pressure – Contact your local gas supplier.
5. Partially clogged ODS/pilot – Clean the ODS/pilot.
These issues can affect combustion and cause odors or improper flame color.
This answer is automatically generated
I have owned my ProCom MTB300TBA for more than 5 years without any problems other than cleaning the ignitor by using a compressed gas electronics duster. This is usually necessary when dust accumulates around the pilot which extinguishes the flame preventing the unit from igniting the burner. In addition to this I've noticed that the central part of the burner after lighting surges directly in front of the pilot light causes the flame to reach higher towards the top of the inside of the unit. Which didn't occur at all during the first few years of the units' winter operations. Is this behavior due to a loose connection of the coupler connection to the burner? This hasn't created any reason for concern other than wondering if the burner and the pilot need adjustment, replacement or anything else you might know of that I should have knowledge of. If a picture of the unit while in operation would be helpful, please advise. Thank you in advance for any information you can provide or inform me about which will increase the efficiency, safety and the operation of the unit. Thank you, Richard