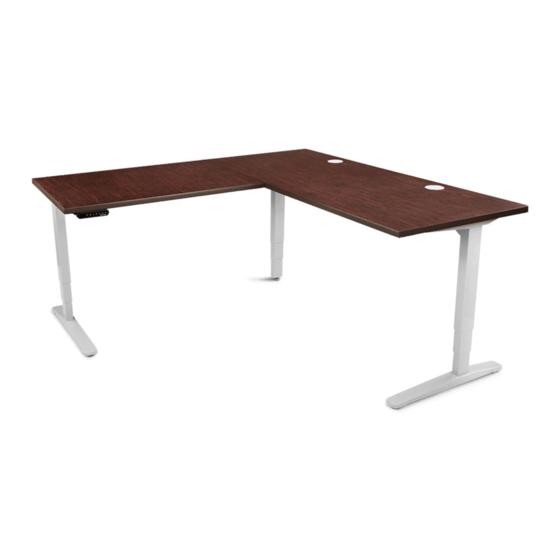
Summary of Contents for Jason.L Sit-Stand Series
- Page 1 ASSEMBLY INSTRUCTION MODEL : ST SUPREME E25T 90° LEFT Electric L-Shaped Desk Frame ( Table Top 150X150cm / 180X150cm / 180X180cm ) V1.0...
- Page 2 BOX NO.1 Component List - ST SUPREME E25T 90°_V1.0 Left Column Right Column Foot Qty:1 Qty: 1 Qty: 2 Axle Drive L400mm Crossbar Assy. Qty : 2 Qty: 1 Hex Shaft L295mm Qty : 2 Crossbar Assy. Qty: 1 Hex Shaft L600mm Qty : 1 Side L Plate Hex Shaft L430mm...
- Page 3 BOX NO.2 Component List - ST SUPREME E25T 90°_V1.0 Right Column Foot Qty: 1 Qty: 1 Crossbar Assy. Qty: 1 Side L Plate Qty: 1 Crossbar Assembly Qty: 1 Hex Shaft L430mm Qty : 1 Rubber Pad Type-A Leveling Base Screw M5 X L10 Screw M6 X L16 Qty : 4...
- Page 4 Assembly Instruction: Left Stand Assembly Step 1 : Install Leveling Base ITEM NO. DESCRIPTION QTY.BOX NO.1 Foot Leveling Base STEP 2 : Install Foot ITEM NO. DESCRIPTION QTY.BOX NO.1 Left Column Screw M6 XL16 STEP 3 : Install Crossbar Left Assy. ITEM NO.
- Page 5 Assembly Instruction: Right Stand Assembly Step 1 : Install Leveling Base ITEM NO. DESCRIPTION QTY.BOX NO.1 Foot Leveling Base STEP 2 : Install Foot ITEM NO. DESCRIPTION QTY.BOX NO.1 Right Column Screw M6 XL16 STEP 3 : Install Crossbar Right Assy. ITEM NO.
- Page 6 Assembly Instruction: 3rd Stand Assembly Step 1 : Install Leveling Base ITEM NO. DESCRIPTION QTY.BOX NO.2 Foot Leveling Base STEP 2 : Install Foot ITEM NO. DESCRIPTION QTY.BOX NO.2 Right Column Screw M6 XL16 STEP 3 : Install Crossbar Right Assy. ITEM NO.
- Page 7 Assembly Instruction: Integrate Left, Right & 3rd Stand ITEM NO. DESCRIPTION QTY.BOX NO.1 QTY.BOX NO.2 Crossbar Motor Model Crossbar Assembly Notes: Step 1 : Select table size (Refer table lower right side). Step 2 : Intergrate Right Stand Assy & Crossbar Assembly (Item No.27) (Before intergrate, Please follow Figure A Step 3 : Intergrate Crossbar Motor Model (Item No.07) Step 4 : Intergrate Left Stand Assy.
- Page 8 Assembly Instruction: Install Motor Assembly ITEM NO. DESCRIPTION QTY.BOX NO.1 Screw M6 XL10 Motor TGM1-2252-003 V1.0 Pg.5/15...
- Page 9 Assembly Instruction: Axle Drive And Hex Shaft Assy. For Length 145cm (5Feet) ITEM NO. DESCRIPTION QTY.BOX NO.1 Axle Drive L400mm Hex Shaft L295mm Hex Shaft L430mm Set Screw M6(X4) (50~60mm) (50~60mm) Press Down Press Down Press Down Axle Drive Notes: 1.Before Insert Hex Shaft, make sure Left Stand &...
- Page 10 Assembly Instruction: Axle Drive And Hex Shaft Assy. For Length 110cm (5Feet) Press Down Press Down Press Down Axle Drive Hex Shaft Length 295mm Figure No.2 Notes: 1.Before Insert Hex Shaft, make sure Left Stand & Right Stand are at lowest position. Please see attachment caution ! (Refer Pg10/15).
- Page 11 Assembly Instruction: Axle Drive And Hex Shaft Assy. For Length 175cm (6Feet) ITEM NO. DESCRIPTION QTY.BOX NO.1 Axle Drive L400mm Hex Shaft L295mm Hex Shaft L600mm Set Screw M6(X4) (50~60mm) (50~60mm) Press Down Press Down Press Down Axle Drive Notes: 1.Before Insert Hex Shaft, make sure Left Stand &...
- Page 12 Assembly Instruction: Axle Drive And Hex Shaft Assy. For Length 140cm (6Feet) ITEM NO. DESCRIPTION QTY.BOX NO.2 Hex Shaft L430mm Press Down Set Screw M6 Press Down Press Down Axle Drive Figure No.4 Notes: 1.Before Insert Hex Shaft, make sure Left Stand &...
- Page 13 Caution: Column Must Be At Lowest Position Before Install Hex Shaft Press down the column make sure it is at lowest postion. The marking O not appear means it is at lowest position refer to below diagram. Press Marking not seen (Means at lowest position) Marking partially seen...
- Page 14 Assembly Instruction: Install Side L Plate ITEM NO. DESCRIPTION QTY.BOX NO.1 QTY.BOX NO.2 Side L Plate Screw M5 XL10 Side L Plate Screw M5 XL10 V1.0 Pg.11/15...
- Page 15 Assembly Instruction: Install Cable Tray ITEM NO. DESCRIPTION QTY.BOX NO.1 Cable Tray Screw M5 XL10 V1.0 Pg.12/15...
- Page 16 Assembly Instruction: Install Control Box & Handset ITEM NO. DESCRIPTION QTY.BOX NO.1 Control Box TC11 Handset TH14 V1.0 Pg.13/15...
- Page 17 Assembly Instruction: Plug Rubber Pad Type-A ITEM NO. DESCRIPTION QTY.BOX NO.1 QTY.BOX NO.2 Rubber Pad Type-A Rubber Pad Type-A V1.0 Pg.14/15...
- Page 18 Assembly Instruction: Reset The Desk Before Use 'UP' Button 'DOWN' Button Cautions! Make sure all cables are connected to control box before power up. Reset operation as below : 1.One time reset For the first powered up, press and hold both 'Up' and 'Down' buttons, simultaneously for more than 3 seconds until the desk moves down to lowest position.


Need help?
Do you have a question about the Sit-Stand Series and is the answer not in the manual?
Questions and answers