Table of Contents
Advertisement
Quick Links
1.1 SAFETY PRECAUTIONS....................................................................................
2.1
2.2
2.3
2.4
3.1 SETP1...................................................................................................................
3.2 SETP2...................................................................................................................
3.3 SETP3...................................................................................................................
4.1 Adjusting the resistance......................................................................................
4.2 Usage and Maintenance......................................................................................
TABLE OF CONTENTS
......................................................................................................
...................................................................................................
...........................................................................
...................................................................
.................................................
1
2
3
4
4
5
6
7
8
8
9
Advertisement
Table of Contents

Subscribe to Our Youtube Channel
Related Manuals for SportsArt Fitness C510


Summary of Contents for SportsArt Fitness C510
-
Page 1: Table Of Contents
TABLE OF CONTENTS CHAPTER 1: SAFETY PRECAUTIONS 1.1 SAFETY PRECAUTIONS..................CHAPTER 2: INSTRUCTIONS DIMENSIONS ...................... LIST OF PARTS ....................COMPONENTS in the Hardwars Kit..............COMPONENTS on the Product ................CHAPTER 3: ASSMBLY INSTRUCTIONS 3.1 SETP1........................3.2 SETP2........................3.3 SETP3........................CHAPTER 4: OPERATION INSTRUCTIONS .......... -
Page 2: Chapter 1: Safety Precautions
- CHAPTER 1 SAFETY PRECAUTIONS 1.1 SAFETY PRECAUTIONS 1. Read and follow all cautionary messages and warnings in this manual. Obtain instructions on the proper user of this machine prior to exercising. Use appropriate body positioning and controlled movements. 2. To address your particular needs and physical condition, consult your physician before beginning any exercise program. -
Page 3: Chapter 2 Instructions
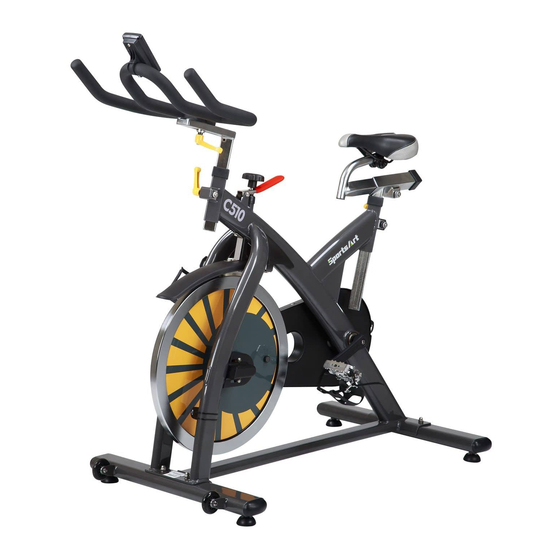
- CHAPTER 2 INSTRUCTIONS 2.1 DIMENSIONS... -
Page 4: List Of Parts
2.2 LIST OF PARTS Assembly Parts Number Qty Number Name Name Pedal Main frame Bottle cage Saddle Hardware kit Handle bar w/stainless slider Stainless Handle bar post Front stabilizer tube Rear stabilizer tube... -
Page 5: Components In The Hardwars Kit
2.3 COMPONENTS in the Hardwars Kit Hardware Kit Name Number Specification Notes (M4) L shaped Allen wrench Open end wrench 2.4 COMPONENTS on the Product Components on the Product Number Notes Name Specification Stainless nut for stabilizer tube Stainless washer for stabilizer tube Fixing bolt for stabilizer tube Handle bar release lever Stainless screw for bottle cage... -
Page 6: Chapter 3 Assmbly Instructions
- CHAPTER 3 ASSMBLY INSTRUCTIONS 3.1 STEP 1 (a) Remove screws (21) from the front and rear stabilizer tubes (A5, A6). (b) Use screws (21) to secure front and rear stabilizer tubes (A5, A6) onto the main frame (A1). -
Page 7: Setp2
3.2 STEP 2 (a) Remove the handlebar release lever (22) from the handlebar w/stainless slider (A3) ○○. in order (b) Rotate to release the set knob. Remove the filler tube, and insert the stainless handlebar post (A4) into the main frame (A1). Then rotate to secure the set knob. Assemble the handlebar w/stainless slider (A3) onto the stainless handlebar post ○○... -
Page 8: Setp3
3.3 STEP 3 (a) Install the saddle (A2) onto the main frame (A1). Then secure the saddle (A2) nuts on both sides. (b) Secure pedals (A7) onto the cranks. Remove screws (23)(24) from the main frame (A1). Then secure the bottle cage (A8) into place. -
Page 9: Chapter 4: Operation Instructions
- CHAPTER 4 OPERATION INSTRUCTIONS 4.1 Adjusting the resistance Use the brake knob (25) to loosen (-) or tighten (+) resistance as you exercise. The flywheel should rotate freely without any resistance when you loosen (-) the brake system fully. More experienced riders may wish to increase the overall resistance by tightening (+) the brake system. -
Page 10: Usage And Maintenance
Put your foot as far forwards as possible into the toe-clip, and pull the strap tight. (6) The C510 should operate on a level surface with no lateral movement. There is a height adjustment pad underneath both sides of the foot tube. Rotate these pads upward or downward until the bike is totally stable on the ground. - Page 11 Daily Weekly Monthly Quarterly Annually No DESCRIPTION 1 Wipe machine down 2 Spray the frame with WD40 3 Perform a visual check 4 Check security of handle bar post & seat post 5 Check security of saddle 6 Remove handlebar post and clean tube 7 Remove seat and clean tube 8 Check brake pads for wear and...
Need help?
Do you have a question about the C510 and is the answer not in the manual?
Questions and answers