Advertisement
Quick Links
Advertisement

Related Manuals for Xtracycle Stoker 2021


Summary of Contents for Xtracycle Stoker 2021
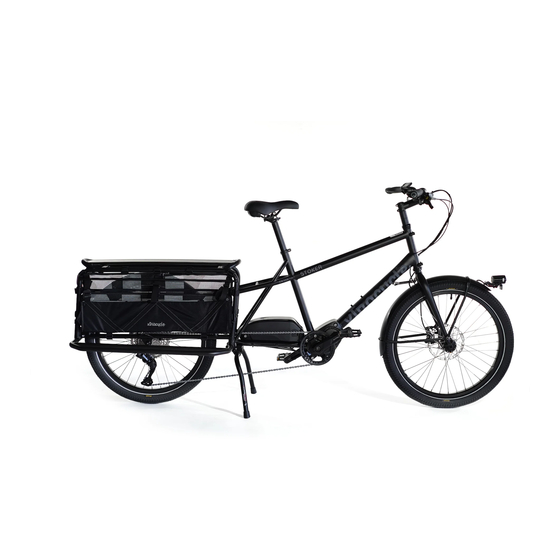
- Page 1 stoker assembly Manual 2021...
-
Page 2: Tools Needed
Assembling the xtracycle stoker Tools needed 01 - Open the bike box 3 mm Allen wrench Look over the box for signs of shipping damage. If damage 4 mm Allen wrench is present, please take pictures in case a shipping damage 5 mm Allen wrench report needs to be filed. - Page 3 Open the box. Inspect the contents and look again for any signs of shipping damage. Remove the small parts box, the KickBack 3 and the seat Cut the string attaching the rear of the bike to the end of the post and set these aside.
-
Page 4: Install The Front Wheel
Remove all of the packaging from the seat post and saddle. Remove the bike from the box and secure it in your bike With the bike still in the box, install the seat post into the stand. Once in the stand, loosen the FreeLoader Too bag and frame. - Page 5 Remove the front axle from the front fork. Install the front wheel onto the fork. Make sure the rotor rests in between the brake pads. Reinstall the front axle using the M6 Allen wrench. 14 - Install the KickBack 3 Grab the KickBack 3 and needed hardware to install the the KickBack 3 mounting plate needs to be slid into these KickBack 3.
- Page 6 Start to thread one M5 bolt up from the bottom of the With the KickBack legs folded up, place both Xtracycle KickBack mounting plate. Thread it far enough to keep the U-bolts over the Xtracycle’s front bridge and through the KickBack attached to the frame.
- Page 7 Using your 5 mm Allen wrench, tighten the bolts on the Using the 10 mm socket wrench, fully tighten all four U-bolt BoomStrap or the single bolt below to 3Nm. nuts. The installation of the KickBack is now complete. 22 - Adjust the front light To adjust the front light, first rotate the light so that it is front Tighten the pivot bolts and secure the M6 bolt on the fender facing.
- Page 8 24 - Adjust the stem and handlebars You will now be adjusting the front stem and handlebars. Once the handlebars are straight, tighten down the stem bolts to 4-6 Nm. Loosen the stem bolts and rotate the stem to a forward facing position.
-
Page 9: Installing The Pedals
28 - Connecting the cycling computer Place the wire hanging off the front of the handlebars into You will hear a click when the wire has been attached the Shimano Cable Tool TL-EW300 which is located in the completely. small parts box. Holding the cable tool, connect the wire into the handlebar computer. - Page 10 32 - Install the U-Tubes Before installing the U-Tubes, please take note that the Determine if you would like to have the U-tubes installed in rear insertion end on each U-Tube is slightly longer than the the wide setting (shown on the left side of the bike pictured insertion end on the front end of the U-Tube.
- Page 11 If your U-tubes do not seem to easily slide into the frame, you Four bolts are securing the tailpiece in place. Loosen these will need to loosen the tailpiece on the back end of the bike four bolts using the 10 mm socket wrench and the 5mm in order to acquire additional tolerance.
-
Page 12: Complete Assembly
Looking to install additional accessories? 41 - Complete assembly Please refer to the following page on the Xtracycle After ensuring that the brakes and gears are set to your wesbite for links to additional installation manuals: preference, tie down the two hook and loop straps on the bottom of the FreeLoader Too bags to the bike frame.
Need help?
Do you have a question about the Stoker 2021 and is the answer not in the manual?
Questions and answers