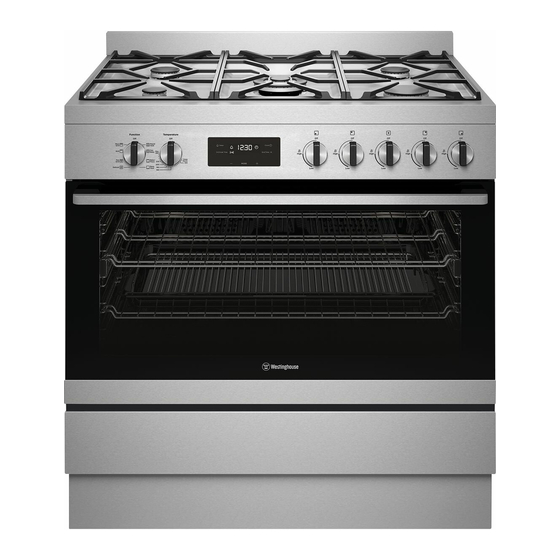
Westinghouse WFE904SD User Manual

Westinghouse WFE904SD User Manual

900mm cooking appliances
Hide thumbs Also See for WFE904SD:

Advertisement

USER MANUAL
Enjoy peace of mind.
Register your appliance today.
Stay updated on better living services, safety notices and
shop for accessories.
1. O pen the camera app on your smartphone and
point at the QR code to scan
Product Registration QR code is located on the
front of your appliance or inside the door rim *.
2. Tap the notification or link to open the registration form
3. Complete your details and enjoy peace of mind
*Exact location of QR code may vary depending on oven model
900mm COOKING
APPLIANCES
WFE904SD, WFE915SD, WFE916DSD,
WFE946SD, WFEP917DSD
IMPORTANT SAFETY INSTRUCTIONS
1

Advertisement

Table of Contents
loading

Summary of Contents for Westinghouse WFE904SD

  • Page 1 2. Tap the notification or link to open the registration form 3. Complete your details and enjoy peace of mind *Exact location of QR code may vary depending on oven model 900mm COOKING APPLIANCES WFE904SD, WFE915SD, WFE916DSD, WFE946SD, WFEP917DSD IMPORTANT SAFETY INSTRUCTIONS...
  • Page 2: Table Of Contents

    Installation of the appliance ............7 under the Westinghouse manufacturer’s warranty correctly and that you read the safety instructions • Ensure that all specified vents, openings and carefully to avoid misuse and hazards.
  • Page 3: Important Safety Instructions

    Control Panel of cooking. catch fire. • Do not slide pans across the surface of the ceramic Model WFE904SD Gas cooktops glass as it could result in scratching of the surface. • The ceramic cooktop is not intended to be operated •...
  • Page 4: Wfe916Dsd

    • Clearances to combustible surfaces may be reduced if combustible surfaces are protected in accordance with clause 6.10.1.2 of AS/NZS 5601.1, or clause 6.9.2 Models WFE904SD, WFE915SD, WFE916DSD, Stainless steel splashback of AS/NZS 5601.2. WFEP917DSD & WFE946SD are designed to fit into a 900mm wide gap between standard kitchen cabinets.
  • Page 5: Wfep917Dsd

    IMPORTANT TIPS & INFORMATION WARNING CAUTION • WFE904SD is supplied with two silver feet and The freestanding type installation requires four screw-in • To avoid scratching the floor and the appliance two black feet, it is recommended to install the two feet to be installed before it can be fitted in between...
  • Page 6 INSTALLATION OF THE APPLIANCE (CONTINUED) Leveling oven Freestanding installation (continued) Installation the anti-tilt brackets Place a level in the oven as below making sure the level sits on the front and rear forms. Adjust the feet To ensure cooker stability, the anti-tilt brackets must accordingly to level the appliance.
  • Page 7 INSTALLATION OF THE APPLIANCE (CONTINUED) Freestanding installation (continued) Freestanding installation (continued) • Connect services to the appliance prior to placing into cavity. WARNING WARNING • To locate appliance, slide into cavity ensuring the • Appropriate fasteners must be used to suit the type anti-tilt brackets fully engaged with the rear left and of wall on which the anti-tilt brackets are installed.
  • Page 8 INSTALLATION OF THE APPLIANCE (CONTINUED) Freestanding installation (continued) Slot-in installation Make sure both clip modules are in the same orientation after installation. Clip the kick panel onto the front feet of the appliance. Make sure the kick panel snaps onto the larger section of the front feet.
  • Page 9: Wiring Requirements

    3.9). final sub-circuit in the fixed wiring that is intended to supply this cooking range. Supply cord size required: WFE904SD/WFE915SD/WFE916DSD - 2.5mm WFEP917DSD - 4.0mm WFE946SD - 6.0mm The Data plate gives information about rating and is located behind the bottom of the oven door.
  • Page 10: Installing The Freestanding Cooker

    Bypass screw of an upstream regulator may be needed, or an using a tape or jointing compound suitable for gas For WFE904SD and WFE915SD upstream regulator or valve with insufficient flow connections. The consumer piping is then connected capacity may be present in the gas supply line.
  • Page 11: Testing The Operation Of The Gas Cooker

    TESTING THE OPERATION OF THE GAS COOKER BEFORE OPERATING YOUR APPLIANCE FOR THE FIRST TIME Checking gas supply When maximum flame appearance is correct, then check the turn-down setting on each burner. If the settings 1. Check the manometer zero point is correct. appear to be incorrect, proceed as follows: Preparing your appliance for the first time Setting the time...
  • Page 12: Installing Your Oven Accessories

    INSTALLING YOUR OVEN ACCESSORIES Slides (telescopic runners) (on selected models) Installing the side racks Fitting grill dish and insert 1. Insert the rear peg into the rear access hole provided, Your oven comes with a full width grill dish and a grill 1.
  • Page 13: Installing Burners And Trivets

    INSTALLING BURNERS AND TRIVETS GETTING TO KNOW YOUR COOKTOP Installing burners Trivet installation sequence Model WFE904SD & WFE915SD Using your gas hot plates (All gas hob model) The burner crown must be fitted correctly into the Install the middle trivet first by aligning the trivet with burner cup or damage will occur during operation.
  • Page 14: Getting To Know Your Ceramic Cooktop

    GETTING TO KNOW YOUR COOKTOP (CONTINUED) GETTING TO KNOW YOUR CERAMIC COOKTOP Ceramic hotplates (WFE946SD) Ceramic cooktop controls A flat or slightly concave pan is preferable for The cooktop is made from ceramic glass, a tough, ceramic hotplates durable material that withstands heating and cooling without breaking.
  • Page 15: Using Your Ceramic Cooktop

    USING YOUR CERAMIC COOKTOP Switching the ceramic cooktop on and off Locking/unlocking the control panel The length of time that the automatic warm up function Overriding the child safety device operates depends on the heat setting selected. The control panel, with the exception of the ‘On/Off’ The child safety device can be switched off in CONTROL PANEL DISPLAY...
  • Page 16 USING YOUR CERAMIC COOKTOP (CONTINUED) Using the timer Pause Displaying the time remaining for a cooking zone function sets all cooking zones that operate to OUTCOME AFTER CONTROL PANEL FIELD DISPLAY FUNCTION CONDITION THE TIME HAS the lowest heat setting 1.
  • Page 17: Using Your Oven

    USING YOUR OVEN Understanding your oven functions Bake/Pizza Grill Cooling/Venting fan Your built-in appliance is fitted with a cooling fan. Rapid Heat This prevents your kitchen cabinet from overheating and reduces the condensation inside the oven. It will operate whenever you are using your oven or grill and will blow warm air across the top of the oven door.
  • Page 18 NOTE: Do not forget to add preheating time if necessary. On when timer is set Press together for 2 seconds to switch Cooking with your timer WFE904SD the clock display ’on’ again. Time of day icon Setting the cooking end time...
  • Page 19 USING YOUR OVEN (CONTINUED) Setting the cook time Setting the delayed start cooking time Additional Functionality Releasing the child-proof lock Use the knobs to select the desired oven function The ‘cook time’ and ‘end time’ functions can be Touch and hold the buttons at the same Setting the countdown timer and cooking temperature.
  • Page 20: Easybake +Steam

    EASYBAKE +STEAM COOKING TEST Your WFEP917DSD has the ability to add steam while Get to know your new oven with this • The grill tray can be used in the oven as a baking dish, baking. Cooking with steam is a great addition to ‘Simple Test Cake’...
  • Page 21: Cooking Guide

    COOKING GUIDE Choosing the best oven settings EasyBake +Steam function The following table is intended as a guide and WATER IN CAVITY TEMPERATURE OVEN SHELF FOOD TIME IN MINUTES experience may show some variation in cooking WELL (ML) • POSITION* times necessary to meet individual requirements.
  • Page 22: Dealing With Cooking Problems

    COOKING GUIDE (CONTINUED) DEALING WITH COOKING PROBLEMS (see also TROUBLESHOOTING) Grilling Guide PROBLEM CAUSES REMEDIES Uneven cooking: • Incorrect shelf position. – Select shelf that puts food in the WARNING centre of the oven. WARNING Always clean the grill/oven dish after every use. Excessive fat build up may cause a fire. •...
  • Page 23: Cleaning Your Oven

    CLEANING YOUR OVEN CLEANING YOUR OVEN ACCESSORIES Gas hotplate Removing the trays and shelves from your Cleaning your oven door appliance WARNING WARNING • The trivets can be removed for cleaning by carefully The oven door has been designed to allow the two lifting them from the hob.
  • Page 24: Steam Assisted Cleaning

    CLEANING YOUR OVEN ACCESSORIES (CONTINUED) STEAM ASSISTED CLEANING Cleaning your oven door Changing the light globes Steam Assisted Clean • There are 2 light globes located in the top of the (WFEP917DSD model only) oven cavity towards the front. The light globe glass is WARNING WARNING accessible between the passes of the upper element.
  • Page 25: Cleaning Your Pyrolytic Oven

    CLEANING YOUR PYROLYTIC OVEN TROUBLESHOOTING WFEP917DSD Faults TIPS & INFORMATION IMPORTANT Pyrolytic cleaning of the oven cavity If there is a problem with the oven and/or grill, please: During the pyrolytic cleaning function, it is advisable • Check the points listed below before calling for service. NOTE: We may charge for service even in the The oven has the Pyrolytic self-cleaning function, it not to use a cooktop if it is fitted above the oven.
  • Page 26: Warranty

    Dirt or spillage on flame safeguard sensor Clean flameguard sensor tip the Appliance; (d) ‘Westinghouse’ is the brand controlled by Electrolux Home Products (where fitted) In addition, Electrolux is not liable under this warranty if: Pty Ltd of 163 O’Riordan Street, Mascot NSW 2020, ABN 51 004...
  • Page 27 0800 10 66 10 email: customercare@electrolux.co.nz web: westinghouse.co.nz and WESTINGHOUSE are trademarks of Westinghouse Electric Corporation. Used under license by Electrolux Home Products Pty Ltd. All Rights Reserved. Part Number: A20343201 REV D © 2021 Electrolux Home Products Pty Ltd...

This manual is also suitable for:

Wfe915sdWfe916dsdWfe946sdWfep917dsd

Table of Contents