Table of Contents
Advertisement
USER MANUAL
Enjoy peace of mind.
Register your appliance today.
Stay updated on better living services, safety notices and
shop for accessories.
1. O pen the camera app on your smartphone and
point at the QR code to scan
Product Registration QR code is located on the
front of your appliance or inside the door rim *.
2. Tap the notification or link to open the registration form
3. Complete your details and enjoy peace of mind
*Exact location of QR code may vary depending on oven model
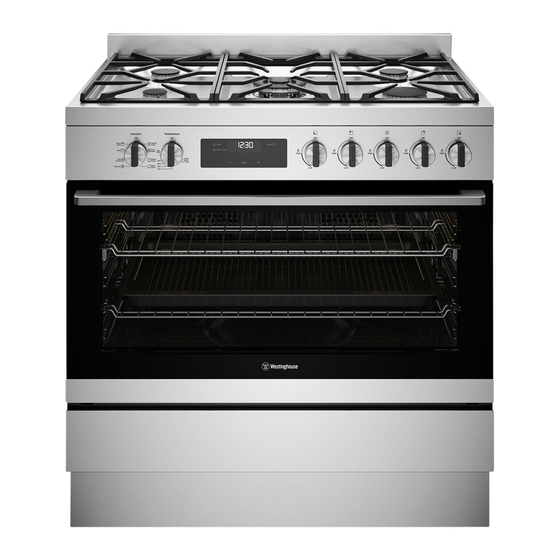
90cm COOKING
APPLIANCES
WFE9515SD
1
Advertisement
Table of Contents

Related Manuals for Westinghouse WFE9515SD


Summary of Contents for Westinghouse WFE9515SD
- Page 1 *. 2. Tap the notification or link to open the registration form 3. Complete your details and enjoy peace of mind *Exact location of QR code may vary depending on oven model 90cm COOKING APPLIANCES WFE9515SD...
-
Page 2: Table Of Contents
Before operating your appliance for the first time ....20 under the Westinghouse manufacturer’s warranty correctly and that you read the safety instructions • Ensure that all specified vents, openings and carefully to avoid misuse and hazards. -
Page 3: Important Safety Instructions
• Always turn pan handles to the side or rear to catch fire. prevent accidental knocking and to keep out of Model WFE9515SD reach of children. Gas cooktops • Do not allow pots to boil dry, as damage to both pan and cooktop may result. -
Page 4: Installation Of The Appliance
Freestanding installation with AS/NZS 5601.1, or AS/NZS 5601.2. Model WFE9515SD is designed to fit into a 900mm • When setting the cooker height, ensure the top of wide gap between standard kitchen cabinets. The... - Page 5 INSTALLATION OF THE APPLIANCE (CONTINUED) Freestanding installation (continued) Gently close the door until it comes to a stop. Then lift Leveling oven the door off the hinge. Place a level in the oven as below making sure the Installation of screw-in feet level sits on the front and rear forms.
- Page 6 INSTALLATION OF THE APPLIANCE (CONTINUED) Freestanding installation (continued) Freestanding installation (continued) Installation the anti-tilt brackets WARNING WARNING To ensure cooker stability, the anti-tilt brackets must be installed. • Appropriate fasteners must be used to suit the type There are left and right engagement slots for the of wall on which the anti-tilt brackets are installed.
- Page 7 INSTALLATION OF THE APPLIANCE (CONTINUED) Freestanding installation (continued) Freestanding installation (continued) • Connect services to the appliance prior to placing Make sure both clip modules are in the same orientation into cavity. after installation. • To locate appliance, slide into cavity ensuring the anti-tilt brackets fully engaged with the rear left and right engagement slots.
- Page 8 INSTALLATION OF THE APPLIANCE (CONTINUED) Slot-in installation Slot-in installation (continued) • The anti-tilt brackets are to be secured to the back • Once services are connected, product can be lifted wall with appropriate fasteners. onto the plinth and pushed back carefully, ensuring the appliance engages into both brackets at the rear •...
-
Page 9: Wiring Requirements
• The appliance is preset for natural gas use, if LPG is to • Electrical supply authorities. be used see Conversion to LPG section. WFE9515SD - 2.5mm • Building regulations. • Gas installation must be made in accordance with AS/ NZS 5601.1, the local gas fitting regulations, municipal... -
Page 10: Lpg Conversion Gas Cooktop
LPG CONVERSION GAS COOKTOP TESTING THE OPERATION OF THE GAS COOKER A conversion kit is included with the product for 10. Attach the LPG sticker to the cooker, near the gas Checking gas supply When maximum flame appearance is correct, then check Universal LPG usage. -
Page 11: Before Operating Your Appliance For The First Time
BEFORE OPERATING YOUR APPLIANCE FOR THE FIRST TIME INSTALLING YOUR OVEN ACCESSORIES Slides (telescopic runners) Installing the side racks 1. Insert the rear peg into the rear access hole provided, Preparing your appliance for the first time Setting the time 1. -
Page 12: Installing Burners And Trivets
INSTALLING BURNERS AND TRIVETS GETTING TO KNOW YOUR COOKTOP Installing burners Trivet installation sequence Model WFE9515SD The burner crown must be fitted correctly into the Install the middle trivet first by aligning the trivet with burner cup or damage will occur during operation. -
Page 13: Using Your Oven
USING YOUR OVEN Understanding your oven functions Maxi Grill Preheating your oven with “Rapid Heat” To preheat your oven select the “Rapid Heat” function. Rapid Heat This function allows your oven to reach the preset temperature quicker than any other cooking function. Heat comes from the element below the floor of the oven. - Page 14 USING YOUR OVEN (CONTINUED) EASYBAKE+STEAM Setting the time of day To check or cancel settings Your oven has the ability to add steam while baking. Cooking with steam is a great addition to straight ‘hot Before the appliance can be used, the time must be set. To check settings, touch the symbol until air’...
-
Page 15: Cooking Test
COOKING TEST Get to know your new oven with this switch it on. (see also TROUBLESHOOTING) ‘Simple Test Cake’ • Keep edges of baking dishes at least 40mm from the pRoBLEM cAUSES REMEDIES side of the oven. This allows free circulation of heat Although we strive for a perfect performing oven, it’s Uneven cooking: •... -
Page 16: Cooking Guide
COOKING GUIDE Choosing the best oven settings EasyBake +Steam function The following table is intended as a guide and WAtER IN cAVIty tEMpERAtURE oVEN ShELf fooD tIME IN MINUtES experience may show some variation in cooking WELL (ML) • poSItIoN* times necessary to meet individual requirements. - Page 17 COOKING GUIDE (CONTINUED) Grill Trivets and burners WARNING WARNING These can all be lifted off and removed for separate • Always keep the grill dish and grill dish insert clean, as cleaning. • Always make sure that the oven is electrically isolated any fat deposits may catch fire.
-
Page 18: Cleaning Your Oven Accessories
CLEANING YOUR OVEN ACCESSORIES Removing the trays and shelves from your Cleaning your oven door Cleaning your oven door Changing the light globes appliance The oven door has been designed to allow the two • There are 2 light globes located in the top of the •... -
Page 19: Troubleshooting
TROUBLESHOOTING NOTE: Only authorised personnel should carry out servicing. If the household fuse continues to blow, call the Faults Customer Care Centre. In the event of a power failure the gas burners may be lit with a hand held igniter and used. Take care to avoid letting unburnt gas flow for more than 5 seconds when attempting to light the burner. -
Page 20: Warranty
(c) ‘ASC’ means Electrolux’s authorised serviced centres; the Appliance; (d) ‘Westinghouse’ is the brand controlled by Electrolux Home Products In addition, Electrolux is not liable under this warranty if: Pty Ltd of 163 O’Riordan Street, Mascot NSW 2020, ABN 51 004... - Page 21 0800 10 66 10 email: customercare@electrolux.co.nz web: westinghouse.co.nz and WESTINGHOUSE are trademarks of Westinghouse Electric Corporation. Used under license by Electrolux Home Products Pty Ltd. All Rights Reserved. © 2023 Electrolux Home Products Pty Ltd ABN 51 004 762 341...
Need help?
Do you have a question about the WFE9515SD and is the answer not in the manual?
Questions and answers