Advertisement
Quick Links
Quick Start Guide
WFEP917
Dear Customer,
Thank you for purchasing a Westinghouse appliance. You have chosen a product that
comes from a history of durable and reliable products loved by many families. We look
to help you make the most of your time at home, so you can spend your time doing
what you really love, with the ones you love.
Welcome to Westinghouse.
Ready
This is a Quick Start Guide. Please refer to user manual
online for detailed information and installation
To access your detailed user manual online, simply scan the QR code on your smart phone.
For more detailed information and installation guide refer to user manuals
at westinghouse.com.au/manuals
Before you start, please make sure:
Your oven has been correctly installed by a qualified person.
Your oven has power and is switched on.
You've removed all relevant packaging.
Set...
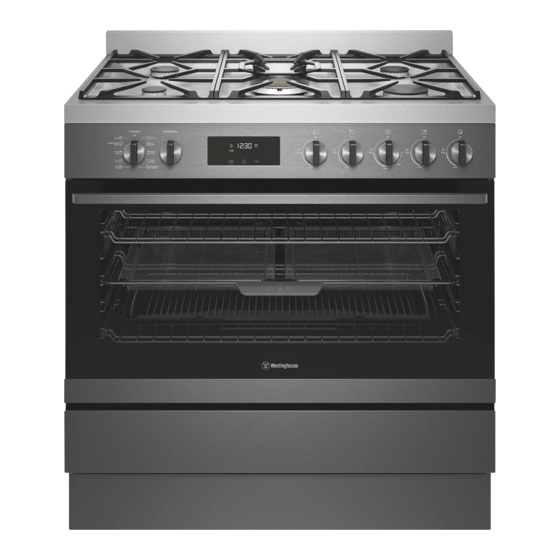
Get to know your control panel:
1
1
Oven function selector
2
Oven/grill temperature
control
3
Cook time icon
4
End time icon
5
Touch to start timer mode.
9
10
11
12 13
3 4
2
5
6
7
Hold to turn oven light on/off
6
Toggle through timer modes
7
Toggle through cooking time
& oven set temperature
8
Gas hob burner controls
9
Time of day icon
Most of the packaging
materials can be recycled.
Please dispose of them at
your local recycling centre
or in your own recycling bin.
8
10 On when timer is set
11 On when oven warming up
12 3 bars displayed when oven
reaches set temperature
13 On when oven cooling down
Advertisement

Subscribe to Our Youtube Channel
Related Manuals for Westinghouse WFEP917


Summary of Contents for Westinghouse WFEP917
- Page 1 WFEP917 Dear Customer, Thank you for purchasing a Westinghouse appliance. You have chosen a product that comes from a history of durable and reliable products loved by many families. We look to help you make the most of your time at home, so you can spend your time doing what you really love, with the ones you love.
- Page 2 Set... Left hand side rack Front peg Rear peg Installing the accessories 1. Install the telescopic slides (where supplied) to the side racks. Refer to the installation guide supplied with the telescopic slides. 2. Insert side racks. There is a left hand and right hand version (see image). Insert the rear peg into the rear access hole, ensuring that the peg is fully inserted.
- Page 3 You’re ready to use your new Westinghouse appliance. A few tips from us: Remember to pre-heat each time. For best cooking results pre-heat the oven. Pre-heating allows the oven to reach the required temperature quickly and efficiently as well as cook food at the correct temperature for the entire cook time. Recommended pre-heat time is 30 minutes for baking and 3 minutes for grilling.
- Page 4 WESTINGHOUSE are trademarks of Westinghouse Electric Corporation. Used under license by Electrolux Home Products Pty Ltd. All Rights Reserved. © 2020 Electrolux Home Products Pty Ltd. ABN 51 004 762 341 W_QSG_WFEP917_A4_Aug20 ANC A20499401 RevA(Assy ANC A20659101 RevA)
Need help?
Do you have a question about the WFEP917 and is the answer not in the manual?
Questions and answers