Table of Contents
Advertisement
Advertisement
Table of Contents

Related Manuals for AEG COMPETENCE 5033 V


Summary of Contents for AEG COMPETENCE 5033 V
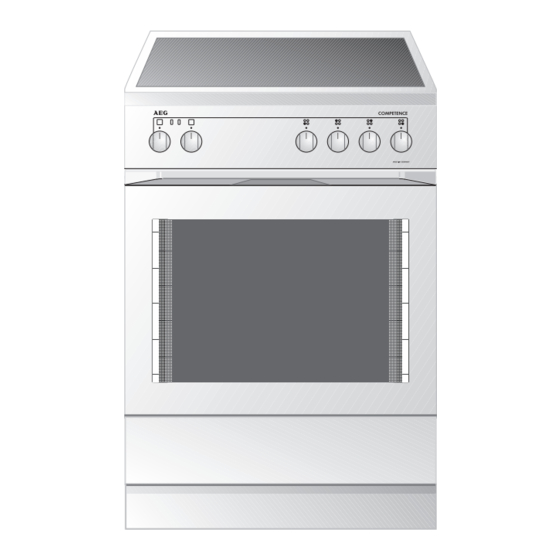
- Page 1 COMPETENCE 5033 V The Electric Free-Standing Cooker Operating Instructions...
-
Page 2: Dear Customer
Dear Customer, Please read these operating instructions through carefully. Above all, please take note of the “Safety” section on the first few pages. Please keep these operating instructions for later reference. Pass them on to any subsequent owner of the appliance. The warning triangle and/or specific words (Warning!, Caution!, Important!) are used to highlight instructions that are important for your safety or for the function of the appliance. -
Page 3: Table Of Contents
CONTENTS Operating Instructions Safety Instructions ..........Disposal . - Page 4 Contents Preserving ........... . . 33 Preserving Times .
-
Page 5: Operating Instructions
Please observe this instruction, otherwise the warranty will not cover any damage that may occur. The safety features of AEG electrical appliances comply with accepted technical standards and the German Appliance Safety Law. However, we also consider it our obligation as a manufacturer to make you aware of the following safety information. -
Page 6: Intended Use
Operating Instructions • Repairs to the appliance may only be performed by qualified service engineers. Improper repairs can give rise to significant hazards. If your appliance needs repairing, please contact our Customer Service or your specialist dealer. • In the case of the appliance malfunctioning: remove the fuses or switch off the circuit breaker. - Page 7 In this way you avoid damaging your appliance • Do not use the cooking surface for storage. In this way you will avoid damaging the glass ceramic surface. • If sugar or plastic comes into contact with the hot cooking surface and melts, remove it immediately whilst still hot! If it cools, splits may occur in the glass ceramic cooking surface.
-
Page 8: Disposal
Operating Instructions Disposal Disposing of the packaging materials All materials used can be fully recycled. The plastics are marked as follows: • >PE< for polyethylene, e.g. as used for the outer wrapping and the bags inside. • >PS< for polystyrene foam, e.g. as used for the packing pieces, com- pletely free of CFCs. -
Page 9: Appliance Structure
Appliance structure Control panel Oven Functions Rotary switch used for selecting the required oven function. The selected oven function can be read off on the switch from above. Temperature Selection Rotary switch used for selecting the required oven temperature. The selected oven temperature can be read off on the switch from above. -
Page 10: Cooking Surface Features
Operating Instructions Cooking Surface Features Oven Steam Outlet The steam from the oven is fed directly to the extraction hood via the duct in the rear of the cooking surface. Single Ring Cooking Zone Switching on and regulation is performed using the associated switch on the control panel. -
Page 11: Oven Features
Operating Instructions Oven Features Shelf Positions There are side rails on both sides of the oven, each of these has 6 shelf positions. Please note that the shelf positions are counted from top to bottom. Anti-Tip Device All slide-in parts are fitted with an anti-tip device to prevent them being unintentionally pulled all the way out. -
Page 12: Oven Accessories
Operating Instructions Oven Accessories The following items are supplied: Utensils Drawer Underneath the oven door there is a drawer that can be pulled out. It is used for storing utensils and accessories. WARNING: Heat can build up in the utensils drawer when the oven is in use. -
Page 13: Oven Functions
Operating Instructions Oven Functions The following functions are available for the oven: U Fan Cooking Fan cooking is particularly suited to baking on several levels at the same time. Oven temperatures are generally 20-40 °C lower than for conventional heat. A ring heater and part of the bottom element are used. - Page 14 Operating Instructions S Pizza & Baking Using this function you can bake cakes on one level. This function is also suitable for dishes that require more intensive browning and a crispy base, e.g. pizzas , quiche Lorraine, cheesecakes, etc. Oven temperatures are generally 20-40 °C lower than for conventional heat.
-
Page 15: Before Using For The First Time
Before Using for the First Time Initial Cleaning Wipe the glass ceramic surface with a damp cloth and then rub dry to remove any possible residues from manufacture. Oven Before using the oven for the first time, you should clean it thoroughly. You can switch on the oven lighting to make cleaning easier. -
Page 16: Using The Rings
Operating Instructions Using the Rings When the cooking zones are switched on, they may hum briefly. This is a characteristic of all glass ceramic cooking zones and does not impair the function or life of the appliance. Heat Settings • Over the ranges 1-9, you can set 14 heat settings (including interme- diate settings). -
Page 17: Cooking With The Rings
Cooking with the Rings 1. To use, press the ring switch. The switch protrudes. 2. As soon as steam starts to form or the oil is hot, turn back to the heat setting necessary for fur- ther cooking. 3. To stop cooking, turn back to the zero position. Switch off the cooking zone approx. -
Page 18: Operating The Oven
Operating Instructions Operating the Oven Inserting/Removing the Fat Filter Always use the fat filter when roasting without any covering in open roasting dishes. Inserting the Fat Filter Take hold of the fat filter by the tab and insert the two retainers in the opening on the rear wall of the oven (fan opening) from the top downwards. -
Page 19: Switching The Oven On And Off
Switching the Oven On and Off 1. Set the required function by turning the „Oven Functions“ switch. 2. Set the required temperature by turning the „Temperature Selection“ switch. The oven power indicator illuminates as long as the oven or rings are in use. -
Page 20: Usage, Tables And Tips
Operating Instructions Usage, Tables and Tips Pans The better the pan, the better the results. • You can recognise good pans by their bases. The base should be thick and as flat as possible. • Pans with aluminium or copper bases can leave metal discoloration on the glass ceramic surface that is very difficult or impossible to remove. -
Page 21: Cooking
Cooking The information given in the following tables is for guidance only. The heat setting necessary for cooking is dependent on the quality of the pans, and the type and quantity of the food. Typical Heat Settings Switch Cooking Process/ Setting Heating Up Steaming,... -
Page 22: Baking
Operating Instructions Baking Use the pizza & baking function for baking. Important! Do not use a fat filter when baking! Cake Tins • Cake tins made of dark metal and coated tins are suitable for conven- tional heat • Light tins are also suitable for pizza & baking Shelf Positions •... - Page 23 General information • Please note that the shelf positions are counted from top to bottom. • Insert baking sheets with the bevelled edge to the front! • Slide the baking sheet to the rear wall. • Always place cakes in cake tins in the middle of the shelf. You can also bake two cakes simultaneously using pizza &...
-
Page 24: Baking Tables
Operating Instructions Baking Tables Baking on one level Type of Cake or Pastry Cakes in Cake Tins Ring Cakes Madeira Cake/ Koenigskuchen Sponge Cake Shortcrust Pastry Flan Base Sponge Flan Base Covered Apple Flan Savoury Flan (e.g. quiche Lorraine) Cheesecake Cakes and Pastries on Baking Sheets Plaited Roll/Ring... - Page 25 Type of Cake or Pastry from the Fruit Flans on Shortcrust Pastry Base Flat Cakes with Delicate Toppings (e.g. curd cheese, cream) Pizza & baking (with deep topping) Pizza & baking (thin) Unleavened Bread Wähen (CH) Biscuits Shortcrust Biscuits Small Piped Biscuits Sponge Fingers Meringues Macaroons...
-
Page 26: Tips On Baking
Operating Instructions Baking at several shelf positions Type of Cake or Pastry Cakes and Pastries on Baking Sheets Cream Puffs/Eclairs Dry Streusel Cake Pizza & baking Biscuits Shortcrust Biscuits Small Piped Biscuits Sponge Fingers Meringues Macaroons Small Pastries with Yeast Small Pastries made from Puff Pastry Bread Rolls... -
Page 27: Pies And Gratins Table
Pies and Gratins Table Shelf Position from the Pasta Bake Lasagne Gratinated Vegetables Browned Baguettes Sweet Puddings Fish Pies Stuffed Vegetables Frozen Ready Meals Table Food to be Position from Cooked Frozen Pizza Chips (300-600 g) Baguettes Fruit Flan 1) Comment: Turn chips 2-3 times during cooking. Conventional O Shelf Tempera-... -
Page 28: Roasting
Operating Instructions Roasting For roasting, use the rothitherm Important: Use the fat filter when roasting! Roasting Dishes • Any heat-resistant dish is suitable for roasting. • In the case of dishes with plastic handles, ensure that the handles are heat-resistant. •... -
Page 29: Roasting Table
Roasting Table Type of Meat Quantity Weight Beef Pot Roast 1-1.5 kg Sirloin or Fillet per cm - red inside height per cm - pink inside height - cooked per cm through height Pork Schoulder, Neck 1-1.5 kg Joint of Ham Chop, Kassler 1-1.5 kg Meat Loaf... - Page 30 Operating Instructions Type of Meat Game Saddle of Hare, Leg of Hare Saddle of Venison Leg of Venison Poultry Poultry Pieces 4-6 pieces Chicken Halves 2-4 pieces Chicken, Poulard Duck Goose Turkey Fish (steaming) Whole Fish 1) Pre-heat oven. The information given in bold shows you the best oven function for the respec- tive dish.
-
Page 31: Grilling
Grilling Use the grill oven function with a temperature of 275 °C for grilling. Important: Always pre-heat the empty oven for 5 minutes using the grill function! It is not necessary to use the fat filter. Ovenware for Grilling • Use the shelf and universal tray together for grilling. Shelf Positions •... -
Page 32: Defrosting
Operating Instructions Defrosting Use the defrost oven function Defrosting Dishes • Put the food on a plate and put the plate on the tray. • Use only parchment paper or film to cover the food. Do not use plates or dishes as they significantly increase the defrosting time. Shelf Positions •... -
Page 33: Preserving
Preserving Use the fan cooking oven function Preserving Jars • Only use commercially available preserving jars (preserving jars with a rubber ring and glass lid) for preserving. • Jars with screw or bayonet tops are unsuitable, as are metal tins. Shelf Positions •... -
Page 34: Cleaning And Care
Operating Instructions Cleaning and Care Important: Cleaners must not come into contact with the hot glass ceramic cooking surface! All cleaners must be removed with plenty of clean water after cleaning because they can have a caustic effect when the rings are next heated! Do not use any aggressive cleaners such as, e.g. - Page 35 Problem Dirt 1. Remove burnt on sugar, melted plastic, aluminium foil or other materials that can melt immediately, whilst still hot, using a glass scraper. Important: When using the glass scraper on the hot cooking zone, there is a risk of burns! 2.
-
Page 36: Exterior Of The Appliance
Operating Instructions Exterior of the Appliance Wipe the front of the appliance with a damp cloth and warm water with washing up liquid. Do not use scourers, caustic cleaners or abrasive items. Oven Interior Oven Lighting You can switch on the oven light to make cleaning easier. Cleaning 1. -
Page 37: Side Rails
Side Rails The side rails on the left and right hand sides of the oven can removed for cleaning the side walls. Removing and Fitting the Side Rails. 1. Undo the bolt (if necessary use a coin). 2. Pull the base of the side rail forwards and unhook at the top. 3. -
Page 38: Oven Light
Operating Instructions Oven Light Warning: There is a risk of electric shock! Before changing the light bulb in the oven: – Switch off the oven! – Isolate the oven from the power supply. Replacing the Light Bulb in the Oven/Cleaning the Glass 1. -
Page 39: Grill Element
Grill Element To make the cleaning of the oven roof easier, the grill element can be folded down. Warning: Only fold down the grill when the oven is switched off and is cold. Folding Down the Grill Element Turn the two retaining hooks 90° (a quarter of a turn) towards the mid- dle. -
Page 40: Oven Door
Operating Instructions Oven Door The oven door on your appliance can be removed for cleaning. Removing the Oven Door 1. Open the oven door completely. 2. Lift up fully the coloured clamping lever on both door hinges (1). 3. Close the oven door around 3/4 of the way, overcoming the resistance (2). -
Page 41: Oven Door Glass
Oven Door Glass The oven door is fitted with two panes of glass, these are fitted one behind the other. The inner pane can be removed for cleaning. Warning: Please only perform the following steps on the oven door when it has been removed from the oven! When the door is fitted, the reduction in the weight of the door when the glass is removed could lead to the door suddenly closing and creating a hazard. -
Page 42: Utensils Drawer
Operating Instructions Utensils Drawer The utensils drawer underneath the oven can be removed to make cleaning easier. Removing / Replacing the Utensils Drawer 1. Pull the utensils drawer out of the cooker as far as possible. 2. Lift the utensils drawer slightly so that it can be lifted upwards at an angle out of the drawer guide. -
Page 43: What To Do If
Warning: Repairs to the appliance must be carried out by qualified service engineers! Improper repairs can give rise to significant hazards for the user. If your appliance needs repairing, please contact local AEG Service Force Centre. Operating Instructions... -
Page 44: Special Accessories
Operating Instructions Special Accessories The following special accessories for your appliance are available from your specialist dealer: Roasting/Fat Tray E No. 611 898 624 Baking Sheet E No. 611 898 620 Oven Shelf Runner BAZ2 with Combination Shelf E No. 944 189 014 Universal Sheet E No. - Page 45 Operating Instructions Glass Ceramic Fat Tray: Pizza Stoneware: H6.5 x B32.0 x D27.0cm H1.2 x W34.5 x D34.5cm E No. 611 899 660 E No. 944 189 008...
-
Page 46: Installing And Connecting
Installing and Connecting INSTALLING AND CONNECTING Important: Assembly and connection of the new appliance may only be performed by an approved installer. Please observe this instruction, otherwise the warranty will not cover any damage that may occur. Installation Important Information •... -
Page 47: Technical Data
Technical Data Oven Exterior Dimensions Height x Breadth x Depth Depth with the door open Oven Interior Dimensions Height x Breadth x Depth Power Consumption of the Cooking Zones Single ring cooking zone Double ring cooking zone Casserole cooking zone Regulations, Standards, Directives This appliance meets the following standards: •... -
Page 48: Safety Instructions For The Installer
Installing and Connecting Safety Instructions for the Installer • A device is to be included in the electrical installation that makes it possible to isolate the appliance from the mains supply with a mini- mum contact separation of 3 mm. Suitable isolation devices are e.g. cut-outs, fuses (remove screw type fuses from the holder), earth leak- age trips and circuit breakers. - Page 49 Installing and Connecting...
- Page 50 Installing and Connecting...
-
Page 51: Service
SERVICE In the “What to do, if …” section a number of malfunctions are listed that you can rectify yourself. In the event of a malfunction, look there first. Is it a technical malfunction? Then please contact your customer service centre. (You will find addresses and telephone numbers in the "Customer Service Centres"... - Page 52 USD 14 billion in more than 150 countries around the world. AEG Hausgeräte GmbH Postfach 1036 D-90327 Nürnberg http://www.aeg.hausgeraete.de © Copyright by AEG 822 947 318 -05- 0403 Subject to change without notice...
Need help?
Do you have a question about the COMPETENCE 5033 V and is the answer not in the manual?
Questions and answers