
Subscribe to Our Youtube Channel
Related Manuals for Eiki EK-610UA


Summary of Contents for Eiki EK-610UA
- Page 1 Owner’s Manual Multimedia Projector Model EK-610U/EK-611W/EK-612X EK-610UA/EK-611WA/EK-612XA (Projection lens is optional.)
- Page 2 Preface Features and Design This Multimedia Projector is designed with the most advanced technology for portability, durability, and ease of use. This projector utilizes a high luminance and Eco friendly system, a palette of 1.07 billion colors, and digital light processing (DLP) technology. Compact Design Helpful Maintenance Functions This projector is designed compact in size and...
- Page 3 DLP Projector — Owner’s Manual Copyright This publication, including all photographs, illustrations and software, is protected under international copyright laws, with all rights reserved. Neither this manual, nor any of the material contained herein, may be reproduced without written consent of the author. ©...
- Page 4 Preface Important Safety Information Important: It is strongly recommended that you read this section carefully before using the projector. These safety and usage instructions will ensure that you enjoy many years of safe use of the projector. Keep this manual for future reference. Symbols Used Warning symbols are used on the unit and in this manual to alert you of hazardous situations.
- Page 5 DLP Projector — Owner’s Manual Safety Instructions • Please read this manual completely before installing and operating the projector. • The projector provides many convenient features and functions. Proper operation may enable you to fully utilize the features and keep it in good condition. Otherwise, it will not only shorten the service life of the unit, but also may cause malfunction, a fire, or other accidents.
- Page 6 Preface Safety Precautions Caution: • The projector must be grounded. • Do not expose the projector to raindrops or high humidity to avoid a fire or electric shock. • This projector produces intense light from the projection lens. Avoid staring directly into the lens, otherwise eye damage could be caused. Be especially careful that children do not stare directly into the beam.
- Page 7 DLP Projector — Owner’s Manual Safety Guide • All the safety and operating instructions should be read before the product is operated. • Read all of the instructions given here and retain them for later use. Unplug this projector from AC power supply before cleaning.
- Page 8 Preface ¾ When the projector exhibits a distinct change in performance - this indicates a need for service. • When replacement parts are required, be sure the service technician has used replacement parts specified by the manufacturer that have the same characteristics as the original part. Unauthorized substitutions may result in fire, electric shock, or injury to persons.
- Page 9 DLP Projector — Owner’s Manual Exhaust Vent Air Intake Vent Moving the projector When moving the projector, take care of the lens and retract the adjustable foot to prevent damage to the lens and cabinet. Installing the projector properly • Please set the projector on nearly-level. •...
- Page 10 Preface M6 x 4 10mm Caution in moving or transporting the projector • Do not drop or bump the projector, otherwise damages or malfunctions may result. • When carrying the projector, use a suitable carrying case. • Do not transport the projector by courier or any other transport service in an unsuitable transport case.
- Page 11 Model Number : EK-610U/EK611W/EK-612X EK-610UA/EK-611WA/EK-612XA Trade Name : EIKI Responsible party : EIKI International, Inc. Address : 30251 Esperanza Rancho Santa Margarita CA 92688-2132 Telephone No. : 800-242-3454 (949-457-0200) AC Power Cord Requirement The AC Power Cord supplied with this projector meets the requirement for use in the country you purchased it.
- Page 12 Preface Warning: A plug with bared flexible cord is hazardous if engaged in a live socket outlet. The Wires in this mains lead are coloured in accordance with the following code: • Green-and-yellow ..Earth • Blue ......Neutral • Brown ......Live As the colours of the wires in the mains lead of this apparatus may not correspond with the coloured markings identifying the terminals in your plug proceed as follows: •...
-
Page 13: Table Of Contents
DLP Projector — Owner’s Manual Contents GETTING STARTED ........................ 1 ........................1 acking hecklist ......................2 iews of rojector arts Front-right View .............................2 Left View ..............................3 Rear View ..............................4 Built-in Keypad ............................5 Bottom View ............................6 ......................7 emote ontrol arts ................... - Page 14 Preface ..........................37 etuP Lens Function Menu ..........................38 Menu Preferences Menu ........................39 Pin Menu ..............................40 Communications Menu ........................41 ..........................42 Ption Power Settings Menu ...........................43 Light Source Settings Menu .........................44 ................ 45 ontrol rojector sing rowser Wired LAN Terminal functionalities ......................45 Supported External Devices ........................45 LAN_RJ45 ............................46 RS232 by Telnet Function ........................50...
- Page 15 DLP Projector — Owner’s Manual REGULATORY COMPLIANCE ..................... 73 fcc w .......................... 73 arning ........................... 73 aution ............................ 73 anada ......................73 afety ertifications — —...
-
Page 16: Getting Started
DLP Projector — Owner’s Manual ettinG tarted Packing Checklist Carefully unpack the projector and check that the following items are included: DLP PROJECTOR Quick Start Guide EK-610 Accessories List How to install lens Turn on the projector Turn off the projector POWER CORD VGA CABLE REMOTE CONTROL... -
Page 17: Iews Of P Rojector P Arts
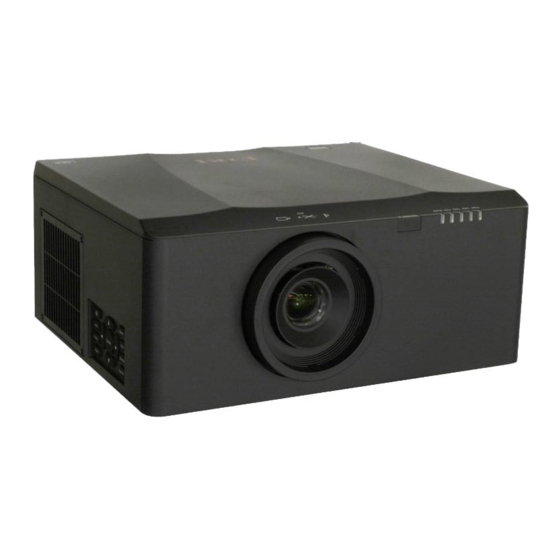
DLP Projector — Owner’s Manual Views of Projector Parts Front-right View abeL escrIptIon ee page Projection Lens Allows automated lens control and adjustment: vertical and horizontal offsets, zoom and focus. Front IR Sensor Receives signals from the IR remote. Keep the signal path to the sensor unobstructed for uninterrupted communication with Top IR Sensor the projector. -
Page 18: Front-Right View
DLP Projector — Owner’s Manual Left View abeL escrIptIon ee page Cooling Air Vents Keep these vents unobstructed to prevent the projector from (Intake) overheating. Built-in Keypad Control the projector. Adjustable Feet Raise or lower the feet to level the projector. Important: Ventilation openings on the projector allow for good air circulation, which keeps the projector lamp cool. -
Page 19: Rear View
DLP Projector — Owner’s Manual Rear View abeL escrIptIon ee page Connect a LAN cable from Ethernet. Connect the WIFI dongle. RS-232C Connect RS-232 serial port cable for remote control. HDBaseT Connect a RJ45 Cat5/Cat6 Ethernet cable to input uncompressed high-definition video signals. Only supports Full-HD video format over network cable. -
Page 20: Built-In Keypad
DLP Projector — Owner’s Manual Warning: As a safety precaution, disconnect all power to the projector and connecting devices before making connections. Important: Ventilation openings on the projector allow for good air circulation, which keeps the projector lamp cool. Do not obstruct any of the ventilation openings. Built-in Keypad abeL escrIptIon... -
Page 21: Bottom View
DLP Projector — Owner’s Manual Bottom View 130.8mm 216.2mm 105.8mm 241.2mm abeL escrIptIon ee page Adjustable Feet Raise or lower the feet to level the projector. Ceiling support Contact your dealer for information on mounting the projector on viii-ix holes a ceiling. -
Page 22: Remote Control Parts
DLP Projector — Owner’s Manual Remote Control Parts Mode Info Auto Source Enter Menu Exit Gamma Bright Cont. Lens H Focus Lens V Keystone H Zoom Keystone V Shutter Hot Key Pattern (AV Mute) Important: 1. Avoid using the projector with bright fluorescent lighting turned on. Certain high-frequency fluorescent lights can disrupt remote control operation. 2. Be sure nothing obstructs the path between the remote control and the projector. If the path between the remote control and the projector is obstructed, you can bounce the signal off certain reflective surfaces such as projector screens. - Page 23 DLP Projector — Owner’s Manual abeL escrIptIon ee page Power on Turn projector ON. Number Keys Enter a number (such as PIN code) or source hotkey. Source Hotkey Key: 1: VGA 2: HDMI 3: Component 4: HDBaseT 5: Video 6: DVI-D Info Display source image information.
-
Page 24: Remote Control Operating Range
DLP Projector — Owner’s Manual Remote Control Operating Range The remote control uses infrared transmission to control the projector. It is not necessary to point the remote directly at the projector. Provided you are not holding the remote perpendicular to the sides or the rear of the projector, the remote will function well within a radius of about 7 meters (23 feet) and 15 degrees above or below the projector level. - Page 25 DLP Projector — Owner’s Manual Remote Control Code The ten different remote control codes (Code 0 - Code 9) are assigned to this projector. Switching the remote control codes prevents interference from other remote controls when several projectors or video equipment next to each other are being operated at the same time.
-
Page 26: Setup And Operation
DLP Projector — Owner’s Manual etup and peratiOn Installing the Projection Lens Before setting up the projector, install the projection lens on the projector. Important: • Before installation, check where the projector is used and prepare a suitable lens. • For details, contact the sales dealer where you purchased the projector. Turn the projector off. - Page 27 DLP Projector — Owner’s Manual While pulling the rejection pin, rotate the lens clockwise to lock the lens in place. Then release the rejection pin. Replace the lens ring. — —...
-
Page 28: Starting And Shutting Down The Projector
DLP Projector — Owner’s Manual Starting and Shutting down the Projector Turn the Projector On Connect the power cord to the projector. Then connect the other end to a wall outlet. The Power button on the built in keypad is illuminated. Important: Make sure that the Power switch is in the ON position. -
Page 29: Adjusting The Projector Level
DLP Projector — Owner’s Manual Adjusting the Projector Level Take note of the following when setting up the projector: • The projector table or stand should be level and sturdy. • Position the projector so that it is perpendicular to the screen. •... -
Page 30: Adjusting The Zoom, Focus, And Keystone
DLP Projector — Owner’s Manual Adjusting the Zoom, Focus, and Keystone Use the Zoom button to resize the projected image and screen size Lens H Focus Lens V Keystone H Zoom Use the Focus button to sharpen the projected image Keystone V Shutter Hot Key... -
Page 31: P Osition
DLP Projector — Owner’s Manual Adjusting the Projecting image’s Position Projection Lens The complete projection lens series as below table. Projection Lens (AH-A22010) (AH-A22020) (AH-A22030) (AH-A21010) (AH-A23010) Focal Length 11.11-14.06 14.03-17.96 18.07-22.59 22.56-42.87 42.60-80.90 F number 2.30-2.53 2.30-2.57 2.00-2.32 2.30-3.39 2.30-2.74 Focus spec 67 lp/mm... - Page 32 DLP Projector — Owner’s Manual Horizontal: ±30% Vertical: ±100% Projection Lens: A01(AH-A22020), A03(AH-A21010), A13(AH-A23010) Latform EK-612X/ 100% 0.7”XGA EK-611W/ 100% 100% 0.65” WXGA EK-610U/ 100% 100% 0.67” WUXGA Projection Lens: A02(AH-A22030) Motorized Lens Shift Latform EK-612X/ (Lens shift range 100% based on 1/2 0.7”XGA screen width and...
- Page 33 DLP Projector — Owner’s Manual A01(AH-A22020)/ A03(AH-A21010)/ A13(AH-A23010) lens shift range: Lens shift range Motorized Lens Shift A02(AH-A22030)/ A15(AH-A22010) lens shift range: (Lens shift range based on 1/2 screen width and height) Darker Lens shift range Lens shift accuracy: 0.5 pixel per step When the lens is shifted beyond the described range of operation, the screen edges may become darker or the images may become out of focus.
-
Page 34: Optional Lenses And Projection Size
DLP Projector — Owner’s Manual Optional Lenses and Projection Size eK-612X/ eK-612Xa/ Xga (4:3) oDeL 0.70” rojectIon (aH-a22010) (aH-a22020) (aH-a22030) (aH-a21010) (aH-a23010) 0.78-0.99 0.99-1.26 1.26-1.58 1.58-3.00 3.00-5.70 Hrow atIo 1.26X 1.28X 1.25X 1.9X 1.9X atIo 0.79-6.03 1.01~7.68 1.28~9.63 1.61~18.29 3.05~34.75 Hrow Istance rojectIon screen sIZe... - Page 35 DLP Projector — Owner’s Manual eK-611w/ eK-611wa/ wXga (16:10) oDeL 0.65" rojectIon (aH-a22010) (aH-a22020) (aH-a22030) (aH-a21010) (aH-a23010) 0.79-1.00 1.00-1.28 1.28-1.61 1.60-3.07 3.04-5.78 Hrow atIo 1.26X 1.28X 1.25X 1.9X 1.9X atIo 0.85~6.46 1.08~8.27 1.38~10.40 1.73~19.83 3.28~37.34 Hrow Istance rojectIon screen sIZe rojectIon DIstance 0.79 1.00...
-
Page 36: Other Optional Parts
DLP Projector — Owner’s Manual eK-610U/ eK-610Ua/ wUXga (16:10) oDeL 0.67" rojectIon (aH-a22010) (aH-a22020) (aH-a22030) (aH-a21010) (aH-a23010) 0.75-0.95 0.95-1.22 1.22-1.53 1.53-2.92 2.90-5.50 Hrow atIo 1.26X 1.28X 1.25X 1.9X 1.9X atIo 0.81-6.13 1.02~7.88 1.31~9.89 1.64~18.87 3.12~35.54 Hrow Istance rojectIon screen sIZe rojectIon DIstance 0.75... -
Page 37: On-Screen Display (Osd) Menu Settings
DLP Projector — Owner’s Manual (OSd) M creen iSplay ettinGS OSD Menu Controls The projector has an OSD that lets you make image adjustments and change various settings. Navigating the OSD You can use the remote control cursor buttons or the projector keypad to navigate and make changes to the OSD. -
Page 38: Setting The Osd Language
DLP Projector — Owner’s Manual Setting the OSD Language Set the OSD language to your preference before continuing. Press the Menu button. PICTURE PICTURE Display Mode Presentation Brightness Contrast OUTPUT Sharpness Color Tint SETUP Phase Frequency Horz Position OPTION Vert Position Use the arrow keys (pq) to select SETUP and press the Enter button to enter the SETUP menu. -
Page 39: Osd Menu Overview
DLP Projector — Owner’s Manual OSD Menu Overview Use the following illustration to quickly find a setting or determine the range for a setting. ettIngs efaULt Presentation Video Bright Display Mode 2D High Speed By source set User Save to User Brightness 0 ~ 100 Contrast... - Page 40 DLP Projector — Owner’s Manual ettIngs efaULt White G Gain 0-254 White B Gain 0-254 HSG Adjustment Reset to Default White Peaking 0 - 100 By source set Film Video Gamma By source set Graphics Standard Warm Color Temperature Medium Cool RGB709 PICTURE...
- Page 41 DLP Projector — Owner’s Manual ettIngs efaULt PIP/PBP Enable HDMI Component Main Source HDBaseT CVBS DVI-D HDMI Component Sub Source HDBaseT CVBS OUTPUT PIP/PBP DVI-D Swap Small Size Medium Large Large PBP, Main Left PBP, Main Top PBP, Main Right PBP, Main Bottom Layout PIP-Bottom Right...
- Page 42 DLP Projector — Owner’s Manual ettIngs efaULt Focus Zoom Lens Shift Lens Function Lens Calibration Lens Lock Menu Transparency 0 ~ 9 Menu Preferences Show Messages Pin Protect PIN default : 12345 Change PIN DHCP IP Address Subnet Mask Default Gateway SETUP MAC Address Apply...
- Page 43 DLP Projector — Owner’s Manual ettIngs efaULt Auto Source High Altitude Grid Green Blue Test Pattern Yellow Magenta Cyan White Black Logo Blue Background Color Logo Black White Blank Screen Aspect Ratio Hot-Key settings Blank Screen Freeze Screen Overscan OPTION 0.5W mode Standby Power Mode 0.5W mode...
- Page 44 DLP Projector — Owner’s Manual ettIngs efaULt Serial Number Native Resolution Firmware Main Source - Resolution - Signal Format - Pixel Clock - Horz Refresh - Vert Refresh Sub Source Information - Resolution OPTION - Signal Format - Pixel Clock - Horz Refresh - Vert Refresh Light Source Mode...
-
Page 45: Picture Menu
DLP Projector — Owner’s Manual Picture Menu Press the Menu button to open the OSD menu. Press the arrow keys (pq) to select PICTURE and press the Enter button to enter the PICTURE menu. Press the arrow keys (pq) to select the menu option and press the Enter button to enter its submenu. -
Page 46: 3D Display Menu
DLP Projector — Owner’s Manual 3D Display Menu Press the Menu button to open the OSD menu. Press the arrow keys (pq) to select PICTURE and press the Enter button to enter the PICTURE menu. Press the arrow keys (pq) to select 3D Display and press the Enter button to enter the 3D Display menu. -
Page 47: Hsg Adjustment Menu
DLP Projector — Owner’s Manual HSG Adjustment Menu Press the Menu button to open the OSD menu. Press the arrow keys (pq) to select PICTURE and press the Enter button to enter the PICTURE menu. Press the arrow keys (pq) to select HSG Adjustment and press the Enter button to enter the HSG Adjustment menu. -
Page 48: Advanced Menu
DLP Projector — Owner’s Manual Advanced Menu Press the Menu button to open the OSD menu. Press the arrow keys (pq) to select PICTURE and press the Enter button to enter the PICTURE menu. Press the arrow keys (pq) to select Advanced and press the Enter button to enter the Advanced menu. -
Page 49: Output Menu
DLP Projector — Owner’s Manual Output Menu Press the Menu button to open the OSD menu. Press the arrow keys (pq) to select OUTPUT and press the Enter button to enter the OUTPUT menu. Press the arrow keys (pq) to select the menu option and press the Enter button to enter its submenu. -
Page 50: Image Warping Menu
DLP Projector — Owner’s Manual Image Warping Menu Press the Menu button to open the OSD menu. Press the arrow keys (pq) to select OUTPUT and press the Enter button to enter the OUTPUT menu. Press the arrow keys (pq) to select Image Warping and press the Enter button to enter the Image Warping menu. -
Page 51: Pip/Pbp Menu
DLP Projector — Owner’s Manual PIP/PBP Menu Press the Menu button to open the OSD menu. Press the arrow keys (pq) to select OUTPUT and press the Enter button to enter the OUTPUT menu. Press the arrow keys (pq) to select PIP/PBP and press the Enter button to enter the PIP/PBP menu. - Page 52 DLP Projector — Owner’s Manual pIp/pbp s pIp/pbp L ayoUt maLL eDIUm arge PBP, Main Bottom PIP-Bottom Right PIP-Bottom Left PIP-Top Left PIP-Top Right — —...
-
Page 53: Setup Menu
DLP Projector — Owner’s Manual Setup Menu Press the Menu button to open the OSD menu. Press the arrow keys (pq) to select SETUP and press the Enter button to enter the SETUP menu. Press the arrow keys (pq) to select the menu option and press the Enter button to enter its submenu. -
Page 54: Lens Function Menu
DLP Projector — Owner’s Manual Lens Function Menu Press the Menu button to open the OSD menu. Press the arrow keys (pq) to select SETUP and press the Enter button to enter the SETUP menu. Press the arrow keys (pq) to select Lens Function and press the Enter button to enter the Lens Function menu. -
Page 55: Menu Preferences Menu
DLP Projector — Owner’s Manual Menu Preferences Menu Press the Menu button to open the OSD menu. Press the arrow keys (pq) to select SETUP and press the Enter button to enter the SETUP menu. Press the arrow keys (pq) to select Menu Preferences and press the Enter button to enter the Menu Preferences menu. -
Page 56: Pin Menu
DLP Projector — Owner’s Manual Pin Menu Press the Menu button to open the OSD menu. Press the arrow keys (pq) to select SETUP and press the Enter button to enter the SETUP menu. Press the arrow keys (pq) to select Pin and press the Enter button to enter the Pin menu. -
Page 57: Communications Menu
DLP Projector — Owner’s Manual Communications Menu Press the Menu button to open the OSD menu. Press the arrow keys (pq) to select SETUP and press the Enter button to enter the SETUP menu. Press the arrow keys (pq) to select Communications and press the Enter button to enter the Communications menu. -
Page 58: Ption M Enu
DLP Projector — Owner’s Manual Option Menu Press the Menu button to open the OSD menu. Press the arrow keys (pq) to select OPTION and press the Enter button to enter the OPTION menu. Press the arrow keys (pq) to select the menu option and press the Enter button to enter its submenu. -
Page 59: Power Settings Menu
DLP Projector — Owner’s Manual Power Settings Menu Press the Menu button to open the OSD menu. Press the arrow keys (pq) to select OPTION and press the Enter button to enter the OPTION menu. Press the arrow keys (pq) to select Power Settings and press the Enter button to enter the Power Settings menu. -
Page 60: Light Source Settings Menu
DLP Projector — Owner’s Manual Light Source Settings Menu Press the Menu button to open the OSD menu. Press the arrow keys (pq) to select OPTION and press the Enter button to enter the OPTION menu. Press the arrow keys (pq) to select Light Source Settings and press the Enter button to enter the Light Source Settings menu. -
Page 61: Control Your Projector Using Web Browser
DLP Projector — Owner’s Manual Control Your Projector Using Web Browser Ethernet Projector Wired LAN Terminal functionalities Remote control and monitoring of a projector from a PC (or Laptop) via wired LAN is also possible. Compatibility with Crestron control boxes enables not only collective projector management on a network but also management from a control panel on a PC (or Laptop) browser screen. -
Page 62: Lan_Rj45
DLP Projector — Owner’s Manual LAN_RJ45 Connect an RJ45 cable to Ethernet port on the projector and the PC (Laptop). On the PC (Laptop), select Start → Control Panel → Network and Internet. Right-click on Local Area Connection, and select Properties. —... - Page 63 DLP Projector — Owner’s Manual In the Properties window, select the Networking tab, and select Internet Protocol (TCP/IP). Click Properties. Click Use the following IP address and fill in the IP address and Subnet mask, then click OK. — —...
- Page 64 DLP Projector — Owner’s Manual Press the Menu button on the projector. Select SETUP → Communications → LAN. After getting into LAN, input the following: • DHCP: Off • IP Address: 10.10.10.10 • Subnet Mask: 255.255.255.0 • Default Gateway: 0.0.0.0 Press the Enter / ►...
- Page 65 DLP Projector — Owner’s Manual ategory npUt engtH IP Address Crestron Control IP ID Port Projector Name Projector Location Assigned To DHCP (Enabled) (N/A) IP Address Network Configuration Subnet Mask Default Gateway Enabled (N/A) User Password New Password Confirm Enabled (N/A) Admin Password New Password...
-
Page 66: Rs232 By Telnet Function
DLP Projector — Owner’s Manual RS232 by Telnet Function Besides projector connected to RS232 interface with “Hyper-Terminal” communication by dedicated RS232 command control, there is alternative RS232 command control way, so called “RS232 by TELNET” for LAN/RJ45 interface. Quick Start-Guide for “RS232 by TELNET” Check and get the IP-Address on OSD of the projector. - Page 67 DLP Projector — Owner’s Manual How to have TELNET enabled in Windows VISTA / 7 By default installation for Windows VISTA, “TELNET” function is not included. But end-user can have it by way of “Turn Windows features On or Off” to be enabled. Open “Control Panel”...
- Page 68 DLP Projector — Owner’s Manual Select “Turn Windows features on or off” to open. Have “Telnet Client” option checked, then click OK. Specsheet for “RS232 by TELNET”: Telnet: TCP Telnet port: 3023 (for more detail, kindly please get contact with the service agent or team) Telnet utility: Windows “TELNET.exe”...
-
Page 69: Maintenance And Security
DLP Projector — Owner’s Manual aintenance and ecurity Replacing the Projection Lamp The projection lamp should be replaced when it burns out. It should only be replaced with a certified replacement part, which you can order from your local dealer. Important: • The projection lamp used in this product contains a small amount of mercury. - Page 70 DLP Projector — Owner’s Manual Perform the following to replace the lamp: Turn the projector off. Allow the projector to cool down into standby mode. Release the screws on the lamp door. Open the lamp door. Release the screws on the lamp module. —...
-
Page 71: Resetting The Lamp
DLP Projector — Owner’s Manual Carefully remove the lamp module. Install the new lamp module by reversing the previous steps. Resetting the Lamp After replacing the lamp, you should reset the lamp hour counter to zero. Perform the following to reset the lamp hour counter: Press the Menu button. -
Page 72: Replacing The Projection Lens
DLP Projector — Owner’s Manual Use the arrow keys (pq) to select Light Source Settings and press the Enter button to enter its submenu. Light Source Settings PICTURE Light Source Mode Constant Power Constant Power Settings Total Projector Hours OUTPUT Lamp Hours Reset Lamp Hours SETUP... - Page 73 DLP Projector — Owner’s Manual Turn the projector off. Allow the projector to cool down into standby mode. Rotate the lens ring counter-clockwise and then remove it from the projector. Pull the rejection pin and then rotate the lens counter- clockwise to release from the compartment.
-
Page 74: Replacing The Filter
DLP Projector — Owner’s Manual Replacing the Filter The interval of the filter replacement is affected by the dustiness. Check the filters periodically for better performance. Note: Dirty filter may reduce the air flowing into the projector and the temperature in the projector may rise as the result. This may activate the protection mechanism or damage the components. Important: Check, clean, and replace the filter periodically. -
Page 75: Cleaning The Projector
DLP Projector — Owner’s Manual Cleaning the Projector Cleaning the projector to remove dust and grime will help ensure trouble-free operation. Warning: • Be sure to turn off and unplug the projector at least 30 minutes before cleaning. Failure to do so could result in a severe burn. -
Page 76: Using The Kensington ® Lock
DLP Projector — Owner’s Manual Using the Kensington Lock ® If you are concerned about security, attach the projector to a permanent object with the Kensington slot and a security cable. Note: Contact your vendor for details on purchasing a suitable Kensington security cable. The security lock corresponds to Kensington’s MicroSaver Security System. -
Page 77: Troubleshooting
DLP Projector — Owner’s Manual rOubleShOOtinG Common Problems and Solutions These guidelines provide tips to deal with problems you may encounter while using the projector. If the problem remains unsolved, contact your dealer for assistance. Often after time spent troubleshooting, the problem is traced to something as simple as a loose connection. -
Page 78: Led Error Messages
DLP Projector — Owner’s Manual LED Error Messages The LED status indicators are located on the rear of the projector. Each LED is defined below. • Power LED LeD s tatUs rojector tate UrpLe Steady Light Standby state (LAN connection is inactive). Flashing (0.5 Standby state (LAN connection is active). -
Page 79: Image Problems
DLP Projector — Owner’s Manual Image Problems Problem: No image appears on the screen Verify the settings on your notebook or desktop PC. Turn off all equipment and power on again in the correct order. Problem: The image is blurred Press the Focus button to adjust the focus on the projector. -
Page 80: Lamp Problems
DLP Projector — Owner’s Manual sequential timing. Set full screen mode. Turn on 3D glasses. Problem: Image does not display in 3D Check if the battery of 3D glasses is drained Check if 3D glasses is turned on Check 3D supported format timings is correct or not ¾... -
Page 81: Hdmi Q & A
DLP Projector — Owner’s Manual Turn off other Infrared-enabled devices in the vicinity. Have the remote control serviced. Having the Projector Serviced If you are unable to solve the problem, you should have the projector serviced. Pack the projector in the original carton. -
Page 82: Specifications
DLP Projector — Owner’s Manual pecificatiOnS Specifications escrIptIon Display type DMD, 0.7” XGA, 0.65” WXGA, 0.67” WUXGA Resolution XGA (1024 x 768), WXGA (1280 x 800), WUXGA (1920 x 1200) Zoom/focus Power Focus / Zoom Zoom ratio Depend on Lens Keystone correction Vertical: +/- 20 degrees, Horizontal: +/- 20 degrees Projection methods... -
Page 83: Projection Distance Vs. Projection Size
DLP Projector — Owner’s Manual Projection Distance vs. Projection Size Projection Distance Projection Distance and Size Table EK-612X/ EK-612XA/ XGA: oDeL (aH-a22010) (aH-a22020) (aH-a22030) (aH-a21010) (aH-a23010) rojectIon rojectIon Istance IagonaL eIgHt IDtH IncH 0.76 1.02 0.79 1.01 1.01 1.28 1.28 1.61 1.61 3.05... - Page 84 DLP Projector — Owner’s Manual EK-611W/ EK-611WA/ WXGA: oDeL (aH-a22010) (aH-a22020) (aH-a22030) (aH-a21010) (aH-a23010) rojectIon rojectIon Istance IagonaL eIgHt IDtH IncH 0.67 1.08 0.85 1.08 1.08 1.38 1.38 1.74 1.73 3.32 3.28 6.24 0.81 1.29 1.02 1.29 1.29 1.65 1.65 2.08 2.06 3.96...
- Page 85 DLP Projector — Owner’s Manual EK-610U/ EK-610UA/ WUXGA: oDeL (aH-a22010) (aH-a22020) (aH-a22030) (aH-a21010) (aH-a23010) rojectIon rojectIon Istance IagonaL eIgHt IDtH IncH 0.67 1.08 0.81 1.03 1.02 1.31 1.31 1.65 1.65 3.14 3.13 5.94 0.81 1.29 0.97 1.23 1.23 1.58 1.58 1.98...
-
Page 86: T Iming M Ode T Able
DLP Projector — Owner’s Manual Timing Mode Table IgnaL rame QD881 HDmI esoLUtIon omponent omposIte rate 640x480 DMT0660 — — 640x480 DMT0672 — — 640x480 DMT0675 — — 640x480 DMT0685 — — 640x480 66.6 APP0667 — — — 720x400 IBM0770H —... - Page 87 DLP Projector — Owner’s Manual IgnaL rame QD881 HDmI esoLUtIon omponent omposIte rate 1280x960 CVT1275 — — 1280x960 CVT1285 — — 1280x1024 CVT1250G — — — 1280x1024 DMT1260G — — 1280x1024 DMT1275G — — 1280x1024 DMT1285G — — 1360x768 CVT1350H —...
-
Page 88: Projector Dimensions
DLP Projector — Owner’s Manual IgnaL rame QD881 HDmI esoLUtIon omponent omposIte rate 1080p — 1080p — HDTV 1080p — 1080p — 1080p — : Frequency supported — : Frequency not supported Projector Dimensions 452.8mm — —... - Page 89 DLP Projector — Owner’s Manual eGulatOry OMpliance FCC Warning This equipment has been tested and found to comply with the limits for a Class A digital device pursuant to Part 15 of the FCC Rules. These limits are designed to provide reasonable protection against harmful interference when the equipment is operated in a commercial environment.
- Page 90 U.S.A. Canada EIKI International, Inc. EIKI CANADA - Eiki International, Inc. 30251 Esperanza 9170 County Road 93, Suite 304, Rancho Santa Margarita Midland, ON, L4R 4K4 Canada CA 92688-2132 Tel: +1 800-563-3454 U.S.A. +1 705-527-4084 Tel: +1 800-242-3454 +1 949-457-0200 E-Mail: canada@eiki.com...
Need help?
Do you have a question about the EK-610UA and is the answer not in the manual?
Questions and answers