
Related Manuals for Wheatstone GSX


Summary of Contents for Wheatstone GSX
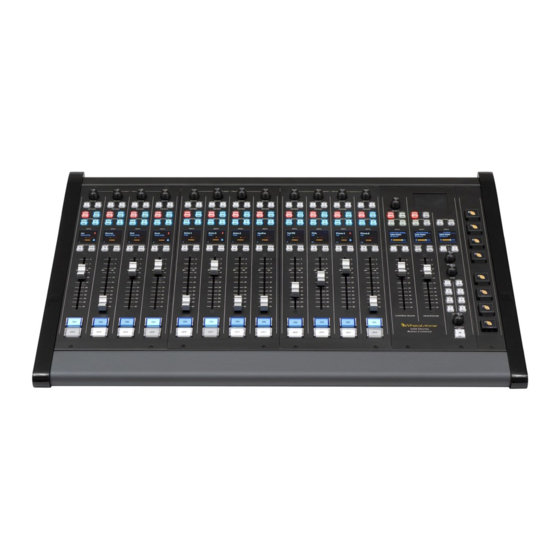
- Page 1 GSX D IGITAL UDIO ONSOLE Networked AoIP Broadcast Console Installation Guide & User Manual Designed & built by New Bern, North Carolina, U.S.A.
-
Page 2: Publication Information
©2021 Wheatstone Corporation Wheatstone considers this document and its contents to be proprietary and confidential. Except for making a reasonable number of copies for your own internal use, you may not reproduce this publication, or any part thereof, in any form, by any method, for any purpose, or in any language other than English without the written consent of Wheatstone Corporation. -
Page 3: Table Of Contents
❖ Locating the GSX Components ........9 Mix Engine Connections ..........11 GSX Console Power Up ..........12 3 – GSX Apps and Console Configuration ......13 ❖ GSX Software Apps ............15 Using the Navigator App ..........15 GSX Surface Setup App ..........30 Using the GSX GUI ............ -
Page 5: Introducing The Gsx Console
Figure 1-3. ❖ Headphone output – A board operator headphone amp is included in the GSX Surface with a ¼” TRS jack on the right side of the chassis, in- line with the OLED displays. -
Page 6: Gsx Overview
Windows PC/server networked with the GSX and your I/O Blades, are used The GSX is a sister to Wheatstone’s flagship console, the fully field- to configure the GSX for use in an on-air studio, a production room, a programmable LXE console. The GSX is scaled-down for use in smaller newsroom, or for use in other live broadcast or streaming applications. - Page 7 Engine without affecting program audio. Mix Engine Blade The Mix Engine Blade has the DSP to control, process, and mix the GSX audio. It doesn’t have any audio inputs or outputs, other than a front panel headphone jack. As viewed from the rear (Figure 1-5), the Surface Host Processor connections are on the left.
-
Page 8: Warranty Statement
Wheatstone Corporation reserves the right to modify or change any unit in whole or in part at any time prior to return delivery to incorporate electron-... -
Page 9: Gsx Hardware Installation
(15 to 30 cm) from the edge of the countertop (Figure 2-1). This “setback” allows keyboards, mice, a VoxPro controller, copy or log sheets, etc. to be set in front of the GSX Surface. The Mix Engine (1RU) is rack mounted in a 19” rack located below the countertop. - Page 10 GSX-24 frame, short Ethernet cables are used to connect them to the Accessory Panel RJ45 jacks on the Panel Host 3. Move the GSX Surface safely out of the way to drill a one-inch hole board. Figure 2-2 shows a GSX-12 frame with one accessory panel thru the countertop.
-
Page 11: Mix Engine Connections
There are no audio connections on the Mix Engine other than the ¼” TRS headphone jack on the front panel. The audio I/O for your GSX console is supplied by one or more I/O Blades. The Blades’ inputs and outputs are then cross-connected in Navigator to connect to the GSX console signals. -
Page 12: Gsx Console Power Up
Plug the supplied IEC AC cords into the Mix Engine and the PS-1600, and could also rotate a channel encoder to see the channel display switch to then plug the cables into AC outlets. It takes about 90 seconds for the GSX show visible source names to verify the Surface is ready. -
Page 13: Gsx Apps And Console Configuration
Blade ID number. Configuring your Mix Engine, Surface, and I/O Blade signals is done The GSX Mix Engine and Surface Host can be set to use other Class B or using Navigator and the GSX Surface Setup app, Windows ®... - Page 14 99 Blades, this is your best choice. ❖ 100+ Blades – Select this choice if the GSX is part of a large, multi- station system which will have over 100 Blades and PCs with audio drivers all networked together.
-
Page 15: Gsx Software Apps
The next section covers how to use the Navigator app. A section on using the GSX GUI begins on page 30. It is assumed, in each case, these When the Main Menu is shown, rotating the knob moves highlighting up apps are installed onto an admin PC that is networked with your WNIP or down thru the menu items. - Page 16 WNIP system. start Navigator, double-click its desktop icon or, from the Start Menu, select WheatNet IP Navigator from the Wheatstone folder. WheatNet-IP Navigator-3, more commonly called Navigator, opens showing the Crosspoint Tab, shown Figure 3-6, pointing Navigator’s...
- Page 17 The Crosspoint grid shows the WNIP system’s sources on the horizontal axis and the system destinations on the vertical axis. The signal names are Note: Use caution when unlocking GSX channel destinations colored to match the device colors shown in the System Dock. The GSXIn01 –...
- Page 18 Salvo again. You can also assign one of the Spare buttons in the monitor section of the GSX Surface, or a button on a programmable button panel, to fire a Salvo.
- Page 19 Refer to the Blade-3 User Manual about using the other settings in this or another source on a fader channel. tab since they are not usually accessed by GSX users. LIO Properties Tab This tab (Figure 3-10) is used to set the unconnected state condition of the user-defined logic functions (User 1–User 500).
- Page 20 Sources and Destinations are selected using the same procedure as not be made if the destination is locked. selecting signals in the GSX GUI Visibilities tab (see page 46 for signal selection details). When sources are selected, and Apply is clicked, the...
- Page 21 Clicking Save saves the current crosspoints to a file, named by the saved date and time in: Documents > Wheatstone > Navigator > Connections. Immediately after saving a crosspoint file, click Restore…...
- Page 22 Navigator license. Contact your Wheatstone dealer or Wheatstone sales about purchasing a Navigator license. A 30-day Navigator demo license is included with the purchase of a GSX console. In the Blades available for update section, checkmark the Blades you want to update. Clicking Select All checkmarks all Blades. Clicking Clear All unchecks all Blades.
- Page 23 WNIP network, and would need to be running, for the daily system logs to allows editing the Mix Engine and I/O be saved. Here’s the save path: C:\ProgramData\Wheatstone\E2Logs\. Blade colors by double-clicking on their Three types of log files are saved into Console, LIO, and System folders.
- Page 24 Since the GSX Mix Engine does not support Silence Detection, a Utility shown under a separate tab from the Blades. The GSX GUI also has a Mixer, or an Audio Player those three tabs are grayed out and are not Locator tab.
- Page 25 ACCESS). Click Finish to add the new mono signal to the Source Signals on Blade 10). The GSX Mix Engine signal names for the PGM, AUX, AUD, list. Its name will then populate the right meter for that input or output, as and OL busses, the console fader channels, the bus-minus signals, etc.
- Page 26 Program bus with no other channels assigned to that bus. The bar mono outputs, on the selected Blade. Below each meter are level (LVL) graph on the GSX Program meters should light up all the green LEDs and controls for mono inputs and outputs. On stereo inputs and outputs there three yellow LEDs to indicate 0 VU/-20 dBFS.
- Page 27 5, on page 11. In addition to the 12 Hardware LIOs, every Blade also has 128 Software LIOs, or SLIO signals, which can be used to carry logic between the GSX and WNIP-compatible devices like Wheatstone talent panels, Eventide BD600W+ delay units, and automation systems from RCS, Wide Orbit, ENCO, and many other vendors.
- Page 28 In the example, we want to setup output logic for a Control logic if it’s not setup in the GSX GUI to light when pressed. Room warning command. In this case the Direction: is Output and the Function:, selected from the drop-down menu items, will be Studio 1 In- Use (assuming Mute Studio 1 is for your Control Room).
- Page 29 (Figure 3-25, right). Click the Fire Salvo checkbox to activate the Salvo made even when that destination is locked. If Lock Override is not drop down list. Select which Salvo to fire then click OK to close the checked, the source-to-destination connection is not made when the window.
-
Page 30: Gsx Surface Setup App
GSX GUI: ❖ Synch From A GSX Surface – The recommended selection, connects the GSX GUI to a GSX Surface Host to view, edit, and then update that GSX console’s configuration settings. ❖ Open A Saved Project From Disk – A Find Project window opens listing existing Projects that can be loaded into the GSX GUI. - Page 31 Project opened. ❖ Projects Opens a submenu with these selections: Along the bottom of the GSX GUI is the App Status bar, which lists the • Synch to Surface… Same function as clicking Apply in the Status Host processor connection status (or Offline);...
- Page 32 Network Interface Controller (NIC) that’s connected to your WNIP ❖ Exit Closes the GSX GUI. If a Project or Script was opened and any system. changes were made, a Project selector window opens so you can save the Project or Script.
- Page 33 Surface. When the GSX GUI has a Panel Layout License, the button functions can be edited, as required, using various drop-down controls in the left pane by selecting a button to edit. When the GSX GUI has a Scripting License, scripts can also be assigned to Surface controls.
- Page 34 Blade (the Mix Engine with the connected GSX Surface Host). Up to three other GSX Surface Hosts can be defined in the Surfaces page tab. Up to four audio processors can be defined in the Audio Procs page tab. Up to 32 Strings can be defined in the Property Map page tab to identify commonly used Sources, Destinations, or Salvos.
- Page 35 Surface functions, from setting up GSX Users to assigning source visibilities on channel selectors and monitor source selectors and is the tab that will see the most use when configuring your GSX console. Its Locator Tab This tab shows technical details on all your WNIP system page tabs are covered in detail in the Using the GSX GUI section, which devices, just like the Locator tab in Navigator.
-
Page 36: Using The Gsx Gui
The Locator list of devices can be sorted by clicking on a heading. Figure 3-31 GSX GUI, Locator Tab View If you click on Product you should see at least four GSX entries for: the GSX Surface Host (default name GSX-HOST), the two to six Input Panels Setting the Surface Host’s Mix Engine... - Page 37 This action assigns that Mix Engine Blade to the GSX Surface Host that Cancel, click it to close the System the GSX GUI is currently connected to, as shown in the status bar at the Scan window. A “save system info?”...
- Page 38 Connect To window. Select the GSX Surface then click Finish to load ScreenBuilder scripts can only be run from the Surface Host. These the Project settings into the GSX GUI. The Apply button will turn red to scripts are typically written, tested, and run by the end user, but not all...
- Page 39 The new password takes effect as soon Figure 3-33 General Page Tab as Apply is clicked to upload changes to the GSX Surface Host. ❖ In Events Ignore Input Fader Level When an Event is saved, the...
- Page 40 Lock Destination When On. If that option is checked, the Event parameters are not applied to ❖ Direct Out Sections These three sections affect the GSX BMxx source the channels that are on. But, if Lock Destination When On is un- signals.
- Page 41 Default Bus Minus/Direct Out The default setting for all channels is unchecked meaning the GSX BMxx sources are Bus Minus signals. When checked that channel’s GSX BMxx source is the Direct Out au- dio for the source assigned to that channel.
- Page 42 • Allow OL Bus Assign When checked allows the active user to characters, displayed above the meters on the GSX monitor. For exam- change OL bus assignments on any channel. ple, the meters could describe the four bus output destinations like AIR FEED, RECORD FEED, NEWS ROOM, and CODECS.
- Page 43 Home View to switch from Layer 1 to another Layer. Us- ing Layers requires the optional GSX GUI Layers License. To add sources to the Signals List, click Add… to open the Add Signal window.
- Page 44 • Remote Ready When checked the channel’s Off button LED is con- ❖ Monitor Mutes The numbered checkboxes correspond to the GSX trolled by the source’s ready logic to indicate the channel’s “Ready” Monitor Outputs. When the Control Room is muted (checkbox 1), the state.
- Page 45 GSX Mon3 (typically used with an associated muting and warning light control. talk studio). When the Layer License is added to the GSX GUI additional The screenshot at right shows Monitor sources (GSX Mon4, etc.) may be created.
- Page 46 Surface button to another function than that assigned in the Typically, the level is adjusted using the Surface control to an appropri- base GSX. When a button is selected in that tab, a Function drop‑down list ate level, and then this option is checked, fixing that level, and locking with about 100 standard functions allows any button on the Surface to be out the Surface control from affecting the level.
- Page 47 When new WNIP devices, like I/O Blades and PC Blades, are added to the network, their sources and destinations will automatically get added to the visibilities lists for the GSX Surface. If you want to limit, or remove these from the visibilities lists, you’ll need to run another System Scan and then return to the Visibilities page tab to manually add/remove the new signals to the various channels and other selectors.
-
Page 48: Gsx Operation And Applications
Once the desired source is The Master panel controls are detailed in Figure 4-4 on page 52. The first shown press “click” mention of each control or GSX feature in the text is in Bold text. Source Selector to take that source. source name... - Page 49 (Caller/Remote Operation). Some fader channels may have dedicated sources, like the board If callers and/or remotes will not be used with the GSX console, the OL operator’s mic, the phone, and the automation system playback channels,...
- Page 50 NOT be assigned to OL. To answer the call or talk to the live remote, the The GSX console can be remotely-controlled using the Remote GSX app. board operator would need to press/hold the TB button on the If the channel fader level was adjusted remotely, and the current position caller/remote channel to talk to them.
- Page 51 Master panel (the CueSTR1 destination), but the cue source signal segments. If they are being lit, lower the fader level so (GSX CUE) can also connect to external powered cue speakers as well. In the peak levels move downwards to keep them in the...
- Page 52 “click” the Select knob. That source is then set as the new GSX Mon1 source, and its name changes from red to white text with its Location or source Blade name shown below it in blue text.
- Page 53 The source assigned to the EXT (External) button is set on the GSX Split HDPN monitor. On the Home View, click or touch (on a touchscreen) the EXT When lit, and cue is active, cue audio is sent to the left ear and the source name.
- Page 54 (a console configuration setting), so the Studio output is at a fixed level. This is also used when the GSX Mon3 signal is To take one of the two Events, press the event 1 or 2 button. If you...
-
Page 55: Gsx Mix Engine Controls
For more detailed information on using the Mix Engine controls, consult your WNIP System/Blade manual. A PDF version of this manual is included For a GSX in a Production or news room, the Default User may be set to on the USB memory stick that ships with each GSX. - Page 56 The left side has the four main bus meters: PGM, AUX, AUD, and OL, at the top, with a Loudness Monitor and Correlation meter shown below. ❖ Home The view that shows the GSX metering and console status. The This section is always shown, regardless of which view is active.
-
Page 57: Using The Gsx Console
❖ X/Y Allows the User to connect a Source (X) to a Destination (Y) by GSX has just one user: Default, so it could be set as the current User and first selecting a destination and a source, then tap/clicking Take to there may be no other users on that GSX console. - Page 58 At the appropriate time, tap/click the Take button to load Figure 4-9 Aux/MxM View that Event into the GSX. Events can be “armed” ahead of time so that one The Aux Send busses (AUX 1-AUX 4) are turned On/Off by tap/clicking just needs to tap/click Take to immediately load the selected Event.
- Page 59 An Aux Send is on when its On button is gold, as for all four of the When the setup option Allow No Source is enabled in the GSX GUI, the Aux Sends as shown in Figure 4-9. An Aux Send is Off when the On button User can disconnect or silence a Destination by highlighting that is outlined in gold.
- Page 60 Selector window. Highlight the desired channel then tap/click Select to Like the Input view, this view’s controls affect the selected channel, switch to that channel. Its channel number then appears in the upper left. which is the channel with a lit Set button. The channel that’s being affected—in real-time, is shown at the upper left.
- Page 61 orange line, in relation to the gray 1:1 transfer line. In Figure 4-12, only CLOSE times are used so the gating doesn’t occur during a breath or a the Compressor is active, and the makeup gain is set to about +10, hence normal speech pause while a faster OPEN setting ensures the audio is not the orange line parallels the gray line by about 10 dB.
- Page 62 Figure 4-13 EQ View considered when setting the Release. The GSX uses a four-band parametric type equalizer with low band and high band Peak and Shelving switches plus variable high and low pass EQ View filters.
- Page 63 frequency of the “yellow graphic” to the left or right, with the center effect is confined to progressively higher frequencies, allowing one to add frequency number being shown in the entry box. Tap/click on another “sizzle” or “sparkle” to the audio source without adding the harshness that control to change the slider to affect that control.
- Page 64 Automix View groups. On the Main view, tap/click the Source name to select the different The Automix View button is grayed out when the GSX console does not signals, then tap/click a Group number to assign that signal to one or have an Automix License, or if the current User does not have access to more Automix Groups.
- Page 65 Custom View move it down to trim the input level of the current channel source. Custom views can be created by engineering when the GSX Surface GUI In either case, you can use the input meter on the channel Info display, has the optional Scripting License.
-
Page 66: Gsx Applications
The controls on these two views were covered on pages 60 - 63. GSX APPLICATIONS The GSX console is most often used in an air studio to control the audio going to a transmitter and/or streaming to the Internet. In almost all cases, the PGM bus is used to feed the air chain and hence has the air signal. - Page 67 The easiest method to do this within the GSX is to dedicate the AUX bus for call recording. Voice Tracking Using the GSX to do voice tracking is easily done in a production room To use the “AUX bus recording method”...
- Page 68 Note: To have any talkback audio, the board operator’s mic source signal must be cross-connected to the GSX TkBk talkback destination. That audio signal is the talkback audio to any channel with an active bus minus signal and to the Studio monitor output.
-
Page 69: Gsx Service Information
To contact the Wheatstone Technical Support department to request an ll GSX consoles are designed to yield many years of RA number, or for installation and other technical support for the GSX console, call 252-638-7000 (8:30–5:30, east coast time) or send an email to: techsupport@wheatstone.com. - Page 70 Select the file then click Open. A software versions of the GSX Surface can be viewed using the GSX popup confirms you want to upload that software to the GSX Mix Engine. monitor by right-clicking on the Wheatstone GSX logo. They can also be Again, GSX operations are not affected during the software uploading but viewed, and updated, using the GSX GUI’s Hardware menu items for the...
- Page 71 AC cord back in. If the Error LED again the field replaceable parts are listed in the GSX Parts list on page 69. lights it indicates a fault that requires repair. Contact Wheatstone technical The GSX Surface can be powered down without affecting the Mix support for assistance.
- Page 72 If the faders were set as on the original panel, and the GSX console has continued playing on air, there will be momentary audio level changes as the new Surface takes control (especially if EQ or...
-
Page 73: Appendix Acreating A Wnip Network
WNIP-compatible consoles may also be networked with the GSX. To network these WNIP devices, one or more Wheatstone-approved gigabit Ethernet switches must be configured to support AoIP (Audio-over- IP) streaming to carry the audio between the GSX Mix Engine and the other WNIP devices. CREATING A WHEATNET-IP SYSTEM Figure A-3 Setting Device Properties in the Locator Tab The default IP addresses that “factory-fresh”... - Page 74 Creating a Small WNIP Network number of device ID numbers available when selecting the 1-99 For a single station facility, which might have a GSX console in an on-air Blade option when configuring a Blade. studio and another networked console in a production room, along with...
- Page 75 TOC, where they When a multiple station facility is being planned, Wheatstone offers can identify whether a codec is available and, if so, to then connect that system configuration and system programming to create salvos, scripting codec to their studio.
Need help?
Do you have a question about the GSX and is the answer not in the manual?
Questions and answers