
Related Manuals for Apera Instruments WS200


Summary of Contents for Apera Instruments WS200
- Page 1 WS200 Fluoride/pH/Conductivity 7-in-1 Portable Meter Kit Instruction Manual APERA INSTRUMENTS, LLC www.aperainst.com - 1 -...
-
Page 2: Table Of Contents
Table of Contents Overview ......................... - 3 - Basic Functions ........................- 3 - Features of Fluoride Measurement ..................- 3 - Features of pH Measurement ....................- 3 - Features of Conductivity Measurement ................- 3 - Technical Parameters: ....................- 4 - Fluoride .......................... -
Page 3: Overview
For technical support, please contact us at info@aperainst.com or +1 (614)-285-3080. The WS200 meter is widely used for drinking water, surface water and other water treatment applications, ideal for both in-field and laboratory testing. 1.1 Basic Functions ◼... -
Page 4: Technical Parameters
◼ Automatically recognize up to 8 kinds of conductivity standard solutions. User can choose from two series of standard solutions: Europe & USA and CHINA. ◼ Automatically adjusts conductivity measuring range, the meter will do perform automatic temperature compensation test for purified water and high purified water less than 10μS/cm, which greatly improves the measuring accuracy. -
Page 5: Conductivity
2.4 Conductivity: Conductivity: (0.00~19.99)μS/cm (20.0~199.9)μS/cm (200~1999)μS/cm (2.00~19.99)mS/cm Measuring Range (20.0~199.9)mS/cm TDS: (0 ~ 100)g/L Salinity: (0 ~ 100)ppt Resistivity: (0 ~ 100)MΩ·cm Resolution 0.01/0.1/1μS/cm 0.01/0.1 mS/cm Accuracy ±1.0% F.S ATC Range (0 - 50)℃(Auto) Electrode Constant 0.1 / 1 / 10 cm Base Temperature 25℃、20℃... -
Page 6: Operation Keys
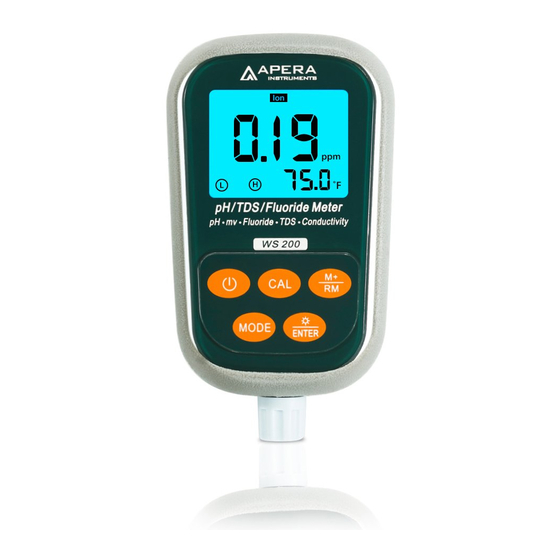
① —— Parameter mode ② —— Measuring value ③ —— Measured value storage and display of numbers, symbols indicate: M+ — Store Measured value RM - Recall measurement values Icon ; ④ —— Measurement unit ⑤ —— Temperature measurement and unit ⑥... -
Page 7: Data Storage, Recall Data, And Clear Data
→ g/L or turn the meter ON/OFF. 3.3 Data Storage, Recall Data, and Clear Data 3.3.1 Data Storage While in the measurement mode, when the measurement data is stable and the smiley face icon appears, short press key (<1.5s), LCD will display “ M+” icon and a storage serial, and meanwhile storing all of the measurement information. -
Page 8: Calibration
4.2 Calibration 4.2.1 Press , LCD displays 0.19 mg/L, and LCD top right corner CAL and the bottom left L will be blinking, indicating that the meter has entered the 1st point calibration mode and the calibration solution is 0.19 mg/l; Rinse the fluoride-ion electrode in distilled or deionized water and shake off the excess water;... -
Page 9: Parameter Settings
4.4 Parameter Settings Table (4-3) Code Parameters Symbol Parameter sets the project Temperature unit selection ˚C / ˚F Backlight display time setting 0-1-3-6 min Auto power off time setting 0-10-20 min Restore to factory default OFF-ON settings 4.4.1 Temperature units ° C/ºF selection (P1) Long Press to enter P1,remaining operations see section 5.4.5 4.4.2 Backlight display time setting (P2) -
Page 10: Ph Measurement
concentration to low-concentration, you need to rinse the electrode with distilled or deionized water, otherwise it will affect the accuracy significantly. 4.5.5 Typically the meter needs to be calibrated before use every time. But when requirement of accuracy is low, calibration is not necessary. Or try the electrode in the calibration solution, if the error is very small, calibration is not necessary. - Page 11 , the LCD will show a blinking 4.00 pH, a stable pH value and a and stay, then again press blinking C3 will be displayed, indicating the second-point calibration has been finished and the meter enters the third-point calibration. 5.2.4. Rinse the pH electrode in distilled water and dry it, then soak it into the pH 10.01 buffer solution, stir the electrode gently and let it stand still,, waiting for a stable reading and a smiley face icon to appear , the LCD will show a blinking...
-
Page 12: Sample Test
Sample Test Soak the pH electrode into the sample solution after rinsing and drying, hold the electrode still. Take the readings when the smiley face icon shows up and stays on screen (indicates a stable reading). pH isothermal measurement principle According to the theory of Isothermal measurements, the smaller the difference of the temperatures between test solution and the calibration solution, the higher the measument accuracy is. - Page 13 (NIST series) — 1.68, 4.01, 6.86, 9.18 and 12.45 pH ( (China series) — 1.68, 4.00, 6.86, 9.18 and 12.46 pH (c) Press key to enter next parameter setting or press key to confirm and return to measurement mode. 5.4.3. Purified water pH temperature compensation setting (P2) (a) Short press key in the mode P1, the meter enters mode P2, see picture (4-3).
- Page 14 5.4.5. Temperature unit ℃/℉ setting (P4) (a) Short press key in mode P3 to enter mode P4, see picture (4- (b) Press key to choose temperature unit: ℃ or ℉. (c) Press key to enter next parameter setting or press key to confirm and return to measurement mode.
-
Page 15: Notes
5.4.8. Restore to producer setting (P7) (a) Short press key in mode P6 to enter mode P7, see picture (4-8). (b) Press key to choose “ON”, means that all the pH measuring parameters have been restored to the factory default setting. 5.5 Notes 5.5.1. -
Page 16: The Self-Diagnose Information
5.5.6. How to clean and renew your pH electrode For general contaminants, soak the electrode in Apera’s cleaning solution (AI1166) or detergent water for 30 minutes. Then use a soft brush to remove the contaminants. Afterwards, soak the probe in Apera 3M KCL soaking solution (AI1107) for at least 1 hour. -
Page 17: Orp Measurement
A still display of -2.00 pH or 19.99 pH — this icon appears when the value has surpassed the measuring 5.6.1 range. There will also appear such signs when the electrode is not well connected with the meter or when the electrode is not immerged into the solution. This is a normal phenomenon. Err1 —... -
Page 18: Sample Test
measurement mode automatically. Calibration Note: The meter’s conductivity mode has been calibrated before leaving factory, so generally users can use it directly. The conductivity can only can be calibrated under the mode of COND. Resistivity (RES), TDS, Sailinity (SAL) are coverted from conductivity so they don’t need calibration as long as conductivity is calibrated. 7.3 Sample Test: 7.3.1 Connect the 2301T-S probe to the meter, soak it into sample solution, stir gently and let it stand still. - Page 19 7.4.3. The temperature compensation coefficient of the meter setting is 2.00%/℃ by default. However, the conductivity temperature coefficient is different for different solutions. Users can refer chart (7-2), as well as the data which they receive from experiments to set in the parameters setting of P4. At the same time, meter will do automatic non-linear temperature compensation in the high purified water which less than 10 μ...
-
Page 20: Parameter Setting
7.5 Parameter Setting: 7.5.1. Conductivity parameter setting (chart (7-3)) Chart (7-3) Prompt Mark Code Parameter Parameter Setting Items USA (84μS/cm, 1413μS/cm, 12.88 mS/cm, Standard solution series selection 111.9 mS/cm) (146.6μS/cm, 1408μS/cm, 12.85mS/cm, 111.3mS/cm) Electrode constant selection 0.1, 1, 10 Benchmark temperature selection 25℃... - Page 21 7.5.4. Benchmark temperature selection (P3) (a) Under P2 mode to short press key to enter P3 mode, see picture (4-5); (b) Press key to choose the benchmark temperature: 25℃→20℃→18℃; (c) Press key to enter the next parameter setting or press key return to measurement mode.
-
Page 22: Notes
7.5.8. Backlight display time setting (P7) (a) Short press key in mode P6 to enter mode P7, see picture (4-9). (b) Press key to choose the time of backlight auto power off: 0 min, 1 min, 3 min or 6 min. The backlight display function will be closed if choosing a 0min. -
Page 23: Complete Kit
We warrant this instrument to be free from defects in material and workmanship and agrees to repair or replace free of charge, at option of APERA INSTRUMENTS, LLC, any malfunctioned or damaged product attributable to responsibility of APERA INSTRUMENTS, LLC for a period of two years from the delivery (a six-month limited warranty applies to probes). -
Page 24: Appendix 1. Fluoride Concentration Conversion Table
10 Appendix 1. Fluoride Concentration Conversion Table mol/L mg/L 1 × 10 3.00 19.00 19.00 1 × 10 4.00 1.90 1.90 1 × 10 5.00 0.19 0.19 APERA INSTRUMENTS, LLC Address: 6656 Busch Blvd, Columbus Ohio 43229 Tel: 1-614-285-3080 Email: info@aperainst.com Website: www.aperainst.com - 24 -...
Need help?
Do you have a question about the WS200 and is the answer not in the manual?
Questions and answers