
Related Manuals for Apera Instruments WS200


Summary of Contents for Apera Instruments WS200
- Page 1 WS200 Fluoride/pH/Conductivity 7-in-1 Portable Meter Kit Instruction Manual APERA INSTRUMENTS, LLC www.aperainst.com - 1 -...
-
Page 2: Table Of Contents
Table of Contents Overview ......................... - 3 - Basic Functions ........................- 3 - Features of Fluoride Measurement ..................- 3 - Features of pH measurement ....................- 3 - Features of Conductivity Measurement ................- 3 - Technical Parameters: ....................- 4 - Fluoride .......................... -
Page 3: Overview
+1 (614)-285-3080. Apera Instruments reserves the right to update the content of this manual without giving prior notices. The WS200 meter is widely used for drinking water, surface water and other water treatment applications, ideal for both in-field and laboratory testing. -
Page 4: Technical Parameters
Technical Parameters: 2.1 Fluoride Measuring range 0.02 ppm to 1900 ppm Display units mg/L, ppm, pF Accuracy ±0.02 ppm or ±5% of reading (which ever is greater) Temperature ( 0-80 ) ℃ ( Automatic) Compensation Range 2.2 pH Measuring range ( -2.00 - 19.99 ) pH Resolution 0.1/0.01 pH... -
Page 5: Other Technical Parameters
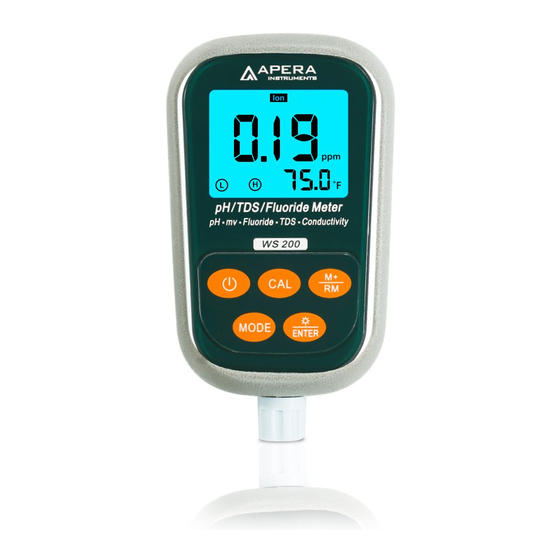
2.5 Other technical parameters: Data Storage 800 Groups Numberings, measurements, units of measurement and a Storage Content temperature values Power Supply AA Battery (1.5VX2) Instrument:(65X120X31) mm/180g ; Suitcases:(360X270X76) Size and Weight mm/1.5Kg Quality and Safety ISO9001:2000,CE and CMC Certification IPClass IP57 Dustproof and waterproof Instrument Description 3.1 LCD Display:... - Page 6 3.2.1 — Switch on / off key 3.2.2 — Calibration key (a)When in the measurement mode, press this key to enter into calibration mode. (b)When in the parameter setting mode, press this key to change the number or the ON/OFF state.
-
Page 7: Fluoride Concentration Measurement
3.3.2 Display measuring information: (a) While in the the measurement mode, long press (>2s), meter will display the last stored information, and the storage number and “RM” icon will appear in the lower right corner of the LCD, and the complete measuring information. Again short press meter will in turn display all the measuring data, Hold to quickly check the measuring data. -
Page 8: Sample Measuring
corner shows two-point calibration icons L and H; The instrument automatically enters measuring mode. 4.3 Sample Measuring 4.3.1 Rinse the fluoride-ion electrode in distilled or deionized water and dap off excess water with clean tissue; soak into solution, stir gently and let it stand still; get the readings when measuring vaule is stable and stays on screen. -
Page 9: Ph Measurement
4.5.2 The calibration solution can be easily polluted, especially for low concentration solution (0.19 mg/l). Please pay attention to avoid contamination otherwise a large measuring error will occur. Replace the solution after 4~5 times of use. 4.5.3 When test solution in the order from low-concentration to high-concentration, the electrode does not need to be rinsed, just shake off or dry the excess solutions with clean tissue. - Page 10 the LCD will show a blinking 7.00 pH, indicating the 1 point of calibration is completed; a stable pH value and a blinking C2 will be displayed, indicating the first point calibration has been finished and the meterenters the second point of calibration. 5.2.3.
-
Page 11: Sample Test
(c) Users should perform a three-point calibration to reach a more accurate measurement if the measuring range is wide, or if the electrode has been used for long or has aging phenomenon. If it’s a new electrode, a three-point calibration is necessary to adjust the meter’s slope to match the pH electrode. - Page 12 Back light display time setting 0-1-3-6min Auto power off setting 0-10-20min Restore to Factory Default OFF-On 5.4.2. pH buffer solution series selection (P1) (a) Press key, meter enters P1 mode: see picture (4-2). (b) Press key to choose buffer solution series: ( Europe &...
- Page 13 measuring mode. (d) The default setting is “ OFF ”. Note: A PU-2 icon will appear in the upper right corner of the LCD if purified water temperature compensation function is set by the user. 5.4.5. Temperature unit ℃/℉ setting (P4) (a) Short press key in mode P3 to enter mode P4, see picture (4-5).
-
Page 14: Special Notes
(c) Press key to enter into next parameter setting or press key to confirm and return to measuring mode. (d) The producer setting for P6 is 10min. 5.4.8. Restore to producer setting (P7) (a) Short press key in mode P6 to enter into mode P7, see picture (4-8). - Page 15 5.5.4. Always keep the meter clean and dry; especially around the socket connecting the meter and electrode, otherwise it may lead to inaccurate measurements or a damaged probe/meter. To clean, dry them with medical cotton and rubbing alcohol if the connectors appear dirty. 5.5.5.
-
Page 16: The Self-Diagnose Information
5.5.9. The lifespan period for the 201T-S pH Electrode is about 1-1.5 year, but its life will be shortened if the meter is used incorrectly or is not well maintenained. be sure to replace the electrode once it has aged or tested inaccurately 5.5.10. -
Page 17: Conductivity Measurement
6.1.2. Connect the ORP probe (Product# AI1315, sold separately), soak it into sample solution, stir gently and let it stand still. Get the readings when the smiley face ion appears and stay on the screen. Conductivity Measurement: 7.1 Preparation Work 7.1.1. -
Page 18: Special Notes
7.4 Special Notes 7.4.1. This meter build-in below two kinds of calibration solution series, please set up in the parameters P1; (Europe & U.S.A. series) — 84μS/cm, 1413μS/cm, 12.88 mS/cm and 111.9 mS/cm (China series) — 146.6μS/cm, 1408μS/cm, 12.85mS/cm and 111.3 mS/cm 7.4.2. -
Page 19: Parameter Setting
Chart (7-2) Solution Temperature compensation coefficient NaCl salt solution 2.12%/℃ 5%NaOH solution 1.72%/℃ 1.88%/℃ Dilute ammonia solution 10% hydrochroric acid solution 1.32%/℃ 5% sulfuric acid solution 0.96%/℃ 7.4.5.The other parameters setting, please see the chart (7-3) 7.4.6. Special attention: when the content of parameter setting is consistent with content of factory default setting, conductivity measuring interface will display as picture (6-1);... - Page 20 Temperature compensation 0.00 to 9.99% coefficient setting Electrode constant setting Temperature unit setting ℃ ℉ Back light display time setting 0-1-3-6min Auto power off time setting 0-10-20min Restore to producer setting OFF-On 7.5.2. Conductivity calibration solution series selection (P1) (a) Press key, meter enters P1 mode, see picture (4-3);...
- Page 21 measuring mode. (d) The factory default setting of P3 is 25℃. 7.5.5. Temperature compensation coefficient setting (P4) (a) Under P3 mode to short press key and enter P4 mode, show as the picture (4-6); (b) Press key to change the number, the changing range of data is from 0.00 to 9.99;...
-
Page 22: Considerations
key to confirm and return to measuring mode. 7.5.8. Back light display time setting (P7) (a) Short press key in mode P6 to enter mode P7, see picture (4-9). (b) Press key to choose the time of back light auto power off: 0 min, 1 min, 3 min or 6 min. -
Page 23: Complete Kit
We warrant this instrument to be free from defects in material and workmanship and agrees to repair or replace free of charge, at option of APERA INSTRUMENTS, LLC, any malfunctioned or damaged product attributable to responsibility of APERA INSTRUMENTS, LLC for a period of two years from the delivery (a six-month limited warranty applies to probes). -
Page 24: Appendix 1. Fluoride Concentration Conversion Table
10 Appendix 1. Fluoride Concentration Conversion Table mol/L mg/L 1 ×10 3.00 19.00 19.00 1 ×10 4.00 1.90 1.90 1 ×10 5.00 0.19 0.19 APERA INSTRUMENTS, LLC Address: 6656 Busch Blvd, Columbus Ohio 43229 Tel: 1-614-285-3080 Email: info@aperainst.com Website: www.aperainst.com - 24 -...
Need help?
Do you have a question about the WS200 and is the answer not in the manual?
Questions and answers
How do I replace the batteries? I don’t see any instructions on the process. I don’t see a battery door anywhere on the meter. Thanks for your help. That would be helpful information in the manual.