Table of Contents
Advertisement
Quick Links
Advertisement
Table of Contents

Related Manuals for Tektronix TDS2000C Series


Summary of Contents for Tektronix TDS2000C Series
- Page 1 Troubleshooting Your Design with the TDS2000C Series Oscilloscopes...
-
Page 3: Table Of Contents
Table of Contents Troubleshooting Your Design with the TDS2000C Series Oscilloscope ....4 Getting Started ....................... 5 Capture Elusive Glitches and Anomalies .............. 6-7 Debug Digital Timing Problems ................8 Verify Timing Relationships ..................9 Check Signal Integrity ..................10-11 Debugging Digital System Lock-up ............... -
Page 4: Troubleshooting Your Design With The Tds2000C Series Oscilloscope
Troubleshooting Your Design with the TDS2000C Series Oscilloscope Today’s engineers and technicians face increasingly complex and The tips on the following pages are designed to further simplify critical troubleshooting tasks. New digital designs often challenge your troubleshooting tasks. But if you need more help, there is designers with new problems to find: race conditions, transients, plenty available. -
Page 5: Getting Started
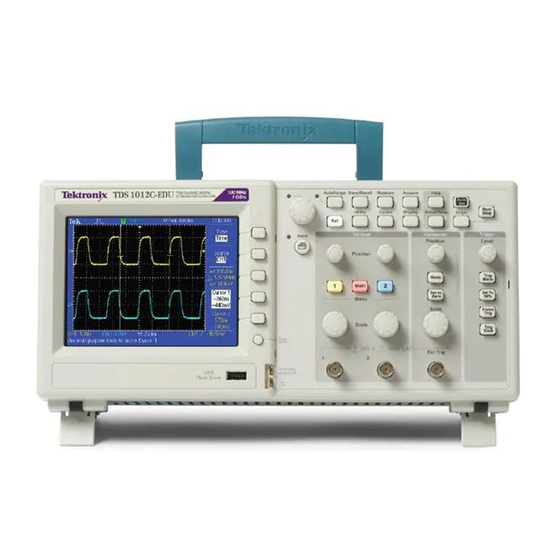
5. If necessary, it will instruct you to adjust your probe compensation. Compensated Correctly To ensure that you begin with factory initialization settings, follow these simple steps: 1. Press the front panel DEFAULT SETUP button. TPP Series 2. Press the front panel AUTOSET button. TDS2000C Series Oscilloscope www.tektronix.com/tds2000... -
Page 6: Capture Elusive Glitches And Anomalies
Peak detect can capture narrow glitches, even anomalies can cause circuits to fail. While finding these glitches has on low-frequency signals. never been easy, the TDS2000C Series simplifies this task with its To use the Peak Detect feature: 1. Display the waveform on the screen. - Page 7 Intermittent signal anomalies can also be a challenge to see. The variations over time, making it easier to understand the TDS2000C Series provides variable- and infinite-persistence display characteristics of the transients you’ve captured. capabilities to provide you with information about the signal To use Display Persistence: 1.
-
Page 8: Debug Digital Timing Problems
For example, race conditions and transients triggering when a signal pulse width is less than, greater than, can cause circuits to perform inaccurately. The TDS2000C Series’ equal to or not equal to a specified pulse width. To use the pulse width trigger: 1. -
Page 9: Verify Timing Relationships
Verify Timing Relationships Electronics engineers often need to verify that their circuits width, period, and frequency. The TDS2000C Series’ cursors can be are working as designed. One of the most common types of used to make such measurements quickly and easily. -
Page 10: Check Signal Integrity
The TDS2000C Series’ cursors can be real world. To characterize these events, engineers can measure used to make such measurements. - Page 11 Check Signal Integrity (continued) The TDS2000C Series’ automatic measurement system can also be used to make such measurements quickly and automatically. To make signal integrity measurements using automatic measurement system: 1. Press the MEASURE front panel button. 2. Press a CH1 side menu button to add an automatic measurement.
-
Page 12: Debugging Digital System Lock-Up
Debugging Digital System Lock-up One common cause of digital system lock-ups is an intermittent clock. The TDS2000C Series trigger system can quickly and easily identify unexpected interruptions in the clock signal. 1. Press TRIG MENU front panel button. 2. Press Type side button until Pulse is selected. -
Page 13: Test For Presence Of Video Signals
Test For The Presence of Video Signals Video technicians must perform a quick check for the presence they can easily carry to each location. The TDS2000C Series’ video of a video signal at different test points. If the site is in the field,... -
Page 14: Look For Unintentional Circuit Noise
Developers can then associate those frequencies with known system frequencies, such as system clocks, oscillators, read/write strobes, display signals, or switching power supplies. TDS2000C Series Oscilloscope www.tektronix.com/tds2000... - Page 15 Look for Unintentional Circuit Noise (continued) The TDS2000C Series offers a standard FFT feature, making it an 1. Press the front panel MATH button. ideal tool for these identifying sources of noise in a circuit. To create 2. Press the Operation menu button until FFT is selected.
-
Page 16: Power Line Harmonic Analysis
6. Press the MATH front panel button. 7. Press the Operation side menu button until FFT is selected. 8. Press the Window side menu button until Flattop is selected. This window is best for measuring amplitudes accurately. TDS2000C Series Oscilloscope www.tektronix.com/tds2000... - Page 17 5. Press the Cursor 2 side menu button and use the multipurpose knob to align the cross-hair cursor on the next-highest peak (the 3rd harmonic, in this case). 6. The readouts at the right of the screen indicated the absolute and relative frequencies and magnitudes. TDS2000C Series Oscilloscope www.tektronix.com/tds2000...
- Page 18 6. Press the Stop side menu button to setup stop options. 7. Press Action on Violation side menu button to setup the action the oscilloscope should take when a violation occurs. 8. Press the Run/Stop Test side menu to start/stop the test. TDS2000C Series Oscilloscope www.tektronix.com/tds2000...
-
Page 19: Automatically Capture And Save Elusive Waveform Anomalies
4. Press the Data Logging side menu button to select the data logging function. 5. Setup the duration time from 30 minutes to 8 hours. 6. Press the Data Logging side menu button to start/stop the test. TDS2000C Series Oscilloscope www.tektronix.com/tds2000... -
Page 20: Documenting Your Results With Openchoice ® Software
5. Click Get Screen to capture the screen image. 6. Click Save As to save the screen image to a file on the PC. 7. Click Copy to Clipboard. You can then launch your documentation program and paste the image into the document. TDS2000C Series Oscilloscope www.tektronix.com/tds2000... -
Page 21: Waveform Measurements Logging
4. Press the TekXL Connection icon, select the desired instrument, and press OK. 5. Press the TekXL Measurements icon. 6. On the Selection tab, choose Frequency. 7. On the Timing tab, select 45 samples. 8. On the Charting tab, choose Upon Completion. TDS2000C Series Oscilloscope www.tektronix.com/tds2000... -
Page 22: Waveform Analysis Using Ni Signalexpress ™ Tektronix Edition
Edition provides advanced analysis capabilities with the ease of USB capabilities, there are applications where the analysis requirements plug-and-play. are better met with PC-based applications. SignalExpress Tektronix 1. Acquire the signal. 2. Connect the oscilloscope to the PC using a USB cable. - Page 24 Contact List Updated 25 May 2010 Copyright © 2010, Tektronix. All rights reserved. Tektronix products are covered by U.S. and foreign patents, issued and pending. Information in this publication supersedes that in all previously published material. Specification and price change privileges reserved. TEKTRONIX and TEK are registered trademarks of Tektronix, Inc.
Need help?
Do you have a question about the TDS2000C Series and is the answer not in the manual?
Questions and answers