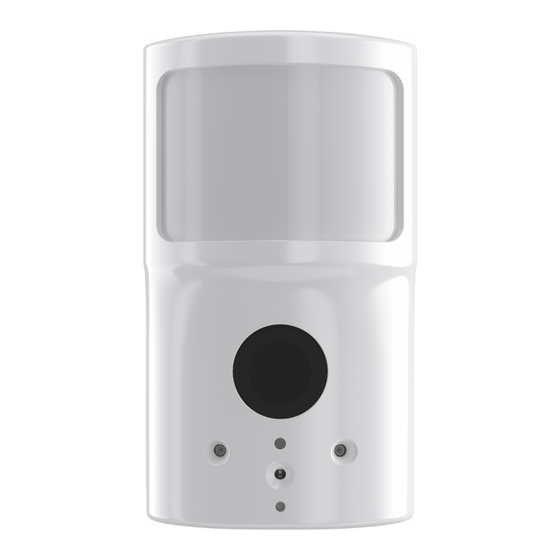
Alarm.Com ADC-IS-300-LP Quick Start Manual
Image sensor version 3
Hide thumbs
Also See for ADC-IS-300-LP:
- Installation manual (17 pages) ,
- Installation manual (15 pages) ,
- Installation manual (4 pages)
Advertisement
Quick Links
Image Sensor Version 3 (ADC-IS-300-LP) - Quick Start Guide
Pre-Setup Checklist
• Image Sensor (included)
• Compatible security panel (additional hardware may be required)
• Alarm.com customer account with a service package that supports the Image Sensor
• Login and password for the Alarm.com account to which you will add the Image Sensor
Panel Enrollment
1. Install the Image Sensor daughterboard inside the customer's security panel (if required for the customer's panel
type). See the Daughterboard Installation guide for instructions.
2. Put the security panel in Add mode.
3. Insert the batteries into the Image Sensor. The Image Sensor LED will progress from Blinking Red to Solid Red to
Blinking Yellow to Solid Yellow after it has successfully enrolled in the panel. See the
4. After the Image Sensor LED has turned Solid Yellow, you must exit Add mode on the panel. The Image Sensor
LED will alternate between Green and Yellow while the customer's device list is updated with Alarm.com. The LED
will turn Solid Green when the Image Sensor has been successfully added to the customer's account. The Image
Sensor is now ready to be tested.
Intended Operation
Mounting Height
Angle
https://answers.alarm.com/ADC/Partner/Installation_and_Troubleshooting/Image_Sensor/Image_Sensor_Version_3/Alarm.com_Image_S
Pet Immunity
6 Feet
Shallow, 6°
Larger Rooms
8 Feet
Shallow, 6°
LED Status Chart
for details.
Smaller Rooms
8 Feet
Deep, 18°
Updated: Tue, 26 Mar 2019 17:32:02 GMT
1
Advertisement

Subscribe to Our Youtube Channel
Summary of Contents for Alarm.Com ADC-IS-300-LP
- Page 1 4. After the Image Sensor LED has turned Solid Yellow, you must exit Add mode on the panel. The Image Sensor LED will alternate between Green and Yellow while the customer’s device list is updated with Alarm.com. The LED will turn Solid Green when the Image Sensor has been successfully added to the customer’s account. The Image Sensor is now ready to be tested.
- Page 2 • Install in an area where there are obstructions in front of or around the camera lens (for example, walls and ceilings within 90 degrees and 2 ft. around the camera). This type of installation will result in washed out night captures. • Install outdoors. Sensor is for indoor use only. https://answers.alarm.com/ADC/Partner/Installation_and_Troubleshooting/Image_Sensor/Image_Sensor_Version_3/Alarm.com_Image_S Updated: Tue, 26 Mar 2019 17:32:02 GMT...
- Page 3 3. Verify that the signal strength of each Image Sensor is at least 30%. 4. Conduct a walk test and test image captures. 5. Test night image captures by darkening the room as much as possible (turn off the lights and close the shades). https://answers.alarm.com/ADC/Partner/Installation_and_Troubleshooting/Image_Sensor/Image_Sensor_Version_3/Alarm.com_Image_S Updated: Tue, 26 Mar 2019 17:32:02 GMT...
- Page 4 Sensor Power Up Solid Red ~10 seconds Memory Check Blinking Yellow ~2 minutes Searching for Unknown Network Blinking Green ~2 minutes Searching for Known Network Intermittent Rapid Blinking Red Network Connectivity Error Continuous Troubleshooting https://answers.alarm.com/ADC/Partner/Installation_and_Troubleshooting/Image_Sensor/Image_Sensor_Version_3/Alarm.com_Image_S Updated: Tue, 26 Mar 2019 17:32:02 GMT...
-
Page 5: Led Status Chart
~5 seconds Sensor Found Network Blinking Yellow & Green Up to 5 minutes Syncing Solid Green ~5 seconds Connected and Synced LED Status Chart LED Pattern Key Solid Multi-color Blinking Blinking Rapid Blink https://answers.alarm.com/ADC/Partner/Installation_and_Troubleshooting/Image_Sensor/Image_Sensor_Version_3/Alarm.com_Image_S Updated: Tue, 26 Mar 2019 17:32:02 GMT... -
Page 6: Troubleshooting
To perform a network reset, use a paperclip to press and hold the reset button for a full 10 seconds or until the LED blinks Red rapidly. A successful network reset will result in the LED blinking Yellow after the memory check. https://answers.alarm.com/ADC/Partner/Installation_and_Troubleshooting/Image_Sensor/Image_Sensor_Version_3/Alarm.com_Image_S Updated: Tue, 26 Mar 2019 17:32:02 GMT... - Page 7 2. Perform a network reset of the Image Sensor. You will only be able to do this after step 1 is complete or the Image Sensor is out of range of its current network. Questions? Visit www.alarm.com/supportcenter for more information and for translations. https://answers.alarm.com/ADC/Partner/Installation_and_Troubleshooting/Image_Sensor/Image_Sensor_Version_3/Alarm.com_Image_S Updated: Tue, 26 Mar 2019 17:32:02 GMT...


Need help?
Do you have a question about the ADC-IS-300-LP and is the answer not in the manual?
Questions and answers