Alarm.Com ADC-IS-300-LP Installation Manual
2gig gc2e image sensor
Hide thumbs
Also See for ADC-IS-300-LP:
- Installation manual (17 pages) ,
- Quick start manual (7 pages) ,
- Installation manual (4 pages)
Advertisement
Quick Links
2GIG GC2e Image Sensor Version 3 - Installation Guide
This guide contains instructions for installing an Image Sensor Version 3 (ADC-IS-300-LP) on a 2GIG GC2e panel.
Product summary & technical specifications
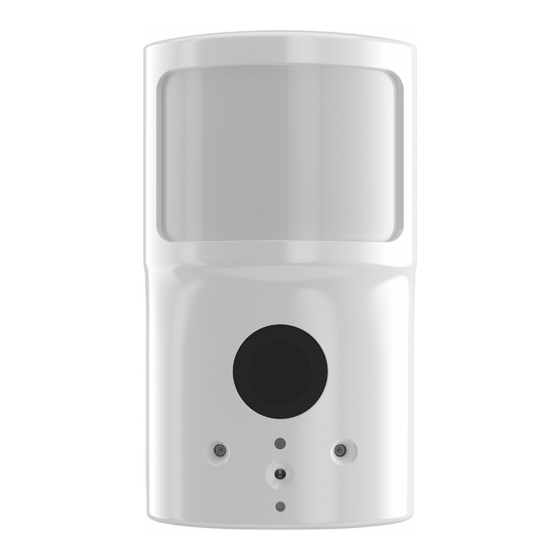
The Image Sensor is a pet immune PIR (passive infrared) motion detector with a built-in camera designed to capture
images during alarm or non-alarm events when motion is detected.
Product features:
• Communicates wirelessly to the security control panel
• 35 foot detection range with a 90 degree horizontal FOV
• Configurable PIR sensitivity and pet immunity settings
• Image: VGA 640x480 pixels
• Color Images (except in night vision)
• Night vision image capture with infrared flash (black & white)
• Tamper detection, walk test mode, supervision
• All systems can support up to three Image Sensors
• UL 639 certified
https://answers.alarm.com/Partner/Installation_and_Troubleshooting/Image_Sensor/Image_Sensor_Version_3/2GIG_GC2e_I...
Updated: Fri, 10 Mar 2023 20:17:16 GMT
1
Advertisement

Related Manuals for Alarm.Com ADC-IS-300-LP


Summary of Contents for Alarm.Com ADC-IS-300-LP
- Page 1 2GIG GC2e Image Sensor Version 3 - Installation Guide This guide contains instructions for installing an Image Sensor Version 3 (ADC-IS-300-LP) on a 2GIG GC2e panel. Product summary & technical specifications The Image Sensor is a pet immune PIR (passive infrared) motion detector with a built-in camera designed to capture images during alarm or non-alarm events when motion is detected.
-
Page 2: Hardware Compatibility
Technical specifications: • Alarm.com Model Number: ADC-IS-300-LP • Power Source: Recommended 2 AA 1.5v Energizer Ultimate Lithium Batteries. • Batteries: Refer to the Batteries section for details • Operating Temperature Range: 60° to 80°F • Weight: 3.1 oz. (with batteries and without mounting accessories) •... - Page 3 XCVR5e Transceiver. Any other transceiver (e.g., XCVR2e) with the GC2e is not compatible with the Image Sensor Version 3. Register module and test Power up the panel and initiate a comm-test to ensure the Alarm.com module is properly installed and communicating with Alarm.com. Installation: Enroll Image Sensor to panel Image Sensors must be enrolled locally on a 2GIG GC2e.
- Page 4 ◦ To select a voice and chime to sound when the sensor is activated, enter a number from 1 through 13 to enable the chime. 20. To program another sensor, tap Next. https://answers.alarm.com/Partner/Installation_and_Troubleshooting/Image_Sensor/Image_Sensor_Version_3/2GIG_GC2e_I… Updated: Fri, 10 Mar 2023 20:17:16 GMT...
- Page 5 21. To exit programming, tap Skip and then tap End and exit. Upon exit, the panel reboots. Allow a few minutes for the panel to turn back on. 22. Perform a cell phone test to ensure that the updated equipment list is sent to Alarm.com. For more information Send a communication test from a 2GIG GC2e.
- Page 6 5. Place and secure the Image Sensor on the arm and secure the arm on the mounting bracket in the desired location. Adjust the horizontal positioning of the sensor to point towards the desired coverage area. https://answers.alarm.com/Partner/Installation_and_Troubleshooting/Image_Sensor/Image_Sensor_Version_3/2GIG_GC2e_I… Updated: Fri, 10 Mar 2023 20:17:16 GMT...
- Page 7 MobileTech app. Installers are required to be onsite to test by running a comm test at the panel. 4. Test night image captures by darkening the room as much as possible (turn off the lights and close the shades). https://answers.alarm.com/Partner/Installation_and_Troubleshooting/Image_Sensor/Image_Sensor_Version_3/2GIG_GC2e_I… Updated: Fri, 10 Mar 2023 20:17:16 GMT...
- Page 8 By default, trouble conditions (malfunction, tamper & low battery) are displayed on the panel LCD. Enable or disable trouble condition messages on the control panel LCD via the Alarm.com Partner Portal. Trouble conditions are always reported to the Alarm.com Customer Website and customers will receive tamper/low/malfunction notifications if they are subscribed, regardless of the panel setting.
- Page 9 2.30V. Panel displays a low battery alert for the sensor and/or Low battery notification notifications are issued via the Alarm.com platform if the customer has subscribed to this notification type. To replace the sensor batteries, slide the front of the sensor up off the sensor-back.
- Page 10 Image Sensor LED reference chart https://answers.alarm.com/Partner/Installation_and_Troubleshooting/Image_Sensor/Image_Sensor_Version_3/2GIG_GC2e_I… Updated: Fri, 10 Mar 2023 20:17:16 GMT...
- Page 11 Resetting the Image Sensor There are two ways to reset the Image Sensor. https://answers.alarm.com/Partner/Installation_and_Troubleshooting/Image_Sensor/Image_Sensor_Version_3/2GIG_GC2e_I… Updated: Fri, 10 Mar 2023 20:17:16 GMT...
- Page 12 After releasing the reset button, the Image Sensor enters sensor power-up mode (blinking red LED) followed by memory check (solid red LED) followed by either a blinking green or blinking yellow light. For the full list of status indicators and expected behaviors, see the Camera LED reference chart. https://answers.alarm.com/Partner/Installation_and_Troubleshooting/Image_Sensor/Image_Sensor_Version_3/2GIG_GC2e_I… Updated: Fri, 10 Mar 2023 20:17:16 GMT...
- Page 13 2. Perform a network reset of the Image Sensor. This can only be completed after the Image Sensor is deleted from the account, or if the Image Sensor is out of range of its current network. https://answers.alarm.com/Partner/Installation_and_Troubleshooting/Image_Sensor/Image_Sensor_Version_3/2GIG_GC2e_I… Updated: Fri, 10 Mar 2023 20:17:16 GMT...
- Page 14 PIR lens and camera coverage diagrams Figure 3. Side View: PIR Lens Coverage https://answers.alarm.com/Partner/Installation_and_Troubleshooting/Image_Sensor/Image_Sensor_Version_3/2GIG_GC2e_I… Updated: Fri, 10 Mar 2023 20:17:16 GMT...
-
Page 15: General Troubleshooting Steps
• Verify sensor is receiving power: After inserting batteries, the sensor LED should illuminate or flash within 10 seconds. • Verify sensor is not communicating with another network: If the sensor has been previously enrolled in a different https://answers.alarm.com/Partner/Installation_and_Troubleshooting/Image_Sensor/Image_Sensor_Version_3/2GIG_GC2e_I… Updated: Fri, 10 Mar 2023 20:17:16 GMT... - Page 16 • Enable auto uploads: During the first four hours after any sensor is enrolled in the system, alarm images will not automatically be uploaded to Alarm.com. Automatic uploads are automatically enabled after four hours. Enable uploads sooner from the Partner Portal.
Need help?
Do you have a question about the ADC-IS-300-LP and is the answer not in the manual?
Questions and answers