Precor 9.33 Manual
Hide thumbs
Also See for 9.33:
- Owner's manual (52 pages) ,
- Product specification (1 page) ,
- Manuel de l'utilisateur (60 pages)
Table of Contents
Advertisement
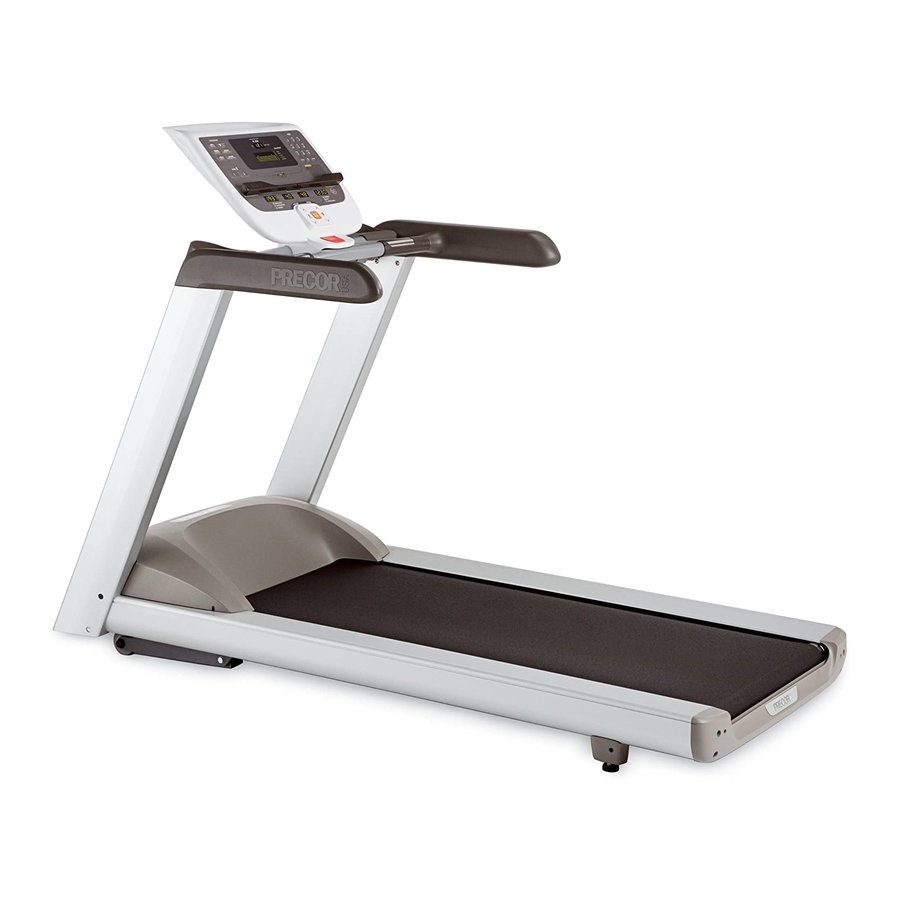
9.33, 9.35 240V Treadmill
9.33, 9.35 Treadmill
Warning: This service manual is for use by Precor trained service providers only.
If you are not a Precor Trained Servicer, you must not attempt to service any Precor Product;
Call your dealer for service.
This document contains information required to perform the majority of troubleshooting, and
replacement procedures required to repair and maintain this product.
This document contains general product information, software diagnostic procedures (when
available), preventative maintenance procedures, inspection and adjustment procedures,
troubleshooting procedures, replacement procedures and electrical block and wiring diagrams.
To move directly to a procedure, click the appropriate procedure in the bookmark section to the
left of this page. You may "drag" the separator bar between this page and the bookmark section
to change the size of the page being viewed.
© 2008 Precor Incorporated
Unauthorized Reproduction and Distribution Prohibited By Law
20081-119
Page 1
Advertisement
Table of Contents
Troubleshooting

Related Manuals for Precor 9.33


Summary of Contents for Precor 9.33
- Page 1 9.33, 9.35 Treadmill Warning: This service manual is for use by Precor trained service providers only. If you are not a Precor Trained Servicer, you must not attempt to service any Precor Product; Call your dealer for service. This document contains information required to perform the majority of troubleshooting, and replacement procedures required to repair and maintain this product.
-
Page 2: Section One - Things You Should Know
Section One - Things you Should Know The 9.33, 9.35 incorporate new drive motor system and display systems. The drive motor is a three phase AC motor. The drive motor controller converts a single phase AC input into three phase motor control. - Page 3 9.33, 9.35 240V Treadmill Safety guidelines you should know and follow include: • Read the owner’s manual and follow all operating instructions. • Operate the treadmill on a solid, level surface.Visually check the treadmill before beginning service or maintenance operations. If it is not completely assembled or is damaged in any way, exercise extreme caution while operating and checking the treadmill.
- Page 4 9.33, 9.35 240V Treadmill General Information For the latest exploded view diagram, part number and part pricing information, visit the Precor dealer website at “www.precor.com/connection. Page 4...
-
Page 5: Procedure 2.1 - Accessing The Hardware Validation Program
Press the OK key to enter the display test. Press the OK or ENTER key several times to step through all of the LED’s on the display. Ensure that all of the LED’s illuminate. Press and hold the OK or ENTER key to exit the display test. Diagram 2.1 - 9.33 Display Numeric Keypad... - Page 6 9.33, 9.35 240V Treadmill KEYBOARD TEST. The keyboard test will place a dot on the display for each key on the display, including the numeric keypad. Pressing a key will cause the dot associated with the key to go out. Test all of the keys in this manner.
- Page 7 9.33, 9.35 240V Treadmill Procedure 2.2 - Accessing the Information Display Program The information display will access the following data; • Odometer • U Boot SW • U Base SW • Lower SW • Usage log • Error log Procedure Plug the power cord into the wall outlet, then turn on the treadmill with the circuit breaker.
- Page 8 9.33, 9.35 240V Treadmill U BASE SW 14. Press the OK or ENTER key. The U Base SW part number will be displayed. The U Base SW is the upper PCA operating system software. 15. Press the OK or ENTER key to exit the U Base SW display.
-
Page 9: Procedure 2.3 - Setting Club Parameters
9.33, 9.35 240V Treadmill Procedure 2.3 - Setting Club Parameters This procedure allows you to change the following settings: • Safety Code • Select Units • Set Max Pause Time • Set Cool Down Time • Set Speed Limit Procedure Plug the power cord into the wall outlet, then turn on the treadmill with the circuit breaker. - Page 10 9.33, 9.35 240V Treadmill 17. Press the OK or ENTER key. 18. Use the ARROW keys to set the COOL SOWN time between 1 and 5 minutes. 19. Press the ENTER key to select the currently cool down time. SET SPEED LIMIT 21.
-
Page 11: Procedure 2.4 - Documenting Software Problems
9.33, 9.35 240V Treadmill Procedure 2.4 - Documenting Software Problems When a problem is found with the software in the upper or lower PCA, record the information listed below. When a problem occurs, record the following information: • Model and serial number •... - Page 12 9.33, 9.35 240V Treadmill Section Three - Checking Treadmill Operation This section provides you with a quick method of checking treadmill operation. Check treadmill operation at the end of a maintenance procedure and when it is necessary to ensure that the treadmill is operating properly.
-
Page 13: Procedure 4.1 - Calibrating The Lift Motor
9.33, 9.35 240V Treadmill Procedure 4.1 - Calibrating the Lift Motor Set the treadmill circuit breaker in the “off” position and unplug the line cord from the wall outlet. Remove the hood. Place the treadmill on it’s right side. Remove hitch and clevis pins that secure the lift tube to the lift platform. - Page 14 9.33, 9.35 240V Treadmill Plug the power cord into the wall outlet, set the treadmill circuit breaker in the “on” position. Press keys RESET, 5,1,7,6,5,7,6,1, sequentially to enter the diagnostics routine. Refer to Procedure 2.1 and advance to the lift test. When the lift calibration number is displayed on...
-
Page 15: Procedure 4.2 - Adjusting Drive Belt Tension
9.33, 9.35 240V Treadmill Procedure 4.2 - Adjusting Drive Belt Tension Set the treadmill circuit breaker in the “off” position and unplug the line cord from the wall outlet. Remove the hood. Place the drive belt tension gauge on the drive belt as shown in Diagram 4.2. - Page 16 9.33, 9.35 240V Treadmill Diagram 4.3 - Drive Belt Adjustment Re-install the hood. Plug the line cord into the wall outlet and set the treadmill circuit breaker in the “on” position. Check treadmill operation per Section 3. Page 16...
-
Page 17: Procedure 4.3 - Treadmill Belt Cleaning
9.33, 9.35 240V Treadmill Procedure 4.3 - Treadmill Belt Cleaning Procedure: First, check for proper operation of the safety stop key. Stand to one side of the treadmill. Insure that the stop key tether is hanging straight down from the stop key and is not wrapped around the handle bars. - Page 18 9.33, 9.35 240V Treadmill Turn the power off. Place your hands on the towel and push it up and down the length of the running deck several times to clean the deck. Remove the towel. Safety Stop Key Tether It is recommended that this procedure be performed frequently to extend the life of the running belt and running deck.
-
Page 19: Procedure 5.1 - Troubleshooting The Keypad And Upper Pca
9.33, 9.35 240V Treadmill Procedure 5.1 - Troubleshooting the Keypad and Upper PCA If the function keys on the electronic console are unresponsive, the problem may be either the upper PCA or keypad. Procedure Set the circuit breaker in the “on” position. - Page 20 Disconnect both keypad cables from the upper PCA. See Diagram 5.2. Note: If the STOP switch cable is disconnected or the STOP switch is activated or defective the message STOP SWITCH will be displayed. Diagram 5.2 - 9.33 Upper PCA & Keypad Upper PCA Heart Rate...
-
Page 21: Procedure 5.2 - Troubleshooting The Incline System
9.33, 9.35 240V Treadmill Procedure 5.2 - Troubleshooting the Incline System Incline System Description: The incline system on these units consists of an AC line voltage driven incline motor (120 Vac or 240 Vac), and an internal 1 KΩ potentiometer for incline position identification. The incline motor contains two motor windings, one to operate the motor in an “upward”... - Page 22 9.33, 9.35 240V Treadmill Diagram 5.4 - Power Control Module Connector Numbering If the incline moves normally skip to step 7. If the display indicates that the incline should be moving and the incline motor does not move and AC line voltage is present, skip to step 12.
- Page 23 9.33, 9.35 240V Treadmill 13. If you have performed all of the procedures above and have been unable to correct the problem, call Precor customer service. 14. Set the treadmill’s on/off switch in the “off” position. Remove the incline motor’s connector from the INCLINE connector on the power control module.
-
Page 24: Procedure 5.3 - Troubleshooting Hand Held Heart Rate
9.33, 9.35 240V Treadmill Procedure 5.3 - Troubleshooting Hand Held Heart Rate Circuit Description The hand held heart rate system is actually a dual system, that is, it can accept a heart rate signal from either the hand held heart rate contacts on the unit’s handlebar or from a Polar heart rate chest strap transmitter. - Page 25 9.33, 9.35 240V Treadmill No hand held reading - Normal chest strap reading Access the diagnostic program (Procedure 3.2). Advance to the heart rate display portion of the diagnostic program. Verify that a hand held signal is not being accepted by firmly grasping both the right and left hand held contacts on the handlebars.
- Page 26 9.33, 9.35 240V Treadmill No hand held reading - No chest strap reading 11. Access the diagnostic program (Procedure 3.2). Advance to the heart rate display portion of the diagnostic program. Verify that neither a chest strap signal or a hand held signal is being accepted with either a heart rate test transmitter or a chest strap transmitter.
-
Page 27: Procedure 5.4 - Troubleshooting The External A.c. Power Source
Procedure 5.4 - Troubleshooting the External A.C. Power Source It is extremely important that any Precor treadmill be connected to and operated on a dedicated 20 amp A.C. circuit. A 20 amp dedicated circuit is defined as: a circuit fed by a 20 amp circuit breaker that feeds a single load. - Page 28 9.33, 9.35 240V Treadmill The circuit breaker correctly feeds a single A.C. outlet but the neutral is common between several A.C. outlets. The common neutral lead must be removed from treadmill’s A.C. outlet and a new neutral lead from the treadmill’s A.C. outlet to the A.C. neutral distribution bar must be added.
-
Page 29: Procedure 5.5 - Troubleshooting The 3 Phase Ac Drive Motor System
9.33, 9.35 240V Treadmill Procedure 5.5 - Troubleshooting the 3 Phase AC Drive Motor System Circuit Description The power control module converts single phase 120Vac or 240Vac into three phase variable frequency current for the AC drive motor. The motor speed is controlled by controlling the frequency of the drive motor current. - Page 30 9.33, 9.35 240V Treadmill 10. Connect an AC voltmeter between terminals 4 & 5 of the OUTPUT connector on the power control module. See Diagrams 5.3 and 5.4. Set the treadmill’s on/off switch in the “on” position. Press the QUICK START key. If the power control module is supplying output, you will momentarily read approximately 55 Vac.
- Page 31 9.33, 9.35 240V Treadmill Procedure 5.6 - Running Belt & Deck Troubleshooting This procedure is to be used to determine the condition of the running belt and running deck combination. A clamp-on ammeter will be used to measure the treadmill’s A.C. input current under load.
- Page 32 9.33, 9.35 240V Treadmill If the peak A.C. current readings are greater than on a new running belt and deck combination but not approaching 20 amperes, the reading will give you an indication of the running belt and deck combination’s general condition.
-
Page 33: Procedure 6.1 - Replacing The Incline Motor
9.33, 9.35 240V Treadmill Procedure 6.1 - Replacing the Incline Motor Note: The replacement incline motor must be calibrated prior to installation (See Procedure 4.1). Set the treadmill’s circuit breaker in the “off” position and remove the AC line cord from the AC outlet. -
Page 34: Procedure 6.2 - Replacing The Incline Platform
9.33, 9.35 240V Treadmill Procedure 6.2 - Replacing the Incline Platform Set the treadmill circuit breaker in the “off” position. Remove the AC line cord from the AC outlet. Carefully, lay the treadmill on its side. Remove the hitch pin and clevis pin that fastens the incline motor tube to the incline platform. - Page 35 9.33, 9.35 240V Treadmill Diagram 6.2 - Incline Mounting Pin Fasten the incline tube to the incline platform with the clevis pin and hitch pin removed in step 3. Set the treadmill in its upright position and thoroughly check it per Section 3.
-
Page 36: Procedure 6.3 - Replacing The Power Control Module
9.33, 9.35 240V Treadmill Procedure 6.3 - Replacing the Power Control Module Set the treadmill’s on/off switch in the “off” position and remove the AC line cord from the AC outlet. Remove the treadmill’s hood. Disconnect the COMM, INCLINE, INPUT, DB and OUTPUT connectors from the power control module. -
Page 37: Procedure 6.4 - Replacing Drive Motor
9.33, 9.35 240V Treadmill Procedure 6.4 - Replacing Drive Motor Set the treadmill’s on/off switch in the “off” position and unplug the treadmill’s line cord from the AC outlet. Remove the hood. Disconnect the drive motor connector from the OUTPUT connector on the power control module. -
Page 38: Procedure 6.5 - Replacing The Circuit Breaker
9.33, 9.35 240V Treadmill Procedure 6.5 - Replacing the Circuit Breaker Set the treadmill circuit breaker in the “off” position and unplug the treadmill’s line cord from the AC outlet. Remove the treadmill’s hood. Remove the two screws that fastens the AC input panel to the frame,. See Diagram 6.4. - Page 39 9.33, 9.35 240V Treadmill Remove the two screws retaining the circuit breaker and remove the circuit breaker. Reference the label on the replacement circuit breaker and set the circuit breaker in its mounting position with the “LINE” side of the breaker facing the input module and the “LOAD”...
-
Page 40: Procedure 6.6 - Replacing The Line Filter
9.33, 9.35 240V Treadmill Procedure 6.6 - Replacing the Line Filter Set the treadmill circuit breaker in the “off” position and unplug the treadmill’s line cord from the AC outlet. Remove the treadmill’s hood. Remove the two screws that fastens the AC input panel to the frame,. See Diagram 6.4. -
Page 41: Procedure 6.7 - Replacing The Line Cord
9.33, 9.35 240V Treadmill Procedure 6.7 - Replacing the Line Cord Set the treadmill circuit breaker in the “off” position and unplug the treadmill’s line cord from the AC outlet. Remove the treadmill’s hood. Remove the two screws that fastens the AC input panel to the frame,. See Diagram 6.4. -
Page 42: Procedure 6.8 - Replacing The Input Module
9.33, 9.35 240V Treadmill Procedure 6.8 - Replacing the Input Module Set the treadmill circuit breaker in the “off” position and unplug the treadmill’s line cord from the AC outlet. Remove the treadmill’s hood. Remove the two screws that fastens the AC input panel to the frame,. See Diagram 6.4. -
Page 43: Procedure 6.9 - Replacing The End Cap Or Belt Guard
9.33, 9.35 240V Treadmill Procedure 6.9 - Replacing the End Cap or Belt Guard Set the treadmill circuit breaker in the “off” position and unplug the treadmill’s line cord from the AC outlet. Remove the four screws (2 lower screws, each side) that retain the end cap. Do Not loosen or move the take up roller mounting/adjustment bolts. - Page 44 9.33, 9.35 240V Treadmill Diagram 6.8 - Belt Guard MountingProcedure 6.10 - Replacing the Upper PCA Notch Belt Guard 11. Check treadmill operation per Section 3 Page 44...
- Page 45 Two running belt gauges, Precor part number 20007-101, are required. It is important that this procedure be followed to maintain correct drive belt and running belt tension. When tension is removed from the running belt, the belt requires 24 hours for it to “relax”.
- Page 46 9.33, 9.35 240V Treadmill Slowly rotate the drive motor flywheel while pressing the drive belt off of the drive roller pulley. Continue until the drive belt “walks” completely off of the drive roller pulley. Drive Belt Mark Bolt Here Drive Roller Pulley Using a fine tip marker or scribe, place a mark on the right hand drive roller mounting bolt directly in front of the drive roller shaft.
- Page 47 9.33, 9.35 240V Treadmill 16. If the belt drifts to the right, slowly turn the right hand mounting bolt clockwise until the drifting stops. If the belt drifts to the left, slowly turn the left hand mounting bolt clockwise until the drifting stops. Only a very small adjustment should be required, 1/8 to 1/4 turn.
- Page 48 This procedure is to be used to replace a take up roller while maintaining the running belt’s original tension and tracking settings. Two running belt gauges, Precor part number 20007-101, are required. It is important that this procedure be followed to maintain correct running belt tension.
- Page 49 9.33, 9.35 240V Treadmill Slide the replacement take up roller into the running belt and set it in its mounting position. Hand start both take up roller mounting bolts that were removed in step 5. Alternate tightening the two take up roller mounting bolts, in order to tighten both ends evenly, until both running belt gauges again read exactly 3%.
- Page 50 Two running belt gauges, Precor part number 20007-101, are required. It is important that this procedure be followed to maintain correct drive belt and running belt tension. Over tensioning the belt will lead to premature running belt wear, premature driver roller bearing failure and premature take up roller bearing failure.
- Page 51 9.33, 9.35 240V Treadmill 24. Remove both drive roller mounting bolts. Remove the drive roller from the treadmill. 25. Remove the running belt and deck from the treadmill. If both sides of the deck have been used, discard the deck. If the bottom side of the deck has not been used, flip the deck so that when it is replaced it will now be the top side.
- Page 52 9.33, 9.35 240V Treadmill 33. Slowly rotate the drive motor flywheel while pressing the drive belt onto of the drive roller pulley. Continue until the drive belt “walks” completely onto of the drive roller pulley. Be sure that the drive belt is fully onto and correctly aligned on the drive roller pulley.
- Page 53 9.33, 9.35 240V Treadmill Wiring Diagram 7.1 - 9.33, 9.35 240 Vac Stop Switch Ω Page 53...
- Page 54 9.33, 9.35 240V Treadmill Block Diagram 7.2 - 9.33, 9.35 240 Vac Page 54...
Need help?
Do you have a question about the 9.33 and is the answer not in the manual?
Questions and answers