Advertisement
ASSEMBLY INSTRUCTION
***Please make sure you have all the parts indicated below prior to assembly.
This unit is heavy and can best be assembled with the help of two or more people.
Diagram 2
D
E
F
G
Diagram 1
and lock was
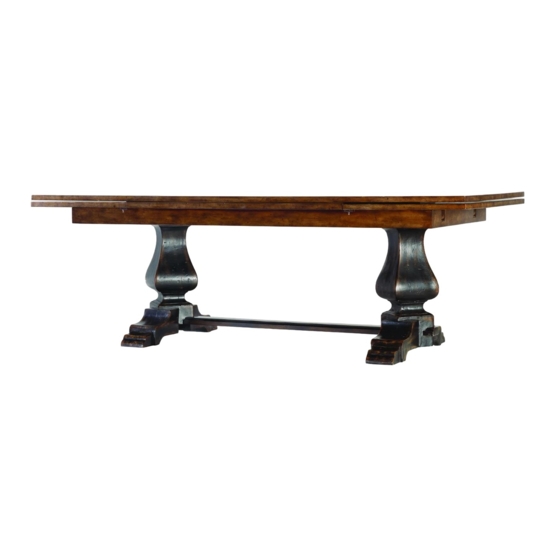
Item#: 3005-75005 Refectory Base-Ebony
3005-75006 Refectory top-Drift
C
B
A
HARDWARE LIST
NO
D
E
F
G
H
1. Place the top (A) upside down on a soft surface;
2. Attach the pedestal (B) to the top (A), align the
holes on the pedestal and the top ,insert 1pc bolt (E)
with 1pc lock washer (F) and 1pc flat washer (G) into
each hole;
3. Secure the bolt (E) in clockwise direction with
allen wrench (D) (see diagram 1);
4. Attach the other pedestal in the same way as step
2 and step 3;
5. Place rail (C) onto two pedestals (B);
6. Insert 1pc bolt (E) with lock washer (F) and flat
washer (G) into holes in rail (C) and corresponding
holes in pedestal (B);
7.
Secure the bolt (E) with allen wrench (D);
8. Turn the table upright (see diagram 2).
It is very important to add the correct washer.
(F & G)If not it will allow the bolt to go too far
This will limit the leaf travel and cause issues
with the function of this leaf.
1/2
73*29*5mm ALLEN WRENCH
50mm BOLT
LOCK WASHER
FLAT WASHER
69*27.2*4mm ALLEN WRENCH
Q'TY
1
12
12
12
1
Advertisement
Table of Contents

Related Manuals for Hooker Furniture 3005-75005


Summary of Contents for Hooker Furniture 3005-75005
- Page 1 ASSEMBLY INSTRUCTION Item#: 3005-75005 Refectory Base-Ebony 3005-75006 Refectory top-Drift ***Please make sure you have all the parts indicated below prior to assembly. This unit is heavy and can best be assembled with the help of two or more people. HARDWARE LIST...
- Page 2 Instruction for the leaves: 1. Pull out the leaves as the arrow direction as shown in diagram 3. Diagram 3 2. Lift the leaves up and make them 1/2” higher than the center top.(See diagram 4) 3. While holding leaf up push all the way in first and lay down the leaves as shown in diagram 5.
Need help?
Do you have a question about the 3005-75005 and is the answer not in the manual?
Questions and answers