Kraus Kohra FUS-14003 Installation Manual
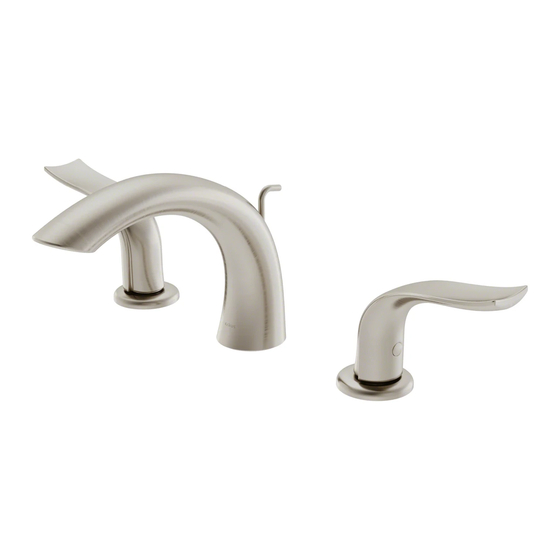
Two handle 8-inch widespread basin bathroom faucet
Hide thumbs
Also See for Kohra FUS-14003:
- Installation manual (12 pages) ,
- Installation manual (16 pages)

Subscribe to Our Youtube Channel
Related Manuals for Kraus Kohra FUS-14003


Summary of Contents for Kraus Kohra FUS-14003
- Page 1 INSTALLATION GUIDE Kohra™ Two Handle 8-Inch Widespread Basin Bathroom Faucet FUS-14003 www.kraususa.com I Toll Free: 1.800.775.0703 I © 2019 Kraus USA Inc. I REV. AUG 06, 2021...
- Page 2 Congratulations on the purchase of your new Please keep the box and packaging materials until your product is completely installed. If you have any questions, require technical assistance, or have any problems with your product: DO NOT RETURN TO STORE Please contact our Customer Service Team 1-800-775-0703 / customerservice@kraususa.com Have the model number available, and retain a copy of your receipt...
- Page 3 Prior to Installation: • Make sure you have all necessary parts by checking the diagram and parts list. If any part is missing or damaged, please contact Kraus Customer Service at 800-775- 0703 for a replacement • Turn o the hot and cold water lines at the angle stops and turn on the old faucet to release any built-up pressure •...
- Page 4 Diagram and Parts List A. Hot Handle Valve B. Spout C. Aerator D. Aerator Wrench E. Cold Handle Valve F. Spout Mounting Hardware F1. Rubber & Metal Washer F2. Mounting Nut G. Three Way Connector H. Hot & Cold Handle Mounting Hardware H1.
- Page 5 Diagram and Parts List Waste Stopper b. Drain Flange c. Rubber Washer d. Concave Washer e. Metal Washer Mounting Nut g. Tail Pipe h. Top Hat Washer Drain Off Pole Washer b h i j k k. Retaining Nut Clip m.
- Page 6 Faucet Dimension 7" (177.1mm) 14 7/8" (379mm) 5 3/8" (136.6mm) MAX 1 7/8" (47.1mm) 1/2-14NPSM-2A Ø 2 1/8" (54mm) 1 1/4-18UNEF-2A 5 5/8" (141.6mm) 1 1/4" Ø (32mm) Installer Tip:...
- Page 7 Remove mounting hardware Step 1: Remove three way connector (G) and mounting hardware (F) from spout (B). Remove mounting hardware (H) from hot and cold valves (A&E). Installing the faucet assembly Step 2: Insert spout (B) through hole in sink or countertop. Secure spout with mounting nut (F2) with an adjustable wrench.
- Page 8 Installing handles Step 3: Insert hot & cold handle valves (A&E) through hole in sink or countertop. Attach hot & cold mounting hardware (H). Secure with adjustable wrench and Phillips head screwdriver. Attach connector Step 4: Attach three way connector (G) to spout (B).
- Page 9 Connect waterlines Step 5: Attach waterlines (not included) to valves (A&E) and angle stops. Tighten until snug. Turn on angle stops and check for leaks. (DO NOT TURN FAUCET Installer Tip: Recommended waterlines: 3/8 in. OD x ½ in IPS Step 6: Install drain Remove waste stopper (a) and...
- Page 10 Install drain - continued Step 6: Insert drain flange (b) through drain hole with rubber washer (c) attached. From underneath, place concave (d) and metal (e) washer on drain flange. Secure with mounting nut (f). Thread tailpipe (g) onto drain (b) and hand tighten.
- Page 11 Step 6. Install drain - continued Attach drain off pole (i) to extender rod (m) with clip (l). Loosen thumb screw (n) on extender rod (m). Push down on lift rod (o) until stopper is in open position. Retighten thumb screw (n).
- Page 12 Replacement Parts Finish Part No. Replacement Part 1. Handle SFS* KP27000 2. Set Screw KP27001 3. Cover Button KP27002 KP27003 4. Screw SFS* 5. Handle Cover KP27004 6. Lock Nut KP27005 7. Cartridge H KP27006 8. Cartridge C KP27007 9. Spacer KP27008 10.
-
Page 13: Troubleshooting
Troubleshooting If you have followed the instructions carefully and your faucet still does not work Hexagon Nut properly, take the following corrective steps: PROBLEM CAUSE ACTION Leakage under faucet handle Hot or cold cartridge (7 or 8) may be Remove cover button (3). Loosen set loose. - Page 14 Any product reported to the authorized dealer or to Kraus as being defective within the warranty period will be repaired or replaced with a product of equal value at the option of Kraus. This warranty extends to the original owner or end-user, and is not transferable to a subsequent owner.
- Page 15 Puerto Rico shipping charges may apply). International shipping fees are not included. Commercial Warranty Kraus extends the above warranty for a period of one (1) year to purchasers of products for industrial, commercial, and business use. All incidental or consequential damages are specifically excluded. No additional warranties, express or implied, are given, including but not limited to any implied warranty of merchantability or fitness for a particular purpose.
- Page 16 IMPORTANT Register Your Kraus Product Activate Your Warranty Access Premium Customer Support Get Product Information REGISTER TODAY http://www.kraususa.com/registration www.kraususa.com...
Need help?
Do you have a question about the Kohra FUS-14003 and is the answer not in the manual?
Questions and answers