Table of Contents
Advertisement
Available languages
Available languages
Quick Links
Advertisement
Chapters
Table of Contents

Subscribe to Our Youtube Channel
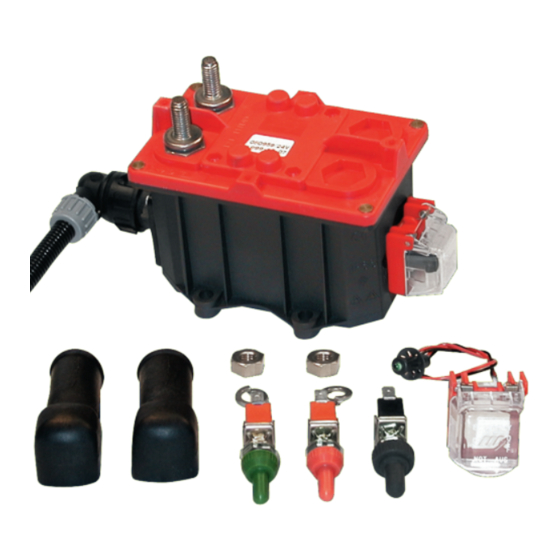
Related Manuals for Littelfuse 08096500 Series


Summary of Contents for Littelfuse 08096500 Series
- Page 1 ADR 2003/A MANUALE STACCABATTERIA ADR NEGATIVO ADR NEGATIVE BATTERY SWITCH MANUAL...
-
Page 2: Table Of Contents
Manuale tecnico staccabatteria ADR negativo versione ADR 2003/A PAGINA INTRODUZIONE _____________________________________________________________________ 3 CERTIFICAZIONI – CONFORMITÁ – OMOLOGAZIONI ___________________________________ 3 AVVERTENZE GENERALI _____________________________________________________________ 3 PRESCRIZIONI AMBIENTALI __________________________________________________________ 3 DEFINIZIONI _______________________________________________________________________ 4 Funzioni pulsanteria _______________________________________________________________ 4 FUNZIONAMENTO ___________________________________________________________________ 5 Attivazione ______________________________________________________________________ 5 Disattivazione ____________________________________________________________________ 5 6.2.1 Disattivazione controllata __________________________________________________ 5... -
Page 3: Introduzione
1 - INTRODUZIONE Lo scopo dello staccabatteria elettronico automatico è quello di sezionare i carichi dalla batteria e di proteggere l’impianto elettrico contro i cortocircuiti e/o sovraccarichi in tutti gli automezzi ed in particolare su quelli adibiti al trasporto di merci pericolose. Lo staccabatteria provvede a: •... -
Page 4: Definizioni
5 - DEFINIZIONI SIGLA DEFINIZIONE Negativo diretto da batteria. Massa dell’impianto (solitamente comune alla massa telaio) e quindi sotto stacca- batteria. In condizioni di attivazione tale tensione è comune fra la tensione delle batterie, quella dell’alternatore e quindi quella disponibile sull’impianto. In condizioni stabili di disattivazione tale linea è... -
Page 5: Funzionamento
6 - FUNZIONAMENTO Collegando lo staccabatteria come nello schema originale indicato nella Figura 1 si ha il seguente funzionamento: 6.1 - Attivazione È possibile attivare lo staccabatteria girando la Chiave in posizione “ON” e successivamente spingendo momentaneamente il comando P in posizione “BATTERY ON”. -
Page 6: Esclusione Funzione Di Disattivazione Automatica
6.2.3.1 - Esclusione funzione di disattivazione automatica È possibile imporre l’esclusione della funzione di disattivazione automatica, esclusione che prevede la prosecuzione della fase di attivazione anche in corrispondenza di un abbassamento della tensione di impianto oltre la tensione di soglia (corto-circuito). Ciò... -
Page 7: Istruzioni Per Il Montaggio
8 - ISTRUZIONI PER IL MONTAGGIO 8.1 - Avvertenze per il montaggio • Dopo aver tolto l’imballo assicurarsi dell’integrità dell’apparecchio. • È responsabilità dell’installatore garantire l’integrità e l’idoneità dell’installazione stessa, in particolare l’uso di strumenti ed accessori adeguati per il cablaggio nonché la corretta esecuzione dello stesso secondo le istruzioni sotto riportate e le norme vigenti, in particolare secondo la norma ADR. -
Page 8: Schemi Di Collegamento Alternativi
8.3 - Schemi di collegamento alternativi Il montaggio dello staccabatteria come da Figura 1 può comportare problemi legati alle varie tipologie di impianto dei veicoli oppure alle specifi che esigenze del cliente. La soluzione di alcuni di questi problemi sono descritti nei paragrafi seguenti. Le modalità di installazione devono essere realizzate in conformità alla normativa ADR. -
Page 9: Utilizzo Selezionabile Fuori Chiave O Sotto Chiave
8.3.2.3 - Utilizzo selezionabile fuori chiave o sotto chiave In questo specifi co caso invece è possibile selezionare mediante un deviatore supplementare il funzionamento dello staccabatteria fuori chiave, analogamente al paragrafo precedente, oppure sotto chiave, come prevede il funzionamento standard. Per i collegamenti vedere lo schema riportato in Figura 5 (vedi pag. -
Page 10: Sezionamento Dell'alternatore
8.4.2 - Sezionamento dell’alternatore Esistono in commercio veicoli dotati di alternatori che non possono essere diseccitati direttamente nonostante dispongano del morsetto D+ sulla propria carcassa, in quanto il morsetto D+ non viene utilizzato come punto di alimentazione del regolatore di tensione. Infatti il cortocircuito del D+, o della relativa spia, verso massa può... -
Page 11: Verifi Ca Funzionamento Dopo Montaggio
8.5 - Verifi ca funzionamento dopo montaggio Per la verifi ca del corretto funzionamento effettuare in sequenza le istruzioni seguenti: RIF. AZIONE VERIFICA EFFETTO Stato iniziale del dispositivo: disattivato Non si deve verifi care l’accensione del quadro stru- Inserire la Chiave e portarla in posizione “ON” menti. -
Page 12: Evoluzioni Prodotto
9 - EVOLUZIONI PRODOTTO 9.1 - Versione 2000 Versione avente sul cablaggio 8 poli (posizione 2) il fi lo nero per l’alimentazione diretta da batteria massimo 0,5A non protetti, come da Figura 12 (vedi pag. fi nali). Inoltre temporizzazione per disattivazione controllata a 10 secondi. 9.2 - Versione 2003 Tale versione si differenzia dalla precedente in quanto è... -
Page 13: Sostituzione Del Dispositivo
11.3 - Sostituzione del dispositivo A seguito di un intervento durante un corto-circuito di notevole entità (es. corto-circuito sul motorino di avviamento) verifi care il corretto funzionamento dello staccabatteria. In caso di dubbia valutazione sostituirlo secondo le modalità sotto-riportate e inviarlo presso il servizio assistenza MENBER’S. •... - Page 14 ADR Negative battery switch technical manual version ADR 2003/A PAGE INTRODUCTION _____________________________________________________________________15 TYPE-APPROVAL - CERTIFICATION - CONFORMITY ___________________________________15 GENERAL DIRECTIONS ______________________________________________________________15 ENVIRONMENTAL DIRECTIONS ______________________________________________________15 DEFINITIONS _______________________________________________________________________16 Push-button panel operations ______________________________________________________16 OPERATION _______________________________________________________________________17 Activation _______________________________________________________________________17 Deactivation _____________________________________________________________________17 6.2.1 Controlled deactivation ____________________________________________________17 6.2.2 Emergency deactivation ___________________________________________________17 6.2.3...
-
Page 15: Introduction
1 - INTRODUCTION The aim of the automatic electronic battery switch is to isolate the battery loads and to protect the electrical system against short circuits and/or overloading on all vehicles and in particular on those used for transport of dangerous goods. The battery switch acts to: •... -
Page 16: Definitions
5 - DEFINITIONS MARK DEFINITION Negative direct from battery. System earth (usually common to the chassis earth) and therefore below the battery switch. In the ON condition this voltage is common in the battery volta- ge, that of the alternator is therefore available on the system. In stable OFF condition, this line is isolated from 31A –... -
Page 17: Operation
6 - OPERATION Connecting the battery switch as in the original diagram indicated in Pict. 1 gives the following operations: 6.1 - Activation It is possible to activate the battery switch by turning the Key into the “ON” position and then momentarily pressing the button P into the “BATTERY ON”... -
Page 18: Excluding Automatic Deactivation
6.2.3.1 - Excluding automatic deactivation It is possible to impose exclusion of the automatic deactivation function, an exclusion that provides for the continuation of the activation phase, even in correspondence with a voltage drop in the system below the threshold voltage (short-circuit). This presents itself in the following cases: •... -
Page 19: Installation Instructions
8 - INSTALLATION INSTRUCTIONS 8.1 - Directions for installation • After unpacking, ensure the integrity of the device. • It is the installer’s responsibility to guarantee the integrity and suitability of the actual installation, particularly the use of suitable tools and accessories for the wiring as well as the correct use thereof in accordance with the following instructions and current regulations, and in particular in accordance with the ADR regulations. -
Page 20: Alternative Connection Diagrams
8.3 - Alternative connection diagrams Installation of the battery switch as in Pict. 1 can cause problems linked to various types of vehicle system, or according to the client’s specifi c requirements. The solutions to some of these problems are described in the following paragraphs. The installation method must be carried out in accordance with ADR regulations. -
Page 21: Key Or No Key Selectable Use
8.3.2.3 - Key or no key selectable use In this specifi c case it is instead possible to select, by means of a supplementary switch, battery switch operation without key, similar to the preceding paragraph, or by key, as provided for standard operation. For connections see the diagram set out in Picture 5 ( see the ending pages) 8.3.3 - Use of devices that have high current absorption... -
Page 22: Isolating The Alternator
8.4.2 - Isolating the alternator There are vehicles on the market that are equipped with alternators that cannot be directly de-energized even though they have a D+ terminal on their casing, as the D+ terminal is not used as a supply point for the voltage regulator. -
Page 23: Check Operation After Installation
8.5 - Check operation after installation To check correct operation, carry out the following instructions sequentially: REF. ACTION VERIFY EFFECT Initial state of device: deactivated Insert Key and move to “ON” position The instrument panel must not light up. Press P into “BATTERY ON”... -
Page 24: Product Evolution
9 - PRODUCT EVOLUTION 9.1 - Version 2000 Version having, on the 8 pole wiring (position 2), the black wire for direct supply from battery maximum 0.5A unprotected, as in Picture 12 ( . Also timing for controlled deactivation of 10 see the ending pages) seconds. -
Page 25: Device Replacement
11.3 - Device replacement Following intervention during a signifi cant short circuit (e.g. short circuit on the starter motor) check correct operation of the battery switch. In the event of dubious evaluation, replace in accordance with the method set out above, and send it to MENBER’S service centre. •... - Page 26 Fig. 1 / Pict. 1 Fig. 2 / Pict. 2...
- Page 27 Fig. 3 / Pict. 3 Fig. 4 / Pict. 4...
- Page 28 Fig. 5 / Pict. 5 Fig. 6 / Pict. 6...
- Page 29 Fig. 7 / Pict. 7 Fig. 8 / Pict. 8...
- Page 30 Fig. 9 / Pict. 9 Fig. 10 / Pict. 10...
- Page 31 Fig. 11 / Pict. 11 Fig. 12 / Pict. 12...
- Page 32 SERVIZIO ASSISTENZA TECNICA...
Need help?
Do you have a question about the 08096500 Series and is the answer not in the manual?
Questions and answers