Table of Contents
Advertisement
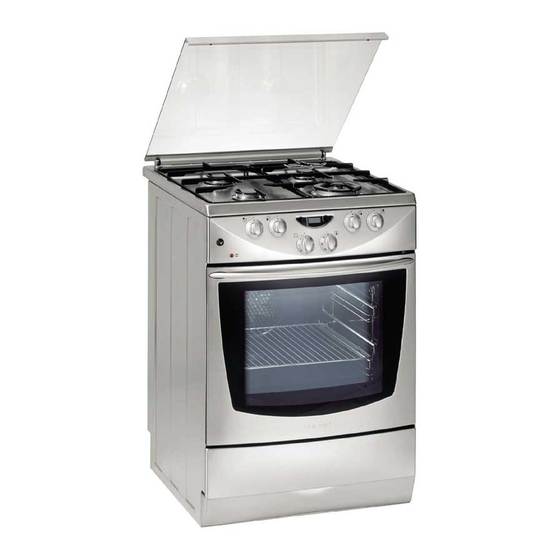
Freestanding combined cooker
Dear Customer!
Congratulations on your purchase. See for yourself: our
products read reliability.
These ample instructions have been compiled in order to help
you learn how to handle the appliance. They will show you step
by step what your appliance is capable of, so please read them
carefully before you attempt to use your cooker for the first
time.
Contents
Safety precautions .......................................................... 2
If you notice any malfunction in the gas installation, or if you
smell gas in the room:
Description of the appliance .......................................... 3
Prior first use .................................................................. 4
Gas burner control ......................................................... 4
Electric hotplates ............................................................ 5
Oven................................................................................. 6
Important warnings!
Safety precautions
• To avoid any possible hazard, the appliance may be
installed by qualified personnel only, authorized by the
gas distributing company and by the authorized service.
Installation should be carried out in accordance with the
legal regulations and technical requirements of the local
gas supplier. Important instructions in this regard may
be found in the Section "Instructions for installation".
• Any repairs by unqualified persons may result in explosion,
electric shock or short circuit. In order to avoid possible
injuries to your body or to the appliance, do not attempt any
repairs by yourself. Such work should be carried out by
qualified service personnel.
• Before installing and connecting the appliance check
whether the specifications of the local gas supplier (type of
gas and pressure) correspond to the specifications of the
appliance.
• Technical specifications of the appliance are indicated on
the rating plate.
2
Safety warnings are listed on page 3.
The first thing to do is to check if your appliance has arrived
undamaged. In case you find any transport damages, please
report it immediately to your local dealer, or to the regional
warehouse which supplied the appliance. You will find their
phone numbers on the invoice or on the delivery note.
We hope your cooker will successfully serve its purpose for
many years.
Cleaning and maintenance ...........................................12
Troubleshooting guide ..................................................13
Note!
Replacement of parts ....................................................14
Instructions for installation and connection ...............14
Gas connections .............................................................15
Electrical connections ...................................................17
Technical specifications ................................................18
Electronic timer.............................................................18
operation
• This appliance is not connected to a chimney or vent
opening. The appliance must be installed and connected in
accordance with the standing regulations. Special attention
should be taken in regard to adequate ventilation.
• During the operation of gas burners the room may be filled
with extra heat and humidity, so it is necessary to assure
adequate ventilation. Occasional opening of the window or
door should provide enough exchange of air. During the
prolonged use of the appliance, or during a very intense use,
more ventilation will be required, and it will probably be
necessary to engage the extractor hood.
• Hot grease is highly inflammable, so pay extra attention
when preparing food with grease or oil. Frying may be
carried out only under constant surveillance.
• Never clean the oven or the cooktop with hot steam devices
or high-pressure jet cleaning device, as they may provoke
short circuit.
• Before opening the control panel and before any attempted
repairs disconnect the appliance from the mains.
Instructions for use, installation and connection
179732
EN
Advertisement
Table of Contents

Related Manuals for Gorenje K 7708 E


Summary of Contents for Gorenje K 7708 E
-
Page 1: Table Of Contents
179732 Freestanding combined cooker Safety warnings are listed on page 3. Dear Customer! The first thing to do is to check if your appliance has arrived Congratulations on your purchase. See for yourself: our undamaged. In case you find any transport damages, please products read reliability. -
Page 2: Intended Use
179732 • Do not keep any flammable material in the drawer under the • The appliance must be placed directly on the floor, without oven (paper, wiping cloth, plastic bags, cleaning agents or any supports. sprays, etc.), as they might cause fire. Use the drawer to The symbol on the product or on its packaging keep only the oven utensils (flat baking pan, oil collector, oil indicates that this product may not be treated as... -
Page 3: Electric Ignition
179732 1 Program clock (certain models only) Cooking zone, rear left, hotplate 2 Oven signal light. On when the oven is heated, and off Signal lamp, operation. Indicates the operation of oven or when the set temperature is reached. a hotplate. 3 Oven ON/OFF button and function mode Cooking zone, front left, hot plate selection. -
Page 4: Ignition And Operation Of Burners
179732 Gas faucet is closed Ignition and operation of burners Maximum power position Gas burners may be ignited by means of electric ignition spark Minimum power position plug, fitted adjacent to each burner (certain models only). To facilitate positioning small dishes on the burner grid, place Single handed ignition the attached support extension over the auxiliary burner. -
Page 5: Energy Saving Tips
179732 • Hot oil or grease is highly inflammable, so the Energy saving tips preparation of food with large quantities of oil (chips) The bottom of the dish is too should be under constant surveillance at all times. thin and becomes crooked in the Special warning for hotplates process of heating up. -
Page 6: Oven Guide Levels
179732 Some models have installed two lamps for oven lighting; one at the top of rear wall and the second one at the middle of right- Defrosting handed side wall . This is the mode with air, circulating without any of the heaters being turned on. -
Page 7: Telescopic Slide Guides
179732 (deep tray) for moist cake, for roasting or for intercepting Baking with upper and lower heater dripping oil/grease. • Use only a single guide level. • This baking position is especially suitable for baking dry pastry, bread and teacakes.Use dark baking pans. Light pans reflect heat and pastry is not adequately browned. -
Page 8: Roasting
179732 Pastry Baking Table Type of pastry Guide level Temp. Guide level Temp. Baking time (from down (°C) (from down (°C) (in min.) upwards) upwards) Sweet pastry Raisin cake 150-160 55-70 160-170 Ring cake 160-170 150-160 60-70 Tree cake (tart form) 160-170 150-160 45-60... -
Page 9: Grilling And Browning (Barbecue)
179732 Roasting Table Type of meat Weight Guide level Temp. Roasting time Temp. Roasting (in grams) (from bottom up) (°C) (in min.) (°C) time (in min.) Beef Beef loin 1000 180-190 100-120 200 -220 Beef loin 1500 200-220 170-180 120-150 Roastbeef, rare 1000 220-230... -
Page 10: Preserving Of Fruit And Vegetables
179732 Grill table Type of meat for grill Weight Guide level Temp. Temp. Grill time (in grams) (from bottom up) (°C) (°C) (in min.) Meat and sausages 2 beefsteaks, rare 14-16 2 beefsteaks, medium 16-20 2 beefsteaks, well done 20-23 2 pork scrag fillets 19-23 2 pork chops... -
Page 11: Cleaning And Maintenance
179732 Cleaning and maintenance Never clean the appliance with pressurized hot steam cleaner! Aggressive cleaning accessories for dishes are not suitable for Before cleaning switch the cooker off and let it cool down cleaning of rims, as they might cause scratches. completely. -
Page 12: Oven Drawer
179732 they close properly (fig. 4). If you have trouble closing the door, Oven ceiling check if the hinges are properly inserted into their slots. (certain models only) Attention! Never let the hinge locks spring out, as the springs • Before lowering the infrared heater disconnect the appliance are strong and may cause injuries. -
Page 13: Replacement Of Parts
179732 fuse or switch off the main switch), then reconnect it to the Baking results are disappointing... mains and set the correct daily time. • did you remove the grease filter? • did you follow the instructions and warnings from the section Program clock display is flashing…... -
Page 14: Leveling The Appliance And Extra Support
179732 the cabinet of equal height as the appliance. Suspended direction or another. Adjustable legs will be turned easier if the cabinets may be installed at such height as not to impede the appliance is somewhat lifted up and tilted. cooking process. -
Page 15: Nozzle Chart
179732 Nozzle chart Type of gas, Auxiliary burner Normal burner Large burner Triple burner pressure Wobe number Standard Fast Natural gas H Nominal heat input 0,36 0,36 1,90 0,46 0,76 1,56 Wo=45,7÷ (kW) 54,7 MJ/ m Consumption (l/h) 95,21 34,4 95,21 34,4 180,9... -
Page 16: Electrical Connections
179732 Electrical connections Open the connection box using the screwdriver, as Colour code shown by the drawing on the cover. L1, L2, L3 = exterior live wires, usually coloured black, black, Connection to the mains power can be done only by brown. -
Page 17: Technical Specifications
179732 Technical specifications Freestanding combined cooker type K44E2-234VD K44D2-244VD K44D1-234ND K44D2-234VD 85/60/60 nebo 90/85-60/60 Dimensions height / width / depth (cm) Cooking zone hotplates (kW) B = fast hotplate N = normal hotplate Rear left Front left Front right Rear right Gas burners * D = Triple-ring burner B = large burner... -
Page 18: Setting The Conventional (Manual) Operation
179732 Caution: In case you fail to set the current time within 7 or "-". The symbol S1 is off if the end time is greater than the seconds following the plugging of the appliance to mains current time + the preset period of operation. power, it will start running automatically.
Need help?
Do you have a question about the K 7708 E and is the answer not in the manual?
Questions and answers