Table of Contents
Advertisement
Quick Links
Advertisement
Table of Contents

Related Manuals for Gorenje K55203AW


Summary of Contents for Gorenje K55203AW
-
Page 3: Important Precautions
OPERATING AND MAINTENANCE INSTRUCTIONS Dear customer! Thank you for purchasing a new combined electric. following information will help you understand the features of the appliance and use it safely. We hope the appliance will serve you successfully for a long period of time. - Page 4 resetting to another type of gas must endorsed Certificate of Warranty by the authorized service. Failure to do so would render the warranty void. The appliance must not be used for any other purposes other than for the preparation of food. Using appliance other purposes...
- Page 5 vapor hood with mechanical extraction). Prolonged operation of the appliance may require extensive ventilation, for instance opening the window or boosting the performance of the hood with a mechanical fan. appliance requires minimum air admission of 2m for every kW of power input. Never use naked light to detect gas leakage! If you detect a flaw on the gas...
- Page 6 objects on the appliance or at a distance shorter than its safety distance (the shortest distance of an appliance from combustible - 100 items is 750 mm in the direction of main radiation and 100 mm in other directions). Do not put any flammable objects close burners, oven...
- Page 7 could be heated up up to a high temperature. At pulling out of hot shelf the surfaces and objects coming into contact or being in a close distance damaged. Do not operate the appliance with pulled out shelf. The objects stored in the shelf can be hot, therefor it is not allowed to put in this storage shelf...
- Page 8 85%,...
- Page 10 Solely an authorised, skilled person install range. authorised person is obliged to set range cooking plate horizontal position, to connect it to the mains and to check up on its duty. Installation of the range must be confirmed in the certificate of warranty.
-
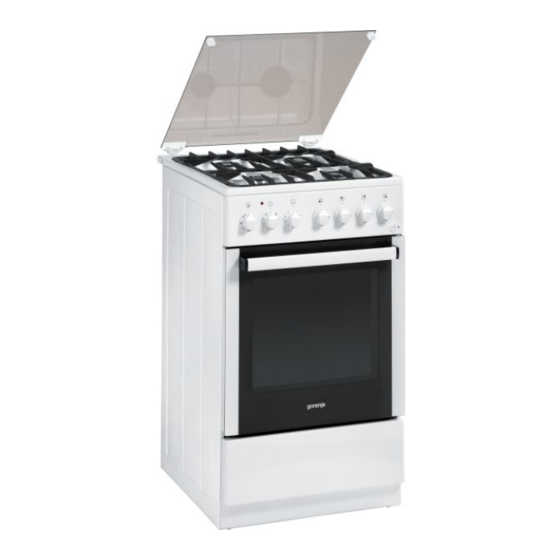
Page 11: Control Panel
CONTROL PANEL 1. Left front burner control knob 2. Left rear burner control knob 3. Right rear burner control knob 4. Right front burner control knob 5. Temperature selector 6. Oven control knob 7. Oven operation indicator 8. High voltage gas ignition switch 9. -
Page 12: Operation
the factory treatment. Be sure that the power cords of adjacent or other appliances do not come into contact with hotplates, oven door or other hot parts of the range while in operation. manufacturer declines responsibility injuries persons or damages to the appliance resulting from improper usage of the appliance. - Page 13 COOKING HOB LIGHTING THE HOB BURNERS Press the appropriate burner control knob slightly towards the appliance and turn it anti- match or any gas ignition device. After firing the burner hold the knob pressed to a limit position to the panel for about 5 seconds till the flame sensor heats up.
- Page 14 SHUTTING THE HOB BURNERS OFF position and check whether the flame is extinct COOKING Use low and wide cookware for preparing food on gas burners. Make sure the burner flames heat the dish bottom and do not go beyond its rim. The appliance is fitted with different size burners.
- Page 15 CAUTION Before opening the hob lid any spilled liquid must be removed from the lid surface. Do not close the hob lid if the burners are still hot! INSTRUCTIONS FOR USING THE GLASS LID ATTENTION! Glass lid may crack if it is heated. Before closing the lid switch off all burners.
-
Page 16: Oven Interior
down. Do not use abrasive detergents to clean the lid, as they may scratch the glass surface and cause discoloration. OVEN INTERIOR Oven is fitted with three level side guides for inserting the grid. It is also fitted with the top heater, used also for grilling, and the bottom heater located under the oven bottom. - Page 17 INSERTING OF GRID IN THE OVEN OVEN FUNCTIONS AND APPLICATIONS Oven illumination on. Heating by means of top and bottom heaters. The temperature selector can be set anywhere between 50-...
- Page 18 Grilling infrared radiation. temperature selector maximum position. Grilling assisted with oven fan. Temperature inside the oven is higher towards top. temperature selector is set between the 150- range. Tip: This function is also used for grilling 150- 150- or baking bulky meat chunks at high 150 - temperature.
- Page 19 This new cooking mode is ideal for making pizza. Pizza is baked in a preheated oven at a temperature of approx. 190- pizza is placed in bottom guide level for 20 minutes, depending on the size of pizza. Noticed baking time is for information only (depends on sort of pizza) Warming zone...
- Page 20 of oven. Youwill find details in the section Cleaning and maintenance. clean BAKING AND ROASTING CHART Below some recommended temperatures for the preparation typical food for your guidance. 50-70 Drying 50-70 130-150 Stewing 130- 130-150 130- 150-170 Preservation 150- 150-170 150-17 180-220 Baking of yeast dough...
- Page 21 FOOD GRILLING Grilling with the oven door shut. The position of grid depends on the mass and the type food. As a general rule the grid should be placed in top level guide. ATTENTION: When using a grill, the accessible parts (oven door, etc.) may become very hot, so make sure that children are well away at a safe distance from the oven.
-
Page 22: Cleaning And Maintenance
WARNINGS To use the oven without timer, set the osition. switch on: to start oven operation cooking time. If the selected cooking time is less than 20 minutes, we suggest you turn the control knob to 30 minutes and then return to the required time setting. (ON) (ON) CLEANING... -
Page 23: Cleaning The Cabinet
Wait until the range is cool. CLEANING THE CABINET Clean the exterior with a damp sponge and some detergent. Fat stains can be removed with warm water special detergent enamel. Never clean enameled surfaces with abrasive agents they permanently damage the surface of the appliance. - Page 24 NOTICE Since the burner distributor caps are made of aluminum alloy, we discourage you from cleaning them in a washing machine. OVEN Clean the oven walls with a damp sponge detergent. To clean stubborn stains burned into the oven wall use a special detergent for enamel.
-
Page 25: Bulb Replacement
BULB REPLACEMENT Set all the control knobs to the OFF position and disconnect the range from the mains. Unscrew the bulb glass cover in the oven by turning it anti-clockwise. Unscrew the bulb and replace it with a new bulb. Replace the bulb glass cover. - Page 26 OVEN Procedure for cleaning of internal glass door.
-
Page 27: Warranty Terms And Conditions
WARRANTY TERMS AND CONDITIONS In case of any defects to the appliance during the warranty period, do not attempt to repair it by yourself. Make a claim to the nearest authorized dealer or place of purchase, and make sure you can produce the endorsed Certificate of Warranty. -
Page 28: Important Precaution
DISPOSAL OF OBSOLETE APPLIANCES This appliance is marked in accordance with Directive 2012/19/EU on waste 2012/19/EU electrical and electronic equipment - WEEE. - WEEE. After the expiry of its useful life deliver the appliance to the collecting place for used electric and electronic equipment. elecronic equipment - WEEE). - Page 29 from electric mains power. After installation the qualified personnel should perform the following: Leakage test on gas couplings, and correct electric connection to the mains. Check burners their adjustment (oven burner prime air, saving power input, thermoelectric sensors). Explain to the customer all functions of appliance particulars regarding...
-
Page 30: Connection To Gas Supply
resistance the cooker can be positioned on any floor, as long as it is not located on a pedestal. A minimum distance of 750 mm, in line Thermal stability walls, surrounding elements and spaces (material of floor, partitions and walls around the cooker) must be at least CONNECTION TO GAS SUPPLY... - Page 31 CONNECTION TO THE LPG NETWORK (G30) Special LPG coupling must be installed at (G 30) the 1/2" pipe connection. FLEXIBLE HOSE CONNECTION For safety reasons use only the certified hose complying with local standards. We recommend length of 1000 mm for connection according.
- Page 32 1. Connection ending 2. Knee 3. Connection hose (connection from the right) 4. Connection hose (connection from the left) 5. Fixing clamp 6. Back cover of the cooker CONNECTION TO THE MAINS POWER NOTE: The combined cooker is a Class I appliance according to the electric shock prevention degree...
- Page 33 immediately replaced with a new one. CAUTION Make sure that the power cord is installed in such way to avoid touching hot parts of the cooker (exhaust at the back side, bottom part of the hob). High temperature could cause damage to the insulation. BURNER SETTINGS...
-
Page 34: Conversion To Another Type Of Gas
MINIMUM OUTPUT ADJUSTMENT Before starting adjustments disconnect the appliance from the mains power supply. Adjustments must be carried out with the tap at the "SAVING" position. The minimum gas output is correctly adjusted when the inner cone of the flame arrives at the height of 3 to 4 mm. If this is not the case, first remove the tap knob and then tighten or loosen the screw C, depending on whether the flame... -
Page 35: Leveling The Appliance
LEVELING THE APPLIANCE Cooker hob must be leveled in horizontal position by means of 4 leveling screws supplied with the appliance. PROCEDURE Remove the range receptacle; Tilt the cooker on one side; Screw plastic screws into the bottom crossbar front and rear openings on one side;... - Page 36 / Burner / Auxiliary / / Semi-rapid / / Rapid / / Natural gas / G 20 0,83 1,12 1,37 Nozzle diameter (mm) / Natural gas / G 20 RU,BY 0,77 1,01 1,22 Nozzle diameter (mm) / Propane-butane / G 30 0,50 0,66 0,83...
- Page 37 TECHNICAL DATA RU, BY, KZ COMBINED ELECTRIC K55203AW AND GAS COOKER Dimensions: 850 / 500 / 605 height / width / depth (mm) Package dimensions: 950 / 570 / 716 height/ width / depth (mm) Hotplates - Burners Left front (kW)
-
Page 38: Information List
INFORMATION LIST Model K55203AW More efficient Less efficient Energy consumption (KWh) 0,96 Time (min) 55,6 0,95 (kWh) Energy consumption (KWh) Time (min) 50,8 Useful volume (liters) Oven size small MEDIUM large Noise level (db) Standby- power consumption (W) (stanby) (W) - Page 39 ACCESSORIES K55203AW Wire shelf Backing try Grill pan Set of adjustable feets Nozzles for G 30 30 mbar G 30 Grating under small container Lifetime 10 years Does not contain harmful substances - - RoHS - RoHS RoHS RoHS Earthing sign...
Need help?
Do you have a question about the K55203AW and is the answer not in the manual?
Questions and answers