Table of Contents
Advertisement
Quick Links
NANO
NANO
USER MANUAL
USER MANUAL
EN
EN
MANUALE D'USO
MANUALE D'USO
IT IT
CHAIN ACTUATOR / ATTUATORE A CATENA
Doc. 86371S - Rev. 01/02/2021
Doc. 86371S - Rev. 01/02/2021
NANO BMSLine
1/43
ULTRAFLEX CONTROL SYSTEMS s.r.l.
Via XXV Aprile 45
16012 BUSALLA (GE)
Tel. +39 010 9768232
Fax +39 010 9768233
e-mail:ucs@ultraflexgroup.it
www.ultraflexgroup.it/ucs
www.ultraflexcontrolsystems.com
Drw. / Dis. 37304
Drw. / Dis. 37304
ITALY
Advertisement
Table of Contents

Subscribe to Our Youtube Channel
Related Manuals for UCS NANO BMSLine


Summary of Contents for UCS NANO BMSLine
- Page 1 NANO NANO USER MANUAL USER MANUAL MANUALE D’USO MANUALE D’USO IT IT ULTRAFLEX CONTROL SYSTEMS s.r.l. NANO BMSLine Via XXV Aprile 45 16012 BUSALLA (GE) ITALY Tel. +39 010 9768232 Fax +39 010 9768233 e-mail:ucs@ultraflexgroup.it www.ultraflexgroup.it/ucs CHAIN ACTUATOR / ATTUATORE A CATENA www.ultraflexcontrolsystems.com...
- Page 2 USER MANUAL USER MANUAL MANUALE D’ISTRUZIONI MANUALE D’ISTRUZIONI IT IT Drw. / Dis. 37304 Doc. 86371S - Rev. 01/02/2021 2/43...
-
Page 3: Table Of Contents
8.1 Cable connection .........16 8.1 Collegamento cavi ........16 8.2 Wiring diagrams .........17 8.2 Schemi di collegamento ......17 8.2.1 ModBus Net connection using 8.2.1 Collegamento ad una rete ModBus cables supplied by UCS - General con cavi forniti da UCS - Schema Diagram ........17 generale ..........17 8.2.2 Polarity inversion control ...18 8.2.2 Comando inversione di polarità .18 8.2.3 Simple ModBus Network ...19 8.2.3 Semplice rete ModBus ....19... -
Page 4: Introduction
USER MANUAL USER MANUAL MANUALE D’ISTRUZIONI MANUALE D’ISTRUZIONI IT IT 1 INTRODUCTION 1 INTRODUZIONE ..1.1 Symbols used ..1.1 Simbologia impegata The operations which can be dangerous Le operazioni che possono presentare rischi, if they are not carried out correctly are se non effettuate correttamente, sono indicated with this symbol. - Page 5 Systems srl” cavo danneggiato rivolgersi a “UCS – Ultraflex Control Systems srl” In case of installation with automatic systems, In caso di installazione con sistemi automatici, please contact UCS Technical Support. If the rivolgersi all’Assistenza Tecnica UCS. Nel caso automatic system enables the actuators in cui il sistema automatico attivi gli attuatori continuously, the mechanic and electronic in maniera continua, si potrebbe avere una components could wear prematurely.
- Page 6 USER MANUAL USER MANUAL MANUALE D’ISTRUZIONI MANUALE D’ISTRUZIONI IT IT The cable types, lenghts and sections must Le tipologie, le lunghezze e le sezioni dei cavi be choosen according to the technical devono essere scelte in base alle specifiche specifications provided by the manufacturer. funzionali fornite dal costruttore. I cavi devono essere posati correttamente, in Cables must be laid properly, so that they modo da non tagliarsi, piegarsi o attorcigliarsi. cannot be cut, bent or twisted. It is necessary E’ necessario inoltre dotare i cavi posati nei to provide the cables laid into the window profili del serramento di tubi isolanti in grado profiles with insulating tubes able to resist to...
-
Page 7: Informative Letter
Nothing contained in this manual can be nella presente pubblicazione può inoltre essere interpreted as a modification or confirmation interpretato come modifica o asserzione dei of the terms of any purchase contract. termini di qualsivoglia contratto di acquisto. The UCS products have not been conceived I prodotti UCS non sono progettati per funzionare to work in areas at risk of explosions. In case in ambienti con pericolo di esplosioni. In caso di of damage or malfunction, do not use the guasti o non corretto funzionamento, gli attuatori... -
Page 8: Packing Contents
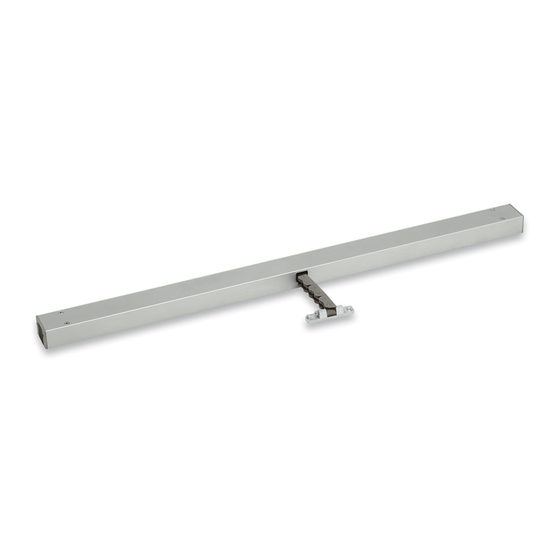
The actuator is equipped with a 8-pole connector L’attuatore è dotato di un connettore a 8 poli da to be connected to the special cable which is sold collegare all’apposito cavo venduto in un kit separato in a separate kit and with a side plug. e di un tappo laterale. NANO BMSLine 2.1 Accessories not included 2.1 Accessori non inclusi According to the type of installation to be carried A seconda del tipo di installazione da effettuare out (see paragraphs 8 and 9), the actuator must (vedi paragrafi 8 e 9), l’attuatore deve essere... -
Page 9: Cable Kits
NANO NANO 2.1.2 Cable kits 2.1.2 Kit cavi To connect models SYNCHRO NANO DC and SYN- Per il collegamento dei modelli SYNCHRO NANO CHRO NANO DC F-SIGNAL, use the available cables DC e SYNCHRO NANO DC F-SIGNAL, utilizzare i cavi supplied in separate kits. The cable features are shown disponibili forniti in kit separati. Le caratteristiche in the tables below. Please, refer to paragraph 8 for dei cavi sono riportate nelle tabelle sotto. -
Page 10: Data Plate
USER MANUAL USER MANUAL MANUALE D’ISTRUZIONI MANUALE D’ISTRUZIONI IT IT 4. DATA PLATE 4. DATI DI TARGA The manufacturer’s identification and European Sull’attuatore sono riportati i dati di identificazione Directive conformity plate is located on the del costruttore e di conformità alle Direttive actuator. Europee. Several safety warnings are applied to the actuator; Inoltre, sono riportate alcune avvertenze di sicurezza such warnings must be strictly followed by che devono essere attentamente rispettate da... - Page 11 NANO NANO The actuator is intended for the electromotive L’attuatore deve essere utilizzato per l’apertura e la opening and closing of windows. It is suitable for chiusura elettriche a motore di finestre. É destinato indoor use, only. al solo uso interno. NANO BMS actuators are equipped with a self- Gli attuatori NANO BMS sono dotati di funzione learning function: by connecting up to 4 devices...
- Page 12 The configuration software is contained on the è necessario il BMSline Setup Kit. Il software per USB storage device provided with the Kit. la configurazione è contenuto all’interno della chiavetta usb presente nel Kit. Follow the instructions in the user manual of the BMSLine Setup Kit. If actuators are impro- Seguire le istruzioni presenti nel manuale perly programmed not using BMSline software d’uso del BMSLine Setup Kit. In caso gli supplied in the BMSline Setup Kit, UCS does not attuatori dovessero essere programmati in accept any responsibility for damage caused by modo improprio non utilizzando il software malfunctions due to programming of the BMS BMSline fornito nel BMSLine Setup Kit, UCS motors. non si ritiene responsabile di eventuali danni causati da malfunzionamenti imputabili alla programmazione dei motori BMS. 41587H BMSLine Setup Kit Drw. / Dis. 37304 Doc. 86371S - Rev. 01/02/2021...
-
Page 13: Technical Features
NANO NANO 6 TECHNICAL FEATURES 6 CARATTERISTICHE TECNICHE The tables below show the technical features for Le tabelle di seguito riportano le caratteristiche NANO BMS models: tecniche dei modelli NANO BMS: MAIN FEATURES/ CARATTERISTICHE PRINCIPALI VOLTAGE SUPPLY 24 Vdc ± 15% ALIMENTAZIONE CURRENT ABSORPTION (with max load) 1.2 A ASSORBIMENTO (a carico max) OPERATION polarity inversion COMANDO... -
Page 14: Defaul Settings
USER MANUAL USER MANUAL MANUALE D’ISTRUZIONI MANUALE D’ISTRUZIONI IT IT 6.1 Default Settings 6.1 Impostazioni di fabbrica The actuator is supplied with the parameter L’attuatore viene fornito on i valiori dei parametri values set according to the table: settati secondo la tabella: PARAMETER VALUE PARAMETRO VALORE STROKE Nominal for the actuator CORSA Nominale dell’attuatore SMOKE VENT STROKE Nominal for the actuator CORSA EFC Nominale dell’attuatore... -
Page 15: Dimensions
NANO NANO 7 DIMENSIONS 7 DIMENSIONI STROKE (C) ACTUATOR CORSA (C) ATTUATORE 254,5 304,5 404,5 604,5 1000 SIDE BRACKET KIT CONNECTOR KIT STAFFE FISSE LATERALI CONNETTORE BACK BRACKET KIT KIT STAFFE POSTERIORI BRACKET FOR BOTTOM HINGED WINDOWS STAFFA PER FINESTRA WASITAS FRONT BRACKET KIT KIT STAFFE FRONTALI Doc. -
Page 16: Wiring
UCS recommends using Dead man push UCS raccomanda l’uso di pulsanti a uomo buttons to control the actuators. presente per il comando degli attuatori. 8.1 Cable connection 8.1 Collegamento cavi NANO BMS is provided with two connectors at the Il NANO BMS è... -
Page 17: Wiring Diagrams
8.2 Wiring Diagrams 8.2 Schemi di collegamento 8.2.1 ModBus Net connection using 8.2.1 Collegamento ad una Rete ModBus cables supplied by UCS con cavi forniti da UCS General Diagram Schema generale FEEDER C-SV SMOKE VENT CONTROL UNIT BUS DATA LINE... -
Page 18: Polarity Inversion Control
USER MANUAL USER MANUAL MANUALE D’ISTRUZIONI MANUALE D’ISTRUZIONI IT IT 8.2.2 Polarity inversion control 8.2.2 Comando a inversione di polarità Example Esempio PUSH BUTTON (DPDT) PULSANTE (DPDT) Blue - Blu Brown - Marrone X = DO NOT CONNECT Black - Nero X = NON COLLEGARE Yellow - Giallo Gray - Grigio White - Bianco... -
Page 19: Simple Modbus Network
NANO NANO 8.2.3 Simple ModBus Network 8.2.3 Semplice Rete ModBus MASTER 24 V (Gateway, PC, ...) FEEDER ALIMENTATORE X = DO NOT CONNECT X = NON COLLEGARE Blue - Blu Brown - Marrone Black - Nero Yellow - Giallo Gray - Grigio White - Bianco E-LOCK BMS SEE ACTUATOR’S USER GUIDE VEDERE MANUALE DELL’ATTUATORE... -
Page 20: Modbus Net With Smoke Exaust Control Panel C-Sv
USER MANUAL USER MANUAL MANUALE D’ISTRUZIONI MANUALE D’ISTRUZIONI IT IT 8.2.4 ModBus Net with smoke 8.2.4 Rete ModBus con centrale exhaust control panel C-SV EFC modello C-SV C-SV SMOKE VENT CONTROL UNIT CENTRALE EVACUAZIONE FUMO E CALORE C-SV FEEDER ALIMENTATORE MASTER (Gateway, PC, ...) 24 V Blue - Blu Brown - Marrone Black - Nero Yellow - Giallo... -
Page 21: Voltage Drop For Actuator Chain
Lo schema mostra la caduta di tensione tipica actuators with stroke of 1000 mm operating per attuatori con corsa di 1000 mm funzionanti at maximum load and cables supplied by UCS. a pieno carico e con cavi forniti da UCS. WARNING WARNING ATTENZIONE... -
Page 22: Customized Cable Wiring
ACTUATORS SV Power supply / Alimentazione EFC COLLEGAMENTO TRA DUE ATTUATORI 2 4 6 8 CAN H - SYNCHRO ACCESSORI "UCS" ACQUISTABILI PULSANTE (DPDT) PURCHASABLE "UCS" ACCESSORIES PUSH BUTTON (DPDT) CAN L - SYNCHRO ACCESSOIRES "UCS" ACHETABLES BOUTON POUSSUAR (DPDT) - Page 23 NANO NANO To carry out the wiring, it is possible to use Per effettuare il collegamento, è possibile utilizzare the complete cables supplied by UCS as kits. i cavi completi forniti da UCS in kit. In alternativa, Alternatively, the customer may choose a wired il cliente può decidere di utilizzare una cavo cable provided that it matches the pin positions cablato purchè vengano rispettate le posizioni dei shown in this paragraph and the dimensions pin indicate in questo paragrafo e le dimensioni indicated in the drawing below.
- Page 24 PATTERN FUNCTIONS SCHEMA FUNZIONI +/- 24V +/- 24V SMOKE VENT/ EFC SMOKE VENT/ EFC ACCESSORI "UCS" ACQUISTABILI PULSANTE (DPDT) PURCHASABLE "UCS" ACCESSORIES PUSH BUTTON (DPDT) MODBUS A ACCESSOIRES "UCS" ACHETABLES BOUTON POUSSUAR (DPDT) ZUBEHÖRTEILE "UCS" DRUCKNOPF (DPDT) ACCESORIOS "UCS" COMPRABLES...
-
Page 25: Installation
NANO NANO 9 INSTALLATION 9 INSTALLAZIONE B E F O R E P R O C E E D I N G W I T H T H E PRIMA DI PROCEDERE CON IL MONTAGGIO MECHANICAL MOUNTING OF THE MECCANICO DELL’ATTUATORE SULLA ACTUATOR ON THE WINDOW, CARRY OUT FINESTRA, EFFETTUARE I COLLEGAMENTI THE WIRING OPERATIONS DESCRIBED IN... -
Page 26: Top Hung Window Open Outwards - Side Bracket With Sill
USER MANUAL USER MANUAL MANUALE D’ISTRUZIONI MANUALE D’ISTRUZIONI IT IT Top hung window open outwards Finestra a sporgere verso - side bracket with sill l’esterno - staffa laterale su davanzale Necessary Components: Componenti necessari: • NANO actuator • Attuatore NANO • Side bracket kit • Kit staffe laterali Note Nota... - Page 27 NANO NANO 1. Insert the connector with cable (refer to 1. Inserire il connettore con cavo (vedi istruzioni instructions in paragraph 8). all’interno del paragrafo 8). 2. Power the actuator to extend the chain, then 2. Dare alimentazione all’attuatore per fare uscire follow the sequence shown by the drawings la catena, quindi seguire l’ordine indicato dai below: disegni riportati sotto: WARNING WARNING ATTENZIONE ATTENZIONE...
-
Page 28: Top Hung Window Open Outwards - Concealed Installation
USER MANUAL USER MANUAL MANUALE D’ISTRUZIONI MANUALE D’ISTRUZIONI IT IT Top hung window open outwards Finestra a sporgere verso - concealed installation l’esterno - installazione nascosta Necessary Components: Componenti necessari: • NANO actuator • Attuatore NANO • Side bracket kit • Kit staffe laterali Note Nota Installation is possible only if the window Installazione possibile solo se l’altezza della height is higher or equal to the triple value finestra è maggiore o uguale al triplo della... - Page 29 NANO NANO 1. Insert the connector with cable (refer to 1. Inserire il connettore con cavo (vedi istruzioni instructions in paragraph 8). all’interno del paragrafo 8). 2. Power the actuator to extend the chain, then 2. Dare alimentazione all’attuatore per fare uscire follow the sequence shown by the drawings la catena, quindi seguire l’ordine indicato dai below: disegni riportati sotto: WARNING WARNING ATTENZIONE ATTENZIONE...
-
Page 30: Top Hung Window Open Outwards- Concealed Wing With Front Bracket
USER MANUAL USER MANUAL MANUALE D’ISTRUZIONI MANUALE D’ISTRUZIONI IT IT Top hung window open Finestra a sporgere verso outwards- concealed wing l’esterno - anta nascosta con with front bracket staffa frontale Necessary Components: Componenti necessari: • NANO actuator • Attuatore NANO • Front bracket kit • Kit staffe frontali Note Nota... - Page 31 NANO NANO 1. Insert the connector with cable (refer to 1. Inserire il connettore con cavo (vedi istruzioni instructions in paragraph 8). all’interno del paragrafo 8). 2. Power the actuator to extend the chain, then 2. Dare alimentazione all’attuatore per fare uscire follow the sequence shown by the drawings la catena, quindi seguire l’ordine indicato dai below: disegni riportati sotto: WARNING WARNING ATTENZIONE ATTENZIONE...
-
Page 32: Top Hung Window Open Outwards- With Front Bracket
USER MANUAL USER MANUAL MANUALE D’ISTRUZIONI MANUALE D’ISTRUZIONI IT IT Top hung window open Finestra a sporgere verso outwards- with front bracket l’esterno - con staffa frontale Necessary Components: Componenti necessari: • NANO actuator • Attuatore NANO • Front bracket kit • Kit staffe frontali Note Nota Check the window height in relation to the Verificare l’altezza della finestra in rapporto actuator stroke. See picture 4 on page 33. - Page 33 NANO NANO 1. Insert the connector with cable (refer to 1. Inserire il connettore con cavo (vedi istruzioni instructions in paragraph 8). all’interno del paragrafo 8). 2.Power the actuator to extend the chain, then fol- 2. Dare alimentazione all’attuatore per fare uscire la catena, low the sequence shown by the drawings below: quindi seguire l’ordine indicato dai disegni riportati sotto: WARNING WARNING ATTENZIONE ATTENZIONE When the chain actuator is not mounted, pay Con il connettore catena non montato, fare estrema great attention not to retract the chain into the attenzione a non far rientrare completamente la cat- actuator completely: the chain could get stuck ena all’interno dell’attuatore, poiché...
-
Page 34: Bottom Hung Window Open Inwards (Z Bracket + Pivoting Bracket)
USER MANUAL USER MANUAL MANUALE D’ISTRUZIONI MANUALE D’ISTRUZIONI IT IT Bottom hung window open Finestra vasistas ad apertu- ra verso l’interno (staffa a “Z” inwards (Z bracket + pivoting bracket) + staffa oscillante) Componenti necessari: Necessary Components: • Attuatore NANO • NANO actuator • Kit staffe posteriori •... - Page 35 NANO NANO 1. Inserire il connettore con cavo (vedi istruzioni 1. Insert the connector with cable (refer to all’interno del paragrafo 8). instructions in paragraph 8). 2. Dare alimentazione all’attuatore per fare uscire 2. Power the actuator to extend the chain, then la catena, quindi seguire l’ordine indicato dai follow the sequence shown by the drawings disegni riportati sotto: below: WARNING WARNING ATTENZIONE ATTENZIONE...
- Page 36 USER MANUAL USER MANUAL MANUALE D’ISTRUZIONI MANUALE D’ISTRUZIONI IT IT 12. Connect the system to the mains according to 12. Collegare il sistema alla rete di alimentazione the electric diagrams. secondo gli schemi elettrici. Drw. / Dis. 37304 Doc. 86371S - Rev. 01/02/2021 36/43...
-
Page 37: Bottom Hung Window Open Inwards - Actuator On Wing
NANO NANO Bottom hung window open Finestra vasistas ad apertura ver- Bottom hung window open ..inwards- actuator on wing so l’interno - attuatore su anta outwards Necessary Components: Componenti necessari: • NANO actuator • Attuatore NANO • Front bracket kit • Kit staffe frontali Note Nota Check the window height in relation to the Verificare l’altezza della finestra in rapporto actuator stroke. See picture 8 on page 38. - Page 38 USER MANUAL USER MANUAL MANUALE D’ISTRUZIONI MANUALE D’ISTRUZIONI IT IT 1. Insert the connector with cable (refer to 1. Inserire il connettore con cavo (vedi istruzioni instructions in paragraph 8). all’interno del paragrafo 8). 2. Power the actuator to extend the chain, then 2. Dare alimentazione all’attuatore per fare uscire follow the sequence shown by the drawings la catena, quindi seguire l’ordine indicato dai below: disegni riportati sotto: WARNING...
- Page 39 NANO NANO 12. Connect the system to the mains according to 12. Collegare il sistema alla rete di alimentazione the electric diagrams secondo gli schemi elettrici. Doc. 86371S - Rev. 01/02/2021 39/43 Drw. / Dis. 37304...
-
Page 40: Bottom Hung Window Open Outwards - Concealed Installation
USER MANUAL USER MANUAL MANUALE D’ISTRUZIONI MANUALE D’ISTRUZIONI IT IT Bottom hung window open Finestra vasistas ad apertura verso outwards - concealed installation l’esterno - installazione nascosta Necessary Components: Componenti necessari: • NANO actuator • Attuatore NANO • Side bracket kit • Kit staffe laterali Note Nota Installation is possible only if the window Installazione possibile solo se l’altezza della height is higher or equal to the triple value... - Page 41 NANO NANO 1. Inserire il connettore con cavo (vedi istruzioni 1. Insert the connector with cable (refer to all’interno del paragrafo 8). instructions in paragraph 8). 2. Dare alimentazione all’attuatore per fare uscire 2. Power the actuator to extend the chain, then la catena, quindi seguire l’ordine indicato dai follow the sequence shown by the drawings disegni riportati sotto: below: WARNING WARNING ATTENZIONE ATTENZIONE...
-
Page 42: Maintenance
USER MANUAL USER MANUAL MANUALE D’ISTRUZIONI MANUALE D’ISTRUZIONI IT IT 12. Connect the system to the mains according to 12. Collegare il sistema alla rete di alimentazione the electric diagrams secondo gli schemi elettrici. 10 MAINTENANCE 10 MANUTENZIONE In oder to ensure the correct operation of the L’attuatore deve essere controllato da personale actuator in safety conditions, it must be revised qualificato almeno una volta all’anno per garantirne by skilled staff at least once a year. il corretto funzionamento in condizioni di sicurezza. Always check the tightness of fastenings and Verificare sempre il serraggio degli elementi e clamping screws and replace worn or damaged delle viti di fissaggio e sostituire le parti usurate o... -
Page 43: Disposal
For more details please refer to the general installazione o ad un uso negligente o improprio. Warranty Conditions on our site www.ucs. Per maggiori dettagli, si prega di far riferimento ultraflexgroup.it alle Condizioni Generali di Garanzia sul nostro sito www.ucs.ultraflexgroup.it Doc. - Page 44 USER MANUAL MANUALE D’ISTRUZIONI MANUALE D’ISTRUZIONI IT IT Via XXV Aprile 45 16012 BUSALLA (GE) ITALY Tel. +39 010 9768232 Fax +39 010 9768233 e-mail:ucs@ultraflexgroup.it ULTRAFLEX CONTROL SYSTEMS s.r.l. www.ultraflexgroup.it/ucs www.ultraflexcontrolsystems.com Drw. / Dis. 37304 Doc. 86371S - Rev. 01/02/2021 44/43...
Need help?
Do you have a question about the NANO BMSLine and is the answer not in the manual?
Questions and answers