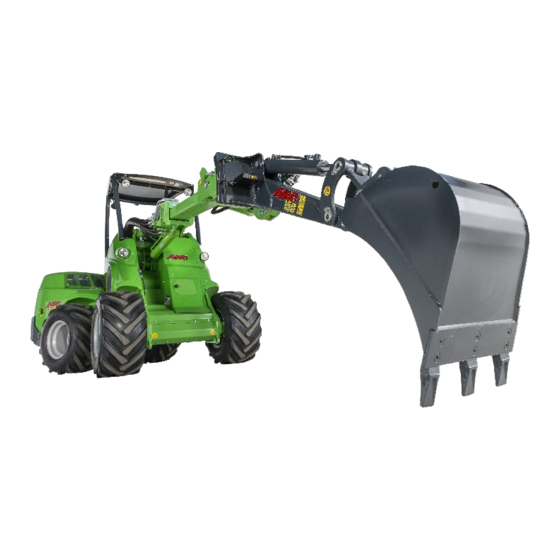
AVANT Mini Digger 150 Operator's Manual For Attachment
Hide thumbs
Also See for Mini Digger 150:
- Operator's manual for attachment (34 pages) ,
- Operator's manual for attachment (22 pages)

Related Manuals for AVANT Mini Digger 150


Summary of Contents for AVANT Mini Digger 150
- Page 1 English Mini digger 150 2016 1 Operator's Manual for Attachment Mini digger 150 Product number: Mini digger 150 A35317 www.avanttecno.com...
- Page 2 Mini digger 150 2016 1...
-
Page 3: Table Of Contents
8. MAINTENANCE AND SERVICE ......................28 Inspection of hydraulic components ........................28 Cleaning the attachment ............................29 Inspection of metal structures ..........................29 Lubrication ................................29 8.4.1 Lubrication of Mini digger 150 with tilt adapter ..................29 9. WARRANTY TERMS ..........................30... -
Page 4: Foreword
If you sell or transfer the equipment, be sure to hand over this manual to the new owner. If the manual is lost or damaged, you can request a new one from your Avant dealer or from the manufacturer. -
Page 5: Designed Purpose Of Use
The robust digger can be used with several available bucket options in general excavation, and moving and loading of soil. Changing of bucket on the Mini digger 150 for 400-700 series is fast and easy thanks to the quick attach system, and the bucket can also be mounted pointing forward if necessary. Bucket tilt adapter is also available as an option. -
Page 6: Safety Instructions For Using The Attachment
Never lift or move an unlocked attachment. The Mini digger 150 is designed to be used by one operator at a time. Do not let WARNING others near the danger area of the equipment when it is in use. - Page 7 7 (32) Pay attention to the surroundings and any other persons and machines moving in the vicinity. Pay attention to the contours of the terrain and other hazards, such as branches and trees that can reach to the driver's area, loose rocks, and slippery surfaces.
- Page 8 8 (32) Remember to wear proper personal protective equipment: The noise level at the driver's seat may exceed 85 dB(A) depending on loader model and operating cycle. Extended exposure to loud noise can cause hearing impairment. Wear hearing protection while working with the loader. ...
-
Page 9: Technical Specifications
Several available bucket options are listed in Table 3 below. Also a tilting bucket adapter is available as an option for Mini digger 150. Contact your AVANT dealer for availability and for more information. Table 3 - Mini digger 150 - Bucket options... - Page 10 Crushing hazard - Do not go under a raised attachment; stay away from raised equipment. A420209 Attachment identification plate Table 5 - Main components of the Mini digger 150 Frame with quick attach brackets Faster multi connector holder Bucket quick...
-
Page 11: Attaching The Attachment
Do not stay in the area between the attachment and the loader. Mount the attachment only on level surface. WARNING Never move or lift an attachment that has not been locked. Avant quick coupling system: Step 1: Lift the quick attach plate locking pins up and turn them backwards into the slot so that they are locked in the upper position. -
Page 12: Connecting And Disconnecting The Hydraulic Hoses
5.1 Connecting and disconnecting the hydraulic hoses On Avant loaders the hydraulic hoses are connected using the multi connector system. If you have an Avant 300-700 series loader with the conventional quick couplers and wish to change to the multi connector system, contact your Avant dealer or service point for instructions or installation services. - Page 13 13 (32) The lever should move easily all the way to its locking position. If the lever does not slide smoothly, check the alignment and position of the connector and clean the connectors. Also shut down the loader and release the residual hydraulic pressure.
-
Page 14: Unattaching The Digger And Correct Storage Position
14 (32) 5.2 Unattaching the digger and correct storage position Correct storage position: Before disconnecting the digger, turn the bucket so that it will be in level with the digger frame, or tilted slightly above, as shown in adjacent figure. In this way it will be easy to connect the digger to the loader. -
Page 15: Changing The Bucket On Mini Digger 150
15 (32) 5.3 Changing the bucket on Mini digger 150 The bucket is connected by a standard S30-150 tool-operated quick coupling system. Available bucket options are shown in table 3. Keep the digger attached to the loader for the best stability and to allow to utilise the movements of the digger. -
Page 16: Installing Bucket Tilt Adapter
The manufacturer or it’s representative are not responsible for damages, losses or injuries resulted from incorrect or incomplete installations. Contact your nearest Avant dealer or service point, if you have any additional questions or require installation services. -
Page 17: Safety Instructions For Hydraulic Assemblies
17 (32) Protect the environment from leaking of hydraulic oil and prevent oil from draining on the ground. Keep any loosened hydraulic hose in an upright position or plugged, so that they will leak as little as possible. Clean the equipment thoroughly before starting the installation and make sure that i.e. dirt, dust or water will not enter the hydraulic components or the hydraulic oil. -
Page 18: Tightening Hydraulic Fittings
18 (32) Before handling hydraulic assemblies: 1. Allow the hydraulic systems of the loader and of the attachment to cool down completely before any work on hydraulic systems. 2. Make sure that the loader boom or any other part of the attachment can’t move causing crushing or pinching hazards: Lower the loader boom to its lower position and lower the attachment firmly on ... - Page 19 19 (32) Test to find any leaks Before checking for leakages, or going near any hydraulic fitting, to avoid possible ejection of pressurized hydraulic oil: Shut down the loader engine Depressurize the hydraulic system completely Wipe the hydraulic components clean to find leaks more easily. ...
-
Page 20: Installing The Tilting Bucket Adapter
20 (32) 6.4 Installing the tilting bucket adapter To install the tilt adapter, follow the instructions in the following chapters. Pinching and crushing hazard - make sure any part of attachment can not move: Make sure the attachment is securely lowered on the ... - Page 21 21 (32) Fitting the hydraulic components: Pre-assemble the selector valve at a clean location. The components are oily for storage. Leave the elbow fittings 3 loose and keep the screws ready Table 7 - Component list - Selector valve assembly Part Name Part number pcs Selection valve...
-
Page 22: Electric Connection
Upgrade kits for integrating the separate sockets into the multi connector system are available from your Avant dealer. Route the selected cable in a way that it cannot get stuck or pinched, or stretch when the equipment moves. -
Page 23: Instructions For Use
23 (32) 7. Instructions for use Check the attachment and the operating environment once more before starting to work, and that all obstacles have been removed from the operating area. Quick inspection of the equipment and the operating area before use are parts of ensuring safety and the best performance of the equipment. -
Page 24: Checks Before Use
24 (32) 7.1 Checks before use Check that all obstacles, including any possibly hidden ones, have been removed from the working area before operation. Make sure that it safe to dig at the location. Find out if there are electric cables, water lines or similar ... -
Page 25: Using Digging Equipment
25 (32) 7.2 Using digging equipment Planning and efficient use of the digging equipment Digging work is always started with thorough inspection of the site and planning the work in advance. Things to consider include at least the following: Inclinations and loader capabilities ... - Page 26 26 (32) Filling the bucket: Depending on soil type and operating conditions, the most effective position and movements may differ from the pictures shown. pictures represent typical recommended operating practise. The bucket should never be pressed hard directly downwards, as this would result only in lifting the front tyres of the loader, and moving of the loader.
-
Page 27: Tilt Adapter
27 (32) 7.3 Tilt adapter When bucket tilt adapter is fitted, the function of auxiliary hydraulics control lever (or electric joystick buttons) depends on the position of the electric switch of the tilt adapter. If the switch is in neutral position, or the electric harness is not connected, operating the auxiliary hydraulics of the loader controls the bucket of the mini digger. -
Page 28: Maintenance And Service
Finding any fault means that the hydraulic hose or component must be replaced and the equipment must not be used until it is repaired. Spare parts are available from your nearest AVANT retailer or authorised service point. Leave the repair work to professional service technicians, if you don’t have adequate knowledge and... -
Page 29: Cleaning The Attachment
All lubrication nipples are standard R1/8" nipples. Replace any damaged nipples. 8.4.1 Lubrication of Mini digger 150 with tilt adapter If the digger is fitted with the tilt adapter, there 4 are additional lubrication points as follows:... -
Page 30: Warranty Terms
30 (32) 9. Warranty terms Avant Tecno Oy grants a warranty of one year (12 months) from the date of purchase for the attachment it manufactures. The warranty covers repair costs as follows: Work costs are covered, if the repair is not performed at the factory. - Page 31 A35317 Hydraulic Mini digger; attachment for Avant loaders Hydraulische Baggerarm; Anbaugerät für Avant Radlader Bras retro à commande hydraulique destinée à être utilisée avec les chargeuses Avant 14.3.2016 Ylöjärvi, Finland Risto Käkelä, Toimitusjohtaja / Verkställande direktör / Administrerende direktør /...
Need help?
Do you have a question about the Mini Digger 150 and is the answer not in the manual?
Questions and answers