
Related Manuals for GreenWorks Pro ULTRAPOWER 60V MO60L01


Summary of Contents for GreenWorks Pro ULTRAPOWER 60V MO60L01
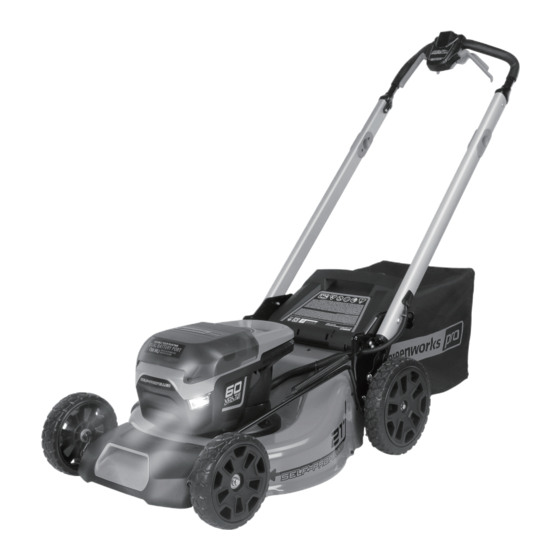
- Page 1 MO60L01 MO60L424 LAWN MOWER OPERATOR MANUAL MANUAL DEL OPERADOR CORTACÉSPED www.greenworkstools.com LMC420...
-
Page 3: Table Of Contents
English Set the cutting height........10 Description......... 4 Install the battery pack........10 Purpose.............. 4 Remove the battery pack......... 10 Overview............4 Operation......... 10 Packing list............4 Start the machine..........10 Read all instructions......4 Stop the machine..........11 Children and Bystanders........4 Operate the self-propel drive system.... -
Page 4: Description
English DESCRIPTION NOTE When using electric lawn mowers, basic safety precautions PURPOSE should always be followed to reduce the risk of fire, electric shock, and personal injury. These basic precautions include This machine is used for domestic lawn mowing. The cutting the following: blade must be approximately parallel to the ground. - Page 5 English • Never pull the mower back toward you while you are • Dress properly, do not wear loose clothing or jewelry that walking. If you must back the mower away from a wall or can be caught in moving parts. Use of safety gloves and obstruction, first look down and behind you to avoid proper footwear is recommended when working outdoors.
-
Page 6: Service/Maintenance
English • Do not open or mutilate the battery. Electrolytes • Maintain Lawn Mower With Care – Keep cutting edges contained within the battery are corrosive and may cause sharp and clean for best and safest performance. Follow damage to eyes or skin if released. It may be toxic if instructions for lubricating and changing accessories. -
Page 7: Risk Levels
English Symbol Name Explanation Symbol Name Explanation Volt Voltage DANGER --- Use extra caution on slopes. Steep Slope do not mow slopes greater Amperes Current Hazard than 15 degrees. Frequency (cycles per sec- Hertz ond) RISK LEVELS Watt Power The following signal words and meanings are intended to Minutes Time explain the levels of risk associated with this product. -
Page 8: Proposition 65
English UNPACK THE MACHINE WARNING If the battery pack cracks or breaks, with or without leaks, WARNING do not recharge it and do not use. Discard it and replace Make sure that you correctly assemble the machine before with a new battery pack. DO NOT TRY TO REPAIR IT! To use. -
Page 9: Unfold The Lower Handle
English 5. Put the bolts (13) through the holes and tighten with the 4. Hold the the grass catcher (6) by its handle (16) and nuts (14), using a Philips head screwdriver (not included). engage the hooks (17) on the door rod (18). 5. -
Page 10: Set The Cutting Height
English 2. Line up the recesses of the side discharge chute (11) NOTE below the pivot (20). The machine has an automatic switch function that lets the 3. Close the side discharge door (19). other battery work when the first cannot operate. SET THE CUTTING HEIGHT 1. -
Page 11: Stop The Machine
English • Press and hold the start button (1), then pull up on the 4 Green The battery is above 80% capacity drive lever (3). Lights 3 Green The battery is between 80% and 60% ca- Lights pacity • Pull up on the drive lever (3), then press the start button (1). -
Page 12: Operation Tips
English • Tighten correctly all the fasteners and caps. WARNING • Clean the machine with a dry cloth. Do not use water. Please keep a low self-propelled speed when you mow on a slope. REPLACE THE BLADE • Do not go up and down on a slope, mow across the face of the slope. -
Page 13: Store The Machine
English TROUBLESHOOTING STORE THE MACHINE • Clean the machine before storage. Problem Possible cause Solution • Make sure the motor is not hot when you store the The handle is not The bolts are not Adjust the height machine. in position. engaged correctly. -
Page 14: Technical Data
English units which have been used for personal use that have not Problem Possible cause Solution been hired or rented for industrial/commercial use, and that The machine stops The blade height is Increase the blade have been maintained in accordance with the instructions in during mowing. -
Page 15: Exploded View
English EXPLODED VIEW Part No. Qty. Description R0200742-00 Blade assembly kit R0201875-00 High lift blade RB311081179A Side discharge cover kit R0200226-00 Side discharge chute RB341281179A 8" front wheel assembly R0200744-00 10" rear wheel assembly RB341472376 Safety key R0200743-00 Upper control assembly... - Page 16 English Part No. Qty. Description R0201921-00 Grass catcher assembly R0201874-00 Power control board R0200068-00 Mulch plug kit R0200860-00 Motor R0201880-00 Bolt/nut...
Need help?
Do you have a question about the ULTRAPOWER 60V MO60L01 and is the answer not in the manual?
Questions and answers
My mower starts, but won’t cut. The blade is set at a good height. In fact, I have moved it to different heights, it doesn’t make a difference. Any suggestions? Thank you.
Possible reasons why the GreenWorks ULTRAPOWER 60V MO60L01 mower starts but does not cut, despite adjusting the blade height, include:
1. The blade is dull or worn and needs to be replaced.
2. The blade is unbalanced, which may prevent proper cutting.
3. The motor shaft is bent, affecting blade operation.
4. The grass is too tall or thick, possibly clogging the blade.
5. The cutting edge is dirty or not sharp, reducing cutting performance.
Inspect and maintain the blade and motor components to ensure proper function.
This answer is automatically generated
drive isnt working
If the drive is not working on the GreenWorks Pro ULTRAPOWER 60V MO60L01, possible issues could include:
- The battery capacity is low. Charge the battery pack.
- The battery key is not inserted. Insert the battery key.
- There may be a mechanical or electrical problem. Speak to a person at an approved service center.
This answer is automatically generated