urmet domus 1092 Series User Manual
4m ahd day & night ball camera 1/3” 3,6mm lens with ir led
Hide thumbs
Also See for 1092 Series:
- User manual (74 pages) ,
- Instructions manual (53 pages) ,
- Quick manual (49 pages)
Advertisement
Available languages
Available languages
Quick Links
+
DS1092-544A
BALL CAMERA AHD 4M DAY & NIGHT
1/3" OTTICA 3,6MM CON LED IR
4M AHD DAY & NIGHT BALL CAMERA
1/3" 3,6MM LENS WITH IR LED
AHD 4M TAG & NACHT KUGELKAMERA
1/3-ZOLL 3,6 MM-OBJEKTIV MIT IR-LEDS
CAMÉRA MINI-DÔME AHD 4M DAY & NIGHT
1/3" OPTIQUE 3,6 mm A DIODES IR
CÁMARA MINIDOMO AHD 4M DÍA/NOCHE
1/3" ÓPTICA 3,6 mm CON LEDS IR
Sch./Ref./Typ/Réf. 1092/280M
MANUALE D'USO
USER MANUAL
BEDIENUNGSANLEITUNG
MANUEL D'UTILISATION
MANUAL DE USUARIO
Mod.
1092
Advertisement

Related Manuals for urmet domus 1092 Series


Summary of Contents for urmet domus 1092 Series
- Page 1 Mod. 1092 DS1092-544A BALL CAMERA AHD 4M DAY & NIGHT 1/3” OTTICA 3,6MM CON LED IR 4M AHD DAY & NIGHT BALL CAMERA 1/3” 3,6MM LENS WITH IR LED AHD 4M TAG & NACHT KUGELKAMERA 1/3-ZOLL 3,6 MM-OBJEKTIV MIT IR-LEDS CAMÉRA MINI-DÔME AHD 4M DAY &...
- Page 2 ITALIANO ITALIANO PRECAUZIONI D’USO Assicurarsi dell’integrità dell’apparecchio dopo averlo tolto dall’imballo. Prima di effettuare qualsiasi operazione di pulizia o di manutenzione disinserire l’apparecchio dalla rete di alimentazione elettrica. Non usare prodotti spray per la pulizia dell’apparecchio. Controllare che la temperatura d’esercizio sia nei limiti indicati e che l’ambiente non sia particolarmente umido.
- Page 3 CONTENUTO DELLA CONFEZIONE N°1 Telecamera. N°1 Manuale d’uso. Nota Bene La composizione degli accessori a corredo può essere variata senza alcun preavviso. NORME D’INSTALLAZIONE Evitare di puntare direttamente l’obiettivo contro il sole o contro luci intense, anche se la telecamera è spenta;...
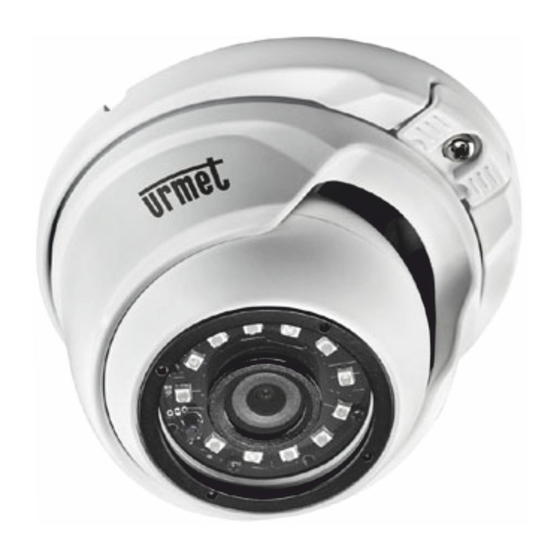
- Page 4 INSTALLAZIONE BASE DI FISSAGGIO CORPO TELECAMERA CALOTTA DI PROTEZIONE Prima d’iniziare l’installazione, assicurarsi che tutte le unità da collegare non siano alimentate. Allentare la vite di blocco presente sulla calotta di protezione per scorporare la telecamera come in figura.
- Page 5 UTILIZZO DEL MENU La telecamera 1092/280M utilizza un menù a più livelli che consente di abilitare/disabilitare o variare le impostazioni. DESCRIZIONE DEL SISTEMA DEI MENU Una volta impartito il comando di accesso al menu apparirà a monitor la finestra iniziale di accesso. Utilizzando i tasti freccia, navigare i menu e selezionare le opzioni prescelte.
- Page 6 MENU PRINCIPALE SETUP (VALORI DI DEFAULT) EXPOSURE BACKLIGHT WHITE BAL. DAY&NIGHT SPECIAL ADJUST EXIT SAVE&END Nota Bene Con i valori di default, la telecamera utilizza una regolazione di luminosità che non si adatta a tutte le tipologie di installazione. Se necessario, variare la funzione luminosità disponibile all’interno del menu ESPOSIZIONE (descritto oltre).
- Page 7 EXPOSURE (ESPOSIZIONE) Questo menu consente di variare le funzioni relative all’ottica della telecamera. Selezionando questa voce si accede al seguente sottomenu: EXPOSURE SHUTTER AUTO ■■■■■■■■█15 BRIGHTNESS ■■█■■■■■■35 D-WDR RETURN SHUTTER (OTTURATORE) - ESPOSIZIONE ELETTRONICA Se si è impostata la lente in MANUAL (all’interno del precedente menu LENS), è possibile configurare manualmente la velocità...
- Page 8 BACKLIGHT (RETROILLUMINAZIONE) – COMPENSAZIONE CONTROLUCE Un oggetto inquadrato con forte luce proveniente da dietro solitamente appare scuro e poco visibile rispetto al resto dell’immagine. La funzione BACKLIGHT permette di ovviare a questo inconveniente ed ottenere una buona compensazione nell’area selezionata (definita impostando posizione e dimensione), aumentando la luminosità...
- Page 9 WHITE BAL (BILANCIAMENTO DEL BIANCO) Nota Bene: questo menu non è attivo se la telecamera è in modalità B/W (MENU DAY & NIGHT). Questa funzione consente di selezionare le modalità di bilanciamento del bianco. Selezionando questa voce è possibile scegliere fra le opzioni in tabella. Opzione Valore Spiegazione...
- Page 10 DAY/NIGHT - VARIAZIONE DEL FUNZIONAMENTO DELLA TELECAMERA IN FUNZIONE DELLA VARIAZIONE DI LUCE PRESENTE SULLA SCENA La telecamera, che normalmente riprende le immagini a colori, in condizioni di scarsa illuminazione, commuta automaticamente il suo funzionamento da “colore” a “bianco/nero”. In questo modo viene ottimizzata la qualità...
- Page 11 SPECIAL– REGOLAZIONI SPECIALI Questo menu consente di variare le funzioni relative ai parametri della telecamera. Selezionando questa voce si accede al seguente sottomenu: SPECIAL MIRROR LANGUAGE RETURN Opzione Valore Spiegazione OFF MIRROR L’opzione MIRROR consente di ruotare l’inquadratura. MIRROR V-FLIP ...
- Page 12 Opzione Valore Spiegazione Questa opzione permette di visualizzare le correzioni dei ON OFF LIVE DPC pixels in tempo reale Questa opzione consente di avviare il processo di aggiustamento dei pixel danneggiati, dopo aver definito l’area dello schermo dove avviare il processo (posizione e ON ...
- Page 13 PULIZIA DEL DISPOSITIVO Usare un panno asciutto e strofinare leggermente per eliminare polvere o sporcizia. Nel caso la sporcizia non fosse eliminabile con un panno asciutto, compiere l’operazione con un panno inumidito di detergente neutro. Non usare liquidi volatili come benzina, alcool, solventi, ecc. o panni trattati chimicamente per pulire il dispositivo al fine di evitare deformazioni, deterioramenti o graffi nella finitura della superficie.
- Page 14 ENGLISH PRECAUTIONS Make sure that the device is intact after removing it from the package. Disconnect the device from the mains before cleaning or maintenance. Do not use spray products to clean the device. Check that the working temperature is within the indicated range and that the environment is not particularly humid.
- Page 15 ACCESSORIES PROVIDED N°1 Camera with bracket for wall mounting. Instruction manual. Important note: Accessories may be changed without prior notice. INSTALLATION SPECIFICATIONS Avoid pointing the lens directly towards the sun or intense sources of light also when the camera is off.
- Page 16 INSTALLATION Mount fixing screw Camera body Protective dome Make sure that no units are powered before starting the installation procedure. Unscrew the fixing base from the ring lock to separate the camera, as in figure. Fix the base to the surface with 4 screws. If it is not planned an hidden installation of connection cables, use the slot present on the base to draw out the connection cables present on the camera body, without pinching them, in order to avoid malfunction.
- Page 17 MENU USE The camera ref. 1092/280M uses a multi-level menu that allows to enable/disable or change camera settings. MENUS SYSTEM DESCRIPTION Once the menu access command has been performed, the access first screen will be displayed. Once the item has been selected, the parameter can be changed choosing among the available options. By selecting the item associated to the symbols it is possible to access to the next submenu, where other changes can be performed.
- Page 18 MAIN MENU SETUP (DEFAULT VALUES) EXPOSURE BACKLIGHT WHITE BAL. DAY&NIGHT SPECIAL ADJUST EXIT SAVE&END Note With default values, the camera uses a brightness adjustment that is not suitable for all installations. Change BRIGHTNESS in the menu EXPOSURE (see below), if necessary. Option Value Description...
- Page 19 MENU ITEMS DESCRIPTION EXPOSURE This function lets you vary the options of the camera optics. Select this menu item to access the following submenus: EXPOSURE SHUTTER AUTO ■■■■■■■■█15 BRIGHTNESS ■■█■■■■■■35 D-WDR RETURN SHUTTER If the LENS has been selected in MANUAL (see the main menu), this function allows to set manually the shutter speed;...
- Page 20 BACKLIGHT - BACK LIGHT COMPENSATION An object with a strong light in the background usually appears dark and not so visible if compared with the rest of image. The BACKLIGHT function allows to solve this problem and obtain a good compensation in the selected area (defined by position and dimension) increasing the brightness if the area appears dark or reducing it if too clear.
- Page 21 WHITE BAL – WHITE BALANCING Note: this menu is not active if the camera is in B/W mode (see DAY & NIGHT MENU). This function is used to select white balancing mode. Select this menu item to choose among the options in the table.
- Page 22 DAY/NIGHT – CAMERA OPERATION CHANGE ACCORDING TO VARIATION OF LIGHT PRESENT IN THE SCENE The camera usually captures color images, but under poor light conditions it automatically switches its operation mode from “color” to “black/white”. In this way the captured image quality is optimized. Selecting DAY/NIGHT, you can choose from the options EXT, AUTO (automatic), COLOR and B/W (black and white).
- Page 23 SPECIAL– SPECIAL ADJUSTMENTS This menu allows to change the functions concerning camera parameters. Select this menu item to access to the following submenu: SPECIAL MIRROR LANGUAGE RETURN Option Value Description OFF MIRROR It mirrors the image in different configurations MIRROR V-FLIP ...
- Page 24 ADJUST This function allows to access the submenu concerning image display mode. Select this menu item to access the following submenu: ADJUST SHARPNESS MONITOR OUTPUT MODE RETURN SHARPNESS Whit this function it’s possible to adjust the SHARPNESS through the level setting (from 0 to 10) and the AGC function (Automatic gain control which operates when the camera shoot images under poor illumination conditions).
- Page 25 DEUTSCH VORSICHTSMASSNAHMEN Nach dem Auspacken des Gerätes muss sichergestellt werden, dass es sich in einwandfreiem Zustand befindet. Ausführen jeglicher Reinigungs- oder Wartungsarbeiten, Gerät Stromversorgungsnetz trennen. Für die Reinigung des Geräts keine Sprays verwenden. Sicherstellen, dass die Betriebstemperatur innerhalb der genannten Grenzen liegt und keine besonders feuchten Umgebungsbedingungen vorherrschen.
- Page 26 MITGELIEFERTES ZUBEHÖR: Bedienungsanleitung Hinweis Die Zusammenstellung der Zubehörteile kann ohne jegliche Vorankündigung geändert werden. INSTALLATIONSBESTIMMUNGEN Vermeiden Sie es, das Objektiv auch bei ausgeschalteter Kamera direkt gegen die Sonne oder intensiver Lichteinstrahlung zu richten. Das aufzunehmende Objekt darf sich nicht im Gegenlicht befinden.
- Page 27 INSTALLATION BEFESTIGUNGSBASIS KAMERAGEHÄUSE SCHUTZKAPPE Stellen Sie vor der Installation sicher, dass alle anzuschließenden Einheiten nicht versorgt werden. Die an der Schutzkappe vorhandene Arretierschraube mit Hilfe des mitgelieferten Schlüssels lockern, um die Kamera wie in der Abbildung ersichtlich zu zerlegen. ...
- Page 28 VERWENDUNG DES MENÜS Bei der Kamera 1092/280M kommt ein Menü mit mehreren Ebenen zur Anwendung, über das die Einstellungen aktiviert/deaktiviert oder geändert werden können. BESCHREIBUNG DES MENÜ-SYSTEMS Nachdem Sie den Befehl für den Zugriff auf das Menü erteilt haben, erscheint das Ausgangsfenster für den Zugriff.
- Page 29 HAUPTMENÜ SETUP (STANDARDWERTE) EXPOSURE BACKLIGHT WHITE BAL. DAY&NIGHT SPECIAL ADJUST EXIT SAVE&END Hinweis den Standardwerten nutzt die Kamera eine Helligkeitseinstellung, die sich nicht allen Installationsumgebungen anpasst. Gegebenenfalls die innerhalb des Menüs EXPOSURE (weiter unten beschrieben) verfügbare Helligkeitsfunktion ändern. Option Wert Erklärung Diese Option ermöglicht die Ausführung von EXPOSURE...
- Page 30 EXPOSURE (BELICHTUNG) Dieses Menü ermöglicht es, die auf die Kameraoptik bezogenen Funktionen zu ändern. Durch die Auswahl dieses Stichpunktes erhalten Sie Zugriff auf das folgende Untermenü: EXPOSURE SHUTTER AUTO ■■■■■■■■█15 BRIGHTNESS ■■█■■■■■■35 D-WDR RETURN SHUTTER (VERSCHLUSS) - ELEKTRONISCHE BELICHTUNGSSTEUERUNG Falls vorherigen LENS-Menü) „MANUAL“...
- Page 31 BACKLIGHT (HINTERGRUNDBELEUCHTUNG) – GEGENLICHTKOMPENSATION Ein mit starkem von hinten kommenden Licht eingefangenes Objekt erscheint in Bezug auf das übrige Bild normalerweise dunkel und nicht gut sichtbar. Die BACKLIGHT-Funktion ermöglicht es, diesem Problem vorzubeugen und im gewählten Bereich (durch Einstellung von Position und Größe definiert) einen guten Ausgleich zu erhalten.
- Page 32 Option Wert Erklärung Der Auto Tracking White Balance-Modus ermöglicht eine automatische Einstellung, die auf der Erfassung der Umgebung (Außenbereich oder Innenbereich) beruht. Manuelle Einstellung der Farben Rot und Blau, MANUAL BLUE ÷ RED auszuwählen aus zwischen 0 und 100 liegenden Werten. Automatische, auf der Umgebung basierende Einstellung: Für Installationen in Innenbereichen sollte vorzugsweise OUTDOOR-INDOOR...
- Page 33 DAY/NIGHT - ÄNDERUNG DES KAMERABETRIEBS IN ABHÄNGIGKEIT ZUR VARIATION DER LICHTSITUATION DER SZENE Die Kamera, die normalerweise Farbbilder aufnimmt, schaltet ihren Betrieb bei schwachen Lichtverhältnissen automatisch von „Farbe“ auf „Schwarz-Weiß“ um. Auf diese Weise wird die Qualität der aufgenommenen Bilder optimiert. Durch die Auswahl von DAY/NIGHT kann zwischen den Optionen EXT, AUTO (automatisch), COLOR und B/W (Schwarz-Weiß) gewählt werden.
- Page 34 SPECIAL– SONDEREINSTELLUNGEN Dieses Menü ermöglicht es, die auf die Kameraparameter bezogenen Funktionen zu ändern. Durch die Auswahl dieses Stichpunktes erhalten Sie Zugriff auf das folgende Untermenü: SPECIAL MIRROR LANGUAGE RETURN DPC (Dead Pixel Compensation – Ausgleich defekter Pixel) Diese Funktion ermöglicht einen Eingriff an Fehlern einzelner Pixel des Sensors bei schwachen Lichtverhältnissen, so dass die Helligkeit einzelner zu heller Pixel reduziert wird.
- Page 35 ADJUST (EINSTELLUNGEN) Dieses Menü ermöglicht den Zugriff auf den Anzeigemodus der Bilder. Durch die Auswahl dieses Stichpunktes erhalten Sie Zugriff auf das folgende Untermenü: ADJUST SHARPNESS MONITOR OUTPUT MODE RETURN SHARPNESS (SCHÄRFE) Ermöglicht es, die Definition der Bilder anhand der Einstellung der STUFE (von 0 bis 10) und die Konfiguration der ACG-Funktion (Automatic gain control, die eingreift, wenn die Kamera Bilder bei schwachen Lichtverhältnissen aufnimmt) zu ändern.
- Page 36 FRANÇAIS PRÉCAUTIONS D’UTILISATION S’assurer que l’appareil est en parfait état après l’avoir sorti de son emballage. Avant d’effectuer toute opération de nettoyage ou d’entretien, veiller à débrancher l’appareil du secteur d’alimentation électrique. Pour le nettoyage de l’appareil, ne pas utiliser de produit en spray. ...
- Page 37 ACCESSOIRES FOURNIS Manuel d’utilisation Nota bene La composition des accessoires fournis peut varier sans préavis. CONSIGNES D'INSTALLATION Éviter d’orienter directement l’objectif vers le soleil ou vers des sources de lumière interne y compris quand la caméra est éteinte ; la personne à filmer ne doit pas être en contre-jour. ...
- Page 38 INSTALLATION BASE DE FIXATION CORPS CAMÉRA CALOTTE DE PROTECTION Avant de procéder à l’installation, s’assurer qu’aucune des unités à brancher n’est alimentée. Desserrer la vis de blocage présentes sur la calotte de protection en utilisant la clé fournie à cet effet, pour démonter la caméra comme indiqué...
- Page 39 UTILISATION DU MENU La caméra 1092/280M utilise un menu à plusieurs niveaux qui permet d’activer/désactiver les réglages ainsi que de les modifier. DESCRIPTION DU SYSTÈME DES MENUS Une fois la commande d’accès au menu transmise la fenêtre initiale d’accès s’affiche sur l’écran. Une fois l’option voulue sélectionnée, il est possible de modifier le paramètres.
- Page 40 MENU PRINCIPAL SETUP (VALEURS PAR DÉFAUT) EXPOSURE BACKLIGHT WHITE BAL. DAY&NIGHT SPECIAL ADJUST EXIT SAVE&END Nota bene Avec les valeurs par défaut, la caméra utilise un réglage de luminosité qui n’est pas adapté à tous les types d’installation. Au besoin, régler la fonction luminosité dans le menu EXPOSURE (voir plus bas). Option Valeur Explication...
- Page 41 EXPOSURE (EXPOSITION) Ce menu permet de modifier les fonctions relatives à l’optique de la caméra. En sélectionnant cette option, on accède au sous-menu suivant : EXPOSURE SHUTTER AUTO ■■■■■■■■█15 BRIGHTNESS ■■█■■■■■■35 D-WDR RETURN SHUTTER (OBTURATEUR) – EXPOSITION ÉLECTRONIQUE Si la lentille a été réglée sur MANUAL (dans le menu précédent : LENS), il est possible de configurer manuellement la vitesse de l’obturateur.
- Page 42 BACKLIGHT (RÉTRO-ÉCLAIRAGE) – COMPENSATION CONTRE-JOUR Un objet filmé avec une lumière intense arrivant de derrière est généralement foncé et beaucoup moins visible que le reste de l’image. La fonction BACKLIGHT permet d’éliminer cet inconvénient et d’obtenir une bonne compensation sur la zone sélectionnée (définie en réglant la position et les dimensions), en augmentant la luminosité...
- Page 43 WHITE BAL (ÉQUILIBRAGE DU BLANC) Nota bene : ce menu est inactif si la caméra est en modalité B/W (MENU DAY & NIGHT). Cette fonction permet de sélectionner la modalité d’équilibrage du blanc. La sélection de ce réglage permet de choisir une des options du tableau qui suit. Option Valeur Explication...
- Page 44 DAY/NIGHT – VARIATION DU FONCTIONNEMENT DE LA CAMÉRA EN FONCTION DE LA LUMIÈRE PRÉSENTE SUR L’ESPACE FILMÉ Dans des conditions de faible éclairage, la caméra, qui en principe filme des images couleur, passe automatiquement du fonctionnement « couleur » au fonctionnement « noir et blanc ». Cela permet d’optimiser la qualité...
- Page 45 SPECIAL– RÉGLAGES SPÉCIAUX Ce menu permet de modifier les fonctions relatives aux paramètres de la caméra. En sélectionnant cette option, on accède au sous-menu suivant : SPECIAL MIRROR LANGUAGE RETURN DPC (Dead Pixel Compensation – Ajustement des pixels endommagés) Cette fonction permet d’intervenir sur les imperfections de chaque pixel du capteur en conditions de basse luminosité, pour réduire la luminosité...
- Page 46 ADJUST (ÉTALONNAGES) Ce menu permet d’accéder aux modalités de visualisation des images. En sélectionnant cette option, on accède au sous-menu suivant : ADJUST SHARPNESS MONITOR OUTPUT MODE RETURN SHARPNESS (NETTETÉ) Permet de modifier la définition des images, à l’aide du réglage du NIVEAU (de 0 à 10) et la configuration de la fonction AGC (Automatic Gain Control, qui intervient quand la caméra cadre des images en conditions de faible luminosité).
- Page 47 ESPAÑOL PRECAUCIONES DE USO Controlar la integridad del aparato después de sacarlo del embalaje. Antes de realizar cualquier operación de limpieza o de mantenimiento, desconectar el aparato de la red de alimentación eléctrica. No usar productos en aerosol para la limpieza del aparato. ...
- Page 48 ACCESORIOS ENTREGADOS CON EL EQUIPO Manual de uso Nota La composición de los accesorios entregados con el equipo puede variar sin aviso previo. NORMAS DE INSTALACIÓN Evitar dirigir el objetivo directamente contra el sol o contra luces intensas, incluso si la cámara TV está...
- Page 49 INSTALACIÓN Base de fijación Cuerpo de la cámara Carcasa de protección Antes de empezar el cableado, asegurarse de que todas las unidades que se deben conectar no tengan alimentación. Afloje el tornillo presente en la carcasa de protección con la llave suministrada, para separar la cámara como muestra la figura.
- Page 50 PRINCIPAL SETUP (VALORI DI DEFAULT) EXPOSURE BACKLIGHT WHITE BAL. DAY&NIGHT SPECIAL ADJUST EXIT SAVE&END Nota Con los valores por defecto, la cámara usa un ajuste de brillo alto que no es adecuado para todo tipo de instalaciones. Si fuera necesario, cambie el brillo (BRIGHTNESS) en el menú EXPOSURE (ver a continuación).
- Page 51 DESCRIPCIÓN DE LOS ELEMENTOS DEL MENÚ EXPOSURE Esta función permite ajustar las opciones de la óptica de la cámara. Seleccione esta opción para entrar en el submenú siguiente: EXPOSURE SHUTTER AUTO ■■■■■■■■█15 BRIGHTNESS ■■█■■■■■■35 D-WDR RETURN SHUTTER Si LENS está en MANUAL (ver el menú principal), con esta función podrá ajustar manualmente la velocidad de obturación.
- Page 52 BACKLIGHT: COMPENSACIÓN DE CONTRALUZ Un objeto iluminado a contraluz por una fuente de luz potente normalmente aparecerá oscuro y menos visible que el resto de la imagen. La función de retroiluminación (BACKLIGHT) permite resolver este problema y obtener una buena compensación en el área seleccionada (se ajusta su posición y su tamaño), aumentando el brillo si el área se muestra oscura o reduciéndolo si es demasiado claro.
- Page 53 WHITE BAL: BALANCE AUTOMÁTICO DE BLANCOS Nota: este menú no estará activado si la cámara está en modo blanco y negro (ver el menú DAY & NIGHT). Esta función permite seleccionar el modo de balance de blancos. Con este menú podrá seleccionar entre las opciones de la tabla: Opción Valor...
- Page 54 DAY/NIGHT: FUNCIONAMIENTO VARIABLE DE LA CÁMARA SEGÚN LAS VARIACIONES LUMÍNICAS DE LA ESCENA Normalmente, la cámara captura las imágenes en color, pero en condiciones de escasa iluminación cambiará automáticamente al modo en blanco y negro. De esta manera, se optimiza la calidad de imagen. Seleccione DAY/NIGHT para elegir entre los siguientes valores: EXT, AUTO (automático), COLOR y B/W (blanco y negro).
- Page 55 SPECIAL: AJUSTES ESPECIALES Este menú permite cambiar las funciones relativas a los parámetros de la cámara. Seleccione esta opción para entrar en el submenú siguiente: SPECIAL MIRROR LANGUAGE RETURN DPC: COMPENSACIÓN DE LOS PÍXELES DEFECTUOSOS Esta función permite reparar píxeles del sensor en condiciones de escasa iluminación, lo que reduce el brillo de los píxeles demasiado brillantes.
- Page 56 ADJUST Esta función permite entrar en el submenú donde podrá ajustar el modo de visualización de la imagen. Seleccione esta opción para entrar en el submenú siguiente: ADJUST SHARPNESS MONITOR OUTPUT MODE RETURN SHARPNESS Esta función permite ajustar la nitidez mediante su ajuste de nivel (de 0 a 10) y la función AGC (Automatic gain control, control de ganancia automático que se activa cuando la cámara toma imágenes en condiciones de poca luminosidad).
Need help?
Do you have a question about the 1092 Series and is the answer not in the manual?
Questions and answers