
Related Manuals for Cormach MEC 810VD-VDL-VDBL


Summary of Contents for Cormach MEC 810VD-VDL-VDBL
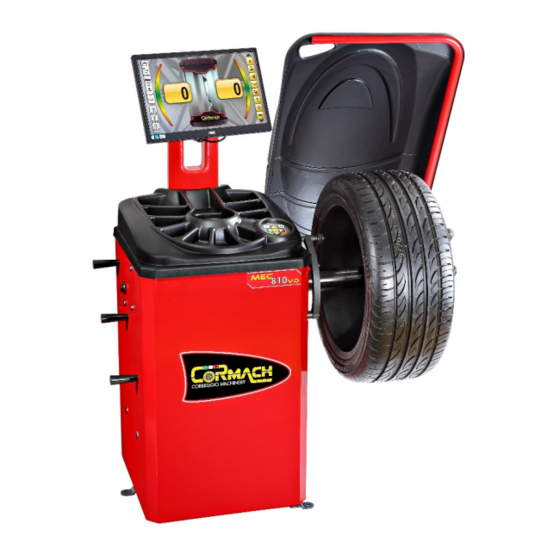
- Page 1 WHEEL BALANCERS MEC 810VD-VDL-VDBL MEC 820VD-VDL-VDLL (SONAR versions) USE AND MAINTENANCE MANUAL...
- Page 3 DECLARATION OF CONFORMITY Complies with EN ISO/IEC 17050-1 and EN ISO/IEC 17050-2 Cormach S.r.l., located in Via A. Pignedoli, 2 – 42015 Correggio (RE) – Italy, Manufacturer of the wheel balancer line, model/s MEC 810VD – MEC 810VDL – MEC 810VDBL MEC 820VD –...
- Page 4 RoHS DECLARATION OF CONFORMITY DECLARATION DE CONFORMITE RoHS RoHS - ÜBEREINSTIMMUNG CORMACH S.r.l. - Via A. Pignedoli, 2 - 42015 Correggio (RE) ITALY Dichiara sotto la propria esclusiva responsabilità che il prodotto: Declare on our own responsibility that the product: Déclare sous son propre responsabilité...
- Page 5 DICHIARAZIONE DI CONFORMITA’ RAEE RAEE DECLARATION OF CONFORMITY DECLARATION DE CONFORMITE RAEE RAEE - ÜBEREINSTIMMUNG EQUILIBRATRICE RUOTE AUTO EQUILIBREUSE ROUES VOITURE WHEEL BALANCER AUSWUCHTMASCHINE Al quale questa dichiarazione si riferisce, E’ CONFORME ALLA DIRETTIVA: To which declaration refers is in CONFORMITY WITH THE FOLLOWING DIRECTIVE: Au quel cette déclaration se rapporte EST CONFORME À...
-
Page 6: Table Of Contents
CONTENTS Introduction Page Intended use Page General safety rules Page 3.1 Safety devices Page Transports and handling Page Unpacking Page Installation and commissioning Page 6.1 Installing display support Page 6.2 Installing external sensor (if present) Page 6.3 Installing wheel guard + wheel guard support Page 6.4 Installing SONAR device (if present) Page... -
Page 7: Introduction
Machine dimensions MEC 810VD – 1170 MEC 810VD – 860 MEC 820VD – 1180 MEC 820VD – 900 MEC 810VD – 880 MEC 820VD – 880 Figure F1.1 1. INTRODUCTION This manual is an integral part of the machine and it must to stay with wheel balancer until the scrapping of the machine. Read carefully each section of this manual before using the machine. -
Page 8: Intended Use
2. INTENDED USE This manual is an integral part of product. Read carefully warnings and instructions contained in this manual because they provide important information about SAFE USE and MAINTENANCE. KEEP WITH CARE THIS MANUAL NEAR THE MACHINE TO FACILITATE ANY CONSULTATION BY OPERATORS. The wheel balancers have been made to be used in balancing of wheels cars (CAR), off-road vehicles (SUV), motorcycles (MOTO). -
Page 9: Unpacking
If the machine is not packed, observe following precautions: PROTECT THE SHARP EDGES AT THE ENDS WITH SUITABLE MATERIAL (Bubble wrap or cardboard). DO NOT USE METAL WIRE ROPES FOR LIFTING BOARD. SLING WITH STRAPS OF AT LEAST 200 cm IN LENGTH AND WITH A HIGHER FLOW RATE OF 3000 kg. DO NOT FORCE ON SHAFT AND/OR FLANGE (See figures F4.1 and F4.2). -
Page 10: Installation And Commissioning
6. INSTALLATION AND COMMISSIONING After unpacking the various parts of the wheel balancer, ensure they are intact and check for any anomalies, then assemble the parts by following the instructions provided below. 6.1 Installing display support Figure F 6.1 and Figure F6.2: Unscrew nr. 4 M6 screws. Position the sheet metal support and clamp it on with 4 M6 screws. Figure F6.3: Prepare the front plastic guard. -
Page 11: Installing External Sensor (If Present)
6.2 Installing external sensor (if present) When present, the external sensor must be installed according to the figures provided below. Figure F6.10: Remove external sensor from the packaging. Figure F6.11 and Figure F6.12: There are holes at the back of the wheel balancer to attach the external sensor. Place the flange of external sensor on the three holes. -
Page 12: Installing Wheel Guard + Wheel Guard Support
6.3 Installing wheel guard + wheel guard support The wheel guard and its support must be installed as shown in following figures. Figure F6.15 and Figure F6.16: Place the tube inside the relative pin and secure it with 2 M8 bolts. Figure F6.17 and Figure F6.18: Remove the wheel guard from the packaging and place it on the tube. -
Page 13: Installing Sonar Device (If Present)
6.4 Installing SONAR device (if present) The SONAR device must be installed as shown in following figures. Figure F6.20 – Figure F6.21 – Figure F6.22: Connect the cable to SONAR device. Mount the device on the pipe following the holes as available on it. -
Page 14: Electrical Connection
6.5 Electrical connection The standard version of the machine must be connected to a mains 230V SINGLE PHASE. The change of the power supply cannot be realized by the user; it must be requested to the MANUFACTURER or to a dealer or to an authorized service center. -
Page 15: Installation
7. INSTALLATION 7.1 Installation area To install the machine you need a useful space on the basis of the information given in figure F7.1. 1000 Figure F7.1 From working position, the user must be able to view the machine and the surrounding area. INSTALLATION AREA MUST BE KEEP CLEAR BY POSSIBLE DANGEROUS OBJECTS. -
Page 16: Environmental Information
9. ENVIRONMENTAL INFORMATION THE DISPOSAL PROCEDURE DESCRIBED BELOW ONLY APPLIES TO MACHINES WITH THE SYMBOL OF THE CROSSED-OUT WHEELIE BIN ON THEIR DATA PLATES. The crossed-out wheelie bin symbol, placed on the product and on this page, reminds the user that the product must be disposed of properly at the end of its life. -
Page 17: Machine Dimensions
10.1 Machine dimensions MEC 810VD MEC 820VD Depth with closed wheel guard mm. 960 mm. 960 Depth with open wheel guard mm. 800 mm. 850 Width with wheel guard mm. 1100 mm. 1150 Height with closed wheel guard mm. 1400 mm. - Page 18 Table T10.1: Functions for machine model Functions MEC 810VD MEC 820VD NOTES Distance and diameter automatic acquisition • • Width automatic acquisition Optional • Balancing accuracy ± 0,5 g. ± 0,5 g. FMB Parking brake pedal Optional MBA Electromagnetic parking brake •...
-
Page 19: Presentation Of The Machine
10.3 Presentation of the machine Keyboard. Weight-tray. Monitor. Wheel guard with support. Width Sensor (only MEC 820VD). Rocking unit. Distance/Diameter sensor. Pins for cones. Figure F10.1 11. SERIAL NUMBER PLATE INFORMATION 12. ORDINARY MAINTENANCE To ensure the efficiency of machine and its proper functioning is essential to follow the manufacturer’s instructions by performing periodic cleaning and routine maintenance. -
Page 20: Monitor
13. MONITOR The machine's control monitor is illustrated in figure F13.1. The control monitor is used by the operator to view the applied controls and the data entered with the keyboard. The same control panel displays the balancing results and machine messages. The functions of the various parts of the monitor are described in table T13.1 while the control key functions are described in table T13.2. - Page 21 Table 13.2: CONTROL ICONS key Icon Meaning Operator number selection icon. Program type selection icon (STD, ALU1, ALU2, ALU3, ALU4, ALU 5, ALS1, ALS2). Automatic plane acquisition activation icon on program ALS1 and ALS2. Icon to activate the manual wheel data entry function. AUTO, SUV, MOTO work program selection icon.
-
Page 22: Keyboard
14. KEYBOARD For convenience the keys are numbered from [P1] to [P9] as shown in figure F14.1. The nine keys have a single main function. Figure F14.1: Control keyboard Table T14.1: Key functions Setting/Program or Menu Function selection key. Function selection key. Function selection key. -
Page 23: Operating Modes Standard, Service, Stand By
15. OPERATING MODES: NORMAL, SERVICE, STAND-BY The machine features three operating modes: • STANDARD mode. This mode is enabled after the machine is turned on and it is possible to perform the wheels balancing; • SERVICE mode. In this mode various utility programs are available for setting parameters (such as grams or ounces) or checking the machine operations (such calibration);... -
Page 24: Machine Calibration
16. MACHINE CALIBRATION To function properly, the machine must be calibrated. Calibration allows storing the mechanical and electrical parameters specific to each machine so as to provide the best balancing results. 16.1 When to carry out machine calibration Table T16.1 lists the cases in which machine calibration should be carried out. Table T16.1: Conditions for carrying out machine calibration Condition Status... - Page 25 Activate the AUTO/SUV calibration program by selecting which will turn blue. Confirm activation of the AUTO/SUV calibration program by pressing [P6] on the keyboard. Remove the wheel and any other accessories from the shaft. Lower the wheel guard: the machine will run a launch. Fit the wheel on the shaft.
- Page 26 Select which type of dimension to enter by pressing [P1] or [P3] on the keyboard and activate the wheel - machine distance insertion function by selecting which will turn blue. Enter the detected value by pressing [P2] or [P4] on keyboard Measure the width of the wheel with the special gauge or read the value of the width indicated on the rim.
- Page 27 Enter the detected value by pressing [P2] or [P4] on keyboard Lower the wheel guard: the machine will run a launch. By hand, turn the wheel in the direction marked by the arrow until you see 50 g on the left display. On the inner side of the wheel, at 12 o'clock, apply the 50 g weight.
- Page 28 On the outer side of the wheel, at 12 o'clock, apply the 50 g weight. Lower the wheel guard: the machine will run a launch. For MEC 820VD: keep the wheel guard lowered. If the MEC 820VD is equipped with the electromagnetic brake for positioning, at the end of the previous spin the machine will perform a set of short spins to calibrate the function of automatic stop on imbalance position...
-
Page 29: Machine Calibration For The Moto Wheel Type
16.3 Machine calibration for the MOTO wheel type The calibration for MOTO wheel type (motorcycle wheels) is completely separated from CAR/SUV wheel type because in the calibration for MOTO a specific adaptor for motorcycle wheels is used and this slightly the shaft balancing. If the calibration for MOTO wheel type has not been done and the user try to spin the wheel for balancing in the MOTO wheel type mode, the machine will not run and will display an error code ERR 031. - Page 30 Lower the wheel guard: the machine will run a launch. At the end of the launch, the machine will display the message shown here. Apply the calibration weight to the inner side, as shown. The calibration weight must be applied on the hole marked with the “CAL”...
-
Page 31: Use Of The Machine In Normal Mode
Lower the wheel guard: the machine will run a launch. At the end of the spin, the MOTO wheel type calibration is finished and the machine will switch to NORMAL mode, ready to run the balancing. When the calibration is finished the MOTO wheel type and ALU1 Program Type value are set. Also the wheel data are automatically set by machine for this type of calibration. -
Page 32: Program Type Selection (Program Type)
Apply the weights displayed by the machine at the indicated positions and then run a second test spin. Normally, the weights should be applied at the 12 o’clock with the exception of special programs for ALS1 and ALS2 aluminum. The machine allows the choice between eight different Program Type of balancing as listed in table T17.1. Table T17.1: Program types available Program Type Wheel... - Page 33 Press [P1] or [P3] on the keyboard to select the icon relative to the required program which will be outlined in blue. Press on the keyboard to confirm and to activate the required balancing program. Use and Maintenance Manual – 08/2018 Rel. 3 Page 28...
- Page 34 Based on the selected Program Type, will be displayed the Program Type status icon and the position of the imbalance weights. Based on the active Program Type, the Program Type status and the position of the imbalance weights are displayed on the icon band.
-
Page 35: Wheel Type Selection (Wheel Type)
The angular position of the balancing weights in the various Program Types is shown in table T17.2. Table T17.2: Angular position of the balancing weights in the various program types Program Type Machine data STD, ALS1 ALS2 acquisition ALU1,2,3,4,5 system Internal External Static... - Page 36 To select a specific Type of Wheel, proceed as described below: Phase Description Press [P1] or [P3] on keyboard select the icon relative to the program to be used. Activate the AUTO program by selecting (by default at power on) which will turn blue. Scroll through the list of available programs by pressing [P2] or [P4] on keyboard...
-
Page 37: Car Wheel Type (Auto-Vehicles)
17.2.1 CAR wheel type (auto-vehicles) The selection of the CAR Wheel Type allows the balancing of wheels of auto-vehicles. For OFF-ROAD vehicles, it may be appropriate to select the SUV Wheel Type (see paragraph below). To select the CAR wheel type, proceed as described below: Phase Description Press [P1] or [P3]... - Page 38 Activate the AUTO program by selecting (by default at power on) which will turn blue. Scroll through the list of available programs by pressing [P2] or [P4] on keyboard activate the MOTO program by selecting . Ensure that the status icon is activated.
-
Page 39: Suv Wheel Type (Off-Roads Vehicles)
17.2.3 SUV wheel type (Off-Roads vehicles) The selection of SUV wheel type allows the balancing of wheels for off-road vehicles. These vehicles are generally equipped with wheels that are larger than normal and the tyre is relatively large compared to the diameter of the rim (that means not the low profile or super low profile types). -
Page 40: Entering Wheel Dimensions
17.3 Entering wheel dimensions The dimensions of the wheel requiring balancing can be entered automatically (partial or total). Note: all the machines are equipped with a graduated scale for manually measuring the distance. 17.3.1 Automatic acquisition of the wheel dimensions for the STD and ALU1, 2, 3, 4, 5 Program Types 17.3.1.1 Machine with width sensor (if present) To acquire the wheel dimensions, proceed as described below: Phase... - Page 41 Only for programs STD, ALU1, ALU2, ALU3, ALU 4, ALU5; Take out first the width sensor and THEN the distance/diameter sensor and place them on the rim, as shown here. When the both sensors come back in rest position, it is automatically activated the STANDARD program.
- Page 42 Press on the keyboard to confirm and to activate the required balancing program. Based on the selected Program Type, will be displayed the Program Type status icon and the position of the imbalance weights. 17.3.1.2 Machine without Width sensor (MEC 810VD) To acquire wheel dimensions, proceed as described below: Phase Description...
- Page 43 Only on MEC 810 VD, is activated automatically (highlighted in blue). The blue band next to the icon will flash until the value is entered. Manually introduce the rim width . The width of the rim is normally printed on the rim itself. Alternatively use the appropriate width measuring gauge.
- Page 44 Only on MEC 810 VD, is activated automatically (highlighted in blue). The blue band next to the icon will flash until the value is entered. Manually introduce the rim width . The width of the rim is normally printed on the rim itself. Alternatively use the appropriate width measuring gauge.
- Page 45 Press on the keyboard to confirm and to activate the required balancing program. Based on the selected Program Type, will be displayed the Program Type status icon and the position of the imbalance weights. 17.3.1.3 Machine with SONAR device (if present) Phase Description Fit the wheel on the shaft and tighten with the ring nut.
- Page 46 Wait to hear the long acquisition beep and then set the sensor back to the rest position. During acquisition the distance and diameter values are displayed on the wheel dimension data band. Lower the wheel guard to run the balancing launch and to activate the SONAR device (in this way you automatic enter the width of the wheel).
- Page 47 Activate the STANDARD program by selecting the icon (by default at power on) which will be outlined in blue. Press on the keyboard confirm. Press [P1] [P3] keyboard to select the icon relative to the required program which will be outlined in blue. Press on the keyboard confirm and to activate the required balancing program.
- Page 48 Based on the selected Program Type, will be displayed the Program Type status icon and the position of the imbalance weights. Lower the wheel guard to run the balancing launch. Please notice: the SONAR device only works with the STD program for steel wheels. In order to have a new width reading, it is necessary to take again the distance/diameter value before lowering the carter.
-
Page 49: Automatic Acquisition Of The Wheel Dimensions For The Als1, Als2 Program Types
17.3.2 Automatic acquisition of the wheel dimensions for the ALS1, ALS2 program types To automatically enter the dimensions of the wheel in the ALS1 and ALS2 program types proceed as described below: Phase Description Fit the wheel on the shaft and tighten with the ring nut. Extract Distance/Diameter ALS2 program automatic activation: Automatic... - Page 50 Wait to hear the long acquisition beep and then set the sensor The machine automatically back to the rest position. starts the ALS2 program. The wheel dimensions have been acquired and the values can be displayed on the wheel dimensions data band. ALS1 PROGRAM ACTIVATION Check that the required program icon is selected;...
-
Page 51: Use Of The Special Program Types For Als1 Aluminum Wheels
Based on the selected Program Type, will be displayed the Program Type status icon and the position of the imbalance weights. 17.4 Use of the special program types for ALS1 aluminum wheels The machine has two special Program Types for aluminum wheels called ALS1. These two programs are different from standard Program Type for aluminum wheels (ALU1 up to ALU5) because the user is allowed to select the position where to apply the weights. -
Page 52: Search Of The Balancing Planes
17.4.2 Search of the balancing planes with distance/diameter sensor gauge The purpose of the balancing planes research is to find the balancing planes which were previously selected by the operator in order to apply the balancing weights. Proceed as described below: Phase Description Adhesive surface... -
Page 53: Use Of The Special Program Types For Als1 And Als2 Aluminum Wheels With Laser (Optional On Mec 810Vd)
Lower the wheel guard to run the balancing launch. At the end of the launch, the imbalance data will be displayed. If you have to balance an identical wheel, it is possible to skip the data acquisition of the balancing planes and perform immediately with the balancing spin and then with the search for balancing planes. -
Page 54: Optimization
The laser pointer will identify the weight application positions on both internal and external (for ALS2) or only external (for ALS1) The weights must always be imbalance points. applied at 6 o’clock. Lower the wheel guard to perform a balancing spin. At the end of the spin the unbalance data will be displayed. - Page 55 If the wheel’s static imbalance is less than 12 grams, the ERR 055 error message will appear and it will automatically exit the OPTIMIZATION program. If, on the other hand the wheel’s static imbalance is greater than 12 grams, the machine will start the OPTMIZATION program.
-
Page 56: Hidden Weights Program
Remove the wheel from the balancing machine, remove the bead from the tyre and rotate it until the valve matches the mark on the tyre. Optimization is finished: exit the optimization menu by pressing [P5] Remount the wheel on the balancing machine and balance it with the normal procedure. - Page 57 Turn the wheel by hand until all of the external imbalance search LEDs light up. Press [P1] or [P3] on keyboard select the icon relative to the program to be used. Activate the HIDDEN WEIGHTS program by selecting (which will be outlined in blue and confirm by pressing [P6] on the keyboard.
- Page 58 Manually rotate the wheel anticlockwise passing the imbalance point and position the sensor behind the second selected spoke. Confirm by pressing [P6] on the keyboard. Using the sensor, apply the weight behind the first selected spoke Using the sensor, apply the weight behind the second selected spoke W2.
- Page 59 19.2 Hidden Weights Program (machines WITH LASER: MEC 810VDL and MEC 820VDL) To access the HIDDEN WEIGHTS program, proceed as described below: Phase Description Apply the internal weight, stated on the left display, on the rim. Turn the wheel by hand until all of the external imbalance search LEDs light up at 6 o’clock.
- Page 60 Manually rotate the wheel anticlockwise passing the imbalance point and with the sensor behind the second selected spoke at 6 o’clock Confirm by pressing [P6] on the keyboard. Apply the weight behind the first selected spoke W1 at 6 o’ clock. Apply the weight behind the second selected spoke W2 at 6 o’...
-
Page 61: Second Operator
20. SECOND OPERATOR The machine has two separate memories allowing two operators to work simultaneously with different settings. This feature can make operations at the workshop quicker because when, for example, an operator is busy with removing or remounting a tyre, the other operator can use the machine to perform balancing operations and vice versa. -
Page 62: Utility Programs
21. UTILITY PROGRAMS Utility Programs are available only in NORMAL mode. 21.1 Selection the imbalance display resolution The machine has two wheel imbalance display resolutions. The two resolutions are defined as X1 (high resolution) and X5 (low resolution). The resolution with which the imbalances of the wheel are displayed varies depending on the unit of weight as indicated in table T21.1. -
Page 63: Selection Of The Static Imbalance Display
Activate the “X1” RESOLUTION program by selecting Ensure that the status icon is activated. 21.2 Selection of the static imbalance display To view the STATIC IMBALANCE proceed as described below: Phase Description Press [P1] or [P3] on keyboard select the icon relative to the program to be used. Activate the DYNAMIC program by selecting (by default at power on) which will turn blue. -
Page 64: Electromagnetic Clamping Brake (Only On Mec 820Vd)
Activate the STATIC program by selecting Ensure that the status icon is activated. Note: in some cases, static imbalance is forcibly set by the machine according to the current settings. For example, if the MOTO Wheel Type program is enabled and the width set is less than 4.5 inches, the machine will automatically set the static imbalance display. 21.3 Electromagnetic clamping brake (only on MEC 820VD) The electromagnetic clamping brake is useful to block the wheel in any position defined by the user and to simplify some operations such as the application or removal of balancing weights. -
Page 65: Illuminator (Only On Mec 820Vd) Page
Activate the BRAKE DISABLING program by selecting The electromagnetic clamping brake is deactivated automatically in the following cases: • Every time a balancing launch is run; • Every time a SWI procedure is performed (stop of the wheel on the imbalance position) at low speed; •... -
Page 66: Swi Wheel Stop Procedure On The Positions Of Imbalance (Only On Mec 820Vd)
Activate the ILLUMINATOR DISABLING program by selecting The illuminator is also automatically manage by the machine that turns it on in the following cases: • When the Distance/Diameter sensor is extracted; • After a wheel stop procedure on the position of imbalance (SWI procedure) which resulted in the balancing position of the internal weight;... - Page 67 21.5.2 SWI procedure at low speed In the low speed SWI procedure, the wheel has already run the launch and is stationary. If the operator presses [P8] key Start with the wheel guard raised, the machine will apply slight acceleration to the wheel and then let it spin by inertia. When the speed is low enough, the machine will wait until the wheel passes through one of the angular positions of imbalance, therefore, it will enable the electromagnetic clamping brake.
-
Page 68: Select Grams/Ounces
21.6 Select grans/ounces This button allows you to display and/or change the unit of weight currently selected. The units available are grams (GRAM) and ounces (OUNCE). To change the UNIT OF MEASURE OF THE WEIGHT, proceed as described below: Phase Description Press [P1] or [P3] on the key board... -
Page 69: Select Inches/Millimeters
Activate the work program in OUNCES by selecting ensure that status icon is activated. 21.7 Select inches/millimeters This button allows you to display and/or change the wheel’s unit of dimension currently selected. The units available are inches (INCHES) and millimeters (MILLIM). To change the UNIT OF MEASURE OF THE WHEEL DIMENSIONS, proceed as described below: Phase Description... -
Page 70: Select Weight Material In Fe/Zn Or Pb
Confirm activation of the MILLIMETERS work program by pressing [P6] on the keyboard Activate the work program in MILLIMETERS by selecting ensure that status icon is activated. 21.8 Select weight material in Fe/Zn or Pb This button allows you to select the balancing weight material. The options available are listed in table T21.3. The selection of the material type slightly changes the balancing results because the weights in Iron/Zinc are lighter than those in Lead and therefore are larger. - Page 71 Activate the work program with WEIGHTS in IRON/ZINC by selecting (by default at power on) which will turn blue. Scroll through the list of available programs by pressing [P2] or [P4] on the keyboard Confirm activation of the WEIGHTS in LEAD work program by pressing [P6] on the keyboard Activate the work program in WEIGHTS in LEAD by selecting...
-
Page 72: Error Codes And Solution
22. ERROR CODES AND SOLUTION The Error signal is always accompanied by a triple beep indicating that the machine cannot run the command given by the operator, or, during operation, conditions were encountered that prevent the action in progress from continuing. The machine reports error conditions by displaying an outline of the description of the cause of the error. - Page 73 The error code can be exited in the following ways: OPERATOR CONFIRMATION The machine exits from the error code display when the operator presses any key. The machine exits from the error code display when the operator performs an action linked to said OPERATOR ACTION error code (for example, ERR 016 brings the Distance sensor back to the rest position).
-
Page 74: Warning Codes
23. WARNING CODES Warning. The Warning signal is always accompanied by a double beep that prompts the operator to perform a particular action or it refers to the fact that the machine has changed status. In any case, the requested operation is not prevented or the current function is completed. -
Page 75: Diagnostics And Efficiency Of Accessories
24. DIAGNOSTICS AND EFFICIENCY OF ACCESSORIES In some occasion, by refitting the wheel on the wheel balancer, the machine could show some more unbalance which is for sure due to the not equal fitting of the tyre on the machine shaft as originally. Some little differences in weight within 15gr (matter of fact it is always half the shown value: i.e. -
Page 76: Electrical Diagram
26. ELECTRICAL DIAGRAM 1 – KLCD board (Keyboard) 2 – CPU-LCD board 3 – PWRB power supply board 4 – GPB board (Graphic board) Use and Maintenance Manual – 08/2018 Rel. 3 Page 71... - Page 77 Use and Maintenance Manual – 08/2018 Rel. 3 Page 72...
- Page 78 CORMACH S.r.l. via A. Pignedoli, 2 42015 CORREGGIO (RE) ITALY Tel. +39 0522 631274 - Fax +39 0522 631284 e-mail: cormach@cormachsrl.com www.cormachsrl.com...
Need help?
Do you have a question about the MEC 810VD-VDL-VDBL and is the answer not in the manual?
Questions and answers