Table of Contents
Advertisement
Advertisement
Table of Contents

Subscribe to Our Youtube Channel
Related Manuals for Cormach TOUCH MEC 1000 SONAR


Summary of Contents for Cormach TOUCH MEC 1000 SONAR
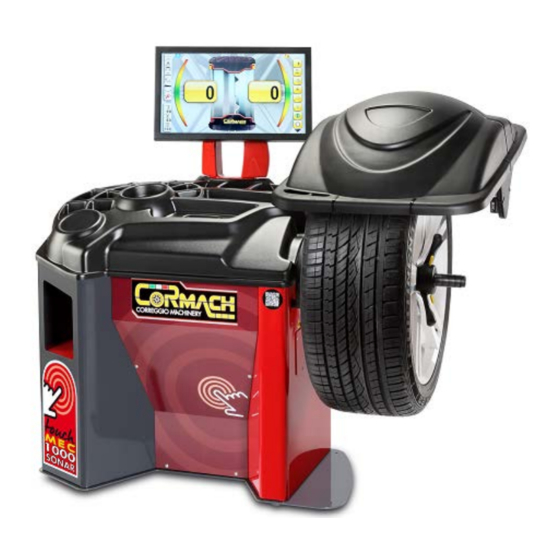
- Page 1 WHEEL BALANCERS TOUCH MEC 1000 SONAR TECHNICAL SUPPORT MANUAL...
-
Page 3: Table Of Contents
8. TROUBLESHOOTING..................................48 9. ELECTRICAL DIAGRAM ..................................50 Cormach s.r.l. reserves the right to make any change to products in order to improve them. Cormach s.r.l. reserves the right to make any change to this manual without notice. Technical Support Manual – 03/2017 Rel. 0... -
Page 4: Access To The Service "Menus
1. ACCESS TO THE SERVICE “MENUS” Inside the SERVICE menu, the machine has a series of CONFIGURATION programs to manage the machine settings and TESTS to help detect any anomalies. To access the SERVICE mode, proceed as described below: Switch the machine ON by pressing the main switch on the back of the wheel balancer, then wait for the test to verify the... - Page 5 At the end of the test, the machine is in NORMAL mode. Technical Support Manual – 03/2017 Rel. 0 Page 3...
- Page 6 Press on icon to exit the SERVICE mode and enter in NORMAL mode. Picture F1.1: SERVICE menu The programs can be selected in SERVICE mode BY PRESSING ON THE MONITOR THE ICONS Technical Support Manual – 03/2017 Rel. 0 Page 4...
- Page 7 Table 1.1: CONTROL ICONS key Icon Meaning Launch number counter selection icon. Test program menu selection icon. Configurations menu activation icon. Electromagnetic brake activation icon. Illuminator activation icon. TOUCH SCREEN monitor test and calibration icon. Technical Support Manual – 03/2017 Rel. 0 Page 5...
-
Page 8: Accessing The Test Programs
Pick-up signal test selection icon (This also controls the parameters that affect the signal). Shaft imbalance test enabling icon. Bearing smoothness test enabling icon (Reserved for Cormach Technical Assistance Service). Encoder disc reading test selection icon. Voltage - frequency converter test selection icon. -
Page 9: Shaft Rotation Speed Test
2.1 Shaft rotation speed test This menu option is used to run the shaft rotation speed test. This test allows you to control the number of shaft RPMs during the launch. A number indicating the speed of the shaft will be viewed on the right display. To access the RPM TEST program, proceed as described below: Press on icon. - Page 10 Lower the wheel guard: the machine will run a launch. At the end of the launch, the screen will display the speed of rotation in RPM (revolutions per minute). It is possible to repeat rotation every time it is necessary. The nominal speed of rotation 135 ÷...
-
Page 11: Pick-Up Signals Test
Press on icon to exit the RPM TEST program. 2.2 Pick-up signals test To run the test, you This menu option is used to run the pick-up signals test. This program allows you to check the pick-up signal. will need to mount a preferably balanced steel wheel (complete with rim and tyre) measuring approximately 15” in diameter and 6”... - Page 12 Press on icon. Lower the wheel guard: the machine will run a launch and display shaft RPM. The machine will spin continuously and the pick-up signals at the three attenuation processes (Attenuation 1, Attenuation 2, Attenuation 4) will be displayed in sequence.
- Page 13 Press on icon to exit the SIGNAL TEST program. Example The values of the displayed signals are expressed in an internal number format and not in any international unit of measure. The attenuation circuit controls the pick-up signals to avoid saturating the input stage of the CPU-LCD board which offers poor results. If both pick-up signals differ significantly from the values provided in table T8.2 but are similar to each other, check whether: •...
-
Page 14: Voltage - Frequency Converter Test
2.3 Voltage – frequency converter test This menu option is used to run the voltage - frequency converter test (or VFC) on the CPU-LCD board. The converter voltage – frequency test shows two numbers on the displays that represent the electronic control board conversion values. To access the VOLTAGE - FREQUENCY CONVERTER TEST program, proceed as described below: Press on icon. - Page 15 The voltage - frequency converter test program displays numbers that represent internal conversion values used in the electronic control board, and 40.0 ÷ 45.0 must be between (See table T8.2). If the value of both or one of the two pick-ups is 0, check the connection and change the pick- up, or both, if necessary.
-
Page 16: Pick-Up Spring Pre-Load Adjustment
PICK-UP SPRING PRE-LOAD ADJUSTMENT For correct operation the pick-up must be pre-loaded with a spring. To do so, the spring must be compressed by a screw, according to the following: ALL PROCEDURES (INCLUDING MINOR) MUST BE CARRIED OUT BY QUALIFIED STAFF; BEFORE PERFORMING ANY PROCEDURE, DISCONNECT THE ELECTRICAL POWER SUPPLY Tighten the hex screw, by hand, as far as it will go;... -
Page 17: Encoder Disc Test
2.4 ENCODER disc test This menu option is used to run the ENCODER disc test. To access the ENCODER TEST program, proceed as described below: Press on icon. Press on icon. Technical Support Manual – 03/2017 Rel. 0 Page 15... - Page 18 Turn the shaft and make sure all of 0 ÷ 255 the values between read (from 000 to 255 turning clockwise, and from 255 to 000 turning anti clockwise). When the reset "notch" on the encoder disc is in position H12, the displayed value must be 000 (or it must be reset to 000 if the value is different).
-
Page 19: Accessing The Configuration "Menus
3. ACCESSING THE CONFIGURATION “MENUS” The machines must be configured so that the electronic control board (CPU-LCD) receives communication from the installed devices. The configuration must be carried out from the CONFIGURATION MENU, on the parameters that are available in SERVICE mode. The CONFIGURATION MENU also makes it possible to run a number of operations (such as resetting the SPIN counter) reserved for technical staff. - Page 20 WHEEL GUARD MICRO operation test icon. SONAR calibration program activation icon. Electromagnetic brake activation icon. Illuminator activation icon. Laser mode activation icon (RESERVED FOR “CORMACH s.r.l.” STAFF). Work language selection icon. Technical Support Manual – 03/2017 Rel. 0 Page 18...
-
Page 21: Enable/Disable Distance/Diameter Sensor
3.1 Enable/Disable distance/diameter sensor This menu option is used to enable or disable the distance diameter sensor. This is a dual function. To enable/disable the DISTANCE/DIAMETER SENSOR, proceed as follows: Press on icon. 14061 Enter the password pressing these icons in rapid sequence. - Page 22 Accordingly, DISTANCE/DIAMETER SENSOR is DISABLED. Proceed as described below to RE- ENABLE DISTANCE/DIAMETER SENSOR. Press on icon to exit the CONFIGURATIONS MENU. Technical Support Manual – 03/2017 Rel. 0 Page 20...
-
Page 23: Enable/Disable Width Sensor
3.2 Enable/Disable width sensor This menu option is used to enable or disable the width sensor. This is a dual function. To enable/disable the WIDTH SENSOR, proceed as follows: Press on icon. 14061 Enter the password pressing these icons in rapid sequence. - Page 24 Accordingly, the WIDTH SENSOR is DISABLED. Proceed as described below to RE- ENABLE THE WIDTH SENSOR. Press on icon to exit the CONFIGURATIONS MENU. Technical Support Manual – 03/2017 Rel. 0 Page 22...
-
Page 25: Sensors Calibration
3.3 Sensors calibration This menu option is used to enable the sensor calibration program. To enable/disable the WIDTH SENSOR, proceed as follows: Press on icon. Press on icon to exit the SENSORS CALIBRATION MENU. Technical Support Manual – 03/2017 Rel. 0 Page 23... -
Page 26: Distance Sensor Operation Test
3.3.1 Distance sensor operation test The distance sensor does not require any calibrating or adjusting. It is only possible to check whether the reading is correct. To test DISTANCE SENSOR operation, proceed as follows: Press on icon. Take out the distance sensor and move it forwards and backwards to test whether the magnetic band takes correct readings. - Page 27 Example Press on icon to exit the DISTANCE SENSOR OPERATION TEST MENU. Example Technical Support Manual – 03/2017 Rel. 0 Page 25...
-
Page 28: Diameter Sensor Calibration
3.3.2 Diameter sensor calibration To calibrate the DIAMETER SENSOR, proceed as follows: Press on icon. Position the diameter sensor as shown on the screen. The left screen will report the output The voltage must be voltage. between 0.99 1.13 Confirm the value by pressing on icon. - Page 29 Press on icon to exit the DIAMETER SENSOR CALIBRATION MENU. Example Technical Support Manual – 03/2017 Rel. 0 Page 27...
-
Page 30: Sonar Device Operation Test
3.3.3 SONAR DEVICE operation test The SONAR DEVICE does not require any calibrating or adjusting. It is only possible to check whether the reading is correct. To test SONAR DEVICE operation, proceed as follows: Press on icon. Press on icon. Technical Support Manual –... - Page 31 Verify the presence of voltage and ensure that the value in Volts is not zero. Example Press on icon to exit the SONAR DEVICE TEST MENU. Example Technical Support Manual – 03/2017 Rel. 0 Page 29...
-
Page 32: Enable Or Disable Electromagnetic Stopping Brake
3.4 Enable or disable electromagnetic stopping brake This menu option is used to enable or disable the electromagnetic stopping brake. This is a dual function. To activate and/or deactivate the ELECTROMAGNETIC STOPPING BRAKE, proceed as described below: Press on icon. 14061 Enter the password pressing these icons in rapid... -
Page 33: Enable Or Disable The Lighting Led
Accordingly, ELECTROMAGNETIC BRAKE DISABLED. Proceed as described below to RE- ENABLE THE ELECTROMAGNETIC BRAKE. The stopping brake setting affects machine operation: if it is disabled, the following functions are not available: • Locking the wheel in the imbalance position (at the end of rotation); •... - Page 34 14061 Enter the password pressing these icons in rapid sequence. Accordingly, the LIGHTING LED IS DISABLED. Proceed as described above to RE- ENABLE THE LIGHTING LED. Technical Support Manual – 03/2017 Rel. 0 Page 32...
-
Page 35: Enable Or Disable The Laser
3.6 Enable or disable the LASER This menu option allows you to enable or disable the laser to the application of weights with the program and ALS1 ALS2. This is a dual function. To activate / deactivate the LASER, proceed as follows: Press on icon. -
Page 36: Micro Wheel Guard Operation Test
The LASER is DEACTIVATED. Proceed as described above to REACTIVATE the LASER. 3.7 MICRO WHEEL GUARD operation test This option allows to control the correct operating of the MICRO SWITCH controlling the WHEEL GUARD. To activate the program proceed as follows: Press on icon. - Page 37 Lower the WHEEL GUARD. If the MICRO works properly, the machine will display the image as byside. Press on icon to exit the MICRO WHEEL GUARD OPERATION TEST. Technical Support Manual – 03/2017 Rel. 0 Page 35...
-
Page 38: Machine Calibration
4. MACHINE CALIBRATION To operate properly, the machine must be calibrated. Calibration allows storing the mechanical and electrical parameters specific to each machine so as to provide the best balancing results. 4.1 When to carry out machine calibration Table T4.1 lists the cases in which machine calibration should be carried out. Table T4.1: Conditions for carrying out machine calibration Condition Status... - Page 39 Press on icon. Remove the wheel and any other accessories from the shaft. Lower the wheel guard: the machine will run a launch. Fit the wheel on the shaft. Manually enter wheel dimensions. If the dimensions of the wheel were introduced before entering the calibration program, this step can be skipped.
- Page 40 Extract the distance sensor and place it on the wheel as shown here. Read the distance value on the graduated scale. The distance value is always expressed in millimeters. Press on icon. Enter the detected value by pressing on icons: Press on icon.
- Page 41 Press on icon. Enter the detected value by pressing on icons: Lower the wheel guard: the machine will run a launch. By hand, turn the wheel in the direction marked by the arrow until you see 50 g on the left display.
- Page 42 On the inner side of the wheel, at 12 o'clock, apply the 50 g weight. Lower the wheel guard: the machine will run a launch. Take off the 50 g weight applied to the inner side (identified by the red X in the figure). By hand, turn the wheel in the direction marked by the arrow...
- Page 43 Keep wheel guard lowered. The machine will perform a set of short spins to calibrate the function of automatic stop on imbalance position (see chapter SWI Stop the wheel on imbalance) Do not lift the wheel guard and do not press on icon during this procedure.
-
Page 44: Machine Calibration For The Moto Wheel Type
4.3 Machine calibration for the MOTO wheel type The calibration for MOTO wheel type (motorcycle wheels) is completely separated from CAR/SUV wheel type because in the calibration for MOTO a specific adaptor for motorcycle wheels is used and this slightly the shaft balancing. If the calibration for MOTO wheel type has not been done and the user try to spin the wheel for balancing in the MOTO wheel type mode, the machine will not run and will display an error code ERR 031. - Page 45 Mount the motorcycle adaptor on the shaft as shown here. The flange for motorbike wheels must be installed so that the “CAL” markings on the shaft flange flange motorbikes line up. Lower the wheel guard: the machine will run a launch. At the end of the launch, the machine will display the message shown here.
- Page 46 If the weight position is significantly different from the vertical position, the machine will refuse to perform the spin and it will display an error code ERR 043. If the motorcycle adaptor is near to the vertical position but not in the precise vertical position, the machine will spin but at the end of the calibration each balancing spin will have an error in the balancing angular position of the weights.
- Page 47 At the end of the spin, the MOTO wheel type calibration is finished and the machine will switch to NORMAL mode, ready to run the balancing. To exit at any time the calibration procedure during its progress, press on icon. The MOTO wheel type and the ALU1 Program Type will remain set and the wheel dimensions will...
-
Page 48: Error And Warning Codes
5. ERROR AND WARNING CODES The machine indicates error conditions by alternating the display of an error code with a brief description (in English) of the error cause. The machine displays the code for different times depending on the error code itself, as indicated in the "Display" column in table T5.1. - Page 49 WARNING: No wheel imbalances in DYNAMIC mode: it is not possible to perform the SWI procedure at a low speed. WARNING: No wheel imbalances in STATIC mode: it is not possible to perform the SWI procedure at a low speed. WARNING: MOTO Wheel Type is enabled: it is not The SWI procedure at low speed id disabled due to operator possible to perform the SWI procedure at a low...
-
Page 50: Acoustic Signals
6. ACOUSTIC SIGNALS The machine emits different acoustic signals based on its status. The acoustic signals are listed in table T6.1. Table T6.1: Acoustic signals Signalling Meaning Notes Very brief beep Manual entry of wheel geometric data. Short beep Selecting a program or a function. •... - Page 51 Table T8.2: Reference values for parameters Parameters Value Unit of measure Speed of rotation 135 ÷ 145 Pick-up Signal 'A' 70 ÷ 120 CPU-LCD internal unit Pick-up Signal 'B' 70 ÷ 120 CPU-LCD internal unit Voltage – frequency converter 40.0 ÷ 45.0 Static imbalance of shaft unit Max.
-
Page 52: Electrical Diagram
9. ELECTRICAL DIAGRAM It is possible to order the following codes: 1 – Code 21201041: CPU-LCD T board 2 – Code 21201019: PWRB power supply board 3 – Code 21201001: GPB (Video) board Technical Support Manual – 03/2017 Rel. 0 Page 50... - Page 54 CORMACH S.r.l. via A. Pignedoli, 2 42015 CORREGGIO (RE) ITALY Tel. +39 0522 631274 - Fax +39 0522 631284 e-mail: cormach@cormachsrl.com www.cormachsrl.com...
Need help?
Do you have a question about the TOUCH MEC 1000 SONAR and is the answer not in the manual?
Questions and answers