Table of Contents
Advertisement
Quick Links
Advertisement
Table of Contents

Related Manuals for Topcon BM-7AC


Summary of Contents for Topcon BM-7AC
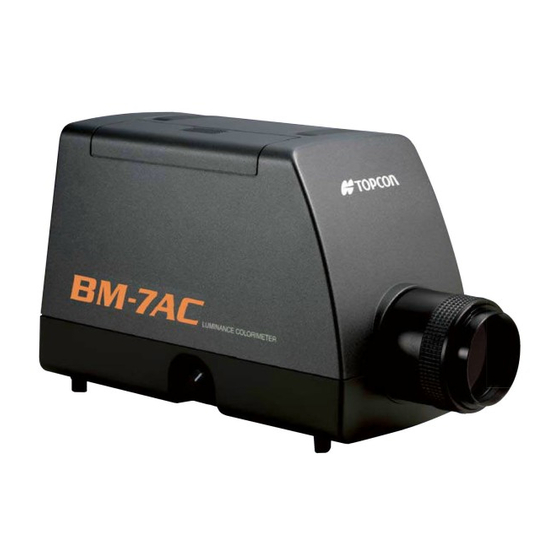
- Page 1 INSTRUCTION MANUAL LUMINANCE COLORIMETER Rev.2...
-
Page 3: Introduction
CRT, LCD, LCD backlight, LED or the like, or reflected light from a painted surface or printed material. Read this manual carefully before using the BM-7AC in work applications. Precautions for Use ・ Be sure to only use the AC adapter supplied with this instrument, or a separately sold authorized AC adapter. -
Page 4: Display For Safe Use
Display for safe use In order to prevent unforeseeable injury to users and others, prevent damage to property or the like, and in order that the instrument is used safely, important items are indicated on the instrument and in the instruction manual. -
Page 5: Safety Precautions
In the case of any strange noise, smell or smoke from the instrument, immediately turn OFF the power to the device and unplug the AC adapter from the power outlet. Continuing to use the device as is could cause fire. Mandatory Contact the dealer or TOPCON TECHNOHOUSE CORPORATION. - Page 6 Caution Do not look directly into the sun or at the light bulb filament. Doing so could result in damage to the eyes. Prohibited Do not put the instrument on an unstable stand or uneven surface. Doing so could cause the instrument to fall or tip over. Prohibited Do not plug in or unplug the plug with wet hands.
-
Page 7: Table Of Contents
Table of Contents Introduction ....................................1 Display for safe use ................................2 Safety Precautions ................................. 3 Notation Rules Used in This Manual ..........................8 1. Before Use ................................9 Checking the Unit and Supplied Parts ....................... 9 Part Names and Function ............................ 10 Preparation ................................ - Page 8 3.1.2 Data/Setting Item Display ..................................43 3.1.3 Numerical Value Setting ....................................44 Standard sample ..............................45 White Board ................................45 White Board Luminance Factor ......................... 46 White Board Correction Factor ......................... 46 Correction Factor ..............................47 3.6.1 Checking/Setting the Correction Factor ............................48 3.6.2 Inputting the Correction Factor ................................49 3.6.3...
- Page 9 4.2.17 FGR Command ....................................... 67 4.2.18 RG K Command ......................................68 4.2.19 RG L Command ......................................68 4.2.20 WG K Command ......................................68 4.2.21 WG L Command ......................................69 4.2.22 WHO/VER/SRL Command ..................................69 4.2.23 UT Command ........................................69 4.2.24 CT Command ........................................
-
Page 10: Notation Rules Used In This Manual
Notation Rules Used in This Manual The following notation rules are used in this manual. Notation Explanation [MODE], [UP] Indicates buttons, or title of the screen displayed on the LCD display. ☞ 「」 Indicates a reference location in the manual. ☞... -
Page 11: Before Use
1.1 Checking the Unit and Supplied Parts Make sure that the main unit and all of the following supplied parts are in proper order. If there are any missing parts, contact the dealer or TOPCON TECHNOHOUSE CORPORATION. ・ Main unit ・... -
Page 12: Part Names And Function
1. Before Use 1.2 Part Names and Function ■Main Body Inner switches/buttons Handle Diopter adjustment ring Objective lens Eyepiece Panel switches USB connector RS-232C connector Analog output connector (X, Y, Z) DC input connector Power switch * Analog output model only Name Function Inner switches/buttons... - Page 13 1. Before Use Name Function Analog output connector Connected when using analog output. Analog output is a function only There are three connectors corresponding to used for analog output model. tristimulus value X Y, Z. Memo ・ Use the manual range when using this output. ・...
- Page 14 Screws that can be used are a metric M3 screw, round-tipped, 5mm long or more slotted set screw, or hexagonal socket head set screw. Tool attachment screws Used when assembling a system, and are screws for attaching the BM-7AC. M4×0.7 (Dia: 4 ㎜, Pitch: 0.7 ㎜) screws ☞ Details 「Appendix: External Dimensions」...
- Page 15 1. Before Use ■Panel Switches FAST/SLOW switch AUTO/MANU RUN/HOLD switch switch LIGHT switch CAL switch MODE switch The function of each of the switches is as described below. AUTO/MANU Switch This switche is used to select AUTO or MANUAL measurement ranges. The range is set to AUTO when the power is ON.
- Page 16 CAL Switch This switch is used to perform zero-adjustment. Internal shutter of BM-7AC make a shaded state and perform measurement in the shaded state, and saves the value. The saved value in the shaded state is subtracted from the measurement value and the result is displayed.
- Page 17 1. Before Use ROTATION This button is used to select a parameter to be inputted. Each time the button is pressed, the selection candidate is displayed in order. The displayed contents differ according to the parameter type. Example : ・ → 0 → 1→ 2 → ……… → 8 → 9 → + → - → E → ・ → ……… 2400 →...
- Page 18 Select when setting a single correction factor. The correction is set in the function mode. FACTOR B Select when setting the direct correction function, using other instrument BM-7AC, SC-777 or SR-3. The correction is set in the function mode. ☞ Function Mode 「3.1 Function Mode」...
- Page 19 1. Before Use ■ LCD Measurement results are displayed on the LCD as follows. Absolute value Correction factor group Measurement measurement:ABS 00_0 : No correction factor group angle /Difference xx_y : Correction factor group 2.0/1.0/0.2/0.1 measurement:DIF xx : 01 – 10 y : 1 - 5 F2.0...
-
Page 20: Preparation
1. Before Use 1.3 Preparation 1.3.1 Connecting the AC Adapter Be sure to use the supplied AC adapter or a separately sold authorized AC adapter. AC Adapter failure may result in fire or electric shock. Mandatory Remove dust or moisture from the AC adapter plug. Failure to do so could cause fire. - Page 21 1. Before Use Plug in the AC adapter plug into the power outlet.
-
Page 22: Connecting A Pc
1.3.2 Connecting a PC When connecting a PC, use a RS-232C cable or USB cable to connect the BM-7AC and PC. When using a RS-232C cable, use a straight cable supporting for a DOS/V PC. It is possible to connect up to a maximum of 16 instruments to one PC by USB, also parallel use with an RS- 232C cable is possible. - Page 23 1. Before Use RS-232C specification for this unit is as shown below. ・ Cable Straight cable supporting for a DOS/V PC ・ Communication method Full duplex ・ Synchronous system Start stop synchronization ・ Baud rate 2400/4800/9600/19200/38400 BPS (Bits Per Second) ・...
-
Page 24: Collimation Of The Measured Object
1. Before Use 1.3.3 Collimation of the Measured Object Do not look directly at a bright light such as the sun or a bulb filament. Doing so could damage the eyes. Prohibited Use only specified screws when using the tripod screw and screw holes for jig attachment. -
Page 25: Turning On/Off The Power
To finish measurement, press the RUN/HOLD switch. The final measurement results of continuous measurement will be displayed. Memo ・ If it has been 1 year or more since calibration has been performed by TOPCON TECHNOHOUSE factory, a screen recommending maintenance will be displayed before zero- adjustment. -
Page 26: Switching The Response Speed Of The Photo-Receiver Circuit
1. Before Use Canceling the warm up To cancel the warm up, press the CAL switch during warm up. The following screen is displayed, and when the CAL switch is pressed again, zero-adjustment begins. DARK MEASURE Push CAL Key. ・ When turning the power ON again after a short time has elapsed after the power Request is turned OFF, do not cancel the warm up. -
Page 27: Maintenance Recommended Display
After purchasing the instrument, or after 1 year has elapsed since calibration was last performed by TOPCON TECHNOHOUSE factory, the following message will be displayed when the power is turned ON to indicate that it is time to perform calibration. -
Page 28: Error Display
Displayed when the model name of reference instrument which is set to the BM-7AC differ from the model name of the instrument that is the actual Different Instrument reference during setting the direct correction function. Check the model name of reference instrument setting to the BM-7AC. - Page 29 USB ERROR 「1.3.2 Connecting a PC」 Connection ☞ 「3.9 RS-232C Parameters」 Communication Conditions ☞ 「3.12 Communication Format」 Displayed when there is an internal shutter error. The shutter may be Shutter ERROR broken, so contact the dealer or TOPCON TECHNOHOUSE office.
-
Page 30: Measurement Operation
☞ BM-7AC Measurement Diameter 「Appendix: Specifications」 The attachment lens is mounted using the screw on the tip end of the BM-7AC objective lens. Also, when using the attachment lens, a correction factor must be set for the BM-7AC unit. ☞... -
Page 31: Using The Unit In A Other Device
Using the Unit in a other device It is possible to use the BM-7AC in a system. A system is presumed to be an apparatus in which the BM-7AC is mounted on an XY stage, and measurement is performed while moving. - Page 32 Interlink FACTOR B RS-232C Set dip switch 5 of the BM-7AC to be corrected to the FACTOR B side, and turn ON the power. Turn on the power to the reference luminance colorimeter. The BM-7AC to be corrected changes to the function mode, and the [*Direct-Correction Factor*] screen is displayed.
- Page 33 Select the type of the reference luminance colorimeter. Press the [ROTATION] button and select the type of the reference luminance colorimeter ("*" is displayed), then press the [ENTER] button. In the case of a BM-7AC, select "COMMON" SELECT REF DEVICE...
- Page 34 Meaning of Error Displays 「1.5 Error Display」 Switch dip switch 8 of the BM-7AC to be corrected to the WRITE side to write data. Place the BM-7AC to be corrected at the location where the reference luminance colorimeter is placed, then press the [ENTER] button to display the following screen.
- Page 35 2. Measurement Operation The correction factor is calculated and the following screen is displayed. K11 KX= 9.343E-01 KY= 9.589E-01 KZ= 9.396E-01 C=SET R=NEXT S=PAGE When "SET" is displayed on the following screen by pressing the [CHANGE] button, indicates that the correction factor has been set. K11...
-
Page 36: Absolute Value Measurement
2. Measurement Operation 2.2 Absolute Value Measurement The procedure for absolute value measurement is described below. Set dip switch 4 to the ABS side. Press the RUN/HOLD switch. The panel switch [RUN] blinks and continuous measurement starts. To end measurement, press the RUN/HOLD switch. The panel switch [HOLD] blinks, and the measurement result is displayed. -
Page 37: Difference Measurement
2. Measurement Operation 2.3 Difference Measurement With this device it is possible to measure the difference from reference data. The procedure for measuring the difference is as described below. Set dip switch 4 to the DIF side. When DIF is set for the first time after the instrument was turned ON, the following screen will be displayed. -
Page 38: Measuring The Light Source Color
2. Measurement Operation 2.4 Measuring the Light Source Color The procedure for measuring the light source color is described below. Make sure the power to the instrument has been turned OFF. If the power is ON, turn it OFF. Set dip switch 3 to the SOURCE side. ... -
Page 39: Measuring The Object Color
If the proper luminance factor is not set, an incorrect measurement value will be displayed. ・ For the white board, use a TOPCON TECHNOHOUSE standard white board WS-3. After measurement, the measurement result will be displayed for about 3 seconds, then measurement of the object color will start automatically in continuous measurement. -
Page 40: Measurement Value Display Mode
2. Measurement Operation 2.6 Measurement Value Display Mode When the display is in the HOLD state ([HOLD] of the RUN/HOLD switch is blinking), it is possible to change the measurement value display mode by pressing the MODE switch. Each time the switch is pressed, the display changes as shown below. ―... - Page 41 2. Measurement Operation ― Object Color ― Chromaticity xy Luminance Lv F2.0 ABS K00 x= 0.2907 y= 0.2281 L= 5.350E+02 cd/m^2 CIELAB F2.0 ABS K00 a*= 0.2 b*= 0.0 L*=100.5 CIELUV F2.0 ABS K00 u*= 0.4 v*= 0.0 L*=100.5...
-
Page 42: Using The Analog Output Connector
2. Measurement Operation 2.7 Using the Analog Output Connector It is possible to obtain analog output from the internal photo-detectors X Y, Z using this connector. Memo ・ The analog output connector is a function that can only be used for analog output model. -
Page 43: Analog Output Response Speed
2. Measurement Operation 2.7.2 Analog Output Response Speed The analog output response speed differs depending on the range used. ☞ Response Speed 「Appendix: Response Speed」 When checking the build up characteristics when a light is on, set the FAST/SLOW switch to FAST. -
Page 44: Various Settings
3. Various Settings 3. Various Settings 3.1 Function Mode The function mode is a mode for checking or changing various data or settings that are store in the internal memory of the instrument. 3.1.1 Entering /Returning from the Function Mode Entering /returning from the function mode is performed using the [FUNCTION] button. -
Page 45: Data/Setting Item Display
3. Various Settings 3.1.2 Data/Setting Item Display After moving to the function mode, each time the [ENTER] button is pressed, the type of data/setting items changes. Press the [ENTER] button until the data/setting item to be checked or changed is displayed. The displayed data/setting items are as shown below. -
Page 46: Numerical Value Setting
3. Various Settings 3.1.3 Numerical Value Setting Numerical values are set when setting the luminance factor of the white board or the like. The procedure for setting numerical values in the function mode is the same for all setting items. Here, an example of setting the luminance factor of the white board is used to explain the procedure for setting numerical values in the function mode. -
Page 47: Standard Sample
3. Various Settings After setting has been completed, press the [ENTER] button. Memo ・ If a mistake is made during input of the numerical value, complete the procedure to step 4 then start over again from step 1. 3.2 Standard sample After the power has been turned ON, first the measurement value of the standard sample from when difference measurement was performed is displayed. -
Page 48: White Board Luminance Factor
3. Various Settings 3.4 White Board Luminance Factor The white board luminance factor is displayed. ☞ Display Method 「3.1.2 Data/Setting Item Display」 * White board * Luminance factor 100.0 % ☞ Change Procedure 「3.1.3 Numerical Value Setting」 3.5 White Board Correction Factor The white board correction factor is displayed. -
Page 49: Correction Factor
3. Various Settings 3.6 Correction Factor The number of the currently set correction factor is displayed. ☞ Display Method 「3.1.2 Data/Setting Item Display」 * FACTOR NUMBER * SET FACTOR 01 The correction factor is a factor for correcting the measurement value by using it to multiply the measurement value. -
Page 50: Checking/Setting The Correction Factor
3. Various Settings 3.6.1 Checking/Setting the Correction Factor The values of the registered correction factors are displayed. If there are no factors registered, "NO DATA" is displayed. "SET" is displayed underneath the number of the correction factor currently being used. K01... -
Page 51: Inputting The Correction Factor
3. Various Settings 3.6.2 Inputting the Correction Factor The correction factor for No. 01 is displayed. K01 KX= 1.000E+00 SET KY= 1.000E+00 KZ= 1.000E+00 R=NEXT S=PAGE The procedure for inputting the correction factor is as described below. Press the [ROTATION] button to display the data for the number of the correction factor to be input [ROTATION] : The correction factor for the next number is displayed. - Page 52 3. Various Settings Direct Input The correction factor input screen is displayed. K01 DIRECT INPUT KX= 1.000E+00 KY= 1.000E+00 KZ= 1.000E+00 The procedure for inputting the correction factor directly is as described below. Press the [CHANGE] button. The KX value can be input and, set the value. ☞...
- Page 53 3. Various Settings Set the sample data and press the RUN/HOLD switch. After measurement, the measurement result is displayed for about 10 seconds, then, the correction factor is calculated using the input reference data and measured sample data is displayed. K01...
-
Page 54: Clearing The Correction Factor
3. Various Settings 3.6.3 Clearing the Correction Factor The following screen is displayed. FACTOR CLEAR ALL CLEAR SELECT CLEAR *BACK Press the [ROTATION] button, and select the process to perform (indicated by "*"). ALL CLEAR : Selected when clearing all correction factors. SELECT CLEAR : Selected when clearing individual correction factors. -
Page 55: Area Correction Factor
「4. Communication with a PC」 Area correction factors can be registered for a total of 10 groups to the BM-7AC. Groups 1 to 5 are assigned to area correction factors for the xy chromaticity diagram, and groups 6 to 10 are assigned to area corrections factors for the u'v' chromaticity diagram. - Page 56 3. Various Settings The area correction function enable measurement data to activate the correction factor automatically at preset area in chromaticity diagram when measured chromaticity value enter the preset area. The area can be specified up to 5 areas at once. For example, when you intend to measure the luminance and chromaticity of R (red), G (green), B (blue), and W (white) color with each correction factor applied, once you preset correction factor and area data for each of colors, it is not necessary to change the setting of correction factor at each color measurement.
-
Page 57: Setting An Area Correction Factor
3. Various Settings 3.7.1 Setting an Area Correction Factor The procedure for changing the setting for an area correction factor group is as described below. Press the [CHANGE] button. The currently set area correction group is displayed. GROUP SET GROUP *OFF... -
Page 58: Measurement Range
3. Various Settings 3.8 Measurement Range When using the manual range, the measurement range for X, Y, and Z is displayed. ☞ Display Method 「3.1.2 Data/Setting Item Display」 * Measuring range * X :Range1 Y :Range3 Z :Range3 The procedure for making changes is as described below. Press the [CHANGE] button. -
Page 59: Rs-232C Parameters
3.9 RS-232C Parameters The RS-232C interface parameters are displayed. ☞ Display Method 「3.1.2 Data/Setting Item Display」 This setting is a necessary to set when BM-7AC connect with a PC through a RS-232C cable. *RS-232C Parameters* Baud rate=38400 Length=7 Parity=ODD Stop bit= 1... -
Page 60: Buzzer Sound
・ BM-7FAST is a communication format for the purpose of using communication software for old model BM-7 and BM-7fast. The commands for BM-7AC is increased than the BM-7 and BM-7fast, so when creating new communication software, the BM-7A Series mode is recommended. -
Page 61: Average Measure
After selection is finished, press the [ENTER] button. 3.13 Maintenance Recommended Display The maintenance recommended display is displayed after buying the or after one year has elapsed since calibration conducted by TOPCON TECHNOHOUSE factory. BM-7AC ☞ Display Method 「3.1.2 Data/Setting Item Display」... -
Page 62: Communication With A Pc
Series mode and the former BM-7fast mode. ☞ Changing the Communication Format 「3.11 Communication Format」 This chapter described the commands for creating communication program with the BM-7AC on user own. BM-7A Series Mode Communication Commands ☞ 「4.2 BM-7A Series Mode Communication Commands」... - Page 63 Reads the amount of time elapsed since calibration. "_" indicates a space. "####" indicates a number. When a communication command is sent from the PC, the BM-7AC returns "OK" as a reception check command. When the BM-7AC received an improper command, it returns "NO".
-
Page 64: St Command
"ST" (ASCII code 53H 54H), and then the PC transmits Cr (0Dh), Lf (0Ah). Check of reception in the BM-7AC After the BM-7AC receives "ST" + (Cr・Lf), it returns “OK” + (Cr・Lf) as a check command and starts measurement. Communication of measurement data After measurement, the BM-7AC transmits the measurement conditions and measurement data. -
Page 65: Ca Command
4. Communication With a PC 4.2.2 CA Command The Zero-adjustment is performed. Command BM-7AC CA + (Cr・Lf) OK + (Cr・Lf) END + (Cr・Lf) 4.2.3 TF Command The response speed of the photo-receiver circuit of the instrument is changed to the FAST mode. -
Page 66: Mm Command
1 to 5 n is the measurement range for Z 1 to 5 "‗" indicates a space. Command BM-7AC MM‗X3‗Y3‗Z3 + (Cr・Lf) OK + (Cr・Lf) 4.2.7 FR Command The correction factor currently being used by the instrument are read out. -
Page 67: R Command
R Command The Correction factor in the instrument is read out. R [n] n is the number of the correction factor to be read. 1 to 15 Command BM-7AC R15 + (Cr・Lf) OK + (Cr・Lf) Correction Factor END + (Cr・Lf) 4.2.10 W Command... -
Page 68: Fk Command
4. Communication With a PC 4.2.12 FK Command Normal correction/direct correction can be selected by this command. FK[n]:n is 1 or 2. 1: Normal correction 2: Direct correction Command BM-7AC FK1 + (Cr・Lf) OK + (Cr・Lf) ☞ When Error code E012 is displayed 「4.5 Error Codes」... -
Page 69: Fo Command
4. Communication With a PC 4.2.15 FO Command The area correction can be deactivated by this command. Command BM-7AC FO + (Cr・Lf) OK + (Cr・Lf) 4.2.16 CGL Command The chromaticity area data in the area correction function per group units can be cleared by this command. -
Page 70: Rg K Command
The area correction factor data can be read out by this command. RG[m]K[n] m is the area correction factor group number 1 to 10 n is the area number 1 to 5 Command BM-7AC RG1K3 + (Cr・Lf) OK + (Cr・Lf) Area correction factor + (Cr・Lf) END + (Cr・Lf) 4.2.19 RG L Command... -
Page 71: Wg L Command
WG[m]L[n] m is the number of the area correction factor group. 1 to 10 n is the area number. 1 to 5 Command BM-7AC WG1L3‗####‗####‗####‗####‗#### + (Cr・Lf) OK + (Cr・Lf) ####‗####‗####‗####‗#### + (Cr・Lf) END + (Cr・Lf) The minimum value of the chromaticity x, the minimum value of the chromaticity y, the maximum value of the chromaticity x, the maximum value of the chromaticity y and the luminance are input in order in ####‗####‗####‗####‗####. -
Page 72: Ct Command
4. Communication With a PC 4.2.24 CT Command The amount of elapsed time since the last calibration of the instrument can be read out by this command. Command BM-7AC CT + (Cr・Lf) OK + (Cr・Lf) Time [minutes] + (Cr・Lf) END + (Cr・Lf) 4.2.25 AM/SM Command... -
Page 73: Remote Measurement Output Format
4. Communication With a PC 4.3 Remote Measurement Output Format During remote measurement (ST command), the output format of data from the instrument is as shown below. ■BM-7A Series Mode Output data Data Contents number example Level of luminance of the measured object with respect to the measurement range of the instrument 0: Normal 1: Under 2: Over Response speed of the photo-receiver circuit... - Page 74 4. Communication With a PC ■ BM-7fast Mode Output data are three kinds of data; measurement conditions, color coordinates/correlated color temperature and tristimulus values. -M0 Command- T*R*XnYnZnUCFn_ x=_#.####_y=_#.####_ X=_#.###E±##_Y=_#.###E±##_Z=_#.###E±##CR -M1 Command - T*R*XnYnZnUCFn_ u’=_#.####_v’=_#.####_ X=_#.###E±##_Y=_#.###E±##_Z=_#.###E±##CR -M2 Command - T*R*XnYnZnUCFn_ Tc=_#.####_duv=_#.###_ X=_#.###E±##_Y=_#.###E±##_Z=_#.###E±##CR T* : Response speed TF:FAST TS:SLOW...
-
Page 75: Communication Commands For The Bm-7Fast Mode
4. Communication With a PC 4.4 Communication Commands for the BM-7fast Mode A list of communication commands for the BM-7fast mode is given below. Communication Function Command Sets the instrument in the measurement status. After measurement, returns measurement data from the device. Performs calibration. -
Page 76: Error Code
Displayed when the internal shutter is abnormal. There is a possibility that it E014 is broken, so contact the dealer or TOPCON TECHNOHOUSE. Displayed when average measurement is abnormal. There is a possibility that the number of times that the instrument perform measurement are less than E015 necessary in average measurement mode, due to over range. -
Page 77: Usb Driver
5. USB Driver 5. USB Driver The procedure for installing the USB Driver in the PC is as follows. Place the CS-900A CD-ROM in the CD-ROM drive. Select and double-click the “dpinst.exe” file in [\USB_Driver\{os name}\ {x86} or {x64}] folder in the CD-ROM via Explorer. Windows®... - Page 78 5. USB Driver In the case of Windows7, 8, the Windows Security dialog appears. Click the [Install]. The following dialog will be displayed, start installing the USB Driver. After installation of USB Driver, The following dialog will be displayed. Click the [Finish] button.
-
Page 79: Appendix
Appendix Appendix Specifications Measurement angle 2°/1°/0.2°/0.1°Switch type Optical system Finder visual field : 5° Objective lens : f = 80 ㎜ F2.5 Spectral sensitivity characteristics Similar to color matching function CIE 1931 * Satisfies router conditions JIS Z 8724-1997. Photo-detector Silicon photodiode 3-element type (X, Y, Z) Measurement diameter (Unit: ㎜φ) - Page 80 Appendix Response Speed Display interval: About 0.5 seconds for both FAST and SLOW. Analog Output (Unit: ms) Range1 Range2 Range3 Range4 Range5 FAST The response speed in the table above means the time that it takes analog output from the instrument to reach 90% of the peak value, when measuring an LED driven by a square wave from a function generator.
- Page 81 Appendix Chromaticity accuracy Guaranteed accuracy range Measurement Luminance (cd/㎡) Angle 2° 10 ~ 30,000 1° 40 ~ 120,000 0.2° 1,000 ~ 3,000,000 0.1° 4,000 ~ 12,000,000 ⊿x, ⊿y : ±0.002 or less(auto range, standard sources A) * Chromaticity is displayed even at a luminance less than that given above. Repeatability Luminance For 2°...
- Page 82 ±3% or less (23℃ is regarded as standard in the range of 0℃ to 40℃) Humidity Characteristics ±3% or less (60%RH is regarded as standard in the range of 60%RH or less) Calibration Reference TOPCON TECHNOHOUSE calibration reference (Standard sources A, 23℃±3℃) User calibration reference Switchable Display...
- Page 83 Appendix FCC Compliance Information This device complies with Part 15 of FCC Rules. Operation is subject to the following twoconditions: (1) the device may not cause interference, and (2) the device must accept anyinterference, including interference that may cause undesired operation of this device.
-
Page 84: Appended Tables
Appendix Appended Tables Unit Conversion Table Foot-Lamberts cd/㎡ (nt) cd/cm (sb) cd/ft rlx (asb) Lamberts (ft-L) 10-4 0.0929 3.1416 0.000314 0.2919 3.426 0.0003426 0.3183 10.764 0.001076 Chromaticity accuracy of the combination of standard light source A and our colored glass filter. -
Page 85: System Diagram
Router filter Condenser lens Measured object Measurement angle sensor Fixed Objective Personal aperture lens Interface Computer Correction system Control switch Spectral Sensitivity Curves BM-7AC z(λ) CIE z(λ) CIE y(λ) BM-7AC y(λ) CIE x(λ) BM-7AC x(λ) 400nm 500nm 600nm 700nm... -
Page 86: External Dimensions
Appendix External Dimensions Use only specified screws when using the tripod screw and screw holes for jig attachment. Do not tighten the screws any more than necessary. Doing so might Request cause internal breakage. Tripod seat reference surface (For tooling) 1/4-20 UNC (Depth 6) Camera tripod screw Rubber leg... -
Page 87: Internal Calculation Processing
Appendix Internal Calculation Processing In this device, the following calculation processing is performed for data. Chromaticity Coordinates xy chromaticity coordinates of XYZ color coordinate system u'v' chromaticity coordinates of UCS color coordinate system u´... - Page 88 Appendix 7.787 7.787 7.787 CIE 1976 L color coordinate system u' , v' : u'v' color coordinates ', v : u' and v' values according to standard light on perfect reflecting diffuser.
-
Page 89: Terminology
Appendix Terminology Correction Factor : This means three factors, KX, KY and KZ to correct tristimulus values. Area Correction Factor : When an arbitrary area is specified on the xy chromaticity diagram and u'v' chromaticity diagram, these factors are for correcting values that enter that area. Correction Reference Sample : This is a sample to determine a correction factors. -
Page 90: Warranty
) after purchase. The repairable period is this period that parts are kept in stock. Even after the storage period has elapsed, there are cases in which repair may be possible, so contact TOPCON TECHNOHOUSE CORPORATION the dealer or (*1) Maintenance and repair parts are parts that are necessary to maintain the function of the product. -
Page 91: Contact Information
Fax +813 (3558) 4661 ◆ Inquiries regarding repairs and maintenance Tel +813 (3558) 2710 Fax +813 (3558) 3011 Luminance Colorimeter BM-7AC Instruction Manual 2019 Edition Date of issue of 2nd edition July., 2019 TOPCON TECHNOHOUSE CORPORATION 75-1 Hasunuma-cho, Itabashi-ku, Tokyo 174-8580 Japan ©2018 TOPCON TECHNOHOUSE CORPORATION...
Need help?
Do you have a question about the BM-7AC and is the answer not in the manual?
Questions and answers