
Related Manuals for Nordson Liquidyn P-Dot CT


Summary of Contents for Nordson Liquidyn P-Dot CT
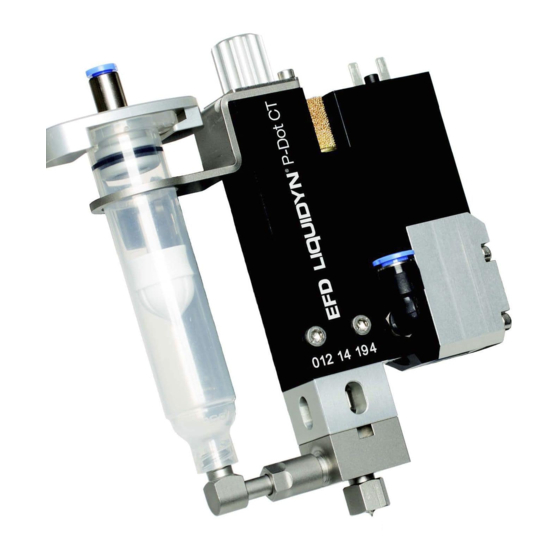
- Page 1 Liquidyn P-Dot Series Jet Valves Operating Manual ™ WATCH VIDEOS www.nordsonefd.com/LQMaintVideos Electronic pdf files of Nordson EFD manuals are also available at www.nordsonefd.com...
- Page 2 Thank You! You have just purchased the world’s finest precision dispensing equipment. I want you to know that all of us at Nordson EFD value your business and will do everything in our power to make you a satisfied customer.
-
Page 3: Table Of Contents
Shut Down the System ............................31 Disassemble the Valve ............................31 Clean the Valve Components ..........................33 Assemble the Valve (After Cleaning) ........................34 Tappet Replacement ..............................36 Continued on next page www.nordsonefd.com info@nordsonefd.com +1-401-431-7000 Sales and service of Nordson EFD dispensing systems are available worldwide. - Page 4 Appendix A, About Non-Contact Dispensing........................46 Appendix B, P-Dot Valve Interface Overview ........................47 Electrical Control ...............................47 Optional Nozzle Heater Control ..........................48 Pneumatic Control ..............................49 Valve Configuration Options ............................49 www.nordsonefd.com info@nordsonefd.com +1-401-431-7000 Sales and service of Nordson EFD dispensing systems are available worldwide.
-
Page 5: Introduction
How the Valve is Controlled The valve can be operated using a Nordson EFD Liquidyn controller or directly by the customer via a 24V input using a customer-supplied controller or a programmable logic controller (PLC). -
Page 6: Nordson Efd Product Safety Statement
Hot surfaces! Avoid contact with the hot metal surfaces of heated components. If contact can not be avoided, wear heat-protective gloves and clothing when working around heated equipment. Failure to avoid contact with hot metal surfaces can result in personal injury. www.nordsonefd.com info@nordsonefd.com +1-401-431-7000 Sales and service of Nordson EFD dispensing systems are available worldwide. -
Page 7: Halogenated Hydrocarbon Solvent Hazards
Qualified personnel are those employees or contractors who are trained to safely perform their assigned tasks. They are familiar with all relevant safety rules and regulations and are physically capable of performing their assigned tasks. www.nordsonefd.com info@nordsonefd.com +1-401-431-7000 Sales and service of Nordson EFD dispensing systems are available worldwide. -
Page 8: Intended Use
Make sure all equipment is rated and approved for the environment in which it is used. Any approvals obtained for Nordson EFD equipment will be voided if instructions for installation, operation, and service are not followed. If the equipment is used in a manner not specified by Nordson EFD, the protection provided by the equipment may be impaired. -
Page 9: Fire Safety
• Test: Verify the operation of features and the performance of equipment using the appropriate sections of this manual. Return faulty or defective units to Nordson EFD for replacement. • Use only replacement parts that are designed for use with the original equipment. Contact your Nordson EFD representative for information and advice. -
Page 10: Important Disposable Component Safety Information
Disconnect and lock out system electrical power. If using hydraulic and pneumatic shutoff valves, close and relieve pressure. For Nordson EFD air-powered dispensers, remove the syringe barrel from the adapter assembly. For Nordson EFD electro-mechanical dispensers, slowly unscrew the barrel retainer and remove the barrel from the actuator. -
Page 11: Equipment-Specific Safety Information
• Operate heaters (optional) within the approved temperature range only. Refer to “Specifications” on page 12. • Use only heaters that are distributed by Nordson EFD specifically for this micro-dispensing valve. • Adhere to the maintenance intervals specified under “Service” on page 30. -
Page 12: Specifications
*This valve meets the EN 61326-1:2013, FCC Part 15 Subpart B, and ICES-003 Issue 6 product family standard for immunity and emissions when connected to a Nordson EFD Liquidyn controller. Usage with any other controller does not guarantee electromagnetic compatibility (EMC) performance. -
Page 13: Operating Features
Mounting screws M3 x 14 (2x) Nozzle (ordered separately) • Steel only Nozzle retaining nut (ordered separately; optional nozzle heater not shown) www.nordsonefd.com info@nordsonefd.com +1-401-431-7000 Sales and service of Nordson EFD dispensing systems are available worldwide. -
Page 14: Installation
2.5 m (8.2 ft) M8 valve cable with 3-pin plug Open-end wrench, size 3.5 mm Open-end wrench, size 6 mm (Not shown) Optional components (ordered and shipped separately) www.nordsonefd.com info@nordsonefd.com +1-401-431-7000 Sales and service of Nordson EFD dispensing systems are available worldwide. -
Page 15: Assemble The Valve (Initial Assembly)
Torque: 5 N•m (3.7 ft-lb) maximum • Optional: Install a tube connector (for non-syringe barrel installations). Continued on next page www.nordsonefd.com info@nordsonefd.com +1-401-431-7000 Sales and service of Nordson EFD dispensing systems are available worldwide. - Page 16 • Position the syringe barrel bracket on the valve and reinstall the safety plate to secure it. • (Syringe barrel installations only) Install the syringe barrel and syringe barrel adapter. www.nordsonefd.com info@nordsonefd.com +1-401-431-7000 Sales and service of Nordson EFD dispensing systems are available worldwide.
-
Page 17: Install A Nozzle Heater (Optional)
Torque for a steel nozzle: 1.2 N•m (10.6 in.-lb) nut by hand. Be sure to connect the heater cable plug in the correct orientation. www.nordsonefd.com info@nordsonefd.com +1-401-431-7000 Sales and service of Nordson EFD dispensing systems are available worldwide. -
Page 18: Mount The Valve
M4 x 10 mounting screws Lever (secures the hook) M4 x 30 mounting screws (for mounting onto a socket; not included) Example of the quick-release mounting option www.nordsonefd.com info@nordsonefd.com +1-401-431-7000 Sales and service of Nordson EFD dispensing systems are available worldwide. -
Page 19: Connect Cables
T10 = Liquidyn T10 or T20 heater controller V10 = Liquidyn V10, V10M, V10D, or M10D controller V200 = Liquidyn V200 controller PLC = Higher-level controller www.nordsonefd.com info@nordsonefd.com +1-401-431-7000 Sales and service of Nordson EFD dispensing systems are available worldwide. -
Page 20: Connect The Air Supply
For the fluid pressure, connect 4 mm or 6 mm tubing to the syringe barrel adapter (syringe barrel installations only). NOTE: Nordson EFD recommends installing a precision pressure regulator with a maximum control tolerance of 0.2% and a pressure limit of 0–8 bar (0–116 psi). -
Page 21: Installation Example
Air pressure source Precision pressure regulator Pressure Operating pressure accumulator 6 mm air supply tubing (at least 0.4 liter) Liquidyn P-Dot valve connection diagram www.nordsonefd.com info@nordsonefd.com +1-401-431-7000 Sales and service of Nordson EFD dispensing systems are available worldwide. -
Page 22: Initial Startup
This section provides recommendations for system startup and operation. System startup for the valve depends on the control unit. If you are using a Nordson EFD Liquidyn controller, obtain the controller manual. If you are using higher-level controller, the control is set up by the customer. -
Page 23: Parameter Settings
EXAMPLE: Because the pulse time must be 2 ms, set the pause time to 18 ms to achieve 50Hz. Dispensing cycle Pulse time Pause time www.nordsonefd.com info@nordsonefd.com +1-401-431-7000 Sales and service of Nordson EFD dispensing systems are available worldwide. -
Page 24: Recommended Setup Adjustments
Simultaneously adjust the operating pressure and the force screw as shown below. Goal Operating Pressure Force Screw Prevent residue at the Increase by 0.1 bar (1.5 psi) Tighten by 0.1 turn (counterclockwise as nozzle viewed from above) www.nordsonefd.com info@nordsonefd.com +1-401-431-7000 Sales and service of Nordson EFD dispensing systems are available worldwide. -
Page 25: Tappet Adjustment
• Fully closed stops deposit formation. In between these two extreme positions is the optimum setting, which should be determined one time only using these instructions. www.nordsonefd.com info@nordsonefd.com +1-401-431-7000 Sales and service of Nordson EFD dispensing systems are available worldwide. - Page 26 Refer to “Manually Setting the Force Screw for Multiple Valves” on page 28. Scale head tool • Easy adjustment. • Economical. Tappet measuring system • Accuracy of 1/100 (1 to 100). tool • Purpose-built for this task. www.nordsonefd.com info@nordsonefd.com +1-401-431-7000 Sales and service of Nordson EFD dispensing systems are available worldwide.
-
Page 27: Returning The Force Screw To The Factory Setting
• Tighten the force screw (from the zero position) 0.5–0.75 turns clockwise as viewed from above. • Reassemble the safety plate and the retaining nut (or heater element) and reinstall the valve. www.nordsonefd.com info@nordsonefd.com +1-401-431-7000 Sales and service of Nordson EFD dispensing systems are available worldwide. -
Page 28: Manually Setting The Force Screw For Multiple Valves
• Between the nozzle and the fluid body thread should now be a gap (“x”). If no gap occurs, tighten the force screw until a gap occurs. Push gently. Continued on next page www.nordsonefd.com info@nordsonefd.com +1-401-431-7000 Sales and service of Nordson EFD dispensing systems are available worldwide. - Page 29 • Repeat the identified number of turns / clicks for all valves. NOTE: Always set the zero position of the nozzle first before tightening the set screw the identified number of turns / clicks. www.nordsonefd.com info@nordsonefd.com +1-401-431-7000 Sales and service of Nordson EFD dispensing systems are available worldwide.
-
Page 30: Service
Regularly perform maintenance on your micro-dispensing valve. Regular maintenance will save you cost-intensive repairs and is a requirement for long valve lifespan. Nordson EFD valves are designed to be maintained easily. All the material-carrying parts can be removed, cleaned, and maintained by the customer. -
Page 31: Shut Down The System
• Optional: If you are using a heater, use the heater key to remove the nozzle retaining nut. • Remove the nozzle from the fluid body. Continued on next page www.nordsonefd.com info@nordsonefd.com +1-401-431-7000 Sales and service of Nordson EFD dispensing systems are available worldwide. - Page 32 • Clean the tappet and annulus with lint-free paper. • Unscrew and remove the two screws that secure the drainage block. • Carefully remove the drainage block without damaging the tappet. www.nordsonefd.com info@nordsonefd.com +1-401-431-7000 Sales and service of Nordson EFD dispensing systems are available worldwide.
-
Page 33: Clean The Valve Components
• Examine the cleaned components for any remaining residue (especially the nozzle, which should be examined under a microscope). • If the parts are still contaminated, repeat the cleaning process. www.nordsonefd.com info@nordsonefd.com +1-401-431-7000 Sales and service of Nordson EFD dispensing systems are available worldwide. -
Page 34: Assemble The Valve (After Cleaning)
• Install the second new (grease-free) O-ring on the tappet on top of the initial O-ring. • Mount the fluid body precisely over the tappet without tilting it. Continued on next page www.nordsonefd.com info@nordsonefd.com +1-401-431-7000 Sales and service of Nordson EFD dispensing systems are available worldwide. - Page 35 • Optional: Install the tube connector. • (Syringe barrel installations only) Install the syringe barrel and syringe barrel adapter. • Mount the valve and restore the system to normal operation. www.nordsonefd.com info@nordsonefd.com +1-401-431-7000 Sales and service of Nordson EFD dispensing systems are available worldwide.
-
Page 36: Tappet Replacement
• Screw the retaining nut and tappet into the piston rod by hand. NOTE: When turning the piston rod, ensure that the tappet is centrally aligned. Continued on next page www.nordsonefd.com info@nordsonefd.com +1-401-431-7000 Sales and service of Nordson EFD dispensing systems are available worldwide. - Page 37 Torque: 0.4–0.6 N•m (3.5–5.3 in.-lb). • Refer to “Assemble the Valve (After Cleaning)” on page 34 to reassemble the valve, then reinstall the valve and restore the system to normal operation. www.nordsonefd.com info@nordsonefd.com +1-401-431-7000 Sales and service of Nordson EFD dispensing systems are available worldwide.
-
Page 38: Part Number
303 stainless steel 7825182 2.5 m (8.2 ft) M8 valve cable 7825011 Safety plate *Other selections are available. Contact your Nordson EFD application specialist for assistance. www.nordsonefd.com info@nordsonefd.com +1-401-431-7000 Sales and service of Nordson EFD dispensing systems are available worldwide. -
Page 39: Nozzles And Nozzle Retaining Nuts
*Many nozzle types and sizes are available. Contact your Nordson EFD application specialist for assistance. The retaining nut secures the nozzle to the valve. The choice of retaining nut depends on the type of nozzle and whether or not a nozzle heater is installed. Contact your Nordson EFD application specialist for assistance. Nozzle... -
Page 40: Syringe Barrels And Accessories
Liquidyn P-Dot Series Jet Valves Replacement Parts (continued) Syringe Barrels and Accessories Many syringe barrel sizes and accessories are available. Contact your Nordson EFD application specialist for assistance. For a complete list of Optimum components, see www.nordsonefd.com/Optimum. 5, 6 2, 3... -
Page 41: Material Supply Tubing Components
Liquidyn P-Dot Series Jet Valves Replacement Parts (continued) Material Supply Tubing Components The following material supply tubing and connectors are available from Nordson EFD. Additional selections may be available. Contact your Nordson EFD application specialist for assistance. Steel Tubing Connectors... -
Page 42: Nozzle Heaters
Standard Up to 90° C (194° F) Small (a small heater has a low-profile height and is less Up to 90° C (194° F) thick overall) www.nordsonefd.com info@nordsonefd.com +1-401-431-7000 Sales and service of Nordson EFD dispensing systems are available worldwide. -
Page 43: Nozzle Heater Kits
EPDM nozzle heater O-ring, 13 x 1.5 mm EPDM Heater Key The heater key is required to install the heater retaining nuts. Part # Description Item 7825209 Heater key www.nordsonefd.com info@nordsonefd.com +1-401-431-7000 Sales and service of Nordson EFD dispensing systems are available worldwide. -
Page 44: Tools And Supplies
Expanded cleaning kit (order based on O-ring type) 7825197 Viton 7825012 Scale head tool for tappet force screw setting 7825215 Measuring system tool for tappet force screw setting www.nordsonefd.com info@nordsonefd.com +1-401-431-7000 Sales and service of Nordson EFD dispensing systems are available worldwide. -
Page 45: Technical Data
3 H7 M8 x 1 13 mm (0.5") 75 mm (3.0") M8 Valve Cable Pin Positions Color Function Brown None Black Valve (+) Blue Valve (-) www.nordsonefd.com info@nordsonefd.com +1-401-431-7000 Sales and service of Nordson EFD dispensing systems are available worldwide. -
Page 46: Appendix A, About Non-Contact Dispensing
At a certain point, it is physically impossible to transfer the required energy to the dispensed material any longer, particularly in the dispensing of highly viscous materials. www.nordsonefd.com info@nordsonefd.com +1-401-431-7000 Sales and service of Nordson EFD dispensing systems are available worldwide. -
Page 47: Appendix B, P-Dot Valve Interface Overview
The valve can be operated using a Nordson EFD Liquidyn valve controller or directly by the customer via a 24V input using a customer-supplied controller or a programmable logic controller (PLC). -
Page 48: Optional Nozzle Heater Control
Nozzle Heater Cable Pin Positions 6-pin plug M5 plug Color Function Brown Heating coil White Heating coil White Not assigned Black PT100 RTD Blue PT100 RTD White Not assigned www.nordsonefd.com info@nordsonefd.com +1-401-431-7000 Sales and service of Nordson EFD dispensing systems are available worldwide. -
Page 49: Pneumatic Control
100 bar (1450 psi) CAUTION Ensure that the pressure limit values for the syringe barrel and air pressure tubing are not exceeded. NOTE: Nordson EFD recommends installing a precision pressure regulator with a maximum control tolerance of 0.2%. Valve Configuration Options •... - Page 50 NORDSON EFD ONE YEAR LIMITED WARRANTY This Nordson EFD product is warranted for one year from the date of purchase to be free from defects in material and workmanship (but not against damage caused by misuse, abrasion, corrosion, negligence, accident, faulty installation, or by dispensing material incompatible with equipment) when the equipment is installed and operated in accordance with factory recommendations and instructions.
Need help?
Do you have a question about the Liquidyn P-Dot CT and is the answer not in the manual?
Questions and answers