Table of Contents
Advertisement
Advertisement
Table of Contents

Related Manuals for Pelican WF6


Summary of Contents for Pelican WF6
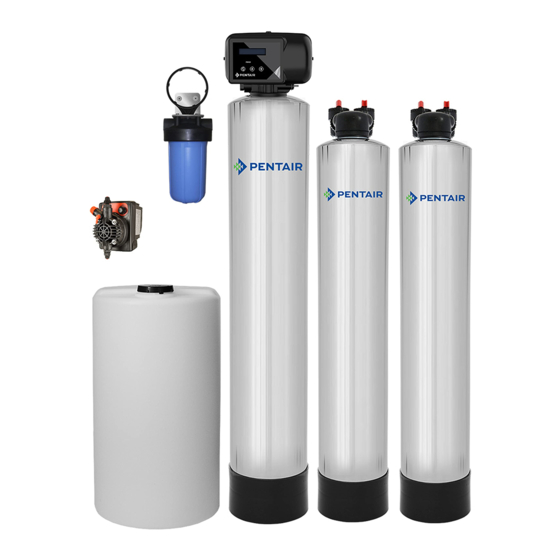
- Page 1 Owner’s Manual Pelican WF6/WF10 Iron/Manganese Filter & Salt Free Softener...
- Page 2 Pelican Water Systems shall not be liable for technical or editorial errors or omissions contained herein or for incidental or consequential damages in connection with the furnishing, performance, or use of this material.
-
Page 3: Table Of Contents
Rev T Pelican WF6/WF10 Iron/Manganese Filter and Salt Free Softener Page 3 Table of Contents Table of Contents ............3 Product Operation and Specifications . -
Page 4: Product Operation And Specifications
Rev T Pelican WF6/WF10 Iron/Manganese Filter and Salt Free Softener Page 4 Product Operation and Specifications Specification Description WF10 Max Flow Rate 10 GPM 15 GPM Minimum Working Pressure 25 PSI Maximum Working Pressure 80 PSI Maximum Vacuum 5 inch/127 mm Hg Operating Temperatures 36°F –... -
Page 5: Complete Parts List
Rev T Pelican WF6/WF10 Iron/Manganese Filter and Salt Free Softener Page 5 Complete Parts List Note: Pelican supplies the parts below to accommodate a variety of water supply lines. Table 1: Parts List Part Description Qty. Part Description Qty. 1" Plastic Male NPT... - Page 6 Rev T Pelican WF6/WF10 Iron/Manganese Filter and Salt Free Softener Page 6 Part Description Qty. Part Description Qty. Pelican Whole House Pelican Whole House Iron Water Filter & Manganese Filter Pelican Salt Free Water Softener/Conditioner Note: Drawings are not to scale.
-
Page 7: Installation Overview Diagram
Installation Overview Diagram Rev T Page 7... -
Page 8: Installation Overview
O-Rings, Split Rings, and Quick Connect Nuts. Push the Bypass Valve into the head of the Pelican Whole House Water Filter or Salt Free Water Softener/Conditioner with the unthreaded ends orientated towards the tank and hand-tighten the Quick Connect Nuts. - Page 9 Rev T Pelican WF6/WF10 Iron/Manganese Filter and Salt Free Softener Page Bypass Operation SERVICE BYPASS Bypass Allen Wrench Notice: The Bypass Valve on the Electronic Head can be set to Bypass or Service by turning the knobs on the top of the valve. The valves can be difficult to turn by hand until the seals become saturated. Use the supplied Bypass Allen Wrench to turn the knobs if necessary.
-
Page 10: Carbon Soak
Rev T Page 10 Pelican WF6/WF10 Iron/Manganese Filter and Salt Free Softener Water Filter - Carbon Soak !IMPORTANT! Your system will not be ready for use for a minimum of 48 hours while the Carbon Soak process takes place. Please plan your installation accordingly. -
Page 11: Carbon Flush
Rev T Pelican WF6/WF10 Iron/Manganese Filter and Salt Free Softener Page 11 Water Filter - Carbon Flush !IMPORTANT! Do not perform the Carbon Flush until the Carbon Soak process is complete. Notice: Water will flow out of the outlet side of the Bypass Valve during this process. Be sure you perform this series of steps in a location suitable for water flow. -
Page 12: Installation
Rev T Pelican WF6/WF10 Iron/Manganese Filter and Salt Free Softener Page 12 Installation Sediment Filter Assembly Sediment Filter Cover Sediment Filter O-Ring Blue Filter Housing Stand Pipe Figure 5 1. Unscrew the cover from the Blue Filter Housing. 2. Remove the plastic covering from the Sediment Filter. -
Page 13: Chemical Injector Pump And Solution Tank Installation
Rev T Pelican WF6/WF10 Iron/Manganese Filter and Salt Free Softener Page 13 Chemical Injector Pump Overview Pressure Release Button Flow Direction Arrow Dosage Adjustment Dosage Lock Nut Suction Hose Nut Figure 7 Pressure Release Button Allows you to relieve the air pressure after install and maintenance. -
Page 14: Chemical Injector Pump Installation
Rev T Pelican WF6/WF10 Iron/Manganese Filter and Salt Free Softener Page 14 Chemical Injector Pump Installation !IMPORTANT! Install the Chemical Injector Pump into the water supply after the Sediment Filter and before any other filtration or softening system. 1. Determine the size and material of your incoming water supply line from the Sediment Filter System. -
Page 15: Iron And Manganese Tank Installation
Rev T Pelican WF6/WF10 Iron/Manganese Filter and Salt Free Softener Page 15 Iron and Manganese Tank Installation Wall Wall Chemical Injector Spigot Pump Drain Line Incoming Barb Outgoing Water Water to Supply House Sediment Filter Solution Tank Electronic Head Salt Free Water... - Page 16 Rev T Pelican WF6/WF10 Iron/Manganese Filter and Salt Free Softener Page 16 IMPORTANT! • Ensure the PVC Tubing Backwash Drain Line is not submerged and is free of kinks. • Maximum vertical rise of the backwash line is 6 feet.
-
Page 17: Whole House Water Filter Tank Installation
Rev T Pelican WF6/WF10 Iron/Manganese Filter and Salt Free Softener Page 17 Whole House Water Filter Installation 1. Level the Whole House Water Filter. Notice: If the tank is not level, lift the tank straight up 6 inches and tap it on the ground until the tank stands vertical. - Page 18 4. Connect the incoming water supply from the outlet of the Whole House Iron & Manganese Tank to the inlet side of the Pelican Whole House Water Filter. 5. Connect the outgoing water supply to the outlet side of the Bypass Valve.
-
Page 19: Whole House Salt Free Water Softener/Conditioner Tank Installation
3. Install the fitting onto the inlet and outlet sides of the Bypass Valve. Follow the diagrams supplied with the fitting. 4. Connect the incoming water supply from the outlet of the Pelican Whole House Water Filter to the inlet side of the Pelican Salt-free Water Softener/Conditioner. -
Page 20: Natursoft - Media Soak
NaturSoft - Media Flush CAUTION: The Pelican Whole House Water Filter MUST be in the bypass position during this process (see Figure). 1. After the tank has soaked for 60 minutes, turn the main water supply back on or turn the arrows on the Bypass Valve back into their original position. -
Page 21: Complete The Installation
4. Peel off the protective plastic wrap from the stainless steel tank jackets. 5. Add the Pelican logo sticker in the desired location on the tank. 6. Wax stainless steel tank jacket(s) with wax provided or any other non-abrasive auto wax a minimum of 1-2 times per year or as needed based on the installed environment. -
Page 22: Programming The Electronic Head
Rev T Page 22 Pelican WF6/WF10 Iron/Manganese Filter and Salt Free Softener Programming the Electronic Head Note: Power Source - For safety reasons the outlet must be protected by a Ground Fault Circuit Interrupter (GFCI). Note: Do not make changes to the settings unless instructed by a Technical Support representative. -
Page 23: Testing Chlorine Levels In Water
Rev T Pelican WF6/WF10 Iron/Manganese Filter and Salt Free Softener Page 23 Testing Chlorine Levels in Water - Dialing In Pressure Release Button Flow Direction Arrow Dosage Adjustment Dosage Lock Nut Suction Hose Nut Figure 13 1. Put the Whole House Water Filter and NaturSoft tanks into bypass. -
Page 24: Flush Your Hot Water Heater
Rev T Pelican WF6/WF10 Iron/Manganese Filter and Salt Free Softener Page 24 Flush Your Water Heater Cleaning and restoring the plumbing system is a major benefit of the NS3/NS6 NaturSoft system. In order to minimize the time required to complete the de-scaling process, we strongly recommend flushing your water heater after a period of 6 weeks: •... - Page 25 Rev T Pelican WF6/WF10 Iron/Manganese Filter and Salt Free Softener Page 25 If you have a dishwasher: Generally, the NS3/NS6 NaturSoft system removes mineral hardness from solution and forms micro crystals; it does not physically remove the natural minerals from the water. Harsh chemicals, specifically acidic (low pH) detergents or rinse agents, can re-dissolve these crystals.
-
Page 26: Maintenance
Rev T Pelican WF6/WF10 Iron/Manganese Filter and Salt Free Softener Page 26 Maintenance Sediment Filter It is recommended that the Sediment Filter be replaced every 6-9 months depending on the amount of sediment present in the water supply. If the system has been working properly and the pressure is slowing, it may be time to change the Sediment Filter. -
Page 27: Troubleshooting
Rev T Pelican WF6/WF10 Iron/Manganese Filter and Salt Free Softener Page 27 Troubleshooting Problem Solution Water leaking at the top of the tank around the head. You may need to turn the head to tighten it. The tank head is pre-installed hand-tight, do not overtighten the head (just turn it snug). -
Page 28: Warranty
Warranty Pelicans Limited Lifetime Warranty Pelican Water ("Pelican") warrants to the end user ("customer") that its tanks (13" and smaller), valves, in/ out non-electric heads, bypass's, fittings and housings for POE systems ("Covered Items") will be free from defects in material and workmanship under normal use and service for a limited lifetime of twelve (12) years from the date of original purchase**. -
Page 29: Warranty Registration Form
Rev T Pelican WF6/WF10 Iron/Manganese Filter and Salt Free Softener Page 29 Warranty Registration Form Send in this Warranty Registration Form to validate your warranty or visit www.PelicanWater.com to complete warranty registration form online. Pelican Warranty Registration Form Date Item(s) were Received:... -
Page 30: Product Certifications
Do not use where water is microbiologically unsafe or with water of unknown quality without proper disinfection before or after the filter/softener system. Product Certifications Pelican NaturSoft-NS3/NS6 – WQA Gold Seal tested and certified under NSF/ ANSI61 for material safety and tested according to NSF/ANSI 42 for structural integrity only Clack V3007-xx Bypass Fittings –...
Need help?
Do you have a question about the WF6 and is the answer not in the manual?
Questions and answers