WLINK WL-R210 Series User Manual
3g/4g
Hide thumbs
Also See for WL-R210 Series:
- User manual (51 pages) ,
- User manual (83 pages) ,
- User manual (99 pages)

Related Manuals for WLINK WL-R210 Series


Summary of Contents for WLINK WL-R210 Series
- Page 1 User Manual ---Apply to WL-R210 Series 3G/4G Router V3.1 http://www.wlink-tech.com 2015/03/31...
- Page 2 Due to product updates or functional upgrading, we may renew the content of this file, and this file only for reference. All statement, information, suggestion.etc in this file does not compose any form of guarantee and we WLINK reserves the right of final explanation. Shenzhen WLINK Technology Company Limited 6F, Yiben Building, Chaguang Road, Xili, Nanshan District, China, Add:...
-
Page 3: Table Of Contents
3 Router Configuration ........................ 12 3.1 Local Configure ......................12 3.2 Basic Configuration ....................... 13 3.3 WLAN Setting ......................... 19 3.4 Advanced Network Setting ................... 22 3.5 VPN Tunnel ........................28 3.6 Administration ......................... 29 3.7 Debugging Setting ......................42 www.wlink-tech.com... - Page 4 Industrial R210 Series Cellular Router User Manual 3.8 “Reset” Button for Restore Factory Setting..............45 3.9 Appendix (For advanced optional features only) ............45 www.wlink-tech.com...
-
Page 5: Product Introduction
Model introduction WLINK industrial grade router series have single module / single SIM card, single module / double SIM card, double module / double SIM card design, support multi-band frequency WCDMA, HSPA+, TD/FDD-LTE, EVDO(CDMA 2000) etc., mobile wide-band, backward compatibility with GPRS、EDGE、CDMA 1x, etc., mobile narrow-band, optional built-in... - Page 6 Industrial R210 Series Cellular Router User Manual Table 1-1 Router partial model table www.wlink-tech.com...
-
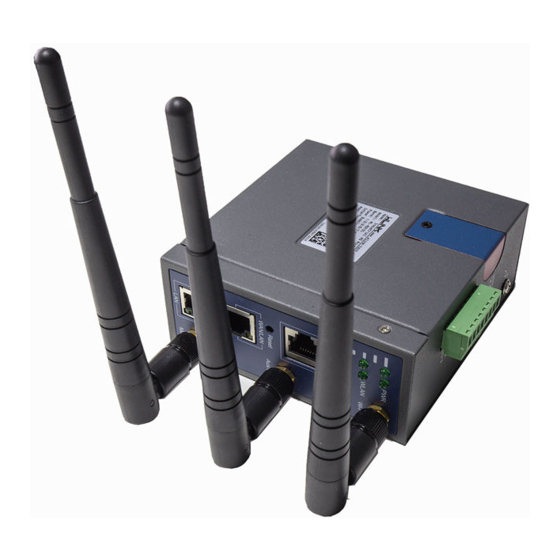
Page 7: Product Appearance
WLINK 4G/3G Router are widely used in Telecom, economic, advertisement, traffic, environment protection business area. For example, in economic area, WL-R210 Series Router connect server by IPSec & GRE to ensure data security, tiny design makes it easily installed into ATM machine. All these... -
Page 8: Features
Provide friendly user interface, use normal web internet explorer to easily configure and manage, long-distance configure Telnet/SSH + CLI Optional IPv6 protocol stack Optional support M2M terminal management platform WDT watchdog design, keep system stable Customization as per customer’s demand www.wlink-tech.com... -
Page 9: Hardware Installation
But the difference won’t have any influence to products performance. Panel: Table 2-1 WL-R210 Structure WLINK Tech. R210 series Front There are some difference on Antenna interface and indicator light for the device with extended Wi-Fi, GPS features. -
Page 10: Led Status
WLAN enable, but no data communication. WLAN Blinking quickly Data in transmitting Dark WLAN disable Dark System operation and LTE/3G online. Solid Light(Red) System fail indicator. It indicates SIM card/ module fail. Green Solid light Connected Green Blinking Data in transmitting. www.wlink-tech.com... -
Page 11: How To Install
How to Install 2.4.1 SIM/UIM card install If use dual SIM/UIM card router, you need insert dual SIM before configure it. After inserting, please follow below steps to connect the router. Before connecting, please disconnect any power resource of router www.wlink-tech.com... - Page 12 If you want to connect the router via serial port to laptop or other devices, you should prepare a serial port or RJ45 cable, this cable is optional available from WLINK. One end connect to computer serial port, the other end connects to the console port of the router Before connecting, please disconnect any power resource.
-
Page 13: Router Configuration
Refer to the figure below. Figure 3-3 Network Connection Step 2 Obtain a IP address automatically or set up IP address,192.168.1.xxx(XXX can be any number between 2~254) Step 3 Run an Internet Explorer and visit “http://192.168.1.1/”, to enter identify page. www.wlink-tech.com... -
Page 14: Basic Configuration
Different software version have different web configuration interface, here take R210 2.6.0.1 version as example. After visit the WEB interface, you can check the current status of Router, or modify router configuration via web interface, below is the introduction for the common setting. www.wlink-tech.com... - Page 15 Industrial R210 Series Cellular Router User Manual Figure 3-5 Router Status GUI 3.2.1 Cellular Network Configure Step 1 Single Click Basic Network-> Cellular, you can modify relevant parameter according to the application. www.wlink-tech.com...
- Page 16 Enable ICMP, Router will automatically check whether the defined IP address is reachable per 60s. If the IP address is unreachable and ICMP check is timeout at the first time, it will check 2 time as 3s interval. If the third time is still failed, the www.wlink-tech.com...
- Page 17 SIM2 within the defined time. Once the time is over, it will switch back to SIM1. Step 2 After Setting, please click “save” icon. ----End 3.2.2 LAN Setting Step 1 Single Click “ Basic Network>LAN” to enter below interface www.wlink-tech.com...
- Page 18 Dynamic allocation IP service, after enable, it will show the IP address range and options of lease IP Address Range IP address range within LAN Lease The valid time Step 2 After setting, please click “save” to finish, the device will reboot. ----End www.wlink-tech.com...
- Page 19 Table 3-3 DDNS Setting Instruction parameter Instruction Default is standard DDNS protocol, for customized protocol, please IP address contact Wlink engineer. Usually, use default IP 0.0.0.0 Auto refresh Set the interval of the DDNS client obtains new IP, suggest 240s or time above Service Select the DDNS service provider that listed.
-
Page 20: Wlan Setting
Step 2 Please Click “ Save “ to finish. WLAN Setting It’s mainly for router which support Wi-Fi, you can modify and configure WLAN parameter through Web GUI, below is the common setting 3.3.1 Basic Setting Step 1 Click “WLAN->Basic Setting” to configure relative parameter www.wlink-tech.com... - Page 21 The channel of wireless network, suggest keep the default Channel Width 20MHZ and 40MHZ alternative Security Support various encryption method Step 2 Please click “Save” to finish. ----End 3.3.2 Wireless Filter Setting Step 1 Single click “WLAN > Wireless Filter”. www.wlink-tech.com...
- Page 22 Only allow the listed MAC address to connect to router by wireless following client Block the follow Prevent the listed MAC address to connect to router by wireless Client Step 2 Please click ”save” to finish ----End 3.3.3 Wireless Survey Step 1 Please click “WLAN> Wireless Survey” to check survey. www.wlink-tech.com...
-
Page 23: Advanced Network Setting
Ext Ports. Only one port per entry is supported when forwarding to a different internal port. Internal Address. The destination address inside the LAN. Int. Address Description Remark the rule Step 2 Please click ”save” to finish ----End www.wlink-tech.com... - Page 24 If define IP address, it will just allow the defined IP address Restriction to access. Leave Remote Access Step 2 Please click ”save” to finish ----End 3.4.3 Triggered Setting Step 1 Please click “Advanced Network> Triggered” to check or modify the relevant parameter. www.wlink-tech.com...
- Page 25 Port triggering opens an incoming port when your computer is using a specified outgoing port for specific traffic. Step 2 Please click ”save” to finish. ----End 3.4.4 Firewall Setting Step 1 Please click “Advanced Network> Firewall” to check or modify the relevant parameter. www.wlink-tech.com...
- Page 26 Table 3-10 “Firewall” Instruction Parameter Instruction Applies To White list. Blocked Black list. Resources Step 2 Please click ”save” to finish. 3.4.5 Serial App. Setting Step 1 Please click “Advanced Network> Serial App” to check or modify the relevant parameter. www.wlink-tech.com...
- Page 27 Parity Bit None as default Data Bit 8bit as default Stop Bit 1bit as default Step 2 Please click ”save” to finish. 3.4.6 UPnp/NAT-PMP Setting Step 1 Please click “Advanced Network> Upnp/NAT-PMP” to check or modify the relevant parameter. www.wlink-tech.com...
- Page 28 Step 2 Please click ”save” to finish. 3.4.7 Static DHCP Setting Step 1 Please click “Advanced Network> Static DHCP” to check or modify the relevant parameter. Figure 3-14 Static DHCP Setting GUI Step 2 Please click ”save” to finish. www.wlink-tech.com...
-
Page 29: Vpn Tunnel
It’s a reachable IP address. Once the ICMP check is failed, ICMP Check IP Address GRE will be established again. Step 2 Please click ”save” to finish. 3.5.2 VPN Client Setting Step 1 Please click “VPN Tunnel> VPN Client” to check or modify the relevant parameter. www.wlink-tech.com... -
Page 30: Administration
As the configuration requested. Tunnel Step 2 Please click ”save” to finish. Administration 3.6.1 Identification Setting Step 1 Please click ”Administrator> Identification” to enter the GUI, you may modify the router name, Host name and Domain name according to self-requirement. www.wlink-tech.com... - Page 31 Default is router, can be set maximum 32 character Domain name Default is empty, support maximum up to 32 character, it is the domain of WAN, no need to configure for most application. Step 2 Please click ”save” to finish ----End www.wlink-tech.com...
- Page 32 Step 1 Please click “Administrator> time” to check or modify the relevant parameter. Figure 3-17 System Configuration GUI If the device is online but time update is fail, please try other NTP Time Server. Step 2 Please click “save to finish. ----End www.wlink-tech.com...
- Page 33 In this page, you can configure the basic web parameter, make it more convenient for usage. Please note the “password” is the router system account password. Figure 3-18 Admin Setting GUI Step 2 Please click save iron to finish the setting ----End www.wlink-tech.com...
- Page 34 Step 1 Please click “Administrator>Schedule Reboot” to check and modify relevant parameter. Figure 3-19 Scheduler Reboot Setting GUI Step 2 Please click save iron to finish the setting ----End 3.6.5 SNMP Setting Step 1 Please click “Administrator>SNMP” to check and modify relevant parameter. www.wlink-tech.com...
- Page 35 Industrial R210 Series Cellular Router User Manual Figure 3-20 SNMP Setting GUI Step 2 Please click save iron to finish the setting ----End 3.6.6 M2M Access Setting Step 1 Please click “Administrator>M2M Access” to check and modify relevant parameter. Figure 3-21 M2M Access Setting GUI www.wlink-tech.com...
- Page 36 Industrial R210 Series Cellular Router User Manual Step 2 Please click save iron to finish the setting ----End 3.6.7 DI/DO Setting Step 1 Please click “Administrator>DI/DO Setting” to check and modify relevant parameter. Figure 3-22 DI/DO Setting GUI 3.6.7.1 DI Configure www.wlink-tech.com...
- Page 37 The alarm SMS will send to specified phone group. Each phone group include up to 2 phone numbers. SMS Content 70 ASCII Char Max Number 1 SMS receiver phone number. Number 2 SMS receiver phone number. Step 2 Please click ”save” to finish. 3.6.7.1 DO Configure www.wlink-tech.com...
- Page 38 ON, input the Digital Output keep on status time. Input from 0 to 255 seconds. (0=keep on until the next action) Delay Available when enable Pulse in Alarm On Action/Alarm Off Action. The first pulse will be generated after a “Delay”. www.wlink-tech.com...
- Page 39 (70 ASIC II char max). Number 1 SMS receiver phone number. Number 2 SMS receiver phone number. Step 3 Please click ”save” to finish. 3.6.8 Configuration Setting Step 1 Please click “ Administrator> Configuration ” to do the backup setting www.wlink-tech.com...
- Page 40 Industrial R210 Series Cellular Router User Manual Figure 3-23 Backup and Restore Configuration GUI Restore Default would lose all configuration information, please be careful. Step 2 After setting the backup and restore configuration. The system will reboot automatically. ----End www.wlink-tech.com...
- Page 41 Industrial R210 Series Cellular Router User Manual www.wlink-tech.com...
- Page 42 Step 1 Please click “Administrator> Logging” to start the configuration, you can set the file path to save the log (Local or remote sever). Figure 3-24 System log Setting GUI Step 2 After configure, please click “Save” to finish. ----End www.wlink-tech.com...
-
Page 43: Debugging Setting
“Yes” or “NO” before the next step. Step 2 If choose “yes”, the system will restart, all relevant update configuration will be effective after reboot. ----End Debugging Setting 3.7.1 Logs Setting Step 1 Please click “Debugging>Logs” to check and modify relevant parameter. www.wlink-tech.com... - Page 44 Step 1 Please click “Debugging>Logs” to check and modify relevant parameter. Figure 3-27 Ping GUI Step 2 After configure, please click “Save” to finish. ----End 3.7.3 Trace Setting Step 1 Please click “Debugging>Trace” to check and modify relevant parameter. www.wlink-tech.com...
- Page 45 Industrial R210 Series Cellular Router User Manual Figure 3-28 Trace GUI Step 2 After configure, please click “Save” to finish. ----End www.wlink-tech.com...
- Page 46 Password admin After reboot, the previous configuration would be deleted and restore to factory settings. Appendix (For advanced optional features only) 3.9.1 GPS Setting Step 1 Please click “Advanced Network> GPS” to view or modify the relevant parameter. www.wlink-tech.com...
- Page 47 GPS to server. Packet Payload The max packet for GPS data. Heart-Beat GPS heart beat packet. Content Heart-Beat The heart beat packet interval. Interval Step 2 Please click ”save” to finish GPS data format as below. www.wlink-tech.com...
- Page 48 Industrial R210 Series Cellular Router User Manual dtu.heartbeat.content,gps_date, gps_time, gps_use, gps_latitude, gps_NS, gps_longitude, gps_EW, gps_speed, gps_degrees, gps_FS, gps_HDOP, gps_MSL e.g. Router_00001,083238,120313,12,2230.31563,N,11355.02863,E www.wlink-tech.com...
Need help?
Do you have a question about the WL-R210 Series and is the answer not in the manual?
Questions and answers