
Related Manuals for Fisher & Paykel OR36SDBGX1


Summary of Contents for Fisher & Paykel OR36SDBGX1
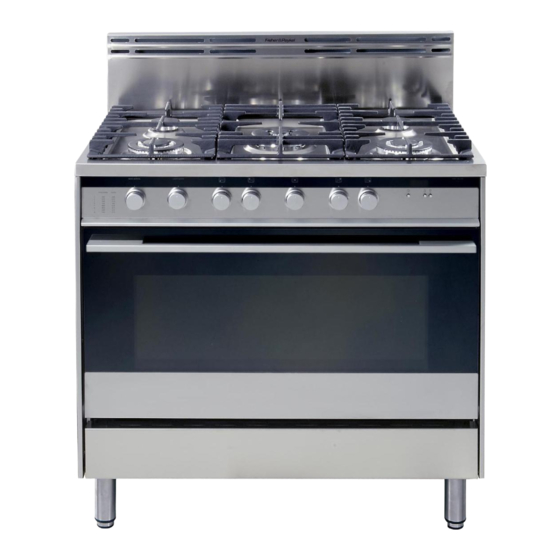
- Page 1 Installation instructions Freestanding range Instructions d'installation Cuiseur indépendant OR36SDBGX model US CA...
-
Page 2: See Installation Instructions
The appliance guarantee will be void if the appliance is used within a non domestic environnement i.e. a semi commercial, commercial or communal environment. WARNING • ALL RANGES CAN TIP • INJURY TO PERSON COULD RESULT • INSTALL ANTI-TIP DEVICE PACKED WITH RANGE • SEE INSTALLATION INSTRUCTIONS... - Page 3 If an external electrical source is utilized, the appliance, when installed, must be electrically grounded in accordance with local codes or, in the absence of local codes, with the national Electrical Code, ANSI/NFPA This range is supplied with a protective film on This film must be removed before installing/using the appliance.
-
Page 4: Installation Instructions
INSTALLATION INSTRUCTIONS WARNING! THIS APPLIANCE HAS TO BE INSTALLED BY A QUALIFIED INSTALLER. Improper installation, adjustment, alteration, services, or maintenance can cause injury or property damage. Consult a qualified installer, service agent, or the gas supplier. IMPORTANT: The use of suitable protective clothing/gloves is recommended when handling, installing of this appliance. TOOLS NEEDED FOR INSTALLATION T-handle Tape... -
Page 5: General Information
14. When installing or removing the range for service, a rolling lift jack should be used. Do not push against any of the edges of the range in an attempt to slide it into or out of the installation. Pushing or pulling a range (rather than using a lift jack) also increases the possibility of bending the leg spindles or the internal coupling connectors. -
Page 6: Installation
3. The maximum upper cabinet depth recommended is 13” (330 mm). Wall cabinet above the range must be a minimum of 30” (762 mm) above the countertop for a width of minimum 35” 7/8 (911 mm): it has to be centred with the range. Side wall (220 mm) 21/32 cabinets above the range must be a minimum of 18”... - Page 7 17” 15/16 6” 8” 11/16 ÷ 21/32 17” 15/16 * : Depending on feet regulation Area for GAS connection Fig. 1.2 455.5 170 ÷ 220 455.5 Dotted line showing the position of the range when installed Area for ELECTRICAL connection...
- Page 8 3 3 0 m m ) 1 3 " m a x . ( PROXIMITY TO SIDE CABINETS RANGE WITH BACKGUARD Fig. 1.3a 1 3 " m a x . ( 3 3 0 m m ) Fig. 1.3b...
- Page 9 1 3 " m a x . ( 3 3 0 m m ) PROXIMITY TO SIDE CABINETS RANGE WITH ISLAND TRIM Fig. 1.3c ( 3 3 0 m m ) 1 3 " m a x . Fig. 1.3d...
-
Page 10: Fitting The Adjustable Feet
Rest the rear of the cooker on a piece of the polystyrene packaging exposing the base for the fitting of the feet. ATTENTION: Most important! Pay special attention not to damage the range dur- ing this operation. Fit the 4 legs by screwing them tight into the support base as shown in picture 1.5. - Page 11 Fig. 1.8 ASSEMBLING THE BACKGUARD OR THE ISLAND TRIM It is mandatory to install the backguard or the island trim • Assemble the backguard or the island trim as • Do not remove the 3 spacers "B" already fitted shown in figure 1.8 or 1.9 and fix it by screwing the 5 screws “A”...
-
Page 12: Anti-Tip Stability Device Installation Instructions
1. The anti-tip bracket has to be attached as shown on figure below, it has to be fixed on the rear wall by no. 2 (two) suitable screws (supplied with the anti-tip kit). 2. After fixing the anti-tip bracket, slide range into place. Be sure the anti-tip bracket is fully inserted in the slot of the range back. -
Page 13: Gas Connection
The supply line shall be equipped with an approved shutoff valve. This valve should be located in the same room as the range and should be in a location that allows ease of opening and closing (in a position where it can be reached quickly in the event of an emergency). - Page 14 STEP 2 Assemble the 1/2” NPT connector + pressure regulator group to the extension pipe interposing the gasket supplied. The regulator cover must be ordiented toward the front side of the range. IMPORTANT: use two spanners to tighten the connection. Arrow...
- Page 15 Insert the extension pipe + pressure regulator group in the “A” bracket. STEP 4 Assemble the extension pipe + pressure regulator group to the range manifold interposing the gasket supplied. The regulator cover must be ordiented toward the front side of the range.
- Page 16 STEP 5 Fix the “B” bracket on the back of the range by the 2 (two) screws supplied with the kit for gas connection. The regulator cover must be ordiented toward the front side of the range. Fig. 2.2e...
- Page 17 1/2” NPT female Arrow WARNING: check the right positioning of the gas regulator. The arrow on the gas regulator must be oriented toward the connector. To range Gasket pipe male pipe fitting 1/2” NPT 1/2” NPT female (conical) male Connector 1/2”...
-
Page 18: Flexible Connections
(Gas conversions are the responsibility of the dealer or end user.) d) This range can be used with NATURAL or LP/PROPANE gas. It is shipped from the factory adjusted for use with NATURAL gas. -
Page 19: Conversion To Lp/Propane Gas
REGULATION CONVERSION TO LP/PROPANE GAS Every range is provided with a set of injectors for the various types of gas. Select the injectors to be replaced according to the “INJECTORS TABLE”. The nozzle diameters, expressed in hundredths of a millimetre, are marked on the body of each injector. -
Page 20: Injectors Table
NOMINAL POWER BURNERS Semi-rapid (R) Triple ring (TC) 2800 for NATURAL GAS (*) Inner crown 3500 for LP/PROPANE GAS (*) Dual (D) 16000 for NATURAL GAS (#) Outer crowns 15000 for LP/PROPANE GAS (#) Oven burner Broil burner (*) Power calculated only with inner crown operating (#) Power calculated with inner and outer crowns operating Semi-rapid burner... - Page 21 SETTING THE BURNER MINIMUM When switching from one type of gas to another, the minimum flow rate must also be correct: the flame should not go out even when passing suddenly from maximum to minimum flame. To regulate the flame follow the instructions below: Rapid and triple ring burners –...
- Page 22 Fig. 2.9 Fig. 2.10 Fig. 2.11 Fig. 2.12 OPERATIONS TO BE EXECUTED FOR THE REPLACEMENT OF THE INJECTORS OF THE OVEN AND BROIL BURNERS Oven Burner – Lift and remove the lower panel inside the oven. – Remove the burner securing screw (fig. 2.9). –...
-
Page 23: Adjustment Of The Oven Burner Minimum
After regulation repeat the operations indicated in paragraph “2. Pressure regulator” at pages 13 and 18. If the range has been disconnected and then connected again to the gas supply line repeat the operations indicated in paragraph “5. Leak Testing” at page 18. -
Page 24: Electrical Connection
If codes permit and a separate ground wire is used, it is recommended that a qualified electrician determine that the ground path is adequate. Check with a qualified electrician if you are not sure whether the range is properly grounded. -
Page 25: Wiring Diagram
ELECTRIC DIAGRAM KEY Switch Security microswitch Cooling fan safety lamp Oven lamp Air switch Thermal overload Ignition switches group Ignition coil Electronic clock Cooling fan Terminal block Earth connection WIRING DIAGRAM... - Page 26 AVERTISSEMENT : SI L’INFORMATION CONTENUE DANS CE MANUEL N’EST PAS SUIVIE À LA LETTRE, UN INCENDIE OU UNE EXPLOSION PEUVENT SE PRODUIRE ET ENTRAÎNER DES DOMMAGES MATÉRIELS, DES BLESSURES OU MÊME LA MORT. ✓ Ne rangez pas et n’utilisez pas d’essence ou d’autres vapeurs et liquides inflammables à...
- Page 27 PLAQUE SIGNALÉTIQUE IMPORTANT - VEUILLEZ LIRE ET SUIVRE ✓ Avant de commencer, veuillez lire attentivement toutes les instructions. ✓ N’enlevez pas les étiquettes, plaques ou avertissements permanents de l’appareil. Cela pourrait annuler la garantie. ✓ Veuillez respecter tous les codes et les règlements locaux et nationaux. ✓...
-
Page 28: Instructions D'installation
INSTRUCTIONS D’INSTALLATION AVERTISSEMENT! CET APPAREIL DOIT ÊTRE INSTALLÉ PAR UN INSTALLATEUR QUALIFIÉ. Une mauvaise installation, modification, réparation ou un mauvais réglage ou entretien peuvent causer des blessures ou des dommages matériels. Consultez un installateur qualifié, un agent autorisé ou le fournisseur de gaz. IMPORTANT : L’utilisation de vêtements et de gants de protection est recommandée lors de la manutention et l’installation de cet appareil. -
Page 29: Renseignements Généraux
RENSEIGNEMENTS GÉNÉRAUX 1. L’installation doit être conforme aux codes locaux ou, en l’absence de ceux-ci, à la dernière édition du National Fuel Gas Code, ANSI Z223.1. 2. Installation dans une maison préfabriquée (mobile) : L’installation doit être conforme au Manufactured Home Construction and Safety Standard, Titre 24 CFR, Partie 3280 (anciennement le Federal Standard for Mobile Home Construction and Safety, Titre 24, HUD/Partie 280) ou,... - Page 30 PROXIMITÉ DES ARMOIRES 1. Cette cuisinière peut être installée directement adjacente à des armoires de base existantes de 36 po (914 mm) de hauteur. Dimensions de la cuisinière : • largeur : 35-7/8 po (911 mm) • profondeur : 23-31/32 po (609 mm) •...
- Page 31 RACCORDEMENTS ÉLECTRIQUE ET AU GAZ Réf. pouces 15/32 15/16 11/16 ÷ 21/32 15/16 * : En fonction du réglage des pieds Zone pour le raccordement au GAZ Fig. 1.2 455,5 170 ÷ 220 455,5 Ligne pointillée illustrant la posi- tion de la cuisinière au moment de l’installation Zone pour le raccordement...
- Page 32 0 m m ) m a PROXIMITÉ DES ARMOIRES 1 3 p o ( 3 3 CUISINIÈRE AVEC DOSSERET Fig. 1.3a 1 3 p o ( 3 3 0 m m ) m a x . Fig. 1.3b...
- Page 33 1 3 p o ( 3 3 0 m m ) m a x . PROXIMITÉ DES ARMOIRES CUISINIÈRE AVEC GARNITURE D’ÎLOT Fig. 1.3c 0 m m ) m a 1 3 p o ( 3 3 Fig. 1.3d...
-
Page 34: Mise À Niveau De La Cuisinière
0 po 0 mm + 1-31/32 po Fig. 1.6 + 50 mm Fig. 1.7a Fig. 1.4 INSTALLATION DES PIEDS RÉGLABLES Les pieds réglables doivent être installés à la base de la cuisinière avant son utilisa- tion. Appuyez l’arrière de la cuisinière contre un morceau de l’emballage de polystyrène, exposant ainsi la base pour l’installation des pieds. - Page 35 Fig. 1.8 MONTAGE DU DOSSERET OU DE LA GARNITURE D’ÎLOT L’installation du dosseret ou de la garniture d’îlot est recom- mandée. • Montez le dosseret ou la garniture d’îlot tel • N’enlevez pas les 3 butoirs « B » déjà fixés sur qu’indiqué...
- Page 36 VOUS DEVEZ UTILISER LE SUPPORT DE STABILITÉ ANTIBASCULEMENT POUR ÉVITER QUE L’APPAREIL BASCULE. FIXATION DU DISPOSITIF DE STABILITÉ ANTIBASCULEMENT Dispositif de stabilité anti- basculement INSTRUCTIONS D’INSTALLATION DU DISPOSITIF DE STABILITÉ ANTIBASCULEMENT 1. Le support antibasculement doit être fixé tel qu’indiqué dans l’illustration ci-dessous. Vous devez le fixer au mur arrière avec des vis n°...
-
Page 37: Raccordement Au Gaz
raccordement au gaz Tous les raccordements au gaz doivent être effectués conformément aux codes natio- naux et locaux. Ce tuyau d’alimentation en gaz doit être du même format ou plus grand que la conduite de l’appareil. Le produit d’étanchéité sur tous les joints de tuyau doit être résistant à... - Page 38 INSTALLATION DU RÉGULATEUR DE PRESSION ÉTAPE 1 Montez le connecteur mâle (conique) NPT de 1/2 po sur le régulateur de pression et serrez avec une clef. Ne serrez pas le connecteur outre mesure. Trop serrer pourrait entraîner une fissure dans le régulateur. ÉTAPE 2 Montez le connecteur NPT de 1/2 po et l’ensemble du régulateur de pression sur le tuyau de prolongation en interposant le joint fourni.
- Page 39 ÉTAPE 3 Insérez le tuyau de prolongation et l’ensemble du régulateur de pression dans le support « A ». ÉTAPE 4 Montez le tuyau de prolongation et l’en- semble du régulateur de pression sur le collecteur de la cuisinière en interposant le joint fourni.
- Page 40 ÉTAPE 5 Fixez le support « B » sur l’arrière de la cuisinière en vous servant des 2 (deux) vis fournies avec le nécessaire pour le raccordement au gaz. Le couvercle du régulateur doit être orienté vers l’avant de la cui- sinière.
- Page 41 SPÉCIFICATION DU RACCORDEMENT AU GAZ Vers le raccord principal Régulateur de pression Femelle NPT de 1/2 po Femelle NPT de 1/2 po Flèche AVERTISSEMENT : Vérifiez que le régulateur de gaz est bien positionné. La flèche située à l’arrière du régulateur de gaz doit être orientée vers le connecteur.
- Page 42 ADAPTATEUR DU POINT D’ÉPREUVE L’adaptateur du point d’épreuve est dispo- nible auprès du Service après-vente. Fig. 2.4 c) Toute conversion requise doit être effectuée soit par votre détaillant, soit un techni- cien agréé qualifié ou par la société gazière. Veuillez remettre le présent manuel au technicien avant de commencer l’entretien de la cuisinière.
- Page 43 RÉGLAGE DU RÉGULATEUR DE PRESSION Vous pouvez accéder au régulateur de pression à travers le compartiment de range- ment, en ouvrant le panneau pivotant inférieur. Le régulateur de pression est situé sur le côté gauche arrière de la cuisinière.
- Page 44 PUISSANCE NOMINALE BRÛLEURS Semi-rapide (R) Triple couronne (TC) Couronne inté- 2 800 pour GAZ NATUREL (*) rieure 3 500 pour GAZ PROPANE/GPL (*) Double 16 000 pour GAZ NATUREL (#) Couronnes 15 000 pour GAZ extérieures PROPANE/GPL (#) Brûleur du four Brûleur du gril (*) Puissance calculée avec seulement la couronne intérieure en marche (#) Puissance calculée avec les couronnes intérieure et extérieures en marche...
- Page 45 RÉGLAGE MINIMUM DU BRÛLEUR Lorsque vous passez d’un type de gaz à un autre, le débit minimal doit aussi être correct : les flammes ne devraient pas s’éteindre même lors du passage brusque des flammes maximales aux flammes minimales. Pour régler les flammes, suivez les instructions ci-dessous : Brûleurs rapide et triple couronne –...
- Page 46 Fig. 2.9 Fig. 2.10 Fig. 2.11 Fig. 2.12 OPÉRATIONS À EFFECTUER POUR LA SUBSTITUTION DES INJECTEURS DES BRÛLEURS DU FOUR ET DU GRIL Brûleur du four – Soulevez et enlevez le panneau inférieur à l’intérieur du four. – Enlevez la vis de blocage du brûleur (fig. 2.9). –...
- Page 47 RÉGLAGE MINIMUM DU BRÛLEUR DU FOUR Cela doit être fait seulement pour le brûleur du four (pour le brûleur du gril, la capacité est fixe) en effectuant les opérations suivantes sur le thermostat : – Allumez le brûleur en réglant le bouton du thermostat à la position –...
-
Page 48: Raccordement Électrique
AVERTISSEMENT Risque de choc électrique Branchez dans une prise à 3 alvéoles. Ne retirez pas la broche de mise à la terre. N’utilisez pas d’adaptateur. Le non-respect de ces instructions peut entraîner la mort, provoquer un incendie ou un choc électrique. Fig. -
Page 49: Schéma De Câblage
LÉGENDE DU SCHÉMA DE CÂBLAGE Interrupteur Microcontact de sécurité Voyant de sécurité du ventilateur de refroidissement Lampe du four Interrupteur d’air Ventilateur Rupteur thermique Groupe de contacteurs Bobine d’allumage Horloge électronique Ventilateur de refroidissement Bloc de raccordement Mise à la terre SCHÉMA DE CÂBLAGE... - Page 52 être modifiées à tout moment. Nous vous recommandons de vérifier auprès de votre revendeur que ce manuel décrit le produit actuellement disponible. www.usa.fisherpaykel.com US CA Freestanding range installation instructions Published: 03/2007 Part No. 599404 A Elba Part No. 1102996...
Need help?
Do you have a question about the OR36SDBGX1 and is the answer not in the manual?
Questions and answers