Fisher & Paykel OR30SCG User Manual
Hide thumbs
Also See for OR30SCG:
- User manual (48 pages) ,
- User manual (48 pages) ,
- User manual (48 pages)
Table of Contents
Advertisement
Advertisement
Table of Contents

Related Manuals for Fisher & Paykel OR30SCG


Summary of Contents for Fisher & Paykel OR30SCG
- Page 1 FREESTANDING RANGE OR30SCG & OR30SDG OR36SCG & OR36SDG models USER GUIDE US CA...
- Page 2 WARNING! If the information in this manual is not followed exactly, a fire or explosion may result causing property damage, personal injury or death. Do not store or use gasoline or other flammable vapors and liquids in the vicinity of this or any other appliance.
-
Page 3: Table Of Contents
CONTENTS Safety and warnings Introduction First use Conditioning the oven Oven use Positioning the shelves Using your oven for baking and roasting Using your oven for broiling Oven cooking guidelines Oven functions Cooking charts Cooktop use Using the cooktop burners Cooking guidelines and Cookware Care and cleaning Manual cleaning chart... -
Page 4: Safety And Warnings
SAFETY AND WARNINGS To reduce the risk of fire, electrical shock, injury to persons, or damage when using the appliance, follow the important safety instructions listed below: WARNING! Electrical Shock Hazard Before removing a faulty oven light bulb, make sure you turn the power to the range off at the main fuse or circuit breaker panel. - Page 5 SAFETY AND WARNINGS WARNING! Explosion Hazard If you smell gas, do not use the appliance. Open a window or door to let the gas escape, then follow the instructions on the inside front cover of this manual. Do not use water on grease fires. A violent steam explosion may result. Turn all burners off, then smother fire or flame or use dry chemical or foam-type extinguisher.
- Page 6 SAFETY AND WARNINGS IMPORTANT SAFETY INSTRUCTIONS! Read all the instructions before using the appliance. Use the appliance only for its ● intended purpose as described in these instructions. Proper installation – Be sure your appliance is properly installed and grounded by a ●...
- Page 7 SAFETY AND WARNINGS IMPORTANT SAFETY INSTRUCTIONS! Safe food handling: leave food in the oven for as short a time as possible before and ● after cooking. This is to avoid contamination by organisms which may cause food poisoning. Take particular care during warmer weather. Clean only the parts listed in this manual.
-
Page 8: Introduction
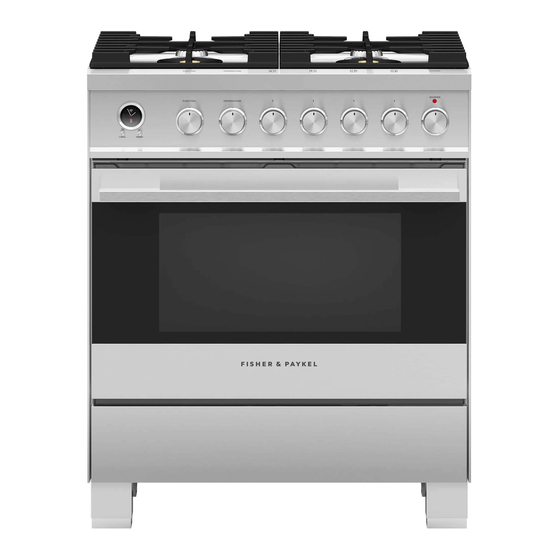
INTRODUCTION 30” MODELS OR30SCG OR30SDG 36” MODELS OR36CGG OR36SDG Models may vary from shown... - Page 9 INTRODUCTION Before you start 1 Make sure that the anti-tip bracket at the right rear of the range has been properly installed. 2 Make sure that the installer has completed the ‘Final checklist’ in the Installation instructions. 3 Read this guide, taking special note of the ‘Safety and warnings’ section. 4 Remove all accessories and packaging from the oven and cooktop.
-
Page 10: First Use
FIRST USE Dials may vary Control panel layout Oven controls Cooktop burner controls Condition the oven It is important to condition your oven before using it for cooking and baking. Conditioning will burn off any manufacturing residues and ensure that you get the best results right from the start. - Page 11 FIRST USE 3 When the burner is lit, close the door 4 After 30 minutes turn the LIGHT & FAN and adjust the temperature to 550F. dial counterclockwise to turn the oven fan on. IMPORTANT! If the flame extinguishes for any reason while the oven is on, the safety valve will automatically shut off the gas supply to the burner.
-
Page 12: Oven Use
OVEN USE Positioning the shelves Shelf positions are numbered from the bottom. ● Position the shelves you will need before turning the oven on. ● For advice on which shelf position to use, see sections ‘Oven functions’, ‘Oven cooking ● guidelines’, and ‘Cooking charts’. - Page 13 OVEN USE To insert the shelves Guard rail 1 Make sure the guard rail is at the 2 Hold the shelf firmly with both hands, back, facing up and the slides are not making sure you grip the wire shelf too extended.
-
Page 14: Using Your Oven For Baking And Roasting
OVEN USE Using your oven for baking and roasting 1 In the O (OFF) position, push the 2 Close the door slowly, and adjust the BAKE & BROIL dial in as far it will go temperature as needed. then turn counterclockwise to BROIL. Wait for the oven to preheat for ●... -
Page 15: Using Your Oven For Broiling
OVEN USE Using your oven for broiling 1 In the O (OFF) position, push the 2 When you have finished cooking turn BAKE & BROIL dial in as far it will go the BAKE & BROIL dial back to OFF. then turn clockwise to BAKE. -
Page 16: Oven Cooking Guidelines
COOKING GUIDE Oven cooking guidelines IMPORTANT! Use all the oven modes with the oven door closed. ● Never use aluminum foil to cover the oven shelves or to line the floor of the oven. The ● trapped heat can irreversibly damage the enamel and may even cause fire. Do not place water, ice, or any dish or tray directly on the oven floor, as this will ●... - Page 17 COOKING GUIDE Oven cooking guidelines ROASTING The broil rack and pan are ideal for broiling and roasting. Place meat on the broil rack ● (on top of the broil pan) to allow hot air to circulate around it. This gives more even browning and a result similar to a rotisserie.
- Page 18 COOKING GUIDE Oven cooking guidelines REHEATING Use BAKE or BAKE + FAN to reheat food. ● BAKE mode is particularly good for reheating pastry based items, as the base heat will ● help re-crisp the pastry case. Always reheat food to piping hot. This reduces the risk of contamination by harmful ●...
-
Page 19: Oven Functions
OVEN FUNCTIONS IMPORTANT! Use all the functions with the oven door closed. ● BAKE This is the traditional cooking function. ● It is best to cook on only one shelf at a time in this function. ● Ideal for cakes, pies, desserts and bread, and slow cooked dishes like casseroles. BAKE + FAN The fan can be used with the BAKE function for foods that require additional browning ●... -
Page 20: Cooking Charts
COOKING CHARTS Shelf positions are counted from the base up ● (1 is the lowest, 7 is the highest). Position shelves before you turn the oven on. For best results preheat the oven. ● Multi shelf cooking may need the shelves rotating midway through cooking. ●... - Page 21 COOKING CHARTS The information in these charts are guidelines only. Refer to your recipe or the packaging and be prepared to adjust the cooking times and settings accordingly. RECOMMENDED SHELF TIME TEMP (°F) TEMP (°C) MODE POSITIONS (MINS) Bake with Fan 400 - 425 210 - 220 8 - 10...
- Page 22 COOKING CHARTS SAVOURY FOOD SHELVES Single Cornbread Single Vegetables Single Lasagne Casserole Single Pizza Single Quiche Single (blind bake, then add filling) Single Potatoes (whole, baked) Single Frittata (shallow) Single Oven Meals ROASTING RECOMMENDED FOOD SHELVES * MODE Beef (Boneless) Rare Single Bake with Fan...
- Page 23 COOKING CHARTS RECOMMENDED SHELF TIME TEMP (°F) TEMP (°C) MODE POSITIONS (MINS) Bake with Fan 400 - 425 210 - 215 20 - 25 Bake with Fan 350 - 375 175 - 190 30 - 50 Bake with Fan 350 - 375 175 - 190 35 - 40 Bake...
- Page 24 COOKING CHARTS BROILING FOOD SHELVES Beef Steak Rare Single Medium Single Hamburger Single (ground - patties) Meatballs Single (ground) Medium Single Lamb Chops Well done Single Chops (well done) Single Pork Ham steak Single Bacon Single Boneless pieces Single Chicken Bone In Pieces Single Sausages...
- Page 25 COOKING CHARTS RECOMMENDED SHELF TEMP (°F) TEMP (°C) TIME (MINS) MODE POSITIONS Broil 6 or 7 8 - 10 Broil 6 or 7 10 - 15 Broil 6 or 7 12 - 15 Broil 6 or 7 12 - 15 Broil 6 or 7 15 - 20...
-
Page 26: Cooktop Use
COOKTOP USE OR30 models - cooktop OR36 models - cooktop 1 Semi-rapid burner 2 Dual wok burner 3 Triple-ring wok burner Burner Controls The dials control the flow of gas through the valve. Using the single burners Using the dual burner 1 Identify the dial of the burner you want 1 Starting from the O (OFF) position, push to use. - Page 27 COOKTOP USE 3 When the burner has lit, adjust the 3 When you have finished cooking, turn flame anywhere between HI and LO. the dial clockwise back to O (OFF). Do not adjust the dial between HI and If you are using LP gas, there may be ●...
- Page 28 COOKTOP USE If a burner does not light Turn the control dial to O (Off) and wait at least one minute before trying again, to all the gas to disperse. If the burner still does not light, check that: the range is plugged in and the power supply is switched on ●...
-
Page 29: Cooking Guidelines And Cookware
COOKING GUIDELINES AND COOKWARE Cooking guidelines IMPORTANT! Never leave the cooktop unattended when in use. Boilover causes smoking and greasy ● spills that may ignite. Take care when deep-frying: oil or fat can overheat very quickly, particularly on a high ●... - Page 30 COOKING GUIDELINES AND COOKWARE Wok stand The wok stand fits over the triple-ring wok or dual burner trivet. IMPORTANT! Using a wok without the stand may cause the wok to tip or the wok or dual burner to ● operate incorrectly. Do not use the stand for ordinary, flat-bottomed saucepans.
-
Page 31: Care And Cleaning
CARE AND CLEANING DON’TS Read these cleaning instructions and the Do not use aerosol cleaners until ● ● ‘Safety and warnings’ section before you the range has completely cooled. start cleaning your range. The propellant substance in these Before cleaning or removing any part, cleaners could catch fire in the ●... - Page 32 CARE AND CLEANING Manual cleaning chart WHAT? HOW? IMPORTANT! HOW OFTEN? RANGE EXTERIOR 1 Soften any stubborn stains Door frame Always read the label to ● under a hot soapy cloth. exterior, make sure your stainless steel 2 Clean with a solution of Control panel, cleaner does not contain mild detergent and hot...
- Page 33 CARE AND CLEANING OVEN PARTS 1 Remove everything from the oven: Enamel Oven cleaners are caustic oven interior – shelves, side racks, all utensils. and may permanently stain 2 Cover the floor in front of the oven stubborn, ‘baked- or damage some surfaces. on’...
- Page 34 CARE AND CLEANING Manual cleaning chart WHAT? HOW? IMPORTANT! HOW OFTEN? OVEN PARTS Oven door Use a soft cloth and a mixture of Do not use oven cleaners ● glass warm water and dishwashing liquid or any other harsh/ to remove light soiling. For stubborn (interior) abrasive cleaners, stains, try using a ceramic cooktop...
- Page 35 CARE AND CLEANING WHAT? HOW? IMPORTANT! HOW OFTEN? COOKTOP PARTS 1 Check that the burner is turned Burner caps Keep the notches of ● OFF and allow it to cool. and flame the flame spreaders 2 Lift off the burner cap and brass clear.
-
Page 36: Removing And Replacing The Oven Door
CARE AND CLEANING Removing and replacing the oven door IMPORTANT! Do not lift the oven door by its handle. Doing so may damage the door. ● Make sure the oven and the door are cool before you begin to remove the door. ●... - Page 37 CARE AND CLEANING To replace the oven door Notch 1 Hold the door firmly in an approximately 2 Insert the hinge tongues into the slots, halfway open position. making sure that the notches on both sides drop into place as shown. 3 Open the door fully.
-
Page 38: Removing And Replacing The Side Racks
CARE AND CLEANING Removing and replacing the side racks IMPORTANT! Always turn off the oven at the wall first. Ensure the oven has cooled down completely before starting. To remove side racks Remove all shelves 1 Slide out all shelves and remove. For easier access we recommend removing Remove all the oven door. -
Page 39: Removing And Replacing The Storage Drawer
CARE AND CLEANING Removing and replacing the storage drawer IMPORTANT! Do not remove the drawer while the oven is in operation. ● Do not remove the drawer while the oven is hot. ● Ensure the drawer is completely empty before removing it. ●... -
Page 40: Replacing The Burner Parts
CARE AND CLEANING Burner parts You can remove and clean these parts with hot soapy water or non-abrasive detergents. ● Clean spills regularly before they become burnt on. Do not wash these parts in a dishwasher. After cleaning, check that the burners and their flame spreaders are dry before replacing ●... - Page 41 CARE AND CLEANING Replacing the triple-ring wok and dual burners Ignitor Ignitor Correct positioning of flame spreader - dual burner Correct positioning of flame spreader - triple-ring wok burner Ring Correct positioning of Incorrect and correct positioning cap and ring - triple-ring wok and dual burner of cap and ring - triple-ring wok and dual burner...
-
Page 42: Replacing The Oven Light Bulbs
CARE AND CLEANING Replacing the oven light bulbs IMPORTANT! Use a 25W, 120V 60HZ G9 halogen bulb for replacement. Do not use a standard light bulb in any oven, the heat will break it. 1 Allow the oven (including the lamp cover and the bulb) to cool completely. IMPORTANT! Turn the oven off at the wall before continuing. -
Page 43: Troubleshooting
TROUBLESHOOTING If you can’t find an answer to your problem in the chart below, or if the problem cannot be fixed, you will need technical help. Contact your Authorized Service Center or Customer Care. PROBLEM POSSIBLE CAUSES WHAT TO DO OVEN The oven will not light. - Page 44 TROUBLESHOOTING PROBLEM POSSIBLE CAUSES WHAT TO DO OVEN Food has high moisture Condensation is normal. You Condensation around content or local climate can wipe the drops off the oven (e.g. on control (temperature, humidity) is control panel. If there is panel or top of oven contributing to condensation.
- Page 45 TROUBLESHOOTING PROBLEM POSSIBLE CAUSES WHAT TO DO COOKTOP BURNERS Burner parts or ignitors may Check that the burner parts Some burners will not be wet, dirty, or misaligned. are clean, dry, and correctly light. assembled. Check that the ignitors are clean and dry. Flames do not burn all See ‘Care and cleaning’...
-
Page 46: Warranty And Service
WARRANTY AND SERVICE Before you call for service or assistance ... Check the things you can do yourself. Refer to the installation instructions and your user guide and check that: 1 Your product is correctly installed. 2 You are familiar with its normal operation. If after checking these points you still need assistance or parts, please refer to the Service &... - Page 48 FISHERPAYKEL.COM © Fisher & Paykel Appliances 2017. All rights reserved. The product specifications in this booklet apply to the specific products and models described at the date of issue. Under our policy of continuous product improvement, these specifications may change at any time. You should therefore check with your Dealer to ensure this booklet correctly describes the product currently available.
Need help?
Do you have a question about the OR30SCG and is the answer not in the manual?
Questions and answers