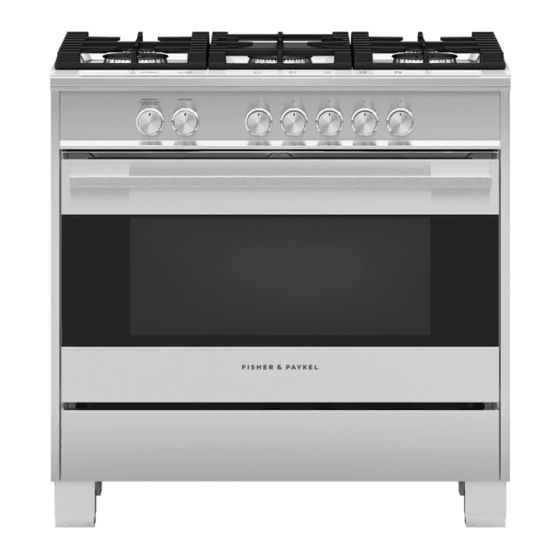
Fisher & Paykel OR36SDG4X1 Manual
Gas conversion
Hide thumbs
Also See for OR36SDG4X1:
- Installation manual (57 pages) ,
- User manual (48 pages) ,
- User manual (48 pages)
Advertisement
Quick Links
Gas Conversion
Conversion to LP/Propane Gas
• This range can be used with NATURAL or LP/PROPANE gas. It is shipped from the factory adjusted for use with
NATURAL gas.
• Any conversion required must be performed by your dealer, a qualified licensed technician or gas service
company. Provide the service person with this manual before any work is started on the range. (Gas
conversions are the responsibility of the dealer or end user.)
• The range is supplied with a set of injectors required for converting the range burners.
• Refer to the following table to select the appropriate size injector. The nozzle diameters (hundredths of a
millimetre) are marked on the body of each injector.
• This range can be used with NATURAL or LP/PROPANE gas. It is shipped from the factory
• Any conversion required must be performed by your dealer, a qualified licensed technician or
• The range is supplied with a set of injectors required for converting the range burners.
• Refer to the following table to select the appropriate size injector. The nozzle diameters
Setting the Pressure Regulator
The pressure regulator is accessible by removing the storage/warmer drawer; the pressure regulator is positioned on the
rear right side of the range C.
https://producthelp.fisherpaykel.com/us/Cook/Ranges/Gas/OR36SDG4X1/Installation_Guide_OR36SDG4X1/19_Gas_Conver...
adjusted for use with NATURAL gas.
gas service company. Provide the service person with this manual before any work is started on
the range. (Gas conversions are the responsibility of the dealer or end user.)
(hundredths of a millimetre) are marked on the body of each injector.
Updated: Wed, 01 Dec 2021 11:49:07 GMT
Powered by
1
Advertisement

Summary of Contents for Fisher & Paykel OR36SDG4X1
- Page 1 (hundredths of a millimetre) are marked on the body of each injector. Setting the Pressure Regulator The pressure regulator is accessible by removing the storage/warmer drawer; the pressure regulator is positioned on the rear right side of the range C. https://producthelp.fisherpaykel.com/us/Cook/Ranges/Gas/OR36SDG4X1/Installation_Guide_OR36SDG4X1/19_Gas_Conver… Updated: Wed, 01 Dec 2021 11:49:07 GMT Powered by...
- Page 2 • Be sure storage/warming drawer is empty before removing. • Always position your hand below the front panel to open/close the drawer. To Set the Pressure Regulator 1. Unscrew the regulator cover. https://producthelp.fisherpaykel.com/us/Cook/Ranges/Gas/OR36SDG4X1/Installation_Guide_OR36SDG4X1/19_Gas_Conver… Updated: Wed, 01 Dec 2021 11:49:07 GMT Powered by...
-
Page 3: Injectors Table
Semirapid (SR) 8000 (Natural 1800 Gas) 12000 (LP/ 6300 Propane Gas) Triple Ring 14000 (Natural 6300 Gas) Inner 2800 1100 crown Dual Full 18000 6500 79 (x2) 135 (x2) burner https://producthelp.fisherpaykel.com/us/Cook/Ranges/Gas/OR36SDG4X1/Installation_Guide_OR36SDG4X1/19_Gas_Conver… Updated: Wed, 01 Dec 2021 11:49:07 GMT Powered by... - Page 4 • Using a wrench substitute the nozzle injectors with those most suitable for the kind of gas for which it is to be used. • Refit the flame spreaders, the burner caps and the pan supports The burners are designed so that no regulation of the primary air is required. https://producthelp.fisherpaykel.com/us/Cook/Ranges/Gas/OR36SDG4X1/Installation_Guide_OR36SDG4X1/19_Gas_Conver… Updated: Wed, 01 Dec 2021 11:49:07 GMT Powered by...
- Page 5 • With a thin screwdriver, turn the regulation screw inside the tap rod until adjustment is correct. Inside Crown of DUAL Burner (B) • Light the DUAL burner. • Set the gas valve to https://producthelp.fisherpaykel.com/us/Cook/Ranges/Gas/OR36SDG4X1/Installation_Guide_OR36SDG4X1/19_Gas_Conver… Updated: Wed, 01 Dec 2021 11:49:07 GMT Powered by...
- Page 6 • With a thin screwdriver, turn the regulation screw inside the tap rod until adjustment is correct. For LP/PROPANE gas, tighten the adjustment screws completely Regulation screw (Semi-Rapid burner) Regulation screw (Inner crown of dual burner) Regulation screw (Outer crown of dual burner) https://producthelp.fisherpaykel.com/us/Cook/Ranges/Gas/OR36SDG4X1/Installation_Guide_OR36SDG4X1/19_Gas_Conver… Updated: Wed, 01 Dec 2021 11:49:07 GMT Powered by...
- Page 7 6. Replace the burner and other components. • Ensure the safety valve probe (V) and the ignition electrode (E) are replaced correctly. • Check the correct operation of the safety valve and the ignition electrode. https://producthelp.fisherpaykel.com/us/Cook/Ranges/Gas/OR36SDG4X1/Installation_Guide_OR36SDG4X1/19_Gas_Conver… Updated: Wed, 01 Dec 2021 11:49:07 GMT Powered by...
- Page 8 5. Replace the burner and other components. Ensure the safety valve probe (V) and the ignition electrode (E) are replaced correctly. Check the correct operation of the safety valve and the ignition electrode. https://producthelp.fisherpaykel.com/us/Cook/Ranges/Gas/OR36SDG4X1/Installation_Guide_OR36SDG4X1/19_Gas_Conver… Updated: Wed, 01 Dec 2021 11:49:07 GMT Powered by...
- Page 9 1/8–5/32” (3–4mm) in height. The flame should not go out even when passing suddenly from maximum to minimum flame. For LP/PROPANE gas the by-pass screw must be fixed thoroughly. https://producthelp.fisherpaykel.com/us/Cook/Ranges/Gas/OR36SDG4X1/Installation_Guide_OR36SDG4X1/19_Gas_Conver… Updated: Wed, 01 Dec 2021 11:49:07 GMT Powered by...


Need help?
Do you have a question about the OR36SDG4X1 and is the answer not in the manual?
Questions and answers