Advertisement
Quick Links
Advertisement

Summary of Contents for Fortis SK-600XL
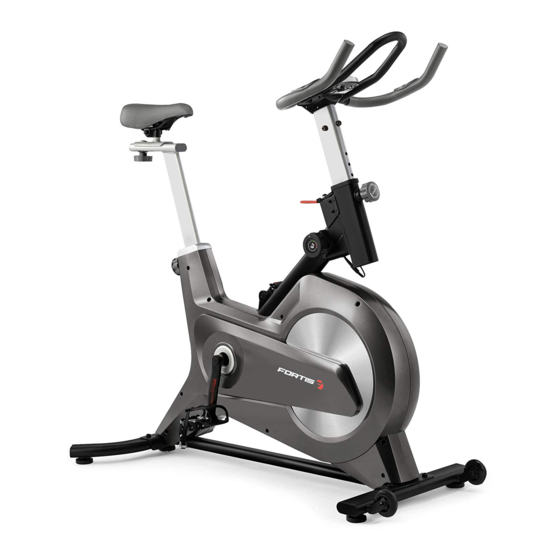
- Page 1 MAGNETIC FLYWHEEL SPIN BIKE WITH EXTRA LARGE FRAME (SK-600XL) FSMSK600XLA...
-
Page 3: Safety And Warnings
SAFETY & WARNINGS Read all of the instructions in this guide before using this product. Retain this guide for future reference. Do not skip, substitute or modify any steps or procedures in this guide, as doing so could result in personal injury or product damage. •... - Page 4 the equipment during exercise, cease use immediately and contact help.kogan.com for assistance. Do not use until resolved. • Do not place fingers or any other objects into moving parts of the exercise equipment. • After exercising, turn the adjusting Knob to increase tension so the pedals will not rotate freely and possibly hurt someone while bike is not in use.
- Page 5 OVERVIEW...
- Page 6 Part Description Part Description Front Stabilizer Bearing 6001-2RS Idle Pulley Φ39*Φ34*24 Hexagon Nut M8*H5.5*S14 Wave Washer Foot Pad ф43*14*M8*25 d12*Φ15.5*0.3 End Cap PT70*30*20 Seat Screw M6*12*S5 Seat Slider Bearing 608ZZ Seat Post Transport Wheel Φ71*Φ19*24 End Cap PT50*25*16 Screw Φ7.8*30*M6*15*S5 Washer d10*Φ30*2.5 Screw M8*20*S6 Knob M10*Φ58*32...
- Page 7 Part Description Part Description Belt Screw M8*16*S6 Tension Knob Nut M12*1*H5*S19 Spring Washer d6 Handlebar End Cap ΦΦ25*16 Washer d6*Φ12*1.2 Foam Grip Φ23*3*420 Ring-Shield d12 Magnet 40*25*10 Main Frame Magnet Holder 45.5*130*10.5 Washer d5*Φ13*1 Magnetic Plate Screw M5*16*Φ8 Magnetic Plate Shaft Pulse Sensor Φ12*53.5*47.4*M6 Screw ST3*10*Φ5.6...
- Page 8 ASSEMBLY Step 1: Attach the Front & Rear Stabilizer (1 & 12) to the Main Frame (81) using x4 Screws (9), x4 Spring Washers (10) and x4 Washers (11). Tighten with the supplied Allen key (A). Attach Left Pedal (40L) to Left Crank (39L). Turn the Left Pedal (40L) counter-clockwise by hand until it is tight, then use the Spanner (B) to securely tighten.
- Page 9 Step 2: Insert Trunk line (88) through Handlebar Post (74). Then attach the Handlebar (78) to Handlebar Post (74) using x3 Screws (76), x3 Spring Washers (10) and x3 washers (11). Tighten with an Allen key (A) (Figure B). Loosen and pull out the Knob (13) from the Main Frame (81). Insert the Handlebar post (74) with Trunk line (88) into Main frame (81) at desired position.
- Page 10 Step 3: Attach the Seat Slider (30) to the Seat Post (31), tighten and secure with Washer (33) and Knob (34).
-
Page 11: Before First Use
BEFORE FIRST USE Tension Adjustment A. Adjusting the Tension: Increasing or decreasing the tension allows to add variety to your workout sessions. To increase the tension, rotate the Tension Knob (52) clockwise (“+”, arrow A). To decrease the tension, turn the Tension Knob (52) counter-clockwise (“-“, arrow B) B. - Page 12 Pedal Strap Adjustment When the pedal is tight, press the buckle and pull the strap up to loosen the strap (Figure A). If loose, press the buckle and pull the strap down to fasten the strap (Figure B). Seat and Handlebar Adjustment The seat of this bike is fully adjustable as it moves up, down, forward and backward.
- Page 13 C. To adjust the height of Handlebar (78), loosen and pull on the Knob (13), then slide the Handlebar Post (74) up or down to the desired height. Once adjusted, tighten the Knob (13) to secure the Handlebar Post (74) in place. Balance Adjustment To achieve a smooth and comfortable experience, you must ensure that the bike is stable.
-
Page 14: Operation
OPERATION MODE: Push to select functions. AUTO ON/OFF: The monitor will be automatically shut off if there is no signal coming in for 4 minutes. The monitor will be auto-powered when start exercises or press the key. Function • TIME (TMR): Count the total time from exercise start to end. •... - Page 15 Battery The computer uses x2 “AAA” batteries, which are included. If there is a problem with the display, try changing the batteries first. When changing the batteries, change both of them. Do not mix old and new batteries. Do not mix battery types. Dispose the batteries according to the laws and regulations of your local region.
- Page 16 Need more information? We hope that this user guide has given you the assistance needed for a simple set-up. For the most up-to-date guide for your product, as well as any additional assistance you may require, head online to help.kogan.com...


Need help?
Do you have a question about the SK-600XL and is the answer not in the manual?
Questions and answers