Advertisement
Quick Links
Advertisement

Related Manuals for Fortis AEXR-270


Summary of Contents for Fortis AEXR-270
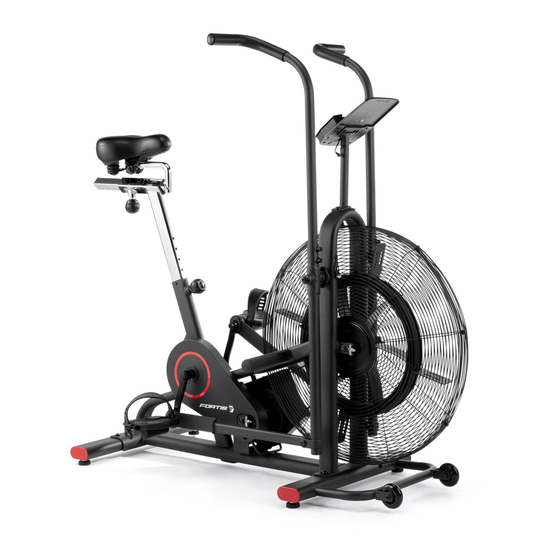
- Page 1 27" FAN RESISTANCE EXERCISE AIR BIKE (AEXR-270) FSFNARBK27A...
- Page 3 SAFETY & WARNINGS • Read all of the instructions in this guide before using this product. Retain this guide for future reference. Do not skip, substitute or modify any steps or procedures in this guide, as doing so could result in personal injury or product damage. •...
- Page 4 • Do not exceed the maximum user weight of 120 KG. • Be careful when lifting and moving the equipment. Always use proper lifting technique and seek assistance if necessary. • Your equipment is intended for use in cool, dry conditions. You should avoid storage in extreme cold, hot or damp areas as this may lead to corrosion and other related problems.
- Page 5 OVERVIEW...
- Page 6 Part List Description Description Wave Washer Main Frame Ø26xØ16x0.3 Metal Bushing Meter Post Ø28xØ16x16 D-shaped Washer Left Handrail Arm Ø28xØ16x5 Right Handrail Arm Flat Washer Ø10xØ25x2.0 Spring Washer Handrail Ø19.5xØ11.5x3.0 Left and Right Foot Bar Hexagon Bolt M10x20 Front Stabilizer Carriage Bolt M8 x 40 Curve Washer Rear Stabilizer...
- Page 7 Description Description Left Chain Cover Left Crank Right Chain Cover Right Crank Hexagon Nut M6 Left Nylon Nut 1/2" Spring Washer Ø6 Right Nylon Nut 1/2" Tension Bracket Ring Ø20 Flange Nut M10x1.0 Bearing 6004Z Eye Bolt M6x36 Chain Hexagon Nut M10x1.0 Magnetic Wheel Axle Ring Ø10 Hexagon Nut M5...
-
Page 8: Allen Wrench S5
Description Description Blade Sensor Holder Bolt M5x40 Fan Wheel Axle Fly Wheel Footrest Bolt M5x35 End Cap Ø38 Magnet Crank Cap Hardware & Tools Spanner with Phillips Spanner Allen Wrench S6 Screwdriver Allen Wrench S5 S10-S13-S17-S19 (1PC) S13-S14-S15 (1PC) (29) Carriage Bolt M8×40 (4PCS) (20) Axle 2PCS (28) Bolt M10x20 (30) Curve Washer ø20xø8x1.5 (4PCS) - Page 9 ASSEMBLY Step 1: Front and Rear Stabilizer Installation • Remove x2 M8x16 Hexagon Bolts (15) and x2 Ø20xØ8x1.5 Flat Washers (38) from the Front Stabilizer (7) using the S6 Allen Wrench provided. • Attach the Front Stabilizer (7) onto the Main Frame (1) with removed the x2 M8x16 Hexagon Bolts (15) and x2 Ø20xØ8x1.5 Flat Washers (38).
- Page 10 Step 2: Handrail, Foot Bar and Foot Pedal Installation • Remove x4 M6x10 Bolts (22) from the Main Frame (1) and take out x2 Locking Plates (21). • Install the Axle (20) to the Main Frame (1), tighten with Spanner provided. •...
- Page 11 Tools: Spanner with Phillips Spanner Allen Wrench S5 Allen Wrench S6 Screwdriver S10-S13-S17-S19 S13-S14-S15...
-
Page 12: Spanner
Step 3: Seat Post, Footrest Installation • Turn the M16x35 Adjustment Knob (81) from the Seat Post (9) in a counter clockwise direction to release the Seat Slider (10). Then adjust the Seat Slider (10) back or forth slightly to the desired hole for the suitable position. •... - Page 13 Step 4: Left and Right Handrail Arm, Meter Post Installation • Insert the Right Handrail Arm (4) on the tube of the Right Handrail (5) with x2 M8x40 Carriage Bolts (29), x2 Ø20xØ8x1.5 Curve Washers (30) and x2 M8 Cap Nuts (31).
- Page 14 Tools: Spanner with Allen Wrench S6 Phillips Screwdriver S13-S14-S15...
- Page 15 OPERATION BUTTONS Mode: Press this button to changeover display or choose the window needs to be set. Set: In setting status, press this button to increase setting value in relevant flashing window for TIME, DIST, and CAL. Reset: • In setting status, press this button to reset the value in relevant flashing window for TIME, DIST and CAL, PULSE.
- Page 16 Need more information? We hope that this user guide has given you the assistance needed for a simple set-up. For the most up-to-date guide for your product, as well as any additional assistance you may require, head online to help.kogan.com.
Need help?
Do you have a question about the AEXR-270 and is the answer not in the manual?
Questions and answers