Getac B300 User Manual
Hide thumbs
Also See for B300:
- User manual (154 pages) ,
- Reference manual (2 pages) ,
- User manual (149 pages)
Table of Contents
Advertisement
Quick Links
Advertisement
Table of Contents

Related Manuals for Getac B300


Summary of Contents for Getac B300
- Page 1 Rugged Mobile Computing Solutions...
- Page 2 TRADEMARKS TRADEMARKS TRADEMARKS TRADEMARKS NOTE NOTE NOTE NOTE...
- Page 3 Table of Contents Table of Contents Table of Contents Table of Contents Chapter 1 Getting Started .............. 1 Chapter 2 Operating Your Computer ..........15...
- Page 4 Chapter 3 Managing Power ............34 Chapter 4 Expanding Your Computer ........... 41 Chapter 5 Using BIOS Setup ............54...
- Page 5 Chapter 6 Using Getac Software ........... 62 Chapter 7 Caring for the Computer ..........64 Chapter 8 Troubleshooting ............71...
- Page 6 Appendix A Specifications .............. 86 Appendix B Regulatory Information..........88...
-
Page 7: Getting Started
Chapter 1 Chapter 1 Chapter 1 Chapter 1 Getting Started Getting Started Getting Started Getting Started... -
Page 8: Getting The Computer Running
Getting the Computer Running Getting the Computer Running Getting the Computer Running Getting the Computer Running Unpacking Unpacking Unpacking Unpacking ... -
Page 9: Using The Tether (Optional)
Using the Tether (Optional) Using the Tether (Optional) Using the Tether (Optional) Using the Tether (Optional) ... -
Page 10: Connecting To Ac Power
Connecting to AC Power Connecting to AC Power Connecting to AC Power Connecting to AC Power CAUTION: Use only the AC adapter included with your computer. Using other AC adapters may damage the computer. NOTE: The battery pack is shipped to you in power saving mode that ... - Page 11 Turning On and Off the Computer Turning On and Off the Computer Turning On and Off the Computer Turning On and Off the Computer Turning Turning On Turning Turning ...
- Page 12 Turning Off Turning Off Turning Off Turning Off To... To... Do this... Do this... To... To... Do this... Do this... Power Shut down Power Sleep ”...
-
Page 13: Taking A Look At The Computer
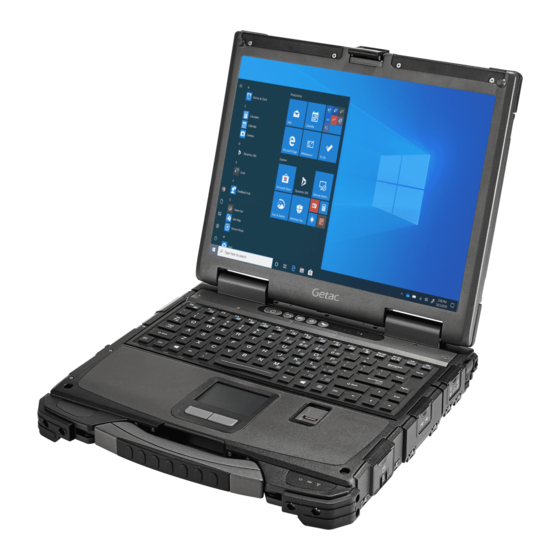
Taking a Look at the Computer Taking a Look at the Computer Taking a Look at the Taking a Look at the Computer Computer NOTE: Depending on the model you purchased, the appearance of your computer may not be exactly the same as those shown in this manual. -
Page 14: Rear Components
Rear Components Rear Components Rear Components Rear Components Re Re Ref f f f Component Component Component Component Description Description Description Description Power Connector Power Connector Power Connector Power Connector USB Port USB Port USB Port USB Port ... - Page 15 Component Component Component Component Description Description Description Description Kensington Lock Kensington Lock Kensington Lock Kensington Lock CAUTION: Closing the cover in an incorrect manner will result in poor sealing. As shown below, when closing the cover, you must firmly press the two sides ( ) of the release latch to ...
-
Page 16: Right-Side Components
Right- - - - Side Components Right Side Components Right Right Side Components Side Components Component Component Component Component D D D D escription escription escription escription ExpressCard Slot ExpressCard Slot ExpressCard Slot ExpressCard Slot SIM Card Slot SIM Card Slot SIM Card Slot SIM Card Slot... - Page 17 Component Component Component Component D D D D escription escription escription escription Microphon Microphone e e e Microphon Microphon Connector Connector Connector Connector RJ RJ RJ RJ- - - - 45 45 45 45 Connector Connector Connector Connector Left Left- - - - Side Components Left Left...
-
Page 18: Top-Open Components
Top- - - - open Components open Components open Components open Components Compo Compo Compo Component nent nent nent Description Description Description Description LCD Screen Screen Screen Screen Quick Buttons Quick Buttons Quick Buttons Quick Buttons P1 P1 P1 P1 ”... - Page 19 Compo Compo Compo Component nent nent nent Description Description Description Description ” Power Button Power Button Power Button Power Button ” Stylus Stylus Stylus Stylus Touchpad Touchpad Touchpad Touchpad Indicators Indicators Indicators Indicators Hard Disk Drive Hard Disk Drive Hard Disk Drive Hard Disk Drive...
-
Page 20: Bottom Components
Compo Compo Compo Component nent nent nent Description Description Description Description RF RF RF RF (Radio (Radio (Radio (Radio Frequency) Frequency) Frequency) Frequency) NOTE: The hardware buttons (except the power button) can be re-defined using G-Manager. Bottom Components Bottom Components Bottom Components Bottom Components Component... -
Page 21: Operating Your Computer
Chapter 2 Chapter 2 Chapter 2 Chapter 2 Operating Your Computer Operating Your Computer Operating Your Computer Operating Your Computer CAUTION: Do not expose your skin to the computer when operating it in a very hot or cold environment. The computer can get uncomfortably warm when you use it in ... -
Page 22: Using The Keyboard
Using the Keyboard Using the Keyboard Using the Keyboard Using the Keyboard Fn Fn Fn Fn Typewriter Keys Typewriter Keys Typewriter Keys Typewriter Keys Ctrl Ctrl Ctrl Ctrl Alt Alt Esc Ctrl Ctrl Ctrl Ctrl Cursor Cursor- - - - Control Keys Cursor Cursor... -
Page 23: Numeric Keypad
Numeric Keypad Numeric Keypad Numeric Keypad Numeric Keypad NOTE: When the numeric keypad is activated and you need to type the English letter in the keypad area, you can turn Num Lock off or you can press Fn Fn Fn Fn and then the letter without turning Num Lock off. -
Page 24: Function Keys
Function Keys Function Keys Function Keys Function Keys F1 F1 F1 F1 Fn Fn Fn Fn Key Fn Fn Fn Fn Fn Fn Fn Fn Hot Keys Hot Keys Hot Keys Hot Keys Description Description Description Description... -
Page 25: Windows Keys
Description Description Description Description Power Options Windows Keys Windows Keys Windows Keys Windows Keys... - Page 26 Start Start Start Start...
-
Page 27: Using The Touchpad
Using the Touchpad Using the Touchpad Using the Touchpad Using the Touchpad CAUTION: Do not use a sharp object such as a pen on the touchpad. Doing so may damage the touchpad surface. NOTE: You can press Fn Fn Fn Fn+F9 F9 F9 F9 to toggle the touchpad function on or off. ... -
Page 28: Configuring The Touchpad
Term Term Term Term Action Action Action Action TABLE NOTE: TABLE NOTE: TABLE NOTE: TABLE NOTE: ” Configuring the Touchpad Configuring the Touchpad Configuring the Touchpad Configuring the Touchpad... - Page 29 Settings Settings Devices Devices Mouse & touchpad Mouse & touchpad Settings Settings Devices Devices Mouse & touchpad Mouse & touchpad...
- Page 30 Using the Touchscreen (Optional) Using the Touchscreen (Optional) Using the Touchscreen Using the Touchscreen (Optional) (Optional) NOTE: You can press Fn Fn Fn Fn+F8 F8 F8 F8 to toggle the touchscreen function on or off. CAUTION: Do not use a sharp object such as a ballpoint pen or pencil on the touchscreen.
- Page 31 Using the DVD Drive Using the DVD Drive Using the Using the DVD Drive DVD Drive CAUTION: When inserting a disc, do not use force. Make sure that the disc is correctly inserted into the tray, and then close the tray. Do not leave the drive tray open.
- Page 32 Inserting and Removing a Disc Inserting and Removing a Disc Inserting and Removing a Inserting and Removing a Disc Disc NOTE: In the unlikely event that you are unable to release the drive tray by pressing the eject button, you can manually release the disc.
- Page 33 Using Network Using Network and Wireless and Wireless Using Using Network Network and Wireless and Wireless Connections Connections Connections Connections Using the LAN Using the LAN Using the LAN Using the LAN Using the WLAN Using the WLAN Using the WLAN Using the WLAN Turning Turning On/Off...
-
Page 34: Using The Bluetooth Feature
Connecting to a Wireless Network Connecting to a Wireless Network Connecting to Connecting to a Wireless Network a Wireless Network Connect Connect Connect Connect Using the Using the Bluetooth Feature Bluetooth Feature Using Using Bluetooth Feature Bluetooth Feature Turning On/Off Turning On/Off the the Bluetooth... -
Page 35: Using The Wwan Feature (Optional)
Connecting to another Bluetooth Device Connecting to another Bluetooth Device Connecting to another Bluetooth Device Connecting to another Bluetooth Device Settings Devices Bluetooth Using the WWAN Feature (Optional) Using the WWAN Feature (Optional) Using the WWAN Feature (Optional) Using the WWAN Feature (Optional) NOTE: The WWAN feature is available to selected countries only. - Page 36 Installing a SIM Card Installing a SIM Card Installing Installing a SIM Card a SIM Card NOTE: To remove the SIM card, push inward to release and slide the SIM card out of the slot. You can use the small plate as a tool to push the SIM card.
- Page 37 Fn+F1 Settings Network & Internet Airplane mode S S S S e e e e tting up a WWAN Connection tting up a WWAN Connection tting up a WWAN Connection tting up a WWAN Connection ...
- Page 38 Using the Fingerprint Scanner Using the Fingerprint Scanner Using the Using the Fingerprint Scanner Fingerprint Scanner (Optional) (Optional) (Optional) (Optional) WARNING: To protect the fingerprint scanner, be sure to slide close the cover when not using the fingerprint scanner. We shall not be liable for any loss or damage whatsoever ...
- Page 39 The fingerprint logon process can take a while. This is because the system has to check hardware devices and security configuration before initiating the fingerprint scanner. Settings Accounts Sign-in options Fingerprint Set up...
-
Page 40: Managing Power
Chapter 3 Chapter 3 Chapter 3 Chapter 3 Managing Power Managing Power Managing Power Managing Power... - Page 41 AC Adapter AC Adapter AC Adapter AC Adapter CAUTION: The AC adapter is designed for use with your computer only. Connecting the AC adapter to another device can damage the adapter. The AC power cord supplied with your computer is for use in ...
-
Page 42: Battery Pack
Battery Pack Battery Pack Battery Pack Battery Pack NOTE: Care and maintenance information for the battery is provided in the “Battery Pack Guidelines” section in Chapter Charging the Battery Pack Charging the Battery Pack Charging Charging the Battery Pack the Battery Pack NOTE: Charging will not start if the battery’s temperature is below ... -
Page 43: Initializing The Battery Pack
NOTE: The battery level may automatically lessen due to the self-discharge process (0.21 % per day), even when the battery pack is fully charged (100 %). This happens no matter if the battery pack is installed in the computer. Initializing the Battery Pack Initializing the Battery Pack Initializing the Battery Pack Initializing the Battery Pack... -
Page 44: Replacing The Battery Pack
Battery Low Battery Low Signals a Battery Low Battery Low Signals a Signals and Actions Signals a nd Actions nd Actions nd Actions Battery Icon Battery Icon Battery Level Battery Level Description Description Battery Icon Battery Icon Battery Level Battery Level Description Description Replacing the Battery Pack... - Page 45 ...
-
Page 46: Power Saving Tips
Power- - - - Saving Tips Power Saving Tips Power Power Saving Tips Saving Tips ... -
Page 47: Expanding Your Computer
Chapter 4 Chapter 4 Chapter 4 Chapter 4 Expanding Your Expanding Your Expanding Your Expanding Your Computer Computer Computer Computer... -
Page 48: Connecting Peripheral Devices
Connecting Peripheral Devices Connecting Peripheral Devices Connecting Peripheral Devices Connecting Peripheral Devices Connecting a Display Connecting a Display Mon Monitor itor Connecting Connecting a Display a Display itor itor... -
Page 49: Connecting A Serial Device
Fn+F5 Control Panel CAUTION: Do not disconnect the external monitor while the computer is in the Sleep mode or Hibernation mode. If no external monitor is connected when the computer resumes, the LCD might not display properly. Connecting a Serial Device Connecting a Serial Device Connecting a Serial Device Connecting a Serial Device... -
Page 50: Connecting Audio Devices
Connecting Audio Devices Connecting Audio Devices Connecting Audio Devices Connecting Audio Devices Audio Output Connector Audio Output Connector Audio Output Connector Audio Output Connector ... - Page 51 Microphone Connector Microphone Connector Microphone Connector Microphone Connector NOTE: After connecting an external audio device, make sure that you specify the use of the correct audio device in Windows. When using the external speakers/headphones or microphone, you cannot use the internal one.
-
Page 52: Smart Cards
Using Various Card Readers Using Various Card Readers Using Various Card Readers Using Various Card Readers Using Smart Using Smart Cards Cards Using Using Smart Smart Cards Cards NOTE: On your computer, the Smart Card reader is a part of the super multi drive module. - Page 53 Some PC cards require additional system resources. Before using such PC card, you may have to free other system resources for the PC card. Although some PC cards can be inserted and removed without turning off the computer, you cannot remove or install PC cards during Sleep mode.