Getac B300 User Manual
Hide thumbs
Also See for B300:
- User manual (154 pages) ,
- Reference manual (2 pages) ,
- User manual (148 pages)
Table of Contents
Advertisement
Quick Links
Advertisement
Table of Contents

Subscribe to Our Youtube Channel
Related Manuals for Getac B300


Summary of Contents for Getac B300
- Page 1 B300 USER’S MANUAL Rugged Mobile Computing Solutions...
- Page 2 May. 2010 TRADEMARKS The Bluetooth® word mark and logos are registered trademarks owned by Bluetooth SIG, Inc. All other brand and product names are trademarks or registered trademarks of their respective owners.
- Page 3 NOTE The information in this manual is subject to change without notice. For the latest version of the manual, please visit the Getac website at www.getac.com. ® ENERGY STAR is a government program that offers businesses and consumers energy-efficient solutions, making it easy to save money while protecting the environment for future generations.
- Page 4 Spending a large portion of time in low-power mode not only saves energy, but helps equipment run cooler and last longer. ® Businesses that use ENERGY STAR enabled office equipment may realize additional savings on air conditioning and maintenance. ®...
-
Page 5: Table Of Contents
Table of Contents Table of Contents............................i Getting Started ............................1-1 Getting the Computer Running ........1-2 Unpacking .............. 1-2 Connecting to AC Power ........... 1-2 Opening the Cover ........... 1-4 Turning On and Off the Computer ......1-5 Taking a Look at the Computer ........1-6 Front Components ............ - Page 6 Function Keys ............2-6 Fn Key ..............2-6 Hot Keys ............... 2-6 Using the Touchpad ............. 2-9 Configuring the Touchpad ......... 2-11 Using the Touchscreen (Optional)........ 2-12 Using the Quick Buttons ..........2-14 Using the Hard Disk Drive .......... 2-16 Installing a Second Hard Disk Drive (Optional) ...
- Page 7 Power Management ............. 3-11 Hibernation ............3-12 Power-Saving Tips ............ 3-13 Expanding Your Computer ........................ 4-1 Connecting an External Monitor ........4-2 Connecting a Serial Device ........... 4-4 Connecting a USB Device ..........4-6 Connecting an IEEE 1394 Device ........4-7 Using Smart Cards (Optional) ........
- Page 8 P1 Quick Launch Key Utility .......... 6-3 Caring for the Computer ........................7-1 Protecting the Computer ..........7-2 Using an Anti-Virus Strategy ........7-2 Using Windows Action Center ........7-2 Using the Cable Lock ..........7-3 Taking Care of the Computer ........7-4 Location Guidelines ...........
- Page 9 Startup Problems ........... 8-10 WLAN Problems ............. 8-11 Other Problems ............. 8-12 Resetting the Computer ..........8-13 Specifications ............................. 1 Regulatory Information .......................... 1 On the Use of the System ..........2 Class B Regulations ............ 2 Safety Notices ............3 On the Use of the RF Device .........
-
Page 11: Getting Started
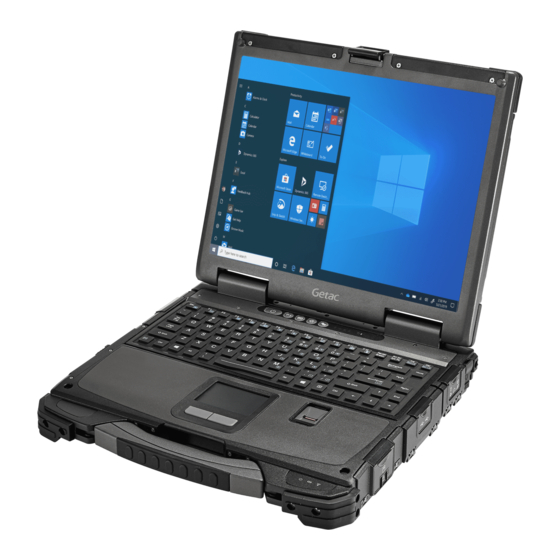
Chapter 1 Getting Started Congratulations on purchasing this rugged computer. This chapter first tells you step by step how to get the computer up and running. Then, you will find a section briefly introducing the external components of the computer. Getting Started... -
Page 12: Getting The Computer Running
Getting the Computer Running This section guides you through the procedures for getting the computer ready for operation. Unpacking After unpacking the shipping carton, you should find these standard items: Rugged computer Accessories: AC adapter AC power cord ... - Page 13 3. Plug the female end of the AC power cord to the AC adapter and the male end to an electrical outlet ( ). 4. When the AC adapter is connected, power is being supplied from the electrical outlet to the AC adapter and onto your computer. Now, you are ready to turn on the computer.
-
Page 14: Opening The Cover
Opening the Cover CAUTION: Be gentle when opening and closing the cover. Opening it vigorously or slamming it shut could damage the computer. Open the top cover by pushing on the cover latch () and lifting up the cover (). You can tilt the cover forward or backward for optimal viewing clarity. Getting Started... -
Page 15: Turning On And Off The Computer
Turning On and Off the Computer Turning On 1. Make sure that the computer is connected to AC power or battery is fully charged. 2. Open the top cover 3. Press the power button ( 4. Each time the computer is turned on, it performs a Power-On Self Test (POST), and the operating system such as Windows should start. -
Page 16: Taking A Look At The Computer
Taking a Look at the Computer NOTE: Depending on the model you purchased, the appearance of your computer may not be exactly the same as those shown in this manual. Front Components Component Description See Also Top Cover Latch Locks the top cover. -
Page 17: Rear Components
Rear Components NOTE: You need to open the covers to access the connectors. Component Description See Also Power Connector Connects the AC adapter. P. 1-2 USB Port Connects a USB device, such as a USB flash P. 4-6 disk, printer, digital camera, joystick, and more. -
Page 18: Right-Side Components
Right-Side Components NOTE: You need to open the covers to access the connectors. Component Description See Also Expansion Card Depending on your model, the slot can be Slot any of the following: ExpressCard Slot Accepts an ExpressCard/34 or P. 4-12 ExpressCard/54 for additional functions. - Page 19 Component Description See Also NOTE: Available modules on your computer depend on the configuration you purchased. Card Reader Accepts a MultiMediaCard (MMC), Secure P. 4-14 Digital (SD), Memory Stick (MS) or Memory Stick PRO (MS PRO) card for removable storage media. ...
-
Page 20: Left-Side Components
Left-Side Components NOTE: You need to open the covers to access the connectors. Component Description See Also Battery Pack Supplies power to your computer when P. 3-3 external power is not connected. Media Bay Depending on your model, the media bay may contain any of the following: Combo Drive/ Accepts a compact disc for installing or... -
Page 21: Top-Open Components
Top-open Components Component Description See Also LCD Screen Displays the output of the computer. May P. 2-22 include the optional touchscreen feature. 1-11 Getting Started... - Page 22 Component Description See Also Quick Buttons Turns off/on the LCD display and LED P. 2-14 indicator by default. Enables/disables power saving when using P. 2-14 battery power. Enables/disables sunlight readable display. P. 2-14 Enables/disables light sensor. P. 2-14 Turns the computer power ON and OFF.
- Page 23 Component Description See Also computer. Fingerprint Serves as the fingerprint verification, P. 2-40 Sensor preventing unauthorized access to your computer. Stereo Speaker Sends out sound and voice from the P. 2-23 computer. Indicators Show the current status of the computer’s devices.
-
Page 24: Bottom Components
Bottom Components Component Description See Also Memory Slots Inside are the memory slots for expanding the P. 4-17 memory size of your computer. 1-14 Getting Started... -
Page 25: Closing Connector Covers
Closing Connector Covers It is important to close the connector covers completely to ensure the waterproof integrity. When closing the covers, push the four corners and make sure that the cover fits in completely. 1-15 Getting Started... -
Page 27: Operating Your Computer
Chapter 2 Operating Your Computer This chapter provides information about the use of the computer. If you are new to computers, reading this chapter will help you learn the operating basics. If you are already a computer user, you may choose to read only the parts containing information unique to your computer. -
Page 28: Starting And Stopping The Computer
Starting and Stopping the Computer There are a number of ways to start and stop the computer. Starting the Computer You always start the computer using the power button. A computer starts up with an operating system (OS) existing on the storage device such as the hard disk. - Page 29 To stop in this Do this... To start up or mode... resume again Sleep Depending on your settings in Windows, you Press any key. can place the computer in Sleep mode by: Closing the display cover Pressing the Fn+F12 hot key ...
-
Page 30: Using The Keyboard
Using the Keyboard Your keyboard has all the standard functions of a full-sized computer keyboard plus an Fn key added for specific functions. The standard functions of the keyboard can be further divided into four major categories: Typewriter keys Cursor-control keys ... -
Page 31: Numeric Keypad
Numeric Keypad A 15-key numeric keypad is embedded in the typewriter keys as shown next: Numeric keys facilitate entering of numbers and calculations. When Num Lock is on, the numeric keys are activated; meaning you can use these keys to enter numerals. -
Page 32: Function Keys
Function Keys On the top row of the keys are the function keys: F1 to F12. Function keys are multi-purpose keys that perform functions defined by individual programs. Fn Key The Fn key, at the lower left corner of the keyboard, is used with another key to perform the alternative function of a key. - Page 33 Description Switches the display output to one of the following when external devices are connected. Upon booting the system with CRT: LCD & CRT NOTE: This function only applies to Plug & Play display devices. Decreases the LCD brightness. Increases the LCD brightness. Switches the touchscreen on and off (option).
-
Page 34: Windows Keys
Windows Keys The keyboard has two keys that perform Windows-specific functions: Windows Logo key and Application key. Windows Logo key opens the Start menu and performs software-specific functions when used in combination with other keys. The Application key usually has the same effect as a right mouse click. (See your Windows manual for more information.) Operating Your Computer... -
Page 35: Using The Touchpad
Using the Touchpad CAUTION: Do not use a sharp object such as a pen on the touchpad. Doing so may damage the touchpad surface. NOTE: Press Fn+F9 to toggle the touchpad on or off. For optimal performance of the touchpad, keep your fingers and the pads clean and dry. - Page 36 accordingly. When your finger reaches the edge of the pad, simply relocate yourself by lifting the finger and placing it on the other side of the pad. Here are some common terms that you should know when using the touchpad: Term Action Point...
-
Page 37: Configuring The Touchpad
Term Action Scroll To scroll is to move up and down or left and right in the working area on the screen. To move vertically, place your finger on the right or left edge of the pad and slide your finger up and down along the edge. To move horizontally, place your finger on the top or bottom edge of the pad and slide your finger left and right. -
Page 38: Using The Touchscreen (Optional)
Using the Touchscreen (Optional) NOTE: Make sure the touchscreen driver has been installed properly. Press Fn+F8 to toggle the touchscreen on or off. CAUTION: Do not use a sharp object such as a ballpoint pen or pencil on the touchscreen. - Page 39 Use the included touchscreen pen to select objects on the screen. The pen can be stretched for better grip and handling. Here are some common terms that you should know when using the touchscreen: Term Action Click/Point Tap gently on the touchscreen. Double-click Tap twice on the touchscreen rapidly.
-
Page 40: Using The Quick Buttons
Using the Quick Buttons Located on top of the keyboard are four quick buttons: Button Description Turns off/on the LCD display and LED indicators by default, Starts a pre-defined program. (See “P1 Quick Launch Key Utility” in Chapter 6 for information.) NOTE: The function of P1 button depends on your setting in BIOS Setup program under the Advanced menu (see chapter 5 for details). - Page 41 lighting condition. The button lights green while light sensor is enabled. 2-15 Operating Your Computer...
-
Page 42: Using The Hard Disk Drive
Using the Hard Disk Drive Your computer comes with a removable 2.5-inch PATA (parallel ATA) / SATA (serial ATA) hard disk drive. Select models come with a heater that automatically turns on for low temperature operation. CAUTION: Make regular backups of your data files from your hard disk drive to USB flash disks or other storage media. - Page 43 3. Press upward the optical drive release latch () and carefully pull on the ribbon strip () to remove the optical drive. 4. Be careful to observe the correct orientation and slide the hard disk drive bracket into the media bay until it reaches the end. 5.
- Page 44 2-18 Operating Your Computer...
-
Page 45: Using The Optical Drive (Optional)
Using the Optical Drive (Optional) Your computer may come with an optical drive. Depending on your configuration, the drive can be one of the following: Combo drive can work both as a DVD drive (reading DVD discs in addition to CDs, audio CDs and CD-R/-RW discs), and also as a CD recorder (writing to CD-R/-RW discs). -
Page 46: Inserting And Removing A Disc
NOTE: For DVD and Combo drives only. This product incorporates copyright protection technology that is protected by method claims of certain U.S. patents and other intellectual property rights owned by Macrovision Corporation and other rights owners. Use of this copyright protection technology must be authorized by Macrovision Corporation, and is intended for home and other limited viewing uses only unless otherwise authorized by Macrovision Corporation. - Page 47 Eject button To remove a disc, hold the disc by its outer edge and lift it up from the tray. 5. Gently push the tray back into the drive. 6. Close the media bay cover. NOTE: In the unlikely event that you are unable to release the drive tray by pressing the eject button, you can manually release the disc.
-
Page 48: Using The Video Features
Using the Video Features The video subsystem of your computer features: 13.3-inch wide TFT (Thin-Film Transistor) color LCD display with 1024×768 XGA resolution Multi-display capability, which allows you to expand your desktop on the screen to another display device so that you have more desktop space to work on Sunlight-readable LCD display by pressing sunlight readable quick button ... -
Page 49: Using The Audio Features
Using the Audio Features NOTE: If you experience interference while recording, try lowering the microphone recording volume. The audio subsystem of your computer features: Azalia interface (high density audio codec) 2-channel analog output Built-in microphone () External audio connectors () ... -
Page 50: Connecting Audio Devices
Connecting Audio Devices For higher audio quality, you can send or receive sound through external audio devices. NOTE: After connecting an external audio device, make sure that you specify the use of the correct audio device in Windows. Audio Output Connector (green) can be connected to speakers, headphones, or ... -
Page 51: Using The Communication Features
Using the Communication Features Using the Modem The internal 56 K fax/data modem allows you to use the telephone line to communicate with others by fax, email, or connect to an online service or bulletin board. To connect the telephone line to the modem, connect one end of the modem cable to the RJ-11 connector on the computer and the other end to the phone line. -
Page 52: Using The Lan
Using the LAN The internal 10/100/1000Base-T LAN (Local Area Network) module allows you to connect your computer to a network. It supports data transfer rate up to 1000 Mbps. To connect the network cable to the LAN module, connect one end of the LAN cable to the RJ-45 connector on the computer and the other end to the network hub. -
Page 53: Using The Wireless Lan
Using the Wireless LAN Depending on your model, an internal mini PCI-E wireless LAN (WLAN) card may have been pre-installed by your computer manufacturer at the factory. This card allows you to access corporate networks or the Internet in a wireless environment. The WLAN features include: WEP (Wired Equivalent Privacy) 64/128-bit data encryption ... - Page 54 If your WLAN card was provided by your dealer instead of the computer manufacturer, contact your dealer for the correct driver to use. 2-28 Operating Your Computer...
-
Page 55: Connecting To A Wireless Network
Turning Off/On the WLAN Radio NOTE: The FAA (Federal Aviation Agency) has deemed it unsafe to operate wireless devices in aircraft as this may interfere with flight safety. Remember to turn off wireless LAN when using your computer in the airplane. To turn on the WLAN radio: 1. - Page 56 3. In the list of available wireless networks, tap a network, and then tap Connect. 4. Some networks require a network security key or passphrase. To connect to one of those networks, ask your network administrator or Internet service provider (ISP) for the security key or passphrase.
-
Page 57: Using The Bluetooth Feature
Turning On and Off the Bluetooth Feature 1. Make sure that the RF switch is at the ON position. 2. Right-click the GETAC Utility icon ( ) located on Windows taskbar and select Quick Bar. (You need to tap on the taskbar to show the hidden icons.) -
Page 58: Connecting To Another Bluetooth Device
3. The following appears onscreen. To turn on the Bluetooth feature, click the Bluetooth quick button. The Bluetooth indicator ( ) will glow in green. By default, your computer is in the general discoverable and pairable mode after the Bluetooth feature is turned on. - Page 59 on the taskbar and click New Connection. 2. Double-click the Bluetooth icon Or, right-click the icon, and then click Add New Connection from the shortcut menu. 3. The Add New Connection Wizard window appears. Select Express Mode (Recommended), and then click Next. 2-33 Operating Your Computer...
- Page 60 4. Select the device to connect to and click Next. 5. Depending on the type of Bluetooth device that you want to connect to, you will need to enter the pertinent information. For detailed information on using the Bluetooth Utility, right-click the icon and then click Help from the shortcut menu.
-
Page 61: Using The 3G Feature (Optional)
Using the 3G Feature 3G is the third generation of mobile phone standards and technology, after 2G. It is based on the International Telecommunication Union (ITU) family of standards under the International Mobile Telecommunications programme. wide area cellular telephone networks Unlike IEEE 802.11 networks, 3G networks are IEEE 802.11 networks are short range, high-bandwidth networks primarily developed for data. -
Page 62: Installing A Sim Card
Installing a SIM Card To use the 3G feature (GSM/UMTS/EDGE/GPRS/EVDO/HSUPA) on your computer, you need to subscribe to 3G service and install the 3G SIM card from your service provider, network operator, or other vendor. To install the SIM card, follow these steps: 1. - Page 63 5. Insert the SIM card into the holder. Make sure the beveled corner on the SIM card is facing towards the slot and that the golden contact area on the card is facing downwards. 6. Replace the optical drive. 7. Close the media bay cover to secure the optical drive in place. WARNING: Keep all SIM cards out of the reach of small children.
- Page 64 Turning On and Off the 3G Feature 1. Make sure that the RF switch is at the ON position. 2. Right-click the GETAC Utility icon ( ) located on Windows taskbar and select Quick Bar. (You need to tap on the taskbar to show the hidden icons.)
- Page 65 You can use the 3G software application to configure 3G connection settings. 2-39 Operating Your Computer...
-
Page 66: Using The Fingerprint Sensor
Using the Fingerprint Sensor The fingerprint sensor provides a strong authentication mechanism based on fingerprint recognition. WARNING: To protect the fingerprint sensor, be sure to slide close the cover when not using the fingerprint reader. We shall not be liable for any loss or damage whatsoever resulting from your use of the fingerprint sensor or neglect of fingerprint sensor use, or any data loss resulting from such developments as fingerprint authentication malfunctioning. - Page 67 3. The following screen appears. Enter your Windows password and click Submit. 4. Use Control Center utility to enroll your fingerprints. 2-41 Operating Your Computer...
- Page 68 5. Follow the onscreen instructions to complete enrolling your fingerprint(s). NOTE: For detailed information, access the program’s online Help or Tutorial. 2-42 Operating Your Computer...
-
Page 69: Managing Power
Chapter 3 Managing Power Your computer operates either on external AC power or on internal battery power. This chapter tells you how you can effectively manage power. To maintain optimal battery performance, it is important that you use the battery in the proper way. Managing Power... -
Page 70: Ac Adapter
AC Adapter CAUTION: The AC adapter is designed for use with your computer only. Connecting the AC adapter to another device can damage the adapter. The AC power cord supplied with your computer is for use in the country where you purchased your computer. -
Page 71: Battery Pack
Battery Pack The battery pack is the internal power source for the computer. It is rechargeable using the AC adapter. The operating time of a fully charged battery pack depends on how you are using the computer. When your applications often access peripherals, you will experience a shorter operating time. -
Page 72: Initializing The Battery Pack
The charging times are as follows: Charging Time Battery Type Computer is Off Computer is On and in Idle State 6-cell (4 A) 2.5~3.5 hours 3.0~4.3 hours 9-cell (4 A) 3.5~4.5 hours 4.0~6.0 hours CAUTION: After the computer has been fully recharged, do not immediately disconnect and reconnect the AC adapter to charge it again. -
Page 73: Checking The Battery Level
5. Connect the AC adapter to fully charge the battery pack. Checking the Battery Level NOTE: Any battery level indication is an estimated result. The actual operating time can be different from the estimated time, depending on how you are using the computer. -
Page 74: Replacing The Battery Pack
Replacing the Battery Pack CAUTION: There is danger of explosion if the battery is incorrectly replaced. Replace the battery only with the computer manufacturer’s optional battery packs. Discard used batteries according to the dealer’s instructions. Do not attempt to disassemble the battery pack. If you often rely on battery power for a long period of time while traveling, you may consider the purchase of an additional battery pack from your dealer and keep it with you in a fully charged state as a backup. -
Page 75: Installing A Second Battery Pack (Optional)
5. Slide the new battery pack all the way into the slot. Make sure to observe the correct orientation (the ribbon strip must face outward for future battery pack removal). 6. Close the compartment cover and slide the release latch downward, then towards the right to secure the battery pack. - Page 76 4. Slide the second battery pack all the way into the slot. Make sure to observe the correct orientation (the ribbon strip must face outward for future battery pack removal). 5. Close the media bay cover to secure the second battery pack. NOTE: To remove the second battery pack, press upwards the battery release latch () and carefully pull on the ribbon strip () to remove the battery pack.
- Page 77 Switch Managing Power...
-
Page 78: Battery Low Signals And Actions
Battery Low Signals and Actions The battery icon changes appearance to display the current state of the battery. Battery Battery Level Description Icon Discharging The icon shows the charge remaining in 10-percent increments until the charge reaches the low-battery level. The battery charge has reached the low-battery level (10% by default). -
Page 79: Power Management
Power Management Your computer supports ACPI (Advanced Configuration and Power Interface) for power management. The power management feature allows you to reduce the power consumption for energy saving. With an ACPI-compliant operating system such as Windows, power supply to different computer components is controlled on an as-needed basis. -
Page 80: Hibernation
For detailed information on power management, see Windows’ Help. Hibernation Hibernation is a very useful feature. People frequently open many applications when they use computers. It takes some time to get all these applications open and running, and normally they all have to be closed before the computer can be turned off. When you use the hibernation feature, you do not have to close the applications. -
Page 81: Power-Saving Tips
Power-Saving Tips Aside from enabling your computer’s power saving mode (see previous section), you can do your part to maximize the battery’s operating time by following these suggestions. Press the power saving quick button ( ) to enter into power saving ... -
Page 83: Expanding Your Computer
Chapter 4 Expanding Your Computer You can expand the capabilities of your computer by connecting other peripheral devices. When using a device, be sure to read the instructions accompanying the device together with the relevant section in this chapter. Expanding Your Computer... -
Page 84: Connecting An External Monitor
Connecting an External Monitor If you want the benefits of a larger display screen with higher resolution, you can connect an external display monitor to your computer. Follow this procedure to connect an external monitor: 1. Make sure that the computer is not turned on. 2. - Page 85 7. You can change display settings through your operating system. See your operating system documentation or online help for specific information. CAUTION: Do not disconnect the external monitor while the computer is in the Sleep mode or Hibernation mode. If no external monitor is connected when the computer resumes, the LCD might not display properly.
-
Page 86: Connecting A Serial Device
Connecting a Serial Device Your computer has two serial ports for connecting a serial device such as a serial mouse or serial communication device (modem). Follow this procedure to connect a serial device: 1. Make sure the “Serial Port COM1/COM2” item is set properly in the BIOS Setup program. - Page 87 NOTE: Portable modems that derive power through the serial port cannot be used with the computer. Instead, use a modem that is powered by its own internal battery or external AC power. Expanding Your Computer...
-
Page 88: Connecting A Usb Device
Connecting a USB Device Your computer has three USB ports for connecting USB devices, such as a digital camera, scanner, printer, modem, and mouse. The USB ports support transfer rates up to 12 MB/s for USB 1.1 devices and 480 MB/s for USB 2.0 devices. -
Page 89: Connecting An Ieee 1394 Device
Connecting an IEEE 1394 Device Your computer has a mini IEEE 1394 port for connecting IEEE 1394 devices that include not only computer peripheral devices such as scanner, printer and high-quality CCD, but also consumer electronic equipment such as DVCAM and VCR. To connect an IEEE 1394 device, prepare an IEEE 1394 cable. -
Page 90: Using Smart Cards (Optional)
Using Smart Cards (Optional) Depending on the model, your computer has a smart card slot for additional security feature, providing tamper-proof storage of user and account identity. A smart card is a type of plastic card embedded with a computer chip that stores and transacts data between you (user) and the computer. - Page 91 2. Pull the card out of the slot. Expanding Your Computer...
-
Page 92: Using Pc Cards
Using PC Cards Depending on your model, your computer has one or two PC card slots which supports type II card and CardBus specifications. Inserting and Removing a PC Card NOTE: Some PC cards require additional system resources. Before using such PC card, you may have to free other system resources for the PC card. - Page 93 To remove a PC card: 1. Double-click on the Safely Remove Hardware icon found on the Windows taskbar and the Safely Remove Hardware window appears on screen. 2. Select (highlight) the PC card from the list to disable the card. 3.
-
Page 94: Using Expresscards (Optional)
Using ExpressCards (Optional) Depending on the model, your computer has an ExpressCard slot. ExpressCard supports the PCI Express and USB 2.0 serial data interfaces (supporting speeds of up to 2.5 Gbps and 480 Mbps respectively), improving speed in data transfer while conserving power usage. ExpressCard Type The ExpressCard slot can accommodate a 54 mm (ExpressCard/54) or 34 mm (ExpressCard/34) wide ExpressCard. -
Page 95: Inserting And Removing An Expresscard
Inserting and Removing an ExpressCard To insert an ExpressCard: 1. Locate the ExpressCard slot on the right side of the computer and open the cover. 2. Slide the ExpressCard, with its label facing up, all the way into the slot until the rear connectors click into place. -
Page 96: Using The Card Reader
Using the Card Reader NOTE: If your hard disk is divided into several drives, make sure that all drives have been formatted before using the Card Reader. Otherwise, you may encounter problems when using the Card Reader. You can use only storage cards. Your Card Reader does not support cards with I/O (input/output) functions such as a wireless network card or Bluetooth card. - Page 97 To insert a storage card: 1. Locate the Card Reader slot on the right side of the computer and open the cover. 2. Align the card with its connector pointing to the slot and its label facing down. Slide the card into the slot until it reaches the end. 3.
-
Page 98: Using The Port Replicator (Optional)
Using the Port Replicator (Optional) A port replicator is available as an option. This device eliminates the hassles of having you connect and disconnect the various cables when carrying your computer around and allows a variety of peripherals to be connected including a headphone or microphone, etc. -
Page 99: System Memory Upgrade
System Memory Upgrade You can upgrade your computer by changing system memory to a maximum of 4 GB on the two 533/667 MHz DDRII SO-DIMM slots. CAUTION: RAM modules are extremely sensitive to static electricity. There are cases where static electricity generated by the human body has adversely affected such modules. - Page 100 (). Then push down until the retaining clips lock the module into position (). CAUTION: If the RAM module is difficult to insert or difficult to push down, do not force it. Check once more to ensure that the module is positioned correctly. 5.
-
Page 101: Using Bios Setup And System Recovery
Chapter 5 Using BIOS Setup and System Recovery BIOS Setup Utility is a program for configuring the BIOS (Basic Input/ Output System) settings of the computer. BIOS is a layer of software, called firmware, that translates instructions from other layers of software into instructions that the computer hardware can understand. -
Page 102: Bios Setup
BIOS Setup When and How to Use You need to run BIOS Setup Utility when: You see an error message on the screen requesting you to run BIOS Setup Utility. You want to restore the factory default BIOS settings. ... -
Page 103: Information Menu
Use the keyboard to move around and make selections. Keyboard information can be found at the bottom of the screen. NOTE: The BIOS Setup Utility screens shown in this chapter are for your reference only. The actual items or settings on your computer may differ. ... -
Page 104: Main Menu
Main Menu The Main menu contains the various system settings. Information Main Advanced Security Boot Exit System Time: :33:08] System Date: [05/14/2010] Legacy USB Support: [Enabled] Wireless LAN: [Last State] Help Select Item Change Values Setup Defaults ↑↓ Exit Select Menu Enter Select ... -
Page 105: Advanced Menu
Advanced Menu The Advanced menu contains the advanced settings. Information Main Advanced Security Boot Exit Item Specific Help P1 Function: Blackout Select P1 button act as Any-key Wake Up from S3: [Disabled] Blackout ON/OFF , CD/DVD Auto Power Control: [Enabled] Quick launch button Ring Wake-Up from S3 [Disabled]... -
Page 106: Security Menu
AHCI SATA Mode set to if your hard disk supports AHCI. AHCI allows you to take advantage of Advanced Host Controller Interface features. The options are AHCI Security Menu The Security menu contains the security settings, which safeguard your system against unauthorized use. - Page 107 TPM Setup Menu Press Enter to display the following screen. Information Main Advanced Security Boot Exit TPM Setup Menu Item Specific Help Enable Trusted Platform TPM Support [Enter Enabled Module support Current TPM State: Disabled & Deactivated Change TPM State [No Change ] Help Select Item...
-
Page 108: Boot Menu
Boot Menu The Boot menu sets the sequence of the devices to be searched for the operating system. Information Main Advanced Security Boot Exit Item Specific Help Boot priority order: 1: USB FDC: Keys used to view or 2: SATA ODD: Optiarc DVD RW AD-7580S-(S configure devices: 3: SATA HDD: SAMSUNG HM250HI –... -
Page 109: Exit Menu
Exit Menu The Exit menu displays ways of exiting BIOS Setup Utility. After finishing with your settings, you must save and exit so that the changes can take effect. Information Main Advanced Security Boot Exit Item Specific Help Exit Saving Changes Exit Discarding Changes Exit System Setup and Load Setup Defaults... -
Page 110: System Recovery
System Recovery You need to run System Recovery when: Your Windows operating system does not start at all. You want to restore the factory default Windows settings. WARNING: Using this feature will reinstall Windows to your system and configure it to the system’s factory default settings. - Page 111 1. The recovery software is solely the purpose of reinstalling or restoring software associated with the hard disk of this operating GETAC machine. 2. Except the above, no other use is granted hereunder. **************************************** (1)Yes, I agree to the provisions of this agreement and wish to continue.
- Page 112 5. Your system will start the recovery process and Windows operating system will be re-installed to its default setting. 5-12 Using BIOS Setup and System Recovery...
-
Page 113: Using The Tpm And P1 Utility
Chapter 6 Using the TPM and P1 Utility Your computer comes with an added security feature known as the TPM (Trusted Platform Module) – a component on your computer’s mainboard that is specifically designed to enhance platform security above-and-beyond the capabilities of today’s software by providing a protected space for key operations and other security critical tasks. -
Page 114: Using Tpm (Trusted Platform Module)
Using TPM (Trusted Platform Module) TPM is a hardware-based security feature that can be used to create and manage computer-generated digital certificates. When combined with security software, the TPM enhances existing network and computer security by enabling features such as file protection capabilities and protected e-mail. NOTE: Make sure you select Enable on the TPM Support item under the Security menu ... -
Page 115: P1 Quick Launch Key Utility
P1 quick launch key. ) and select Quick Buttons To start the utility, right-click the GETAC utility icon ( Definition on the Windows taskbar. The Quick Button Definition window appears as shown next. - Page 116 The appropriate icon will then appear in the box. To launch the program, press the P1 quick launch key, or, if the Quick Button Definition window is open, click the box containing the icon. Using the TPM and P1 Utility...
-
Page 117: Caring For The Computer
Chapter 7 Caring for the Computer Taking good care of your computer will ensure a trouble-free operation and reduce the risk of damage to your computer. This chapter gives you guidelines covering areas such as protecting, storing, cleaning, and traveling. Caring for the Computer... -
Page 118: Protecting The Computer
Protecting the Computer To safeguard the integrity of your computer data as well as the computer itself, you can protect the computer in several ways as described in this section. Using an Anti-Virus Strategy You can install a virus-detecting program to monitor potential viruses that could damage your files. -
Page 119: Using The Cable Lock
Using the Cable Lock You can use a Kensington-type cable lock to protect your computer against theft. The cable lock is available in most computer stores. To use the lock, loop the lock cable around a stationary object such as a table. Insert the lock to the Kensington lock hole and turn the key to secure the lock. -
Page 120: Taking Care Of The Computer
Taking Care of the Computer Location Guidelines For optimal performance, use the computer where the recommended temperature is between 0 C (32 F) and 55 C (131 F) – actual operating temperature depending on product specifications. Avoid placing the computer in a location subject to high humidity, extreme ... -
Page 121: Cleaning Guidelines
To maximize the life of the backlight in the display, allow the backlight to automatically turn off as a result of power management. Avoid using a screen saver or other software that prevents the power management from working. Cleaning Guidelines Never clean the computer with its power on. - Page 122 to rise. Avoid charging the battery pack inside a closed vehicle and in hot weather condition. Also, charging will not start if the battery pack is not within the allowed temperature range. It is recommended that you do not charge the battery pack more than once ...
-
Page 123: Touchscreen Guidelines
Touchscreen Guidelines Use the finger or the included touchscreen pen on the display. Using a sharp or metallic object other than your finger or touchscreen pen may cause scratches and damage the display, thereby causing errors. Avoid using excessive force that may cause damage to the display. ... -
Page 124: When Traveling
When Traveling Before traveling with your computer, make a backup of your hard disk data into flash disks or other storage devices. As an added precaution, bring along an extra copy of your important data. Make sure that the battery pack is fully charged. ... -
Page 125: Troubleshooting
Chapter 8 Troubleshooting Computer problems can be caused by hardware, software, or both. When you encounter any problem, it might be a typical problem that can easily be solved. This chapter tells you what actions to take when solving common computer problems. Troubleshooting... -
Page 126: Preliminary Checklist
Preliminary Checklist Here are helpful hints to follow before you take further actions when you encounter any problem: Try to isolate which part of the computer is causing the problem. Make sure that you turn on all peripheral devices before turning on the computer. ... -
Page 127: Solving Common Problems
Solving Common Problems Battery Problems The battery does not charge (Battery Charge indicator does not light amber). Make sure that the AC adapter is properly connected. Make sure that the battery is not too hot or cold. Allow time for the battery ... -
Page 128: Display Problems
Make sure that the distance between the two devices are not over 10 meters or that there are no walls or other obstructions between the devices. Make sure that the other device is not in “Hidden” mode. Make sure that both devices are compatible. ... -
Page 129: Expresscard Problems
Simultaneous display/multi-display does not work. Make sure that you turn on the external monitor before turning on the computer. Press the Fn+F5 hot key to toggle through the display options or change the Display Settings Properties in Windows. ExpressCard Problems The ExpressCard does not work. -
Page 130: Hard Disk Drive Problems
Hard Disk Drive Problems The hard disk drive error message appears on the screen. The hard disk drive has defects. Ask your dealer for help. The hard disk drive operations seem slow. The data files stored on the hard disk drive may be fragmented. Use a tool ... -
Page 131: Lan Problems
LAN Problems I cannot access the network. Make sure that the LAN cable is properly connected to the RJ-45 connector and the network hub. Make sure that the network configuration is appropriate. Make sure that the user name or password is correct. ... -
Page 132: Pc Card Problems
2. Open the media bay cover by sliding the release latch towards the left. 3. Insert a small rod, such as a straightened paperclip, into the drive’s manual eject hole and push firmly to release the tray. 4. Pull the tray out until fully extended, and then remove the disc. PC Card Problems The PC card does not work. -
Page 133: Power Management Problems
Power Management Problems The computer does not enter Sleep or Hibernation mode automatically. If you have a connection to another computer, the computer does not enter Sleep or Hibernation mode if the connection is actively in use. Make sure that the Sleep or Hibernation time-out is enabled. ... -
Page 134: Sound Problems
If you are sure the operation has stop, reset the computer. (See “Resetting the Computer” later in this chapter.) Sound Problems No sound is produced. Make sure that the volume control is not set too low. Make sure that the computer is not in Sleep mode. ... -
Page 135: Wlan Problems
When you turn on the computer, it stops after POST. Restart your computer. WLAN Problems I cannot use the WLAN feature. Make sure that the mini PCI-E WLAN card is correctly installed. Make sure that the WLAN feature is turned on. ... -
Page 136: Other Problems
I cannot communicate with the computer in the network when Infrastructure mode is configured. Make sure that the Access Point your computer is associated with is powered on and all the LEDs are working properly. If the operating radio channel is in poor quality, change the Access Point and ... -
Page 137: Resetting The Computer
Resetting the Computer You may have to reset (reboot) your computer on some occasions when an error occurs and the program you are using hangs up. If the computer operation seems to hang up, first wait. It is possible that the computer is processing data. -
Page 139: Specifications
Appendix A Specifications NOTE: Specifications are subject to change without any prior notice. Parts Specifications Intel® Arrandale Low Voltage, Intel® Core™ i7-640LM or i7-620LM Processor, 25W, 1066 MHz FSB (Front Side Bus), 2.13 GHz (Turbo up to 2.93GHz) 4M L3 Cache Chipset Intel®... - Page 140 Parts Specifications Storage Hard disk drive SATA interface, 2.5-inch diameter (9.5 mm height), 5400 rpm device support, G-sensor, shock-mounted, user-removable, solid-state disk (option), automotive hard disk drive (option), low temperature – 4 F (– 20 C) up to 131 F (55 C) (option) Optical drive DVD Combo / DVD Dual / Super-Multi...
-
Page 141: Regulatory Information
Appendix B Regulatory Information This appendix provides regulatory statements and safety notices on your computer. NOTE: Marking labels located on the exterior of your computer indicate the regulations that your model complies with. Please check the marking labels and refer to the corresponding statements in this appendix. Some notices apply to specific models only. -
Page 142: On The Use Of The System
On the Use of the System Part 15 Regulations Federal Communications Commission Radio Frequency Interference Statement NOTE: This equipment has been tested and found to comply with the limits for a Class B digital device pursuant to Part 15 of the FCC Rules. These limits are designed to provide reasonable protection against harmful interference in a residential installation. -
Page 143: Safety Notices
Canada Canadian Department of Communications Radio Interference Regulations Class B Compliance Notice This Class B digital apparatus meets all requirements of the Canada Interference-Causing equipment regulations. Cet appareil numérique de Classe B respecte toutes les exigences du Règlement Canadien sur le matériel brouileur. This digital apparatus does not exceed the Class B limits for radio noise emissions from digital apparatus set out in the Radio Interference Regulations of the Canadian Department of Communications. - Page 144 en ekvivalent typ som rekommenderas av apparattillverkaren. Kassera använt batteri enligt fabrikantens instruktion. FINNISH VAROITUS: Paristo voi räjähtää, jos se on virheellisesti asennettu. Vaihda paristo ainoastaan valmistajan suosittelemaan tyyppiin. Hävitä käytetty paristo valmistajan ohjeiden mukaisesti. ENGLISH CAUTION: Danger of explosion if battery is incorrectly replaced. Replace only with the same or equivalent type recommended by the equipment manufacturer.
-
Page 145: About The Modem
About the AC Adapter Use only the AC adapter supplied with your computer. Use of another type of AC adapter will result in malfunction and/or danger. Do not use the adapter in a high moisture environment. Never touch the adapter ... - Page 146 Do not use the telephone function to report a gas leak in the vicinity of the leak. Do not use this product near water, for example near a bathtub, wash bowl, kitchen sink or laundry tub, in a wet basement or near a swimming pool. Caution (for USA Users) To reduce the risk of fire, use only No.26 AWG or larger telecommunication line cord.
-
Page 147: On The Use Of The Rf Device
On the Use of the RF Device NOTE: The information in this section applies to models with the wireless LAN module. USA and Canada Safety Requirements and Notices IMPORTANT NOTE: This device is compliance with SAR for general population /uncontrolled exposure limits in ANSI/IEEE C95.1-1999 and had been tested in accordance with the measurement methods and procedures specified in OET Bulletin 65 Supplement C. - Page 148 Do not operate the radio or attempt to transmit data unless the antenna is connected; if not, the radio may be damaged. Use in specific environments: The use of wireless devices in hazardous locations is limited by the constraints ...
- Page 149 Use on Aircraft Caution CAUTION: Regulations of the FCC and FAA prohibit airborne operation of radio-frequency wireless devices because their signals could interfere with critical aircraft instruments. EMC Requirements This device complies with the limits for a Class B digital device pursuant to Part 15 subpart C of the FCC Rules and Regulations.
-
Page 150: European Union Ce Marking And Compliance Notices
European Union CE Marking and Compliance Notices Statements of Compliance English This product follows the provisions of the European Directive 1999/5/EC. Danish Dette produkt er i overensstemmelse med det europæ iske direktiv 1999/5/EC. Dutch Dit product is in navolging van de bepalingen van Europees Directief 1999/5/EC. Finnish Tämä... - Page 151 Spanish Este producto cumple con las normas del Directivo Europeo 1999/5/EC. Swedish Denna produkt har tillverkats i enlighet med EG-direktiv 1999/5/EC. Local Restrictions of 802.11a/g/n Radio Usage CAUTION: Due to the fact that the frequencies used by 802.11a/g/n wireless LAN devices may not yet be harmonized in all countries, 802.11a/g/n products are designed for use only in specific countries or regions, and is not allowed to be operated in countries or regions other than those of designated use.
- Page 152 The wireless LAN module can currently be used indoors only in the following 38 departments of mainland France. Please turn off your wireless LAN radio when operating the device in areas/places other than the 38 departments listed: Ain Orientales Indre Pyrénées Aisne Indre et Loire...
- Page 153 While operating the computer in those French departments that do not allow use of the wireless LAN equipment, the user of the equipment must turn off the wireless LAN radio in order to comply with local regulations (see Chapter 2 for more information).
Need help?
Do you have a question about the B300 and is the answer not in the manual?
Questions and answers