Advertisement
Available languages
Available languages
Quick Links
Advertisement

Subscribe to Our Youtube Channel
Related Manuals for TEFAL Initial RK740165


Summary of Contents for TEFAL Initial RK740165
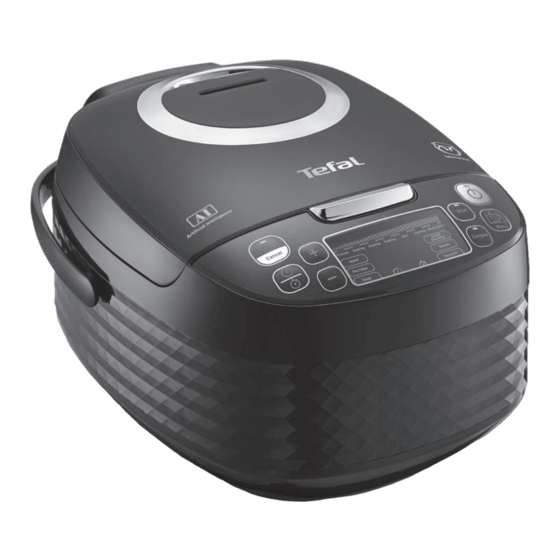
- Page 1 Spherical Pot Rice Cooker www.tefal.com...
- Page 3 Fig.1 Fig.2 Fig.3a Fig.3b 8cups MAX. Fig.4 Fig.5 Fig.6 Fig.7 cups MAX. Fig.8 Fig.9 Fig.10 Fig.11 Fig.12 Fig.13 Fig.14 Fig.15 Fig.16 Fig.17 Fig.18 Fig.19...
- Page 4 CONTROL PANEL DESCRIPTION 1 Steam basket c “Keep warm / Cancel” 2 Graduation for water and rice indicator 3 Removable pot d “Keep warm / Cancel” key 4 Measuring cup e “Preset / Timer” key 5 Rice spoon f “-” key 6 Soup spoon g “Rice”...
- Page 5 IMPORTANT SAFEGUARDS SAFETY INSTRUCTIONS Read and follow the instructions for use. Keep them safe. • This appliance is not intended to be operated by means of an external timer or a separate remote- control system. • This appliance can be used by children aged from 8 years and above if they have been given supervision or instruction concerning use of the appliance in a safe way and if they understand the...
- Page 6 or mental capabilities, or lack of experience and knowledge, unless they have been given supervision or instruction concerning use of the appliance by a person responsible for their safety. • Children should be supervised to ensure that they do not play with the appliance. •...
- Page 7 • The appliance must not be immersed in water or any other liquid. • Use a damp cloth or sponge with diswashing liquid to clean the accessories and parts in contact with the aliments. Rince with a damp cloth or sponge. Drying accessories and parts in contact with food with a dry cloth.
-
Page 8: Connecting To The Power Supply
• Do not get face and hands close to the steam outlet. Do not obstruct the steam outlet. • For any problems or queries please contact our Customer Relations Team or consult our web site. • The appliance can be used up to an altitude of 4000 m. -
Page 9: Protect The Environment
• Do not allow the base of the appliance to come into contact with water • Never try to operate the appliance when the bowl is empty or without the bowl. • The cooking function/knob must be allowed to operate freely. Do not prevent or obstruct the function from automatically changing to the keep warm function. -
Page 10: Before The First Use
BEFORE THE FIRST USE Unpack the appliance • Remove the appliance from the packaging and unpack all the accessories and printed documents. • Open the lid by pushing the opening button on the housing – fig.1. Read the Instructions and carefully follow the operation method. Clean the appliance •... -
Page 11: Control Panel
Never place your hand on the steam vent during cooking, as there is a danger of burns – fig.10. After start the cooking, if you wish to change the selected cooking menu because of an error, press “Keep Warm / Cancel” key and re- choose the menu you want. - Page 12 set the timer. Cooking will begin after the preset time has elapsed. The maximum start delay is 24 hours. If the preset time is shorter than the cooking time, cooking will start immediately. 5. “+”/-” keys: Use these buttons to adjust the cooking time (+/- 1 min) and preset time (+/- 10 mins).
- Page 13 Fill it with water to the corresponding water level (The graduations in cups). • When the rice is ready, when the “Keep Warm” indicator light is on, stir the rice and then leave it in the rice cooker for a few minutes longer in order to get perfect rice with separated grains.
- Page 14 MENU KEY • When the appliance is plugged, the rice cooker is on rice cooking function. When you press Menu key, the rice cooker select Quick Porridge Soup Small quantity Steam Dessert • The screen displays the default cooking time of each function (Rice cooking, Quick rice and Small quantity cooking display “...
-
Page 15: Quick Function
CONGEE FUNCTION • Press “Congee” key to select function “Congee”. The screen displays the default cooking time, the light of “Start” flickers. • You can change the cooking time by pressing “Preset / Timer” key first and then press “+” and “−” keys. •... -
Page 16: Steam Function
PORRIDGE FUNCTION • Press “Menu” key to select function “Porridge”. The screen displays the default cooking time, the light of “Start” flickers red. • You can change the cooking time by pressing “Preset / Timer” key first and then press “+” and “−” keys. •... -
Page 17: Preset Function
DESSERT FUNCTION • Press “Menu” key to select function “Dessert”. The screen displays the default cooking time, the light of “Start” flickers red. • You can change the cooking time by pressing “Preset / Timer” key first and then press “+” and “−” keys. •... -
Page 18: Cleaning And Maintenance
ON COMPLETION OF COOKING • Open the lid – fig.1. • Glove must be used when manipulating the cooking pot and steam basket – fig.11. • Serve the food using the spoon provided with your appliance and reclose the lid. •... - Page 19 Cleaning the micro pressure valve • When clean the micro-pressure valve, please remove it from the lid – fig.15 and open it by rotating in the direction of “open” – fig.16a and 16b. After cleaning it, please wipe dry it and meet the two triangle in the two parts together and rotate it in the direction of “close”, then put it back to the lid of the rice cooker –...
- Page 20 TECHNICAL TROUBLESHOOTING GUIDE Malfunction Causes Solutions description Any indicator Check the power cord is lamp off and no Appliance not plugged. plugged in the socket and heating. on the Mains. Problem of the Any indicator connection of the Send to authorized lamp off and indicator lamp or service center for repair.
- Page 21 Malfunction Solutions Causes description Rice half cooked Not sufficient or overtime simmered. cooking Automatic The keep warm warm-keeping function has been fails (product cancelled by user Send to the authorized stay in cooking during the setting. service center for repair. position, or no See keep warm heating).
- Page 22 控制面板 描述 1 蒸盤 保溫/取消) 指示燈 2 水量及米量刻度 d 「Keep warm/Cancel 」( 3 可拆式內鍋 保溫/取消) 鍵 4 量杯 e 「Preset」(預設時間)鍵 5 飯勺 f 「-」鍵 6 湯勺 g 「Rice」(飯)指示燈 7 蓋 h 「Rice」(飯)鍵 8 可拆式內蓋 i 「Start」(開始)指示燈 9 微壓閥 j 「Start」(開始)鍵 10 開蓋按鈕...
- Page 23 重要建議 安全指示 請閱讀本說明書並妥善保存。 • 本產品不得使用外部定時器或獨立遙控系統操 作。 • 此電器用品可由8歲或以上兒童使用, 但必須在 成人監督下, 或兒童曾受指導, 知道如何安全使 用本 產品, 亦明白當中所牽涉的風險。清潔及 保養工作不應由兒童進行, 除非他們已年滿8歲 或以上, 並有成人監督。請將本產品及相連電 線放置於8歲 以下兒童不能觸及的地方。 • 此產品亦可由身體、感官或心智障礙, 或經驗 及知識不足之人士使用, 但必須在使用時獲指 導, 確 保他們知道如何安全使用本產品, 並明白 當中的風險。 • 兒童不可將本產品當作玩具。 • 該電器產品不適合以下人士使用(包括兒童):身 體、感官或心智障礙的人士, 缺乏相關經驗或 知識的人士, 除非他們在負責其安全的人士給 予指導或監督下使用。 •...
- Page 24 – 農舍; – 酒店、汽車旅館及其他住宿性質環境的客戶 使用; – 供住宿及早餐的旅館。 • 如果電器產品配備可拆卸電源線:如果電源線 損壞, 必須到授權服務中心更換其提供的電源 線。 • 如果電器產品配備固定電源線:如果電器產品 的電源線損壞, 為了您的安全, 必須由授權服務 中心或合資格的人士進行更換。 • 切勿將產品浸入水中。 • 請使用微濕的抹布或海棉及洗潔精, 清潔配件 及與食物有接觸的零件, 再用濕布或海棉沖 洗。用 乾布抹乾配件及與食物有接觸的零件。 • 若電器上印有 標記, 表示「小心:使用時表面 可能變熱」。 • 小心:加熱配件表面在使用後可能仍然燙熱。 • 小心:不正確使用產品可能導致損傷。 • 小心:若產品的電源線可拔除,切勿弄濕連接器。 • 以下情況下, 請務必斷開該電器產品的電源: –...
- Page 25 • 在烹調期間, 產品會產生高溫和蒸汽。請將手 和臉部遠離蒸汽孔。請勿陼塞蒸汽出口。 • 如有任何問題, 請聯繫售後服務部或瀏覽我們 的網站。 • 此產品最高可於海拔 4000 公尺使用。 • 該電器產品符合所有相關的安全法規, 包括低電壓指令、電磁相容性 法規、食品接觸材料立法及環境立法。 • 檢查產品銘牌上的電壓與供電電壓相符(交流電)。 • 如果您在購買地以外的國家使用本產品, 請先將產品送交到當地的授 權服務中心進行檢查。 接通電源 • 下列情況下請勿使用產品: – 產品或電源線受損。 – 產品意外墜落, 造成損傷或不正常運作。 – 在這些情況下, 為了您的安全, 必須將該電器產品送往授權服務中 心。切勿自行拆除該電器產品。 • 請勿讓電源線隨意懸垂。 • 務必確保該產品接在接地插座上。 • 請勿使用延長線。如果您自己承擔責任, 請只使用完好的及與該產品 功率相符的接地延長線。...
- Page 26 • 根據內鍋的刻度來調節米、水比例。 • 一旦產品某部份著火, 請勿直接用水撲滅, 您可以用一塊濕布蓋住著 火部位來滅火。 • 所有對產品作出之改動必須由授權服務中心進行, 並使用原裝配件。 • 本產品只能作為家用。任何專業性用途、不當使用或未遵照本說明 書使用引起的故障, 本公司均 不負任何責任, 此等故障損壞不在保養 範圍內。 保護環境 • 該電器產品能夠持續使用多年。但當您決定更換時, 請記住, 您可以 幫助保護環境。 • 在丟棄電器產品前, 應拆除計時器的電池並將其棄置於廢物收集站或 授權服務中心(根據型號)。 • 授權服務中心接受廢舊電器產品後, 能夠依照環保法規對其進行處理。 請關愛我們的環境! 您的電器產品包含可回收或可循環再用的寶貴材料。 請將其置於當地的廢物收集站。...
- Page 27 初次使用前 拆開包裝 • 拆開包裝,取出電飯煲,並取出所有配件及印刷品。 • 按下煲外的開蓋按鈕,打開煲蓋– 圖1. 小心閱讀以下指引,並按照所示方法操作。 清洗電飯煲 • 拆出內鍋 - 圖2、內蓋及微壓閥– 圖3a及3b。 • 用海綿及梘液清洗內鍋、微壓閥及內蓋。 • 用濕布擦拭機身表面及蓋。 • 小心擦乾。 • 將所有組件放回原位。將內蓋裝在電飯煲頂蓋正確的位置。然後將 內蓋放在兩個勾位後,並向下按直至固定為止。將可拆式電線插入 電飯煲底座插頭。 本電器注意事項以及所有功能 • 小心擦拭內鍋外面部分(特別是底部)。確定內鍋底下或發熱元件 上無任何殘餘食材或液體– 圖5. • 將內鍋放進電飯煲,確定位置妥當– 圖6. • 確定內蓋已放置妥當。 • 關上煲蓋,確定飯煲有發出一下「咔」聲。 • 將電源線插入多功能電飯煲底座插頭;將另一端插上電源。電飯煲 會發出一聲長「嗶」,控制面板上所有指示燈會隨即亮起。預設烹 調程式為煮飯模式。 •...
- Page 28 控制面板 如何使用電飯煲上的按鍵﹕ 1. 「Start」(開始)鍵﹕按此鍵會啟動煮飯模式及開始烹調程序。 烹調進度指示燈會顯示烹調的進度 (預熱 浸泡 加熱 浸泡 煮 沸 慢煮 保溫)。 2. 「Rice cooking」(煮飯)及「Congee」(粥)鍵﹕ • 按「rice」(飯)鍵啟動煑飯模式。烹調會在約5秒後開始;電飯煲 會發出一聲「嗶」。 • 按「congee」(粥)鍵啟動煲粥模式。烹調會在約5秒後開始;電 飯煲會發出一聲「嗶」。 3. 「Menu」(選單)鍵﹕按此鍵選擇以下模式﹕ 「Quick(快煮) Porridge(麥皮粥) Soup(湯) Small quantity(小量) Steam(蒸) Dessert(甜品)」。 相應的指示燈會亮起。...
- Page 29 烹調程式資料表 烹調時間 預設溫度 程式 保溫 (ºC) 預設時間 時間設定 白飯 自動 自動 煮飯 快煮 自動 自動 小量 自動 自動 麥皮粥 1小時 45-1小時10分 自動 粥 1小時30分 1小時 – 2小時 自動 1小時30分 – 湯 2小時 自動 3小時 30分鐘 - 1小時 蒸 1小時 自動 30分鐘...
- Page 30 其他米的烹調指引 內鍋中的水位( 米類 量杯數 米重量 享用人數 連米) 圓粒白米(意大 利米 - 黏性一般 870克 6杯刻度 7到8人 較強) 全粒糙米 887克 6杯刻度 7到8人 意大利米 870克 6杯刻度 7到8人 (Arborio米) 糯米 736克 5杯刻度 7到8人 糙米 840克 6杯刻度 7到8人 日本米 900克 6杯刻度 7到8人 香米 870克 6杯刻度 7到8人 選單鍵...
- Page 31 始)燈會亮起,螢幕會閃出“ ”。 • 煮飯模式中,烹調進度指示燈會顯示烹調進度﹕預熱 浸泡 加熱 浸泡 煮沸 慢煮 保溫。 • 烹調完畢,會有三下「嗶」聲響起,電飯煲進入保溫狀態, 「Keep Warm」(保溫)指示燈會亮起 ,螢幕開始計算保溫時間。 煲粥功能 • 按「Menu」(選單)鍵選擇「Congee」(粥)功能。螢幕會顯示預設 烹調時間,「Start」(開始)燈會閃爍。 • 按「Preset/Timer」(預設時間/計時)鍵後,可用「+」及「-」鍵 更改烹調時間。 • 按 「 St a r t 」 ( 開 始 ) 鍵 。 電 飯 煲 進 入 「 C o n g e e 」 ( 煲 粥 ) 狀 態 , 「Start」(開始)燈會亮起,螢幕會顯示剩餘的烹調時間。...
- Page 32 麥皮粥功能 • 按「Menu」(選單)鍵選取「Porridge」(麥皮粥)功能。螢幕顯示預 設烹調時間,紅色「Start」(開始)燈閃爍。 • 按「Preset/Timer」(預設時間/計時)鍵後,可用「+」及「-」鍵 更改烹調時間。 • 按「Start」(開始)鍵。電飯煲進入「Porridge」(麥皮粥)狀態, 「Start」(開始)燈會亮起,螢幕會顯示剩餘的烹調時間。 • 烹調完畢,會有三下「嗶」聲響起,電飯煲進入保溫狀態, 「Keep Warm」(保溫)指示燈會亮起 ,螢幕開始計算保溫時間。 煲湯功能 • 按「Menu」(選單)鍵選取「Soup」(湯)功能。螢幕顯示預設烹調時 間,紅色「Start」(開始)燈閃爍。 • 按「Preset/Timer」(預設時間/計時)鍵後,可用「+」及「-」鍵 更改烹調時間。 • 按「Start」(開始)鍵。電飯煲進入「Soup」(湯)狀態,「Start」 (開始)燈會亮起,螢幕會顯示剩餘的烹調時間。 • 烹調完畢,會有三下「嗶」聲響起,電飯煲進入保溫狀態, 「Keep Warm」(保溫)指示燈會亮起 ,螢幕開始計算保溫時間。 蒸煮功能 • 按「Menu」(選單)鍵選取「Steam」(蒸)功能。螢幕顯示預設烹調 時間,紅色「Start」(開始)燈閃爍。 • 按「Preset/Timer」(預設時間/計時)鍵後,可用「+」及「-」鍵 更改烹調時間。 • 按「Start」(開始)鍵。電飯煲進入「Steam」(蒸)狀態,「Start」 (開始)燈會亮起,螢幕會顯示剩餘的烹調時間。 •...
- Page 33 更改烹調時間。 • 按 「 St a r t 」 ( 開 始 ) 鍵 。 電 飯 煲 進 入 「 D e s s e r t 」 ( 甜 品 ) 狀 態 , 「Start」(開始)燈會亮起,螢幕會顯示剩餘的烹調時間。 • 烹調完畢,會有三下「嗶」聲響起,電飯煲進入保溫狀態, 「Keep Warm」(保溫)指示燈會亮起...
- Page 34 清潔及保養 • 清潔與保養電飯煲前,請確定電源已拔除,而且電飯煲已徹底冷卻。 • 建議每次使用後都用海綿清潔 – 圖12. • 內鍋、量杯、飯勺及湯勺可用洗碗碟機清洗 – 圖13. 內鍋,蒸盤 • 不建議使用砂粉及鋼絲刷。 • 如有食物黏在鍋底,可在清洗前先浸水一段時間。 • 小心擦乾內鍋。 小心處置內鍋 請按照以下指示小心清洗內鍋: • 為保養內鍋質素,建議避免在裏面切食物。 • 確保將內鍋放回電飯煲內。 • 使用附送的膠勺或木勺,盡量避免使用金屬器具,以免損壞內鍋表 面 – 圖14. • 為防止腐蝕,請勿將醋加入內鍋中。 • 初次使用或多次使用後,內鍋表面的顏色可能會產生變化。這是由 蒸汽及水所造成,不會影響電飯煲的使用,亦不會對人體有害。可 放心繼續使用。 清理微壓閥 • 清洗時,請將微壓閥從煲蓋上取下 – 圖15,並沿「開啓」方向旋轉 以將其打開...
- Page 35 技術疑難排解 異常情況描述 原因 解決方法 有指示燈未亮而且 檢查電飯煲電源線是否已插上 電飯煲未插上電源。 不加熱。 底座插頭以及電源。 有指示燈未亮但加 顯示燈有連接問題或顯示燈 送交授權服務中心維修。 熱。 損壞。 未妥善關蓋。 打開蓋再蓋上。 停止烹調(拔掉電源線)並檢查閥 使用時洩漏蒸汽。 微壓閥未放好或不完整。 是否完整(兩部分互相緊鎖)和安 放妥當。 蓋或微壓閥墊片損壞。 送交授權服務中心維修。 飯半熟或烹調時間 相對於米量放水太多或太 參閱使用水量表。 過長。 少。 飯半熟或烹調 未充分燘煮。 時間過長。 自動保溫失靈 用家在設定期間取消保溫功 送交授權服務中心維修。 (電飯煲停留在烹調 能。參閱有關保溫功能的 狀態,或不加熱) 段落。 頂部的感應器斷路或短路。 停止使用電飯煲,重新啟動程 底部的感應器斷路或短路。...
-
Page 36: Panel Kawalan
PANEL KAWALAN PERIHALAN 1 Bakul kukus d Kekunci “Keep warm (Kekal 2 Penanda untuk air dan nasi Panas)/Cancel (Batal)" 3 Periuk boleh tanggal e Kekunci "Preset (Praset)/ 4 Cawan penyukat Timer (Pemasa)" 5 Sudu nasi f Kekunci “-” 6 Senduk sup g Penunjuk “Rice (Nasi)”... - Page 37 PERLINDUNGAN PENTING ARAHAN KESELAMATAN Baca dan ikut arahan penggunaan. Pastikan ia selamat. • Perkakas ini bukannya untuk dikendalikan dengan menggunakan pemasa luar atau sistem kawalan jauh berasingan. • Perkakas ini boleh digunakan oleh kanak-kanak berumur 8 tahun dan lebih jika mereka dipantau diberi arahan berkenaan...
- Page 38 • Jika perkakas anda dipasang dengan kord kuasa tetap: jika kord bekalan kuasa rosak, ia perlu digantikan oleh pusat servis Tefal yang sah atau kakitangan yang berkelayakan setaraf bagi mengelakkan sebarang bahaya. • Perkakas tidak boleh direndam di dalam air.
- Page 39 pinggan untuk membersihkan aksesori dan bahagian yang terkena makanan. Bilas menggunakan kain atau span lembap. Keringkan aksesori dan bahagian yang terkena makanan menggunakan kain kering. • Jika simbol ditandakan pada peranti, simbol ini bermaksud “Berwaspada: permukaan mungkin menjadi panas semasa penggunaan». •...
- Page 40 hubungi Pasukan Hubungan Pelanggan kami atau rujuk laman web kami. • Untuk keselamatan anda, perkakas ini mematuhi peraturan dan arahan keselamatan yang berkuat kuasa pada masa penghasilan (Arahan Voltan Rendah, Keserasian Elektromagnet, Peraturan Bahan Sentuhan Makanan, Alam Sekitar…). • Pastikan bahawa voltan bekalan kuasa sepadan dengan yang ditunjukkan pada perkakas (arus ulang alik).
- Page 41 • Jangan keluarkan mangkuk semasa perkakas sedang berfungsi. • Jangan letakkan perkakas secara terus atas permukaan panas, atau sebarang sumber haba atau nyalaan yang lain, kerana ia akan menyebabkan kegagalan atau membahayakan. • Mangkuk dan plat pemanas perlu bersentuhan secara terus. Sebarang objek atau makanan yang dimasukkan di antara dua bahagian ini akan mengganggu pengendalian yang betul.
- Page 42 SEBELUM PENGGUNAAN PERTAMA Mengeluarkan perkakasan • Keluarkan perkakasan dari bungkusan dan mengeluarkan semua aksesori dan dokumen bercetak. • Buka tudung dengan menekan butang pembuka di permukaan – rajah Baca Arahan dan berhati-hati mengikut kaedah operasi. Bersihkan perkakasan • Keluarkan periuk – rajah 2, tudung dalaman dan injap tekanan –...
- Page 43 Jangan letakkan tangan anda pada lubang kukus semasa memasak, bahaya melecur – rajah Selepas memasak, jika anda hendak menukar pilihan menu masakan kerana terdapat kesilapan, tekan kekunci “Keep Warm (Kekal Panas)/ Cancel (Batal)” dan pilih-semula menu yang anda mahu. Anda boleh menghentikan proses memasak dengan menekan kekunci “Keep warm (kekal panas) / Cancel (Batal)”...
- Page 44 • Praset: Tersedia untuk semua mod memasak (kecuali mod “Dessert (Pencuci mulut”). Selepas memilih mod memasak yang dikehendaki, tekan kekunci “Preset (Praset) / timer (pemasa)” dua kali (penunjuk praset akan menyala)dan kemudian gunakan butang +/- untuk menetapkan pemasa. Memasak akan bermula selepas masa praset berlalu.
- Page 45 SYOR UNTUK MEMASAK NASI TERBAIK • Sebelum memasak, sukat beras dengan cawan penyukat dan bilas kecuali beras risoto. • Letak beras yang telah dibilas dengan disebarkan sebaiknya di seluruh permukaan mangkuk. Isikan dengan air sehingga paras air yang sepadan (Penanda dalam cawan). •...
- Page 46 PANDUAN MEMASAK UNTUK JENIS BERAS YANG LAIN Cawan Paras air Berat Jenis beras sukatan dalam periuk Hidangan beras beras (+ beras) Beras putih penuh (Beras Itali Penanda 6 870 g 7org.-8org. - biasanya cawan beras yang lebih melekit) Beras perang Penanda 6 887 g 7org.-8org.
- Page 47 Jika anda mahu menambah bunyi bip, anda perlu menekan masa saat pada kekunci “Menu”. FUNGSI MEMASAK NASI • Letak perkakasan secara rata, stabil, permukaan tahan kepanasan jauh dari percikan air dan sumber-sumber haba yang lain. • Tekan kekunci "Rice (Nasi)" untuk memasuki fungsi memasak nasi. •...
- Page 48 FUNGSI SEGERA • Tekan kekunci “Menu” untuk memilih fungsi “Quick (Cepat)”. Skrin memaparkan “ ”, lampu “Start (Mula)” berkelip. Kemudian tekan kekunci «Start (Mula)». Periuk pemasak nasi bertukar kepada status memasak “Quick (Segera)”, lampu “Start (Mula)” akan menyala, skrin berkelip “--”. •...
- Page 49 FUNGSI BUBUR • Tekan kekunci “Menu” untuk memilih fungsi “Porridge (Bubur)”. Skrin memaparkan masa memasak lalai, lampu “Start (Mula)” berkelip merah. • Anda boleh mengubah masa memasak dengan menekan kekunci "Preset (Praset)/Timer (Pemasa)" terlebih dahulu dan kemudian tekan kekunci “+” dan “−”. •...
- Page 50 "Preset (Praset)/Timer (Pemasa)" terlebih dahulu dan kemudian tekan kekunci “+” dan “−”. • Tekan kekunci “Start (Mula)”. Periuk pemasak nasi bertukar kepada status memasak “Steam (Kukus)”, lampu “Start (Mula)” akan menyala, skrin memaparkan masa memasak yang tinggal. • Pada penghujung memasak, pembaz akan berbunyi "bip" tiga kali, periuk pemasak nasi akan memasuki status kekal panas dengan penunjuk "Keep Warm (Kekal Panas)"...
- Page 51 FUNGSI PRASET • Masa praset sepadan dengan masa untuk penghujung memasak. • Fungsi ini tersedia untuk semua fungsi kecuali “Dessert (Pencuci Mulut)”. • Untuk menggunakan fungsi praset, pilih program memasak. Kemudian, tekan kekunci “Preset (Praset) / Timer (Pemasa)” dan pilih masa lengah. Tekan kekunci “+”...
- Page 52 • Jika makanan melekat pada bahagian bawah, anda perlu masukkan air ke dalam mangkuk untuk rendaman sebelum membasuh. • Keringkan mangkuk dengan teliti. Menjaga mangkuk Untuk mangkuk, mengikut arahan berikut dengan berhati-hati: • Untuk memastikan penyelenggaraan kualiti mangkuk, dicadangkan tidak memotong makanan di dalamnya. •...
- Page 53 PANDUAN PENYELESAIAN TEKNIKAL Penerangan Punca Penyelesaian tidak berfungsi Sebarang penunjuk lampu Periksa kord kuasa Perkakasan tidak tidak menyala dipasang pada soket dan dipasang dengan baik. dan tiada sesalur. pemanasan. Sebarang penunjuk lampu Masalah sambungan Hantar ke pusat servis tidak menyala penunjuk lampu atau yang bertauliah untuk dan tiada...
- Page 54 Penerangan Punca Penyelesaian tidak berfungsi Nasi separuh masak atau Tidak cukup direneh. terlebih masak Kegagalan mengekalkan Fungsi kekal hangat hangat telah dibatalkan oleh automatik Hantar ke pusat servis pengguna semasa (produk yang bertauliah untuk tetapan. Rujukan terus dalam diperbaiki. perenggan fungsi kedudukan kekal panas.
- Page 55 แผงควบคุ ม คำ � อธิ บ �ย ถาดนึ ่ ง c สถานะ "อุ ่ น /ยกเลิ ก " ระดั บ น้ ำ า d ปุ ่ ม "อุ ่ น /ยกเลิ ก " หม้ อ ใบในทรงกลม e ปุ ่ ม "ตั ้ ง ล่ ว งหน้ า /ตั ้ ง เวลา" ถ้...
- Page 56 เกี ่ ย วกั บ ก�รป้ อ งกั น ที ่ ส ำ � คั ญ คู ่ ม ื อ ก�รใช้ ง �นเพื ่ อ คว�มปลอดภั ย กรุ ณ �อ่ � นและทำ � ต�มคู ่ ม ื อ ก�รใช้ ง �นฉบั บ นี ้ เก็...
- Page 57 หร ื อ โดยบ ุ ค คลท ี ่ ข าดประสบการณ ์ แ ละความร ู ้ เ ก ี ่ ย วก ั บ เครื ่ อ งใช้ ไ ฟฟ้ า ดั ง กล่ า ว เว้ น เสี ย แต่ ว ่ า พวกเขาจะอยู ่ ภ าย ใต้...
- Page 58 สะอาดอุ ป กรณ์ เ สริ ม และอะไหล่ ท ี ่ ส ั ม ผั ส กั บ อาหาร ล้ า ง ออกด้ ว ยผ้ า ชุ บ น้ ำ า หมาดหรื อ ฟองน้ ำ า เช็ ด อุ ป กรณ์ เ สริ ม และ อะไหล่...
- Page 59 • หากมี ป ั ญ หาหรื อ คำ า ถามใด ๆ กรุ ณ าติ ด ต่ อ ที ม ลู ก ค้ า สั ม พั น ธ์ หรื อ สอบถามจากเว็ บ ไซต์ ข องเรา • อุ ป กรณ์ ส ามารถใช้ ง านได้ ใ นความสู ง สู ง สุ ด ถึ ง 4,000 เมตร...
- Page 60 • อย่ า วางเครื ่ อ งใช้ ไ ฟฟ้ า บนพื ้ น ผิ ว ที ่ ม ี ค วามร้ อ นโดยตรง หรื อ แหล่ ง ความร้ อ น หรื อ เปลวไฟใด ๆ เพราะว่ า จะก่ อ ให้ เ กิ ด การทำ า งานผิ ด พลาดหรื อ เป็ น อั น ตราย •...
- Page 61 ก่ อ นก�รใช้ ง �นครั ้ ง แรก ก�รแกะบรรจุ ภ ั ณ ฑ์ • นำ า เครื ่ อ ง อุ ป กรณ์ เ สริ ม และเอกสารสิ ่ ง พิ ม พ์ ท ั ้ ง หมดออกจากบรรจุ ภ ั ณ ฑ์ •...
- Page 62 ห้ � มเทน้ ำ � หรื อ ใส่ ส ่ ว นผสมลงในเครื ่ อ งโดยที ่ ไ ม่ ม ี ห ม้ อ อยู ่ ด ้ � นใน ปริ ม �ณสู ง สุ ด ของน้ ำ � และส่ ว นผสมไม่ ค วรเกิ น ขี ด ระดั บ สู ง สุ ด ในหม้ อ - รู...
- Page 63 • กดป ุ ่ ม อ ุ ่ น ต ่ อ เน ื ่ อ ง/ยกเล ิ ก เพ ื ่ อ หย ุ ด ข ั ้ น ตอนการท ำ า อาหารหร ื อ ยกเล ิ ก การต ั ้ ง ค ่ า ทั...
- Page 64 คำ � แนะนำ � ในก�รหุ ง ข้ � วข�ว - 8 ถ้ ว ย ถ้ ว ยตวง น้ ำ � หนั ก ข้ � ว ระดั บ น้ ำ � ในหม้ อ (+ ข้ � ว) ปริ ม �ณที ่ เ สิ ร ์ ฟ 300 ก.
- Page 65 ฟั ง ก์ ช ั น ก�รหุ ง ข้ � ว • วางเครื ่ อ งบนพื ้ น ที ่ เ รี ย บ มั ่ น คง และทนความร้ อ น โดยให้ ห ่ า งจากน้ ำ า กระเด็ น และ แหล่...
- Page 66 ทำ า อาหาร: เตรี ย มหุ ง แช่ ข ้ า ว เริ ่ ม หุ ง ดู ด ซั บ น้ ำ า ไอน้ ำ า ระเหย หุ ง สุ ก อุ ่ น •...
- Page 67 • กดปุ ่ ม "เริ ่ ม " หม้ อ หุ ง ข้ า วจะเข้ า สู ่ ส ถานะการทำ า อาหาร "ซุ ป " โดยไฟของปุ ่ ม "เริ ่ ม " จะสว่ า งขึ ้ น และหน้ า จอจะแสดงเวลาการทำ า อาหารที ่ เ หลื อ •...
- Page 68 ฟั ง ก์ ช ั น ตั ้ ง ล่ ว งหน้ � • เวลาที ่ ต ั ้ ง ค่ า ล่ ว งหน้ า จะสั ม พั น ธ์ ก ั บ เวลาเสร็ จ สิ ้ น การทำ า อาหาร •...
- Page 69 ก�รดู แ ลรั ก ษ�หม้ อ ปฏิ บ ั ต ิ ต ามข้ อ แนะนำ า ต่ อ ไปนี ้ เ พื ่ อ การดู แ ลรั ก ษาหม้ อ : • เพื ่ อ การบำ า รุ ง รั ก ษาคุ ณ ภาพของหม้ อ ไม่ แ นะนำ า ให้ ห ั ่ น อาหารในหม้ อ •...
- Page 70 คู ่ ม ื อ เพื ่ อ ก�รแก้ ไ ขปั ญ ห�ท�งเทคนิ ค คำ � อธิ บ �ยเกี ่ ย วกั บ คว�ม ส�เหตุ วิ ธ ี แ ก้ ป ั ญ ห� ผิ ด ปกติ ข องอุ ป กรณ์ สั...
- Page 71 คำ � อธิ บ �ยเกี ่ ย วกั บ คว�ม ส�เหตุ วิ ธ ี แ ก้ ป ั ญ ห� ผิ ด ปกติ ข องอุ ป กรณ์ ข้ า วสุ ก ไม่ ท ั ่ ้ ว ถึ ง ความร้ อ นไม่ เ พี ย งพอ ฟั...
- Page 72 4 – 22 p. 23 – 37 p. 38 – 57 p. 58 – 75 9100025122...
Need help?
Do you have a question about the Initial RK740165 and is the answer not in the manual?
Questions and answers