Table of Contents
Advertisement
Quick Links
Advertisement
Table of Contents

Subscribe to Our Youtube Channel
Related Manuals for DURKOPP ADLER D868


Summary of Contents for DURKOPP ADLER D868
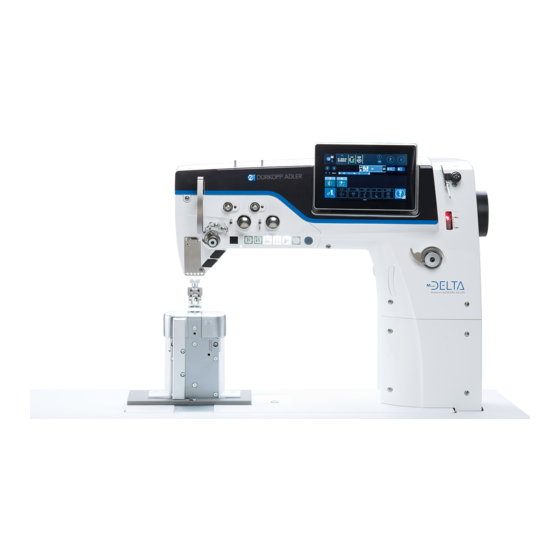
- Page 1 D868 Service Instructions M-TYPE DELTA...
- Page 2 IMPORTANT READ CAREFULLY BEFORE USE KEEP FOR FUTURE REFERENCE All rights reserved. Property of Dürkopp Adler AG and protected by copyright. Any reuse of these contents, including extracts, is prohibited without the prior written approval of Dürkopp Adler AG. Copyright © Dürkopp Adler AG 2020...
-
Page 3: Table Of Contents
Position of the hook and needle ..........53 Adjusting the loop stroke position ..........53 Adjusting the hook side clearance ..........55 Adjusting the needle bar height ..........57 Adjusting the needle guard ............58 Service Instructions D868 M-TYPE DELTA - 00.0 - 06/2020... - Page 4 Defining general settings (technician access) ......111 17.4 Setting the Machine configuration ......... 113 17.4.1 Setting the Thread trimmer parameters ......115 17.4.2 Setting the Needle thread clamp parameters ....119 Service Instructions D868 M-TYPE DELTA - 00.0 - 06/2020...
- Page 5 17.8.8 Logging .................. 178 17.9 Information ................. 179 17.10 Performing a software update .......... 181 Maintenance ................183 18.1 Cleaning ................... 184 18.2 Lubricating ................186 18.2.1 Lubricating the machine head ..........187 Service Instructions D868 M-TYPE DELTA - 00.0 - 06/2020...
- Page 6 Appendix ................. 223 23.1 Barcode examples ..............223 23.2 Converting videos for playback on the control panel ....224 23.3 Basic settings of the machine ........... 227 23.4 Wiring diagram ................. 228 Service Instructions D868 M-TYPE DELTA - 00.0 - 06/2020...
-
Page 7: About These Instructions
Specifies proper setting. Disturbances Specifies the disturbances that can occur from an incorrect adjustment. Cover Specifies which covers must be disassembled in order to access the com- ponents to be set. Service Instructions D868 M-TYPE DELTA - 00.0 - 06/2020... - Page 8 Safety ( p. 9). If no other clear location information is used in a figure, indications of right Location information or left are always from the user's point of view. Service Instructions D868 M-TYPE DELTA - 00.0 - 06/2020...
-
Page 9: Other Documents
Leave machines, equipment and packaging material in the condition in which they were found when the damage was discovered. This will ensure any claims against the transport company. Report all other complaints to Dürkopp Adler immediately after receiving the product. Service Instructions D868 M-TYPE DELTA - 00.0 - 06/2020... - Page 10 About these instructions Service Instructions D868 M-TYPE DELTA - 00.0 - 06/2020...
-
Page 11: Safety
• Setting up the machine/putting the machine into operation • Performing maintenance work and repairs • Performing work on electrical equipment Only authorized persons may work on the machine and must first have understood these instructions. Service Instructions D868 M-TYPE DELTA - 00.0 - 06/2020... -
Page 12: Signal Words And Symbols Used In Warnings
If ignored, environmental damage can result NOTICE (without hazard symbol) If ignored, property damage can result The following symbols indicate the type of danger to personnel: Symbols Symbol Type of danger General Electric shock Service Instructions D868 M-TYPE DELTA - 00.0 - 06/2020... - Page 13 Consequences of non-compliance. Measures for avoiding the danger. This is what a warning looks like for a hazard that could result in moderate or minor injury if the warning is ignored. Service Instructions D868 M-TYPE DELTA - 00.0 - 06/2020...
- Page 14 Type and source of danger! Consequences of non-compliance. Measures for avoiding the danger. This is what a warning looks like for a hazard that could result in property damage if ignored. Service Instructions D868 M-TYPE DELTA - 00.0 - 06/2020...
-
Page 15: Working Basis
NOTICE Property damage may occur! Excess cables can impair the functioning of moving machine parts. This impairs the sewing function and can result in damage. Lay excess cables as described above. Service Instructions D868 M-TYPE DELTA - 00.0 - 06/2020... -
Page 16: Calling Up The Service Routine
Equal sewing foot stroke (setting an even sewing foot Sewing foot stroke) stroke Feed Move (setting the feeding foot movement) The display shows all the values set in the selected service routine. Service Instructions D868 M-TYPE DELTA - 00.0 - 06/2020... - Page 17 The machine moves to the programmed position and is switched off. The button lights up. The display shows the information that the Service Stop is active: Fig. 3: Calling up the service routine (3) 6. Make the required settings. Service Instructions D868 M-TYPE DELTA - 00.0 - 06/2020...
- Page 18 9. Press the button. You are now in the service menu again. 10. Press the button. The machine moves back to its initial position and is ready to sew. Service Instructions D868 M-TYPE DELTA - 00.0 - 06/2020...
-
Page 19: Disassembling And Assembling The Covers
Information Always apply 1 Nm of tightening torque when tightening the screws that are used to attach the covers. Service Instructions D868 M-TYPE DELTA - 00.0 - 06/2020... -
Page 20: Tilting The Machine Head
1. Tilt the machine head as far as it will go. Erecting the machine head To erect the machine head: 1. Push the locking mechanism (1) up with one hand. 2. Erect the machine head using your other hand. Service Instructions D868 M-TYPE DELTA - 00.0 - 06/2020... -
Page 21: Disassembling And Assembling The Arm Cover
1. Loosen the screws (2). 2. Disassemble the arm cover (1). Assembling the arm cover To assemble the arm cover: 1. Assemble the arm cover (1). 2. Tighten the screws (2). Service Instructions D868 M-TYPE DELTA - 00.0 - 06/2020... -
Page 22: Disassembling And Assembling The Front Cover (Service Cover)
Assembling the front cover To assemble the front cover: 1. Switching off the machine 2. Place the front cover (1). Make sure not to damage the thread lever. 3. Tighten the screws (2). Service Instructions D868 M-TYPE DELTA - 00.0 - 06/2020... -
Page 23: Disassembling And Assembling The Head Cover
Caution: 2 screws at the front on the head cover, 2 screws on the rear of the machine. 2. Disassemble the head cover (1). Assembling the head cover To assemble the head cover: 1. Assemble the head cover (1). 2. Tighten the screws (2). Service Instructions D868 M-TYPE DELTA - 00.0 - 06/2020... -
Page 24: Disassembling And Assembling The Motor Cover
3. Remove the motor cover (2). Assembling the motor cover To assemble the motor cover: 1. Set the lever (3) vertical. 2. Place the motor cover (2). 3. Tighten the screws (1). Service Instructions D868 M-TYPE DELTA - 00.0 - 06/2020... -
Page 25: Disassembling And Assembling The Toothed Belt Cover
1. Loosen the screws (1). 2. Remove the toothed belt cover (2); start by disassembling the cover from below. Fig. 12: Toothed belt cover with handwheel cover (2) ③ (3) - Plates Service Instructions D868 M-TYPE DELTA - 00.0 - 06/2020... - Page 26 1. Loosen screws (5) on the handwheel (4). 2. Remove the handwheel (4). 3. Loosen the screws (1). 4. Remove the toothed belt cover (2); start by disassembling the cover from below. Service Instructions D868 M-TYPE DELTA - 00.0 - 06/2020...
- Page 27 (6) - Centering pin 3. Place the handwheel (4), making sure that the centering pin (6) is positioned correctly (otherwise, referencing by the hall sensor will not work properly). 4. Tighten the screws (5). Service Instructions D868 M-TYPE DELTA - 00.0 - 06/2020...
-
Page 28: Disassembling And Assembling The Thread Tension Plate
Make sure not to lose the bobbin case retainer (4) as it will otherwise no longer be possible to connect the push button. 4. Loosen screws (1) and (2). 5. Remove the thread tension plate (3). Service Instructions D868 M-TYPE DELTA - 00.0 - 06/2020... - Page 29 2. Assemble the thread tension plate (3). 3. Tighten screws (1) and (2). 4. Slip plugs onto the PCB: • Thread clamp: Connection X10 (optional) • Thread tension: Connection X11 • Push button: Connection X12 Service Instructions D868 M-TYPE DELTA - 00.0 - 06/2020...
-
Page 30: Opening And Closing The Hook Cover
Closing the left hook cover 1. Fold the left hook cover (1) to the right. 2. Press the left hook cover (1) downwards. The left hook cover (1) audibly clicks into place. Service Instructions D868 M-TYPE DELTA - 00.0 - 06/2020... -
Page 31: Assembling And Disassembling The Throat Plate
1. Execute the service routine Feed dog > Position to needle ( p. 14). The software is used to define the necessary presettings on the machine. 2. Open the hook cover(s) ( p. 28). Service Instructions D868 M-TYPE DELTA - 00.0 - 06/2020... -
Page 32: Assembling And Disassembling The Feed Dog
5. Finish the service routine. 3.7 Assembling and disassembling the feed dog Fig. 20: Assembling and disassembling the feed dog in a 1-needle machine (1) ① ② ① (1) - Screw (2) - Cover Service Instructions D868 M-TYPE DELTA - 00.0 - 06/2020... - Page 33 ① ② ① (1) - Screw (2) - Cover Fig. 22: Assembling and disassembling the feed dog in a 1-needle machine (3) ③ ④ (3) - Feed dog (4) - Screw Service Instructions D868 M-TYPE DELTA - 00.0 - 06/2020...
- Page 34 The maximum permissible stitch length can be set in the service routine. 1. Disassemble the throat plate ( p. 29). 2. Loosen the screws (1). 3. Remove cover (2). 4. Loosen the screw (4). 5. Remove the feed dog (3). Service Instructions D868 M-TYPE DELTA - 00.0 - 06/2020...
- Page 35 (depending on the equipment: 6, 7, 9 or 12) by turning the handwheel. The feed dog must not hit against the throat plate. Order Then check the following adjustment: • Feed dog ( p. 46) Service Instructions D868 M-TYPE DELTA - 00.0 - 06/2020...
-
Page 36: Flats On Shafts
This stabilizes the connection and makes adjusting easier. Important Always ensure that the screws are completely flush with the surface. The rule is to always place the 1 screw in rotational direction onto the flat. Service Instructions D868 M-TYPE DELTA - 00.0 - 06/2020... -
Page 37: Locking The Machine In Place
3. Turn the handwheel carefully until the locking peg (1) slides into the slot on the arm shaft crank. Removing the lock To remove the lock: 1. Pull the locking peg (1) out of the slot in the machine arm. Service Instructions D868 M-TYPE DELTA - 00.0 - 06/2020... -
Page 38: Adjusting The Handwheel Into Position
In some setting programs, the handwheel is adjusted electronically. To adjust the handwheel into position: 1. Turn the handwheel until the specified number on the graduated scale (1) is next to the marking (2). Service Instructions D868 M-TYPE DELTA - 00.0 - 06/2020... -
Page 39: Positioning The Arm Shaft Crank On The Arm Shaft
6. Push the arm shaft to the right flush with the arm shaft crank (1) until it abuts on the bearing (3). 7. Tighten the threaded pins (2). Service Instructions D868 M-TYPE DELTA - 00.0 - 06/2020... -
Page 40: Performing The Basic Settings Of The Eccentrics
Feed dog movement Feed dog lift The looping stroke securing position allows you to define the basic settings for the sewing foot stroke, the feed dog lift and the feed dog movement. Service Instructions D868 M-TYPE DELTA - 00.0 - 06/2020... - Page 41 2. Lock the machine in place ( p. 35). 3. Tilt the machine head. 4. Loosen the screws (3). 5. Turn the eccentric such that slot (1) lines up with slot (2). 6. Tighten the screws (3). Service Instructions D868 M-TYPE DELTA - 00.0 - 06/2020...
- Page 42 To adjust the eccentric for the feed dog movement: 7. Loosen the screws (6). 8. Turn the eccentric such that slot (4) lines up with slot (5). 9. Tighten the screws (6). Service Instructions D868 M-TYPE DELTA - 00.0 - 06/2020...
- Page 43 14. Manually press the control cam (7) into the end position. 15. Loosen the screws (8). 16. Turn the eccentric such that slot (9) lines up with slot (10). 17. Tighten the screws (8). Service Instructions D868 M-TYPE DELTA - 00.0 - 06/2020...
-
Page 44: Adjusting The Compensating Weight
2. Adjust the compensating weight (2) such that screw (1) and screw (4) are at the same height. Make sure there is a gap between the compensating weight (2) and the transmission lever (3). 3. Tighten the screw (1). Service Instructions D868 M-TYPE DELTA - 00.0 - 06/2020... -
Page 45: Adjusting The Mechanical Stitch Adjustment
(stitch length 0 = no feed) is determined by the Calibration zero stitch ( p. 167). Cover • Remove the toothed belt cover ( p. 23) • Motor cover ( p. 22) • Remove the front cover ( p. 20) Service Instructions D868 M-TYPE DELTA - 00.0 - 06/2020... - Page 46 3. Pull the cables out of the cable holders (4). While doing so, make sure not to damage the cables. 4. Insert the locking peg (∅ 5 mm) (2) into the hole (3) on the motor bracket. Service Instructions D868 M-TYPE DELTA - 00.0 - 06/2020...
-
Page 47: Adjusting The Forward And Backward Stitch
The forward and backward stitch are controlled by a stepper motor and adjusted via software. The calibration is performed only in the software and does not require that you mechanically set an eccentric ( p. 167). Service Instructions D868 M-TYPE DELTA - 00.0 - 06/2020... -
Page 48: Adjusting Feed Dog And Needle Bar Linkage
Details on the settings of the Feed dog feed movement, the feed dog lift movement and the compensating weight are provided in the chapter Basic settings of the eccentrics ( p. 38). Service Instructions D868 M-TYPE DELTA - 00.0 - 06/2020... -
Page 49: Moving The Feed Dog Carrier Sideways
Important Make sure that the pusher shaft is tightened by the set collars and does not have any axial play. 8. Tighten the screw (4). 9. Tighten the threaded pins (3). Service Instructions D868 M-TYPE DELTA - 00.0 - 06/2020... -
Page 50: Aligning The Needle Bar Linkage Sideways
3. Disassemble the head cover ( p. 21). 4. Switch on the machine. 5. Execute the service routine Needle-Hook > Needle bar ( p. 14). The software is used to define the necessary presettings on the machine. Service Instructions D868 M-TYPE DELTA - 00.0 - 06/2020... - Page 51 14. Tighten the threaded pins (7). 15. Finish the service routine. Order Then, check the following settings: • Distance between hook and needle ( p. 55) • Looping stroke position ( p. 53) Service Instructions D868 M-TYPE DELTA - 00.0 - 06/2020...
-
Page 52: Aligning The Needle Bar Linkage In The Sewing Direction
6. Move the needle bar linkage until there is a distance of 10 mm between presser bar and walking foot bar. 7. Tighten the screw (1). 8. Finish the service routine. Service Instructions D868 M-TYPE DELTA - 00.0 - 06/2020... -
Page 53: Aligning The Feed Dog In Sewing Direction
5. Align the feed dog in the sewing direction such that the needle pierces in the center of the needle hole. 6. Tighten the screw (1). Order Next, check the feed movement to the throat plate cutout at the maximum stitch length. Service Instructions D868 M-TYPE DELTA - 00.0 - 06/2020... -
Page 54: Adjusting The Feed Dog Height At Top Dead Center
6. Turn the lever (2) such that the upper edge of the feed dog protrudes 0.5 mm (KFA = 0.8 mm) above the throat plate. 7. Tighten the threaded pins (1). 8. Finish the service routine. Service Instructions D868 M-TYPE DELTA - 00.0 - 06/2020... -
Page 55: Position Of The Hook And Needle
• Needle bar linkage is aligned correctly ( p. 48), ( p. 50) Fig. 41: Adjusting the looping stroke position (1) ① ② (1) - Vertical center line of the needle (2) - Hook tip Service Instructions D868 M-TYPE DELTA - 00.0 - 06/2020... - Page 56 You can slightly loosen the threaded pin (5) if the thread trimmer cam (3) can only be turned with difficulty. 8. Tighten the threaded pins (4). 9. Finish the service routine. Service Instructions D868 M-TYPE DELTA - 00.0 - 06/2020...
-
Page 57: Adjusting The Hook Side Clearance
(3) - Hook support (2) - Threaded pin (4) - Screws Proper setting The distance between the hook tip and the groove of the needle is no greater than 0.1 mm. Service Instructions D868 M-TYPE DELTA - 00.0 - 06/2020... - Page 58 8. Tighten the threaded pin (2). 9. Tighten the screws (4). 10. Finish the service routine. Order Then, check the following setting: • Position of the needle guard ( p. 57) Service Instructions D868 M-TYPE DELTA - 00.0 - 06/2020...
-
Page 59: Adjusting The Needle Bar Height
The hook tip is level with the lower third of the groove on the needle. To adjust the needle bar height: 1. Execute the service routine Needle-Hook > Timing ( p. 14). The software is used to define the necessary presettings on the machine. Service Instructions D868 M-TYPE DELTA - 00.0 - 06/2020... -
Page 60: Adjusting The Needle Guard
The needle guard (3) pushes the needle away just enough so that it cannot be touched by the hook tip. To adjust the needle guard: 1. Disassemble the throat plate ( p. 29). 2. Disassemble the feed dog ( p. 30). Service Instructions D868 M-TYPE DELTA - 00.0 - 06/2020... - Page 61 • for pushing away more: Turn screw (2) counterclockwise • for pushing away less: Turn screw (2) clockwise 6. Finish the service routine. 7. Assemble the feed dog. 8. Assemble the throat plate. Service Instructions D868 M-TYPE DELTA - 00.0 - 06/2020...
-
Page 62: Adjusting The Bobbin Case Lifter
(2) must open so that the thread can also slide past in that position. So that the thread can slip through without a problem, the width of the lifting gap and the timing of opening have to be adjusted. Service Instructions D868 M-TYPE DELTA - 00.0 - 06/2020... -
Page 63: Adjusting The Lifting Gap
The correct width of the lifting gap depends on the thickness of the needle thread. Proper setting The needle thread slides through unobstructed between the nose of the bobbin case (1) and the slot in the throat plate (2). Service Instructions D868 M-TYPE DELTA - 00.0 - 06/2020... - Page 64 Ensure that the gap is not so big that the middle part of the hook swings back and forth, hitting the slot in the throat plate. 5. Tighten the threaded pin (4). 6. Close the hook cover (5) ( p. 28). Service Instructions D868 M-TYPE DELTA - 00.0 - 06/2020...
-
Page 65: Adjusting The Timing For Lifting
For 125° or 305°, the threaded pin (4) is exactly in the center of the slot (insert allen key in the threaded pin for orientation). To adjust the timing for lifting: 1. Open the hook cover (3) ( p. 28). Service Instructions D868 M-TYPE DELTA - 00.0 - 06/2020... - Page 66 5. Close the hook cover ( p. 28). 6. Perform a sewing test. 7. If necessary, adjust the setting to the sewing material and to the needle thread and hook thread. Service Instructions D868 M-TYPE DELTA - 00.0 - 06/2020...
-
Page 67: Sewing Feet
Spring pressure always keeps the gear securely in the zero position on the control cam. Order First, check the following setting: • Basic setting of the eccentrics for sewing foot stroke, feed dog lift and feed dog movement ( p. 38) Service Instructions D868 M-TYPE DELTA - 00.0 - 06/2020... - Page 68 5. Disassemble the front cover ( p. 20). 6. Pull the plug (2) off the PCB (1) (only on 2-needle machines). 7. Loosen all plugs from the PCB (1). 8. Remove the PCB (1) CAREFULLY. Service Instructions D868 M-TYPE DELTA - 00.0 - 06/2020...
- Page 69 11. Loosen the threaded pin (5). Check if the threaded pin underneath is seated firmly on the flat. If not, tighten the threaded pin so that there is no play. 12. Tighten the threaded pin (5). Service Instructions D868 M-TYPE DELTA - 00.0 - 06/2020...
- Page 70 15. Use your hand to test if the gear (6) is pushed to the 0 position by the spring. 16. Assemble the PCB (1) again. 17. Attach all plugs at the PCB (1). Service Instructions D868 M-TYPE DELTA - 00.0 - 06/2020...
-
Page 71: Adjusting An Even Sewing Foot Stroke
4. Loosen the screw (3). 5. Lower presser foot (2) and walking foot (1) to the level of the throat plate. The handwheel position is 90°. 6. Re-tighten the screw (3). Service Instructions D868 M-TYPE DELTA - 00.0 - 06/2020... -
Page 72: Adjusting The Sewing Foot Pressure And Sewing Foot Lift
1. Switch off the machine. 2. Disassemble the handwheel. 3. Disassemble the toothed belt cover ( p. 23). 4. Disassemble the motor cover ( p. 22). 5. Insert the locking peg (∅ 5 mm) (1). Service Instructions D868 M-TYPE DELTA - 00.0 - 06/2020... - Page 73 8. Turn the curve (7) until the roller (8) is seated in the recess of the curve (7). 9. To align the lever (5) sideways: The roller (8) must be flush with the curve (7). 10. Tighten the screw (6). 11. Remove the locking peg (1). Service Instructions D868 M-TYPE DELTA - 00.0 - 06/2020...
- Page 74 When the pedal is pressed completely back, the sewing feet will be raised after the thread is cut so that the sewing material can be removed. Service Instructions D868 M-TYPE DELTA - 00.0 - 06/2020...
-
Page 75: Adjusting The Needle Thread Tension
• Higher needle thread tension: thick sewing material, high thread strengths Proper setting The loop of the needle thread slides at low tension over the thickest point of the hook, without forming loops or snagging. Service Instructions D868 M-TYPE DELTA - 00.0 - 06/2020... - Page 76 The factory setting of the needle thread regulator (3) is such that the left notch of the needle thread regulator (3) is flush with the right side of the screw (2). Service Instructions D868 M-TYPE DELTA - 00.0 - 06/2020...
-
Page 77: Adjusting The Thread Tensioning Spring
2. Turn the stop (2) to adjust the spring travel. • longer spring travel: Turn the stop (2) counterclockwise • shorter spring travel: Turn the stop (2) clockwise 3. Tighten the screw (3). Service Instructions D868 M-TYPE DELTA - 00.0 - 06/2020... -
Page 78: Adjusting The Spring Tension
• greater spring tension: Turn screw (4) counterclockwise • less spring tension: Turn screw (4) clockwise The scale (2) of the spring balance (1) indicates the thread tension reading. 5. Tighten the knurled nut (3). Service Instructions D868 M-TYPE DELTA - 00.0 - 06/2020... -
Page 79: Winder
4. To fine-tune the setting, put a completely filled bobbin onto the winder. 5. Loosen the screw (1). 6. Press the winder lever (2) up to the thread as far as it will go. 7. Tighten the screw (1). Service Instructions D868 M-TYPE DELTA - 00.0 - 06/2020... -
Page 80: Adjusting The Winder Filling Quantity
To keep the thread from overflowing on the bobbin, observe the following setting tolerances: • Bobbin Ø 32 mm: Ø 31 ± 0.5 mm • Bobbin Ø 28 mm: Ø 27 ± 0.5 mm Service Instructions D868 M-TYPE DELTA - 00.0 - 06/2020... -
Page 81: Adjusting The Bobbin Thread Guide
(2) to the front • To wind on the bobbin thread further to the rear: Turn the bobbin thread guide (2) to the rear 3. Tighten the screw (1). Service Instructions D868 M-TYPE DELTA - 00.0 - 06/2020... -
Page 82: Thread Trimmer (Fa)
Observe the position of the marking (3) while doing so. 3. Tighten the screw (1). 4. Check the eccentric shaft (2) for axial play. 5. Readjust the setting if detecting axial play. Service Instructions D868 M-TYPE DELTA - 00.0 - 06/2020... -
Page 83: Adjusting The Height Of The Thread-Pulling Knife
• To set the knife holder (2) higher: Turn screw (3) clockwise • To set the knife holder (2) lower: Turn screw (3) counterclockwise 4. Tighten the screw (5) on the surface. 5. Tighten the screw (6). Service Instructions D868 M-TYPE DELTA - 00.0 - 06/2020... -
Page 84: Adjusting The Counter Blade Support
Fig. 69: Adjusting the counter blade support (2) ⑧ ④ ④ ⑤ ⑥ ⑦ ⑧ (4) - Thread-pulling knife (7) - Holder (5) - Screw (8) - Counter blade (6) - Screws Service Instructions D868 M-TYPE DELTA - 00.0 - 06/2020... - Page 85 (4) without any pressure being applied. The cutting pressure during cutting is generated by the shape of thread-pulling knife (4) and counter blade (8). 10. Tighten the screws (6). Service Instructions D868 M-TYPE DELTA - 00.0 - 06/2020...
-
Page 86: Adjusting The End Position Of Cutoff Curve And Thread-Pulling Knife
2. Turn the lever (6) counterclockwise until the roller (5) rests against the electromagnet (4). 3. Align the thread-pulling knife (3) so that the edge (2) is flush with the rear edge of the counter blade (1). Service Instructions D868 M-TYPE DELTA - 00.0 - 06/2020... - Page 87 13. Check the play between cutoff curve (8) and roller (10) again. The play is 0.1 mm. 14. Check to ensure that the thread-pulling knife (3) makes contact in none of the end positions during the cutting cycle. Service Instructions D868 M-TYPE DELTA - 00.0 - 06/2020...
-
Page 88: Adjusting The Cutting Pressure
• Problems in cutting the thread To adjust the cutting pressure: 1. Turn the screw (1). • Increase the cutting pressure: Turn screw (1) clockwise • Reduce the cutting pressure: Turn screw (1) counterclockwise Service Instructions D868 M-TYPE DELTA - 00.0 - 06/2020... -
Page 89: Adjusting The Hook Thread Clamp
160 and 180 grams. 4. Tighten the screw (5). 5. Check if the hook thread remains clamped after cutting between the hook thread clamp (2) and the thread-pulling knife (1). Service Instructions D868 M-TYPE DELTA - 00.0 - 06/2020... - Page 90 The holding force of the hook thread clamp is measured by looping the needle thread around the hook thread and pulling it through the needle hole. Next, the force is measured with the help of a spring balance. Service Instructions D868 M-TYPE DELTA - 00.0 - 06/2020...
-
Page 91: Adjusting The Safety Release Clutch
When the safety release clutch is engaged, threaded pins (1) and (2) are parallel to each other (figure above). When the safety release clutch is disengaged, threaded pins (1) and (2) are not parallel to each other. Service Instructions D868 M-TYPE DELTA - 00.0 - 06/2020... - Page 92 4. Continue to turn the handwheel until the safety release clutch engages with an audible click. Information When the machine is switched on, you can also use the jog dial instead of the handwheel. Service Instructions D868 M-TYPE DELTA - 00.0 - 06/2020...
-
Page 93: Adjusting The Torque
3. Using the screw driver, turn the washer on the slot (1) so that 8 Nm is reached for the torque. • Increase force: turn in the + direction • Decrease force: turn in the - direction 4. Tighten the screw (3). Service Instructions D868 M-TYPE DELTA - 00.0 - 06/2020... -
Page 94: Toothed Belt
(2) - Screw 6. Loosen the screw (2) on the tensioning roller (1). The toothed belt tension is slack. 7. Remove the tensioning roller (1). Make sure not to lose the washer. Service Instructions D868 M-TYPE DELTA - 00.0 - 06/2020... -
Page 95: Changing The Lower Toothed Belt
2. Disassemble the front cover ( p. 20). 3. Disassemble the arm cover ( p. 19). 4. Disassemble handwheel and toothed belt cover ( p. 23). 5. Disassemble the motor cover ( p. 22). Service Instructions D868 M-TYPE DELTA - 00.0 - 06/2020... - Page 96 7. Pull the cable (9) out of the terminals. 8. Loosen the screws (1). 9. Remove the holder (8) with the PCB. Important Make sure not to lose the nut (6). Service Instructions D868 M-TYPE DELTA - 00.0 - 06/2020...
- Page 97 18. Loosen the screw (14) on the tensioning roller (13). The toothed belt tension is slack. 19. Remove the tensioning roller (13). Make sure not to lose the washer. 20. Remove the toothed belt (11). Service Instructions D868 M-TYPE DELTA - 00.0 - 06/2020...
- Page 98 24. Screw the toothed belt (17) onto the gear wheel (18) by turning the gear wheel (18). 25. Continue to turn the gear wheel (18) until the toothed belt (17) rests completely on the gear wheel. Service Instructions D868 M-TYPE DELTA - 00.0 - 06/2020...
- Page 99 32. Fit the tensioning roller (10). 33. Use a wrench to tension the tensioning roller (10). It should not be possible to twist the toothed belt more than 45°. 34. Tighten the screw (16). Service Instructions D868 M-TYPE DELTA - 00.0 - 06/2020...
- Page 100 • Cable thread trimmer (5), slot X12 • CAN cable (7), slot X1 • optional: Pull off the guard junction (slot X5) 39. Clamp the cable (9) into the terminals. 40. Assemble the covers. Service Instructions D868 M-TYPE DELTA - 00.0 - 06/2020...
-
Page 101: Sewing Motor
Fig. 86: Overview of the components ⑥ ① ⑤ ④ ② ③ (1) - Support plate (4) - Toothed belt (2) - Motor (5) - Handwheel (3) - Toothed belt wheel (6) - Tensioning roller Service Instructions D868 M-TYPE DELTA - 00.0 - 06/2020... -
Page 102: Disassembling The Sewing Motor
Fig. 88: Disassembling the sewing motor (2) ③ ⑤ ④ (3) - Tensioning roller (5) - Screw (4) - Screw 8. Loosen the screw (5). The holder will not be removed. Service Instructions D868 M-TYPE DELTA - 00.0 - 06/2020... - Page 103 Fig. 90: Disassembling the sewing motor (4) ⑦ ⑧ (7) - Screw (8) - Support plate 12. Loosen the screws (7) on the support plate (8). 13. Remove the support plate (8) together with the motor. Service Instructions D868 M-TYPE DELTA - 00.0 - 06/2020...
- Page 104 16. Pull off the toothed belt wheel (11). 17. Loosen the screws (13) on the support plate (8). 18. Pull off the motor (9) and replace it with a new one ( p. 103). Service Instructions D868 M-TYPE DELTA - 00.0 - 06/2020...
-
Page 105: Assembling The Sewing Motor
2. Fit the toothed belt wheel (3) Fig. 94: Assembling the sewing motor (2) ⑥ ④ ③ ⑤ (3) - Toothed belt wheel (5) - Cable (4) - Motor (6) - Threaded pin Service Instructions D868 M-TYPE DELTA - 00.0 - 06/2020... - Page 106 5. Attach the support plate (1) along with the motor (4) using the two screws (7) on the left. Fig. 96: Assembling the sewing motor (4) ⑧ (8) - Toothed belt 6. Place the toothed belt (8). Service Instructions D868 M-TYPE DELTA - 00.0 - 06/2020...
- Page 107 11. Fit the handwheel (11) - make sure the centering pin is seated firmly, as the hall sensor will otherwise not be able to complete referencing properly ( p. 23). 12. Tighten screws (12) on the handwheel (11). Service Instructions D868 M-TYPE DELTA - 00.0 - 06/2020...
- Page 108 Sewing motor Service Instructions D868 M-TYPE DELTA - 00.0 - 06/2020...
-
Page 109: Programming
This opens the Login interface. Fig. 100: Logging in as a technician (2) 3. Enter the name technician in the Username field. 4. Enter the code 25483 in the Password field. Service Instructions D868 M-TYPE DELTA - 00.0 - 06/2020... -
Page 110: User Login
This opens the Login interface. Fig. 102: User login (2) There are three ways to log in. The three options - including the necessary settings in the software - are described below. Service Instructions D868 M-TYPE DELTA - 00.0 - 06/2020... -
Page 111: Logging In With Username And Password
To log in with a USB key: 1. Plug the assigned USB key into the control panel. If the USB key has been assigned correctly, the user will be logged Service Instructions D868 M-TYPE DELTA - 00.0 - 06/2020... -
Page 112: Logging In With Nfc Chip (Optional)
1. Hold the assigned NFC chip (1) up to the right side of the arm cover (2). If the NFC chip has been assigned correctly, the user will be logged Service Instructions D868 M-TYPE DELTA - 00.0 - 06/2020... -
Page 113: Defining General Settings (Technician Access)
This opens the navigation interface. Fig. 104: Defining general settings (1) ① (1) - Settings 2. Press Settings (1). This opens the Settings interface. Fig. 105: Settings Service Instructions D868 M-TYPE DELTA - 00.0 - 06/2020... - Page 114 Machine configuration p. 148 Program defaults p. 150 User Configuration p. 160 Manual Data Transfer p. 165 Service p. 179 Information p. 181 Software update Service Instructions D868 M-TYPE DELTA - 00.0 - 06/2020...
-
Page 115: Setting The Machine Configuration
p. 126 Sewing foot stroke p. 128 Stitch length p. 129 RFW/SSD p. 130 Holding force p. 131 Pedal p. 132 Needle cooling p. 132 Puller Service Instructions D868 M-TYPE DELTA - 00.0 - 06/2020... - Page 116 p. 140 Manual bartack p. 140 Jog-Dial p. 140 Reference p. 141 Scanner p. 141 Interface p. 142 Input/Output Configuration p. 145 Additional I/O Configuration Service Instructions D868 M-TYPE DELTA - 00.0 - 06/2020...
-
Page 117: Setting The Thread Trimmer Parameters
Needle thread tension during thread cutting • Value range t needle thread tension 000 – 200 [ms] Thread trimmer Delay, showing how long it takes until the standard needle thread tension is used again. Service Instructions D868 M-TYPE DELTA - 00.0 - 06/2020... - Page 118 (visually) as small as possible. • Value range 00 - 99 Stitch length • Value range -12.0 - 12.0 recommended value range: 0.1 – 1.5 [mm] Service Instructions D868 M-TYPE DELTA - 00.0 - 06/2020...
- Page 119 • Value range 000 - 359 [°] Position of the needle when the change of stitch length is deactivated. • Value range 000-359 [°] • Value range Thread trimming backward stitch On/Off Service Instructions D868 M-TYPE DELTA - 00.0 - 06/2020...
- Page 120 • Value range 000 – 1000 [ms] Duty cycle t2 Duty cycle in time period t2. • Value range 000 – 100 [%] Boost • Value range On/Off Service Instructions D868 M-TYPE DELTA - 00.0 - 06/2020...
-
Page 121: Setting The Needle Thread Clamp Parameters
Sewing foot lift angle • Value range 000-359 • Value range 000-359 Height • Value range 01.0 – 12.0 [mm] PrePressure • Value range 01-20 PreStroke • Value range 0.0-9.0 [mm] Service Instructions D868 M-TYPE DELTA - 00.0 - 06/2020... - Page 122 • Value range 000 – 1000 [ms] Duty cycle t2 Duty cycle in time period t2. • Value range 000 – 1000 [%] Boost • Value range On/Off Service Instructions D868 M-TYPE DELTA - 00.0 - 06/2020...
- Page 123 Neat Seam Beginning is activated • Value range 000 - 359 Exhaust Off only visible if Neat Seam Beginning is activated • Value range 00000 – 99999 [ms] Service Instructions D868 M-TYPE DELTA - 00.0 - 06/2020...
-
Page 124: Setting The Sewing Speed Parameters
Reduction of the speed to 3000 (rpm) in 150-9999 [rpm] combination with an activated input signal • Value range Speed limitation DB2000 Reduction of the speed to 2000 (rpm) in 150-9999 [rpm] combination with an activated input signal Service Instructions D868 M-TYPE DELTA - 00.0 - 06/2020... -
Page 125: Setting The Stop Positions Parameters
01.0 – 20.0 [mm] • Value range with KFA 01.0 – 18.0 [mm] • Value range Step motor speed Speed at which the sewing feet will be 01 - 60 lifted. Service Instructions D868 M-TYPE DELTA - 00.0 - 06/2020... -
Page 126: Setting The Needle Thread Tension Parameters
Mode 2 The needle thread tension is lifted after thread cutting Mode 3 The needle thread tension is lifted as the sewing feet are lifted during sewing and after thread cutting Service Instructions D868 M-TYPE DELTA - 00.0 - 06/2020... - Page 127 Pre-tension is activated With this function, the needle thread tension is activated when sewing start is done with jog dial or via single stitch button. • Value range On/Off Service Instructions D868 M-TYPE DELTA - 00.0 - 06/2020...
-
Page 128: Setting The Sewing Foot Stroke Parameters
Automatic Speed level Speed up to which the second sewing foot stroke is automatically activated. • Value range 0000 - 4000 [rpm], depending on subclass Service Instructions D868 M-TYPE DELTA - 00.0 - 06/2020... - Page 129 • Value range 00.0 - 09.0 Max. Sewing foot stroke Sewing foot stroke at which the reduced speed is reached. • Value range 00.0 - 09.0 Service Instructions D868 M-TYPE DELTA - 00.0 - 06/2020...
-
Page 130: Setting The Stitch Length Parameters
0050 - 4000 [rpm], depending on subclass Stitch length The speed is limited during sewing as from the set stitch length value. • Value range 1.0 - 12.0 [mm], depending on subclass Service Instructions D868 M-TYPE DELTA - 00.0 - 06/2020... -
Page 131: Setting The Rfw/Ssd Parameters
Bobbin Rotation Monitor or remaining thread monitor, the machine will indicate the error message and stop. You must confirm this error before you can resume sewing. • Value range Loop Control On/Off Service Instructions D868 M-TYPE DELTA - 00.0 - 06/2020... -
Page 132: Setting The Holding Force Parameters
Holding current of the motor parameter is activated • Value range 00 - 50 only visible if the Response Response time for the continuous current parameter is activated • Value range 000 - 100 Service Instructions D868 M-TYPE DELTA - 00.0 - 06/2020... -
Page 133: Setting The Pedal Parameters
000 – 255 [ms] • Value range t Position -2 Debouncing of position -2 000 – 255 [ms] • Value range t Position 0 Debouncing of position 0 000 – 255 [ms] Service Instructions D868 M-TYPE DELTA - 00.0 - 06/2020... -
Page 134: Setting The Needle Cooling Parameters
• Value range Raise by On/Off quick stroke adjustment • Value range Delay Lowering of the roller after seam 000.0 – 999.9 [mm] beginning; depends on stitch length and application. Service Instructions D868 M-TYPE DELTA - 00.0 - 06/2020... - Page 135 0 - 359 [°] • Value range Pressure Set the puller pressure Yes/No/ No Pressure with HP foot stroke) • Value range Switch off On/Off • Value range Always on On/Off Service Instructions D868 M-TYPE DELTA - 00.0 - 06/2020...
- Page 136 Diameter, roller • Value range 0000 - 9999 [mm] Direction of rotation, roller 0 (X) = right ) = left Closed Loop 0 (X) = non-regulated ) = regulated Service Instructions D868 M-TYPE DELTA - 00.0 - 06/2020...
- Page 137 Diameter, roller • Value range 0000 - 9999 [mm] Direction of rotation, roller 0 (X) = right ) = left Closed Loop 0 (X) = non-regulated ) = regulated Service Instructions D868 M-TYPE DELTA - 00.0 - 06/2020...
-
Page 138: Setting The Edge Guide Parameters
• Value range Motor driven On/Off • Value range Speed Travel speed of the edge guide 0500 - 60000 [Hz] Service Instructions D868 M-TYPE DELTA - 00.0 - 06/2020... -
Page 139: Setting The Material Thickness Detection Parameters
• Value range To a certain extent, the machine can On/Off compensate itself for the influence of thick material. Service Instructions D868 M-TYPE DELTA - 00.0 - 06/2020... -
Page 140: Setting The Correction Speed Effect Parameters
(Dark) or complete (Bright). • Value range Automatic On/Off On: A seam is started with the pedal and then completed automatically at a defined sewing speed until the end of the material is detected Service Instructions D868 M-TYPE DELTA - 00.0 - 06/2020... -
Page 141: Setting The Seam Segment Mode Parameters
(On). • Value range Stitch length Manual stitch length adjustment with active On/Off operation lock • Value range All Inputs All inputs active during machine blockage. On/Off Service Instructions D868 M-TYPE DELTA - 00.0 - 06/2020... -
Page 142: Setting The Manual Bartack Parameters
Depending on the setting, referencing can be performed automatically or by pressing the pedal back all the way. Icon Menu items Value range • Value range User start referencing manual On/Off Service Instructions D868 M-TYPE DELTA - 00.0 - 06/2020... -
Page 143: Setting The Scanner Parameters
It is possible to define additional settings for the interface. The possibilities are explained in more detail in the table. Icon Menu items Value range • Value range Mode Off/Scanner • Value range Baudrate Transmission rate of the scanner 9600 - 250000 Service Instructions D868 M-TYPE DELTA - 00.0 - 06/2020... -
Page 144: Setting The Input/Output Configuration Parameters
• Program selection Bit B5 • Program selection Bit B6 • Program selection Bit B7 • Program selection Bit B8 • Program selection Bit B9 • Short stitch • 2 edge guide position (height) Service Instructions D868 M-TYPE DELTA - 00.0 - 06/2020... - Page 145 • Bartack suppression LED • 2 stitch length LED • 2 needle thread tension LED • 2 sewing foot stroke LED • Center guide LED • Raise/lower center guide • Motor running Service Instructions D868 M-TYPE DELTA - 00.0 - 06/2020...
- Page 146 • Function module output 4 • Function module output 5 • Function module output 6 • Function module output 7 • Function module output 8 • 2 edge Guide Height • Clean SSD Service Instructions D868 M-TYPE DELTA - 00.0 - 06/2020...
-
Page 147: Setting The Additional I/O Configuration Parameters
• Program selection Bit B0 • Program selection Bit B1 • Program selection Bit B2 • Program selection Bit B3 • Program selection Bit B4 • Program selection Bit B5 • Program selection Bit B6 Service Instructions D868 M-TYPE DELTA - 00.0 - 06/2020... - Page 148 Each output can be assigned one of the following modes. • Sewing foot lift • Needle thread tension • Thread trimmer • Needle cooling • NSB knife • NSB block • Pos. 1 • Pos. 2 Service Instructions D868 M-TYPE DELTA - 00.0 - 06/2020...
- Page 149 • Manual bartack • Stitch done • Motor blockage (operation lock) • Short stitch • Edge guide • Machine arm lighting • Function module output 1 • Function module output 2 Service Instructions D868 M-TYPE DELTA - 00.0 - 06/2020...
-
Page 150: Setting Program Defaults
• Value range Sewing foot stroke 0.5 - 9.0 [mm] • Value range Bartack at seam begin On/Off • Value range Bartack at seam end On/Off • Value range Thread trimmer On/Off Service Instructions D868 M-TYPE DELTA - 00.0 - 06/2020... - Page 151 Segment End = ending of the program with all configurations that are set for this seam section • Value range Thread trimmer On/Off • Value range Pedal Abort On/Off Service Instructions D868 M-TYPE DELTA - 00.0 - 06/2020...
-
Page 152: Setting The User Configuration
Screen configuration Operating Instructions Manual mode Main screen configuration Operating Instructions Manual mode Status bar configuration Role Main Screen Configuration p. 158 Role Status Bar Configuration p. 159 Service Instructions D868 M-TYPE DELTA - 00.0 - 06/2020... -
Page 153: User Management
If, for instance, a role is derived from a Technician (default role), the new role will initially have all of the same authorizations as the original role. You will afterwards be able to adjust the authorizations for the new role using the drop-down menu. Service Instructions D868 M-TYPE DELTA - 00.0 - 06/2020... - Page 154 Access Activate/deactivate Edit the sewing parameters Edit Activate/deactivate access to the Switch to automatic mode function Access Activate/deactivate access to the Parameter View function Access Activate/deactivate Edit the manual bartack Edit Service Instructions D868 M-TYPE DELTA - 00.0 - 06/2020...
- Page 155 Activate/deactivate Edit the Switch Thread Tension function Edit Activate/deactivate Edit the sewing foot pressure Edit Activate/deactivate Edit the sewing foot stroke Edit Activate/deactivate Edit the Switch Foot Stroke Alternation function Edit Activate/deactivate Edit the Bartack Toggle Edit Service Instructions D868 M-TYPE DELTA - 00.0 - 06/2020...
- Page 156 Activate/deactivate Edit the program Edit Activate/deactivate Edit the stitch length correction factor Edit Activate/deactivate Edit the needle thread tension correction factor Edit Sewing Activate/deactivate Edit the Enable multi functional tiles function Edit User Management Service Instructions D868 M-TYPE DELTA - 00.0 - 06/2020...
- Page 157 Enter the last name using the touch screen keypad Authorization Login with username and password to enter the username and the password (optional). login with NFC tag login with USB key Login without authentication at startup Roles Service Instructions D868 M-TYPE DELTA - 00.0 - 06/2020...
-
Page 158: Smart Keys Configuration
2. Select from the list the function you wish to assign to the push button ( p. 157). 3. Select if the function is supposed to be Hold to run or Latching. Service Instructions D868 M-TYPE DELTA - 00.0 - 06/2020... - Page 159 • Program selection Bit B9 • Short stitch • 2 edge guide position (height) • 2 edge guide position (gap and height) • DB3000 • DB2000 • Function module 1 • Function module 2 Service Instructions D868 M-TYPE DELTA - 00.0 - 06/2020...
-
Page 160: Role Main Screen Configuration
3. Pick the desired tile from the bar (2) and add it to the grid. 4. To save the settings, press the button. The display switches to: Service Instructions D868 M-TYPE DELTA - 00.0 - 06/2020... -
Page 161: Role Status Bar Configuration
3. Pick the desired tile from the bar (2) and add it to the grid. 4. To save the settings, press the button. The display switches to: Service Instructions D868 M-TYPE DELTA - 00.0 - 06/2020... -
Page 162: Using Manual Data Transfer
– and a USB key. Various options are available for the data transfer, which are explained in the subchapters. 17.7.1 Exporting data To export data: 1. Connect the USB key at the control panel. 2. Press the Export button. Service Instructions D868 M-TYPE DELTA - 00.0 - 06/2020... - Page 163 System Image Machine configuration: Only Parameter • Default Program • Machine Data • Motor Data • Operation Library • Sewing Global • Sewing Manual • Global Control User Data • User Settings Service Instructions D868 M-TYPE DELTA - 00.0 - 06/2020...
- Page 164 • 101 ORNAMENTAL SEAM • 110 ORNAMENTAL SEAM Own PDFs and videos Customer Multimedia Fig. 115: Exporting data (3) 6. Confirm selection. Fig. 116: Exporting data (4) The data is exported. Service Instructions D868 M-TYPE DELTA - 00.0 - 06/2020...
-
Page 165: Importing Data
1. Connect the USB key at the control panel. 2. Press the Import button. Fig. 117: Importing data (1) 3. Select the import source. E.g.: Right USB port. Fig. 118: Importing data (2) 4. Select the desired folder. Service Instructions D868 M-TYPE DELTA - 00.0 - 06/2020... - Page 166 • CAUTION: The format of the videos must be webm plus VP8 coding. For instructions on how to convert videos, refer to the Appendix ( p. 224) Fig. 119: Importing data (3) 6. Confirm selection. Service Instructions D868 M-TYPE DELTA - 00.0 - 06/2020...
-
Page 167: Service
p. 166 Calibration p. 170 Settings p. 170 Multitest p. 174 Maintenance Management p. 176 QONDAC p. 177 Reset p. 178 Network p. 178 Logging Service Instructions D868 M-TYPE DELTA - 00.0 - 06/2020... -
Page 168: Calibration
p. 136 p. 169 Edge Guide Height only visible if the 2-axis edge guide has been activated p. 136 p. 169 Needle thread tension Service Instructions D868 M-TYPE DELTA - 00.0 - 06/2020... - Page 169 Test run must be 60 mm. 5. If the test run is not the correct length, the values must be adjusted accordingly: Fig. 121: Calibration of the Feed calibration Service Instructions D868 M-TYPE DELTA - 00.0 - 06/2020...
- Page 170 4. Fold the edge guide down. 5. Measure the distance between the needle and the edge guide. 6. Enter the value with the -/+ buttons. 7. Confirm the entry with Next. The calibration is complete. Service Instructions D868 M-TYPE DELTA - 00.0 - 06/2020...
- Page 171 3. Call up the Service > Calibration > Needle thread tension menu. The thread tension is activated, and a percentage value is displayed (e.g. 26%): Fig. 122: Calibration of the needle thread tension Service Instructions D868 M-TYPE DELTA - 00.0 - 06/2020...
-
Page 172: Settings
Parameter list of the machine. Icon Menu items Value range p. 171 Test Output p. 171 Test Input p. 172 Test Sewing Motor Service Instructions D868 M-TYPE DELTA - 00.0 - 06/2020... - Page 173 To check the inputs: 1. Press the input. The display switches automatically to the corresponding input in the pick list on the control panel. The status (on/off) is highlighted with a color. Service Instructions D868 M-TYPE DELTA - 00.0 - 06/2020...
- Page 174 1. Press the pedal. The corresponding positions or steps are displayed in the menu. Depending on the version (analog or digital), the values are displayed directly or as a status indicator (0/1). Service Instructions D868 M-TYPE DELTA - 00.0 - 06/2020...
- Page 175 Thickness Sensor. 2. Lift the sewing feet. 3. Place the sewing material under the sewing feet. 4. Lift the sewing feet. The signal quality (1) must display the value 1. Service Instructions D868 M-TYPE DELTA - 00.0 - 06/2020...
-
Page 176: Maintenance Management
Interval in hours of operation Task that needs to be performed Additional Data Reference to the PDF instructions List of spare parts that can be ordered and are required for the maintenance measure Service Instructions D868 M-TYPE DELTA - 00.0 - 06/2020... - Page 177 6. Add maintenance measures using the button. 7. To add a note, press the icon Edit (3) in the Notes section and enter the desired text using the touch screen keypad. Service Instructions D868 M-TYPE DELTA - 00.0 - 06/2020...
-
Page 178: Qondac
Enter the client identification num- Client Identification ber using the touch screen keypad Information For detailed information on how to network machines, refer to the documentation of the QONDAC. Service Instructions D868 M-TYPE DELTA - 00.0 - 06/2020... -
Page 179: Reset
All created programs are erased. Reset calibration All calibration values are reset to the factory settings. Reset all All parameters, programs, and calibration values are reset to the factory settings. Remove User Tutorials Service Instructions D868 M-TYPE DELTA - 00.0 - 06/2020... -
Page 180: Network
Logging is used to store all messages relating to the activities of the machine. Fig. 126: Logging ① ② ③ ④ ⑤ ⑥ (1) - Control panel (4) - Export (2) - Levels (5) - Reset (3) - Data (6) - Magnifier Service Instructions D868 M-TYPE DELTA - 00.0 - 06/2020... -
Page 181: Information
Setting date and time Date and time Copyright Software version Application Software version of the application Machine Software version of the connected machine List of all active software licenses Software licenses Service Instructions D868 M-TYPE DELTA - 00.0 - 06/2020... - Page 182 Type of the connected control Control panel panel Machine Class selected class Machine subclass selected subclass Serial number Serial number of the machine Production date Production date of the machine Service Instructions D868 M-TYPE DELTA - 00.0 - 06/2020...
-
Page 183: Performing A Software Update
5. Select the update file. The software update is performed. 6. Remove the USB key when the software update is complete. The machine restarts and is ready for sewing. Service Instructions D868 M-TYPE DELTA - 00.0 - 06/2020... - Page 184 Programming Service Instructions D868 M-TYPE DELTA - 00.0 - 06/2020...
-
Page 185: Maintenance
Servicing the pneumatic system (optional) Adjusting the operating pressure Draining the water-oil mixture Cleaning the filter element Servicing specific components Cleaning the thread clamp Checking the toothed belt Service Instructions D868 M-TYPE DELTA - 00.0 - 06/2020... -
Page 186: Cleaning
Sewing dust and thread residues can impair the operation of the machine. Clean the machine as described. NOTICE Property damage from solvent-based cleaners! Solvent-based cleaners will damage paintwork. Use only solvent-free substances for cleaning. Service Instructions D868 M-TYPE DELTA - 00.0 - 06/2020... - Page 187 If you wish to clean the machine with cleaning agents, do not use just any cleaner. To prevent damage to the surfaces, use the cleaner MONOCLEAN X400. Follow the instructions on how to use this cleaning agent to prevent damage to the machine. Service Instructions D868 M-TYPE DELTA - 00.0 - 06/2020...
-
Page 188: Lubricating
• Flash point: 150 °C You can order the lubricating oil from our sales offices using the following part numbers: Container Part no. 250 ml 9047 000011 9047 000012 9047 000013 9047 000014 Service Instructions D868 M-TYPE DELTA - 00.0 - 06/2020... -
Page 189: Lubricating The Machine Head
3. If the oil level is below the minimum level marking (3): Pour oil through the refill opening (1) but no higher than the maximum level marking (2). Service Instructions D868 M-TYPE DELTA - 00.0 - 06/2020... -
Page 190: Lubricating The Hook
• release less oil: Turn screw (1) clockwise Important The released amount of oil does not change until the operating time has run a few minutes. Sew for several minutes before you check the setting again. Service Instructions D868 M-TYPE DELTA - 00.0 - 06/2020... -
Page 191: Servicing The Pneumatic System (Optional)
2. Turn the pressure regulator until the pressure gage (2) indicates the proper setting: • Increase pressure = turn clockwise • Reduce pressure = turn counterclockwise 3. Push the pressure regulator (1) down. Service Instructions D868 M-TYPE DELTA - 00.0 - 06/2020... -
Page 192: Draining The Water-Oil Mixture
3. Loosen the drain screw (3) completely. 4. Allow the water-oil mixture to drain into the vessel. 5. Tighten the drain screw (3). 6. Connect the machine to the compressed air supply. Service Instructions D868 M-TYPE DELTA - 00.0 - 06/2020... -
Page 193: Cleaning The Filter Element
6. Wash out the filter tray using benzine. 7. Tighten the filter element (1). 8. Tighten the collection tray (2). 9. Tighten the drain screw (3). 10. Connect the machine to the compressed air supply. Service Instructions D868 M-TYPE DELTA - 00.0 - 06/2020... -
Page 194: Servicing Specific Components
4. Check the thread clamp (3) for sharp edges. If the thread clamp (3) has sharp edges: 5. Polish or change the thread clamp (3). 6. Assemble and align the thread clamp ( p. 193). Service Instructions D868 M-TYPE DELTA - 00.0 - 06/2020... -
Page 195: Parts List
(3) to thread guide (6). 6. Tighten the threaded pin (5). 18.5 Parts list A parts list can be ordered from Dürkopp Adler. Or visit our website for further information at: www.duerkopp-adler.com Service Instructions D868 M-TYPE DELTA - 00.0 - 06/2020... - Page 196 Maintenance Service Instructions D868 M-TYPE DELTA - 00.0 - 06/2020...
-
Page 197: Decommissioning
5. Cover the control panel to protect it from soiling. 6. Cover the control to protect it from soiling. 7. Cover the entire machine if possible to protect it from contamination and damage. Service Instructions D868 M-TYPE DELTA - 00.0 - 06/2020... - Page 198 Decommissioning Service Instructions D868 M-TYPE DELTA - 00.0 - 06/2020...
-
Page 199: Disposal
When disposing of the machine, be aware that it consists of a range of different materials (steel, plastic, electronic components, etc.). Follow the national regulations when disposing these materials. Service Instructions D868 M-TYPE DELTA - 00.0 - 06/2020... - Page 200 Disposal Service Instructions D868 M-TYPE DELTA - 00.0 - 06/2020...
-
Page 201: Troubleshooting
• Replace encoder • Replace sewing motor • Replace control 1002 Error Sewing motor insulation error • Check motor phase and PE for low-impedance connection • Replace encoder • Replace sewing motor Service Instructions D868 M-TYPE DELTA - 00.0 - 06/2020... - Page 202 • Replace control • Replace motor • Replace encoder 1061 Error Sewing motor overload / • Check selection of class overvoltage /overcurrent • Replace control • Replace motor • Replace encoder Service Instructions D868 M-TYPE DELTA - 00.0 - 06/2020...
- Page 203 • Check selection of class 2172 Error Stepper motor card X30 • Check selection of class motor overload / overvoltage • Replace control /overcurrent (Stitch length) • Replace encoder • Replace stepper motor Service Instructions D868 M-TYPE DELTA - 00.0 - 06/2020...
- Page 204 PE for low-impedance connection • Replace encoder • Replace sewing motor 2187 Error Stepper motor card X30 • Perform a software update transport interval • Check selection of class failure(Stitch length) Service Instructions D868 M-TYPE DELTA - 00.0 - 06/2020...
- Page 205 Stepper motor card X40 not • Replace control Enabled (Sewing foot lift) 2277 Error Stepper motor card X40 I²t • Check for stiff movement (Sewing foot lift) • Replace encoder • Replace motor Service Instructions D868 M-TYPE DELTA - 00.0 - 06/2020...
- Page 206 • Check for stiff movement stepper motor blockage 2321 Error Stepper motor card X50 • Connect encoder cable to encoder plug (Sub-D, 9-pin) the control, use the not connected correct interface Service Instructions D868 M-TYPE DELTA - 00.0 - 06/2020...
- Page 207 • Replace encoder Incorrect stepper motor • Check if plugs have been direction of rotation (Sewing mixed up foot stroke) • Check the wiring in the machine distributor and change it if necessary Service Instructions D868 M-TYPE DELTA - 00.0 - 06/2020...
- Page 208 • Perform a software update parameter init error • Check selection of class 2471 Error Stepper motor card X60 • Perform a software update Watchdog (Edge guide) • Check selection of class Service Instructions D868 M-TYPE DELTA - 00.0 - 06/2020...
- Page 209 Error Stepper motor card X60 • Replace control overcurrent (Edge guide) 2484 Error Stepper motor card X60 • Perform a software update parameter init (Edge guide) • Check selection of class Service Instructions D868 M-TYPE DELTA - 00.0 - 06/2020...
- Page 210 • Replace control Sewing motor encoder not connected(upper Puller) 2574 Error Stepper motor card X70 • Perform a software update Sewing motor encoder not • Check selection of class init (upper Puller) Service Instructions D868 M-TYPE DELTA - 00.0 - 06/2020...
- Page 211 Stepper motor card X70 • Check for stiff movement Reference drive failure • Replace encoder (upper Puller) • Replace motor 2601 Error Stepper motor X80 reference • Check reference sensor run timeout (bottom puller) Service Instructions D868 M-TYPE DELTA - 00.0 - 06/2020...
- Page 212 Stepper motor card X80 I²t • Check for stiff movement (bottom puller) • Replace encoder • Replace motor 2678 Error Stepper motor card X80 • Replace encoder Encoder failure (bottom puller) Service Instructions D868 M-TYPE DELTA - 00.0 - 06/2020...
- Page 213 3021 Error U24 V short circuit • Disconnect magnet plug; replace control if error is not corrected: Replace control 3022 Error U24 V (I²T) overload • One or several magnets defective Service Instructions D868 M-TYPE DELTA - 00.0 - 06/2020...
- Page 214 • Perform a software update process 3383 Information Failure in with the motor • Check motor referencing process • Perform a software update 4201 Warning Failure SD-Card • Insert SD card • Replace control Service Instructions D868 M-TYPE DELTA - 00.0 - 06/2020...
- Page 215 • Data transfer from control panel to control 4931 Information Checksum error of the • Data transfer from control control panel to control 6070 Error Internal CAN • Perform a software update • Replace control Service Instructions D868 M-TYPE DELTA - 00.0 - 06/2020...
- Page 216 (emergency operating features only) 7270 Information External CAN • Check connection cables • Perform a software update • Replace CAN slaves 9300 Error CAN cable not connected • Check CAN cable Service Instructions D868 M-TYPE DELTA - 00.0 - 06/2020...
- Page 217 • Perform a software update • Replacing the PCB 9910 Warning Sewing stop • Check tilt sensor on machine • Check 24V • Replace control 9911 Warning Power down • The control is switched off Service Instructions D868 M-TYPE DELTA - 00.0 - 06/2020...
- Page 218 Not enough thread available • Please insert a full bobbin 9930 Warning Empty bobbin • Please insert a full bobbin 9931 Information Bobbin Wind mode • Press pedal backwards exit bobbin wind mode Service Instructions D868 M-TYPE DELTA - 00.0 - 06/2020...
- Page 219 • Close the hook cover 9936 Warning Left hook cover open • Close the hook cover 9937 Warning Needle area cover open • Close needle area cover 9938 Warning ENG ON 4 • - Service Instructions D868 M-TYPE DELTA - 00.0 - 06/2020...
-
Page 220: Errors In Sewing Process
Check the assembly of the reel assembled incorrectly stand Thread tensions are too Check thread tensions tight Throat plate, hook or Have parts reworked by qualified spread have been specialists damaged by the needle Service Instructions D868 M-TYPE DELTA - 00.0 - 06/2020... - Page 221 Needle thread and hook Check threading path thread have not been threaded correctly Needle breakage Needle thickness is Use recommended needle unsuitable for the sewing thickness material or the thread Service Instructions D868 M-TYPE DELTA - 00.0 - 06/2020...
- Page 222 Troubleshooting Service Instructions D868 M-TYPE DELTA - 00.0 - 06/2020...
-
Page 223: Technical Data
(Compressed air only required in combination with optional additional equipment) Length [mm] Width [mm] Height [mm] Weight [kg] 22.2 Requirements for fault-free operation Compressed air quality must conform to ISO 8573-1: 2010 [7:4:4]. Service Instructions D868 M-TYPE DELTA - 00.0 - 06/2020... - Page 224 Technical data Service Instructions D868 M-TYPE DELTA - 00.0 - 06/2020...
-
Page 225: Appendix
Appendix 23 Appendix 23.1 Barcode examples Fig. 136: Barcode examples Service Instructions D868 M-TYPE DELTA - 00.0 - 06/2020... -
Page 226: Converting Videos For Playback On The Control Panel
Fig. 137: Converting videos (1) To convert videos for playback on the control panel: 1. Download the HandBrake program from the website handbrake.fr and install it on your computer. Fig. 138: Converting videos (2) Service Instructions D868 M-TYPE DELTA - 00.0 - 06/2020... - Page 227 Fig. 140: Converting videos (4) 6. Select the Dürkopp Adler preset file DA_WebM_Handbrake_Preset.json to import it. You can obtain the preset file from Dürkopp Adler's website or from customer service. 7. Click on Open. Service Instructions D868 M-TYPE DELTA - 00.0 - 06/2020...
- Page 228 9. Enter the name of the video and add the file extension .webm. 10. Click on Start Encode to start encoding. Fig. 142: Converting videos (6) The conversion process is indicated by a progress bar. Service Instructions D868 M-TYPE DELTA - 00.0 - 06/2020...
-
Page 229: Basic Settings Of The Machine
Required tools: • Locking peg (included in the scope of delivery, part number 0867 104950) • Spring balance 600 gr. (part number 0APP 001503) Service Instructions D868 M-TYPE DELTA - 00.0 - 06/2020... -
Page 230: Wiring Diagram
Appendix 23.4 Wiring diagram Fig. 143: Wiring diagram (1) Service Instructions D868 M-TYPE DELTA - 00.0 - 06/2020... - Page 231 Appendix Fig. 144: Wiring diagram (2) Service Instructions D868 M-TYPE DELTA - 00.0 - 06/2020...
- Page 232 Appendix Fig. 145: Wiring diagram (3) Service Instructions D868 M-TYPE DELTA - 00.0 - 06/2020...
- Page 233 Appendix Fig. 146: Wiring diagram (4) Service Instructions D868 M-TYPE DELTA - 00.0 - 06/2020...
- Page 234 Appendix Fig. 147: Wiring diagram (5) Service Instructions D868 M-TYPE DELTA - 00.0 - 06/2020...
- Page 235 Appendix Fig. 148: Wiring diagram (6) Service Instructions D868 M-TYPE DELTA - 00.0 - 06/2020...
- Page 236 Appendix Fig. 149: Wiring diagram (7) " Service Instructions D868 M-TYPE DELTA - 00.0 - 06/2020...
- Page 237 Appendix Fig. 150: Wiring diagram (8) Service Instructions D868 M-TYPE DELTA - 00.0 - 06/2020...
- Page 238 Appendix Fig. 151: Wiring diagram (9) Service Instructions D868 M-TYPE DELTA - 00.0 - 06/2020...
- Page 239 Appendix Fig. 152: Wiring diagram (10) Service Instructions D868 M-TYPE DELTA - 00.0 - 06/2020...
- Page 240 Appendix Fig. 153: Wiring diagram (11) Service Instructions D868 M-TYPE DELTA - 00.0 - 06/2020...
- Page 241 Appendix Fig. 154: Wiring diagram (12) Service Instructions D868 M-TYPE DELTA - 00.0 - 06/2020...
- Page 242 Appendix Fig. 155: Wiring diagram (13) Service Instructions D868 M-TYPE DELTA - 00.0 - 06/2020...
- Page 243 Appendix Fig. 156: Wiring diagram (14) Service Instructions D868 M-TYPE DELTA - 00.0 - 06/2020...
- Page 244 Appendix Fig. 157: Wiring diagram (15) Service Instructions D868 M-TYPE DELTA - 00.0 - 06/2020...
- Page 245 Appendix Fig. 158: Wiring diagram (16) Service Instructions D868 M-TYPE DELTA - 00.0 - 06/2020...
- Page 246 Appendix Fig. 159: Wiring diagram 17 Service Instructions D868 M-TYPE DELTA - 00.0 - 06/2020...
- Page 248 DÜRKOPP ADLER AG Potsdamer Straße 190 33719 Bielefeld GERMANY Phone +49 (0) 521 / 925-00 service@duerkopp-adler.com E-mail www.duerkopp-adler.com...
Need help?
Do you have a question about the D868 and is the answer not in the manual?
Questions and answers