Table of Contents
Advertisement
Quick Links
OPERATION MANUAL
Model TMM4-X Series
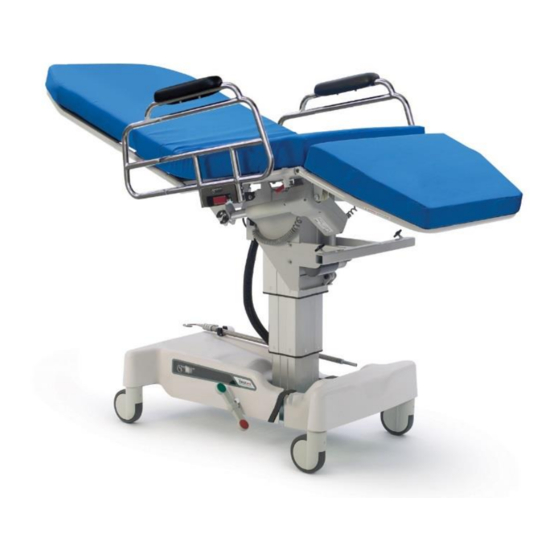
Multi-Purpose Tilt Chair and Surgi-Chair II
Options:
W
T
R
Q
L
F
E
B
A
Lane – Ocala, FL 34474-9307
st
5516 S.W. 1
Phone: 1-800-237-3377 - Fax: 1-352-854-9544
www.transmotionmedical.com
Wide
Tall
Rail on Back Section
Scale
Low
Folding Footrest
Export
Battery
AC Power
Page 1 of 28
Document No.: OM TMM4-X SERIES
Revision: X
Advertisement
Table of Contents

Related Manuals for Winco TransMotion Medical TMM4-X Series


Summary of Contents for Winco TransMotion Medical TMM4-X Series
- Page 1 OPERATION MANUAL Model TMM4-X Series Multi-Purpose Tilt Chair and Surgi-Chair II Options: Wide Tall Rail on Back Section Scale Folding Footrest Export Battery AC Power Lane – Ocala, FL 34474-9307 5516 S.W. 1 Phone: 1-800-237-3377 - Fax: 1-352-854-9544 www.transmotionmedical.com Document No.: OM TMM4-X SERIES Revision: X Page 1 of 28...
-
Page 2: Table Of Contents
TABLE OF CONTENTS IMPORTANT NOTES ABOUT THIS MANUAL ................3 SPECIAL NOTES - SIGNAL WORDS ..................3 SAFETY PRECAUTIONS ......................4 LABELING DIAGRAMS (TMM4-XFB shown) ................7 OPERATING INSTRUCTIONS ....................10 BACK SECTION QUICK RELEASE ........................10 CASTER BRAKE OPERATION ..........................11 SIDE RAIL OPERATION ............................11 ADJUSTING SIDE RAIL ANGLE ........................... -
Page 3: Important Notes About This Manual
IMPORTANT NOTES ABOUT THIS MANUAL This Operations Manual is designed to assist you with operating your TransMotion Medical Product. Carefully read this manual before using the equipment or doing service / maintenance on it. If you are unable to understand the WARNINGS and CAUTIONS and instructions, contact TransMotion Medical customer service before attempting to operate or service the equipment. -
Page 4: Safety Precautions
SAFETY PRECAUTIONS WARNINGS: CHAIR OPERATION BY QUALIFIED, TRAINED MEDICAL PERSONNEL ONLY The chair is intended to be operated only by qualified, trained medical staff. Operation of chair by unauthorized / untrained / lay people must be avoided. USE CAUTION ON RAMPS ... - Page 5 ACCESSORY WARNINGS: To prevent serious injury and property damage, review operating manuals of all medical equipment and accessories that may be used with, or attached to, this chair. Using the supplied accessories in the incorrect manner may cause patient, bystander, or facility harm. ...
- Page 6 PLUG CHAIR INTO PROPERLY GROUNDED WALL OUTLET MARKED “HOSPITAL ONLY” OR “HOSPITAL GRADE” For “A” Option Only Chair is equipped with hospital-grade three-prong plug for protection against electric shock, and must be plugged into properly grounded hospital-grade wall outlet. MAX WEIGHT OF BACK SURGICAL BAR ...
-
Page 7: Labeling Diagrams (Tmm4-Xfb Shown)
REMOVE BATTERY DURING CHAIR STORAGE For “B” Option Only If chair is to be stored or not in use for more than 3 weeks, remove battery pack from chair. Refer to Battery Charger Installation and Usage Instructions (IM TMA57-15), under the “Cautionary Usage Instructions”... - Page 8 Document No.: OM TMM4-X SERIES Revision: X Page 8 of 28...
- Page 9 Document No.: OM TMM4-X SERIES Revision: X Page 9 of 28...
-
Page 10: Operating Instructions
OPERATING INSTRUCTIONS BACK SECTION QUICK RELEASE LOCATE RELEASE LEVER Back section quick release lever (red) is located under seat on patient’s right side. ACTIVATE RELEASE LEVER To activate back section quick release, pull red lever out towards the arm rail. When weight is applied, back section will drop until lever is released. -
Page 11: Caster Brake Operation
CASTER BRAKE OPERATION BRAKE MODE Activate braking system by pressing down on red end of either brake pedal located at base of chair. This mode prevents all four casters from swiveling and all wheels from spinning. NEUTRAL MODE Activate neutral mode by placing either brake pedal into a horizontal orientation. -
Page 12: Adjusting Side Rail Angle
RAISING SIDE RAIL Lift side rail until it is in “up” position. Red rail release tab will engage (lock) automatically. Ensure side rail is secure by pulling on rail after it is raised. ADJUSTING SIDE RAIL ANGLE Remove cushion and seat pan by removing four pan head screws. - Page 13 To move outward, rotate bottom jam nut as shown. Once aligned, tighten top jam nut. NOTICE 1) You do not need to hold bottom nut to tighten top. Once aligned, top nut is tightening nut. 2) When adjusting, ensure bottom jam nut is contacting seat frame.
-
Page 14: Pendant (Controller)
PENDANT (CONTROLLER) PENDANT IS NOT INTENDED FOR PATIENT’S USE To prevent damage, pendant can be stored at various locations on the chair when not in use. ENSURE AREA IS CLEAR OF OBSTRUCTIONS PRIOR TO PENDANT USE To prevent property damage or injury to patient, survey area for possible obstructions prior to pendant use. -
Page 15: Patient Ingress / Egress
PATIENT INGRESS / EGRESS PATIENT SHOULD NEVER BE PERMITTED TO ENTER / EXIT FROM ENDS OF STRETCHER- CHAIR WHEN IN AN UPRIGHT, PARTIALLY, OR TOTALLY RECLINED POSITION. EXCESSIVE WEIGHT ON ENDS COULD CAUSE CHAIR TO TILT, RESULTING IN POSSIBLE PATIENT INJURY. ... -
Page 16: Patient Transfer
PATIENT TRANSFER PATIENT’S BODY WEIGHT SHOULD NEVER BE SHIFTED TOWARDS EITHER END OF CHAIR WHEN IN A PARTIALLY, OR TOTALLY, RECLINED POSITION. SERIOUS PATIENT INJURY MAY OCCUR. ALL PATIENT TRANSFERS MUST BE MADE FROM SIDE OF CHAIR, NOT CHAIR ENDS. Follow these instructions for safe and proper patient transfer between chair (in stretcher orientation) and another horizontal surface. -
Page 17: Options
OPTIONS “W” OPTION: WIDE WIDTH For “W” option, patient surface width is 28”. Standard width is 24”. “T” OPTION: TALL HEIGHT For “T” option, chair height travel is 16”. Standard travel is 8”. Document No.: OM TMM4-X SERIES Revision: X Page 17 of 28... -
Page 18: L" Option: Low Height
“L” OPTION: LOW HEIGHT For “L” option, chair height is 23.5” Standard height is 25”. Chair height travel is the same as Standard and “T” Option. To prevent chair damage, ensure ground clearance is at least 1.75” when driving chair up a ramp or over a bump. -
Page 19: Q" Option: Scale
“Q” OPTION: SCALE To measure patient’s weight with scale: 1) Ensure chair base is level. 2) Ensure chair is not contacting nearby objects. 3) Activate chair’s caster brakes. 4) To tare scale, press and hold the “ZERO” button for approximately 3 seconds until “zero” appears on the display, release button and the display will read 0.0. - Page 20 CHANGING PENDANT BATTERY Follow these instructions if pendant does not wake up when “WEIGH” button is pressed. 1) Remove battery cover on back of pendant by sliding it downwards. 2) Take out battery and replace it with a new 9V Industrial battery.
-
Page 21: F" Option: Folding Footrest
“F” OPTION: FOLDING FOOTREST WHEN POSITIONING FOOTREST, BE AWARE OF PINCH POINTS To stow footrest, place both hands on red handles and lift. For patient comfort, stow footrest prior to articulating chair into supine EXTENDED FOOTREST STOWED FOOTREST (stretcher) position. “E”... -
Page 22: B" Option: Battery Pack
“B” OPTION: BATTERY PACK REMOVING BATTERY PACK FROM CHAIR Grasp integrated handle on battery pack and lift up until cam locks disengage. Pull battery away from mounting bracket. INSTALLING BATTERY PACK ONTO CHAIR Place two round, cam locks on back of battery into square openings of mounting bracket. -
Page 23: A" Option: Ac Power (For On-Board Batteries And Charger)
“A” OPTION: AC POWER (for on-board batteries and charger) AC power cord for charging batteries is attached to chair base, and may be stowed by wrapping around storage bracket. To charge on-board batteries: 1. Insert AC plug into wall outlet. To prevent insufficient power, plug chair in to charge batteries overnight (i.e. -
Page 24: Switch Schematic For "X" Option
SWITCH SCHEMATIC FOR “X” OPTION ALL EXCESS WIRE IS PLACED IN FRONT OF CONTROL BOX GROUND WIRE ATTACHES TO GROUND POST (“A” OPTION ONLY) BATTERY CORD PLUGS INTO PORT #13 COLUMN PLUG (TMM4-X) OR PLUGS (TMM4-XT) PLUG INTO PHONO TO DIN ADAPTER PLUGS THEN PLUG INTO PORTS #1 (AND PORT #2 FOR TMM4-XT) LONGEST WIRE FROM WIRING ASSEMBLY IS THE BACK SECTION ACTUATOR –... -
Page 25: Cleaning Instructions
CLEANING INSTRUCTIONS STEAM AND/OR PRESSURE CLEANING CHAIR WILL VOID WARRANTY CLEANING COMPONENT FREQUENCY PROCEDURE COMMENT AGENT Facility approved As required/in Wipe with damp All Rails and Painted detergents, Check for chipped accordance with cloth and allow to Metal disinfectants & paint/chrome facility policies air dry... - Page 26 Upholstery Care & Cleaning Instructions Proper care is essential in ensuring the durability and reliability of TransMotion Medical upholstery. In general, all products should be: 1. Cleaned 2. Disinfected (in accordance with facility policy) 3. Rinsed 4. Allowed to air dry It is important to note that the terms “disinfecting”...
-
Page 27: Pad Removal Instructions
PAD REMOVAL INSTRUCTIONS When removing cushions, pull laterally. Do not pull from top to bottom. PREVENTIVE MAINTENANCE To ensure proper operation and extend the chair’s life, it should be maintained on a regular basis as shown below. COMPONENT FREQUENCY PROCEDURE TOOL COMMENT ... -
Page 28: Service Information
SERVICE INFORMATION PROPERLY DISPOSE OF BATTERIES BEING REPLACED DURING SERVICING Battery posts, terminals, and related components contain lead and lead compounds, which are known by the state of California to cause cancer or other reproductive harm. Wash hands thoroughly after handling or servicing.
Need help?
Do you have a question about the TransMotion Medical TMM4-X Series and is the answer not in the manual?
Questions and answers