
Subscribe to Our Youtube Channel
Related Manuals for vita Easyshade Compact


Summary of Contents for vita Easyshade Compact
- Page 1 Operating Instructions VITA shade taking VITA shade communication VITA shade reproduction VITA shade control Date of issue 01.09 Model Number: DEASYCS220...
- Page 3 3. Do not immerse the VITA Easyshade Compact hand piece This product is intended for use in the electromagnetic or base unit in water or any other liquid.
- Page 4 Important copyright information: © Copyright 2008, Vita Zahnfabrik. All Rights Reserved. or any obligation on the part of Vita Zahnfabrik and/or Software in part © Copyright 2008, JJL Technologies LLC. JJL Technologies to provide support or other services All Rights Reserved.
-
Page 5: Table Of Contents
12.7 Storage and transport conditions 4.3 Restoration mode 12.8 Glossary 4.4 Training mode 12.9 Patents and trademarks 12.10 Warranty 5 Recording the results 6 Extended color information 6.1 VITAPAN classical A1–D4 Shades 6.2 VITA SYSTEM 3D-MASTER Shades 6.3 Verify restoration... -
Page 6: Getting Started
Getting started 1 Getting started Thank you for your purchase of the VITA Easyshade Compact precision instrument which provides accurate shade determination for natural dentition and a variety of restorations. The instrument can measure a broad range of shades, including VITA Linearguide 3D-MASTER, VITA Toothguide 3D-MASTER including the BLEACHED SHADE GUIDE shades and VITAPAN c1assical A1-D4 shades. -
Page 7: System Setup / Features
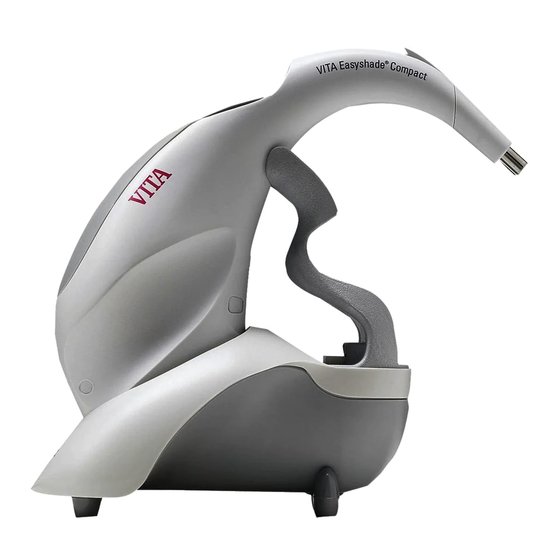
Open the VITA Easyshade Compact shipping container Place the base unit on a flat surface. and remove the operating instructions, the CD-Rom Insert the Easyshade Compact hand piece into the base with the Operating Instructions and LabRX, unit so that the battery charging port fits over the Easyshade Compact hand piece, base unit with the charging pins. -
Page 8: Battery Charging
1.5 Applying an anti-infection cover It is important to properly clean and disinfect the instrument between patient uses and to use a new VITA Easyshade Compact anti-infection cover for each patient to prevent patient cross-contamination. The anti-infection cover also protects the fiber optics in the probe tip from damage. -
Page 9: Power-On
Getting started 1.6 Power-on Turn on VITA Easyshade Compact by pressing and holding the measurement switch on the top of the unit or any of the display switches for two seconds. As long as the hourglass icon is displayed, the unit is not ready for use. - Page 10 Getting started After successful calibration, the measurement menu is displayed (fig. 9) and the unit is ready for use. The measurement used last is highlighted and activated after pressing the Enter key. If a single “beep” sounds, the adjacent screen (fig. 10) and a corresponding error number will be displayed (see section 12.4).
-
Page 11: Manual Calibration
Note: VITA Easyshade Compact is pre-calibrated at the factory for the calibration block that is shipped with the instrument. If you own more than one VITA Easyshade Compact, care must be taken not to switch calibration blocks between VITA Easyshade Compact units, which may adversely affect the accuracy of measurements. -
Page 12: Menu Navigation
Menu navigation 2 Menu navigation The two arrow buttons located below the display (as shown in figure 14) are used to navigate the instrument's menus. Display These buttons move the cursor over the icons. Arrow Pressing the Enter button will select the highlighted icon. buttons Enter button... -
Page 13: Measuring A Tooth
While holding the probe tip steady against the tooth, press the Measurement button until three rapid “beeps” can be heard to indicate completion of the measurement. VITA Easyshade Compact will display the results of the measurement. Incorrect placement (fig. 16): Probe tip not flush on the tooth surface. - Page 14 Note: Prior to measuring a tooth, an anti-infection cover must be applied to the VITA Easyshade Compact probe and the instrument must be calibrated. It is recommended to remove any stains from the surface of a tooth prior to measurement.
-
Page 15: Modes Of Operation
Enter button. Place the probe tip on the upper middle third of the tooth and press the measurement switch. The measurement results will be displayed on the screen of VITA Easyshade Compact: The closest interpolated VITA SYSTEM 3D-MASTER shade is displayed. -
Page 16: Tooth Areas Mode
Modes of operation Press the Enter button to return to the shade result screen. When more than one VITAPAN classical A1-D4 shade is indicated on the screen, the shade with the largest font is the closest VITAPAN classical A1-D4 shade and the nearest neighbor VITAPAN classical A1-D4 shades are indicated with the small font (see fig. -
Page 17: Restoration Mode
Modes of operation After successful measurement of all areas, the VITA SYSTEM 3D-MASTER and VITAPAN classical A1-D4 shade results will be displayed. If an error occurs during measurement, a long “beep” will sound and an “X” will be displayed in the measured tooth area (not shown). - Page 18 Modes of operation Use the arrow buttons and the Enter button to select a VITA SYSTEM 3D-MASTER or VITAPAN classical A1-D4 shade as illustrated in the adjacent screens. The arrow buttons are used to switch between the value, hue and chroma groups of VITA SYSTEM 3D-MASTER.
- Page 19 Modes of operation *** ”Good” means that the base color of the restoration has little or no color difference from the target shade to which it has been verified. ** ”Fair” means that the base color of the restoration may have a noticeable but acceptable difference from the target shade to which it has been verified.
-
Page 20: Training Mode
Modes of operation 4.4 Training mode To learn how to use VITA Easyshade Compact, it is useful to practise using the instrument by measuring VITA Linearguide 3D-MASTER, VITA Toothguide 3D-MASTER or VITAPAN classical A1-D4 shade tabs. To measure a shade tab, highlight the Shade tab icon on the Measurement menu. -
Page 21: Recording The Results
Recording the results 5 Recording the results The instrument has a memory capacity to store 25 successful measurements in the order in which they were made. Each set of tooth area measurement is stored as one result. The Record icon is located on the lower left of the Measurement menu screen. -
Page 22: Extended Color Information
C +/- The tooth's chroma is higher/lower than the VITAPAN classical A1–D4 shade. h +/- The tooth's hue is yellower/redder than the VITAPAN classical A1–D4 shade. 6.2 VITA SYSTEM 3D-MASTER ® shades This screen displays the L*C*h* *a*b color coordinates... -
Page 23: Verify Restoration
For additional information on color theory, visit VITA's website at www.vita zahnfabrik.com. Note: The CIEL*a*b* values measured by VITA Easyshade Compact are measurement mode specific and only accurate for natural teeth. Measuring shade tabs or dental restorations in the Single Tooth or Tooth Areas mode for CIEL*a*b values will produce inaccurate results. -
Page 24: Battery Level
Battery level 7 Battery level The battery charge level is indicated Fully charged by the Battery icon. When the battery is almost empty, Low battery level the Battery icon will flash. Highlight and select the Battery level icon on the Settings screen. The battery charge level can be exactly viewed on the Battery screen. -
Page 25: Cleaning And Disinfecting
CDC's recommendations for universal precautions during the use of VITA Easyshade Compact. VITA Easyshade Compact may only be calibrated with a new anti-infection cover. In the event that the calibration block becomes contaminated, the calibration block including holder must be removed from the base unit and sterilized using a steam autoclave in accordance with the instructions of the manufacturer of the sterilizing agent. -
Page 26: Automatic Power Off
Automatic power off 9 Automatic power off After twenty minutes of inactivity, VITA Easyshade Compact turns off auto- matically (automatic power off) to save battery energy, unless the instrument is connected to a computer via a USB cable. Press any switch to return to the Calibration screen. -
Page 27: Shades
2R2.5 2.5R2.5 3R2.5 3.5R2.5 4R2.5 The 29 VITA Linearguide or Toothguide 3D-MASTER VITA Easyshade Compact measures teeth shades are shown in bold in the tables above. and restorations to the nearest The tables also include the 52 interpolated shades VITA SYSTEM 3D-MASTER shade. -
Page 28: Easyshade Labrx Software
Follow the instructions included with the to a PC via the USB port located at the rear Easyshade LabRx software for software compatibility of the hand piece. and setup of the VITA Easyshade Compact software Use the enclosed mini USB cable. interface. -
Page 29: Appendix
Appendix 12 Appendix 12.1 Replacement parts and accessories for users The following replacement parts and accessories LabRX CD-ROM: D39000 for users are available from VITA: Operating instructions: 1506 Case with insert: DEASYCSK Quick start guide: 1559 Anti-infection cover: D39003 Mini USB cable:... -
Page 30: Screens
Appendix 12.3 Screens... -
Page 31: Error Messages
Power unit off. Insert the probe tip into the calibration block holder. Switch the unit on and calibrate it. 101, 102 104, 105 Hold steady when measuring. 116, 117 Internal message, contact VITA's Technical Service if problem persists. 109, 110 Re-calibrate 101, 111 Re-calibrate... -
Page 32: Troubleshooting
Make sure that the calibration block and the probe tip are clean; then re-calibrate the unit. Use only approved VITA Easyshade Compact anti-infection covers. Repeat the measurement, assuring that the probe tip is touching the surface at 90° in the middle of the shade tab and that the probe tip is not moving during the measurement. -
Page 33: Technical Data
511 g Battery: Rechargeable Li-Ion battery Lamp type: White High Power LED Connection: Use only approved power supply, VITA Prod. No. D46002 Classifications: UL 60601-1 Class II equipment Type B applied part IPXO Equipment is not suitable for use in presence of flammable anesthetic mixture with air or nitrous oxide. -
Page 34: Glossary
VITA SYSTEM 3D-MASTER shades Refers to the 29 shade sample teeth including 3 Bleached Shade Guide and the 52 VITA SYSTEM 3D-MASTER interpolated shades. VITAPAN classical A1–D4 shades Refers to the 16 original VITAPAN classical A1-D4 shades found on the VITAPAN classical A1-D4 shade guide, which was originally called the Lumin Vacuum shade guide. -
Page 35: Patents And Trademarks
General Terms of Business of VITA. VITA does not assume any liability for loss of data caused by the use of the LabRX CD-Rom. Technical support or service for Easyshade Compact are available from VITA at + 49 / 77 61 - 56 20. - Page 36 After the publication of these operating instructions any previous versions become obsolete. The current version can be found at www.vita-zahnfabrik.com VITA Zahnfabrik is certified according to the Medical Device Directive and the following product bears the CE mark VITA Easyshade ®...
Need help?
Do you have a question about the Easyshade Compact and is the answer not in the manual?
Questions and answers