Table of Contents
Advertisement
Quick Links
Advertisement
Table of Contents

Related Manuals for AVer FC1020-P


Summary of Contents for AVer FC1020-P
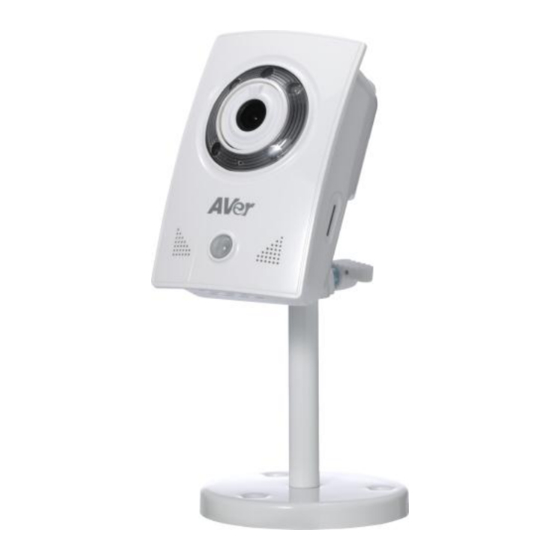
- Page 1 FC1020-P Cube IP Camera Quick User Guide...
-
Page 2: Table Of Contents
III. IP Assignment ......................8 Finding IP Camera by using “NXU Lite recording software” ..........8 Finding IP Camera by using “AVer IPCam Utility” ............11 Using NON-DHCP Server/Router Network ..............13 Connecting the IP Camera ..................15 FCC NOTICE (Class A) ..................... 16 COPYRIGHT ........................ -
Page 3: Before Installation
The following section introduces package contents, hardware installation, factory default reset, and SD card Compatibility List of each type camera. 1. Package Contents Item Descriptions 1. FC1020-P 2. Bracket 3. Screw pack 4. Power Adaptor(DC 12V/0.5A) (Optional) 5. CD (User’s Manual and Quick Guide, NVR software included) **If any of the above items are missing, please contact your dealer immediately. -
Page 4: Hardware Installation
Hardware Installation 1. Install with bracket Please refer to the picture for camera installation. Use the screws to lock the bracket to the wall or ceiling, and then connect the camera to the bracket. There’s a knob on the back of the bracket. Loosen the knob and you can adjust the angle of camera. - Page 5 2. Connector Instruction The camera connectors are as below. Connect the power and the Ethernet cable with the camera, and set it according to your network environment. AUDIO ETHERNET DI/DO DC 12V M I C R O P H O N E POWER DEFAULT BUTTON...
- Page 6 a. Please connect the G & DO pin to the external relay (buzzer) device When no event happens, DO output is 5V (DO and GND are disconnected). When the camera detects event happening and triggers external alarm, DO output is 0V (DO and GND are connected).
-
Page 7: Factory Default
Factory Default 1. To recover the default IP address and password, please follow the following steps. 2. Remove power and Ethernet cable. 3. Press and hold the button and connect power and Ethernet cable to the camera again and hold for round 20 seconds for system booting. -
Page 8: Sd Card Compatibility List
3. SD card Compatibility List FC1020-P is compliant with microSD/SDHC card and to ensure recording quality, and please use the following memory card. MicroSD/SDHC card Transcend SDHC class4 32GB Transcend SDHC class10 64GB SanDisk SDHC class4 32GB SanDisk SDHC class10 64GB... -
Page 9: Monitor Setting
Monitor Setting 1. Right-click on the desktop. Select “ Properties” 2. Change “Color quality” to “Highest (32-bit)”. -
Page 10: Ip Assignment
Finding IP Camera by using the “NXU Lite recording software” Finding IP Camera by using the “AVer IPCam Utility” Finding IP Camera by using “NXU Lite recording software” 1. The NXU Lite software is in the attached software CD. Before launching it, please install the software first. - Page 11 3. Click the “Setup” button. 4. Click the “Add IPCam” button. 5. Select “IP Camera” item.
- Page 12 6. Enter IP Camera’s ID and Password (default is admin/admin) and click “Auto Search” to find camera. 7. In the Search Result window, click the IP camera model that the user has purchased (Please ignore ONVIF connection item); the camera is in red text that is configurable. Users can double-click on the camera in the red text and configure the IP camera’s settings;...
-
Page 13: Finding Ip Camera By Using "Aver Ipcam Utility
Finding IP Camera by using “AVer IPCam Utility” 1. Use the software, “AVer IPCam Utility” to assign the IP address of the IP camera. The software is in the attached software CD. 2. Run the IPCam Utility 3. Select the proper network adapter and click [Search] to begin searching. - Page 14 5. The IE browser will open and direct you to IP camera login page. This requires IPViewer.ocx to run. If the IE ActiveX warning message appears, click to allow running the add-on. Default ID:admin Default Password:admin [Note] The default IP address is: 192.168.1.168 ...
-
Page 15: Using Non-Dhcp Server/Router Network
Using NON-DHCP Server/Router Network In Non-DHCP server/router network, the static IP address must be assigned to the device each time when adding another IP camera to the network; the default IP address of the current one must be changed to avoid conflict. Please make sure the Subnet of the PC’s IP address and the IP camera’s IP address are the same. - Page 16 A quick way to access remote monitoring is to double-click on a selected IP camera in “Camera Name list” in AVer IPCam Utility. Then, the IE browser will open and connect to IP camera. Then, please key in the default “ID” and “Password”, both of which are “admin”.
-
Page 17: Connecting The Ip Camera
IV. Connecting the IP Camera Launch the Internet Explorer browser, type the IP address of the IP camera in the address field. It will show the following dialogue box. Key-in the ”ID” and “Password”. The default ”ID” and “Password” are both “admin”. Once connected to the IP camera, the following program interface will appear. -
Page 18: Fcc Notice (Class A)
© 2014 AVer Information Inc. All rights reserved. All rights of this object belong to AVer Information Inc. Reproduced or transmitted in any form or by any means without the prior written permission of AVer Information Inc. is prohibited. All information or specifications are subject to change without prior notice. -
Page 19: Limited Warranty
You as the original purchaser. Except for the foregoing, the Product is provided “AS IS.” In no event does AVer warrant that You will be able to operate the Product without problems or interruptions, or that the Product is suitable for your purposes. Your exclusive remedy and the entire liability of AVer under this paragraph shall be, at AVer’s option, the repair or replacement... -
Page 20: Governing Law And Your Rights
Aver’s total, aggregate liability for damages of any nature, regardless of form of action, shall in no event exceed the amount paid by you to aver for the specific product upon which liability is based.
Need help?
Do you have a question about the FC1020-P and is the answer not in the manual?
Questions and answers