AVer VB342 Pro User Manual
4k ptz video bar
Hide thumbs
Also See for VB342 Pro:
- User manual (64 pages) ,
- Quick start manual (72 pages) ,
- Step-by-step instructions (10 pages)
Table of Contents
Advertisement
Quick Links
Advertisement
Table of Contents

Related Manuals for AVer VB342 Pro


Summary of Contents for AVer VB342 Pro
- Page 1 VB342 Pro 4K PTZ Video Bar (Conference Camera) — — User Manual...
- Page 2 Caution Risk of explosion if battery is replaced by an incorrect type. Dispose of used batteries according to the instructions. PSTI Statement of Compliance Please refer to the following website: https://www.aver.com/product-security-advisory...
- Page 3 ©2024 AVer Information Inc. All rights reserved. | September 6, 2024 All rights of this object belong to AVer Information Inc. Reproduced or transmitted in any form or by any means without the prior written permission of AVer Information Inc. is prohibited. All...
- Page 4 Tel: +1 (408) 263 3828 Tel: +31 (0) 10 7600 550 Toll-free: +1 (877) 528 7824 Japan Branch Office Vietnam Branch Office Công ty TNHH AVer Information アバー・インフォメーション株式会社 (Việt Nam) 〒160-0023 日本東京都新宿区西新 宿 3-2-26 立花新宿ビル 7 階 Tầng 5, 596 Nguyễn Đình Chiểu, P.3, Tel: +81 (0) 3 5989 0290 Quận 3, Thành phố...
-
Page 5: Table Of Contents
RS-232 Connection ......................11 RS-232 Port Pin Definition ..................11 Mini Din 6 to D-Sub 9 Cable Pin Definition ..............11 Connect VB342 Pro to a Camera Controller or Computer .......... 12 Installation ........................13 Wall Mount Installation ....................13 TV VESA Mount Installation (Optional) ................ - Page 6 Web Interface ........................21 PTZ Control ........................21 Overview of PTZ Control ..................... 21 Save, Load and Clear a Preset ..................22 Add and Delete Available Presets (Presets 10-127) ............22 Setting ..........................23 Overview of the Floating Live View ................26 Tracking Mode ......................
-
Page 7: Overview
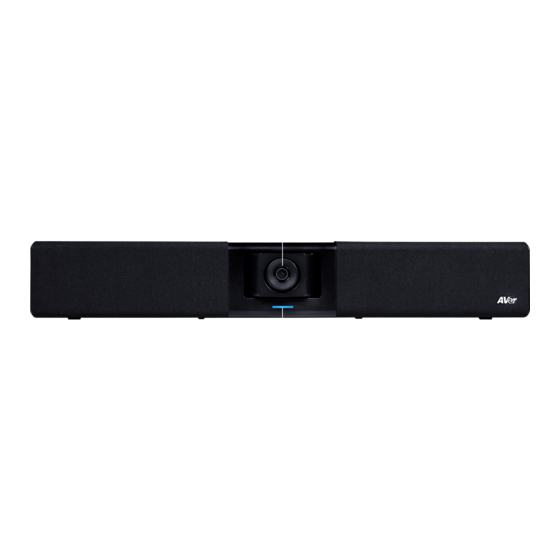
Overview Package Contents VB342 Pro Power Adapter & Remote Control USB 2.0 Type-B to Power Cord Type-A Cable (5 m) USB Type-A to Wall Mount M5 x 8 mm 1/4"-20 L=7.5 mm Type-C Adapter Bracket (x2) Wall Mount Screw (x4) -
Page 8: Warning
Optional Accessories Expansion Speakerphone Expansion Microphone USB 3.1 Extender 10 HDMI Cable 10m/ 20m w/ Cable 10m/ 20m w/ Cable m/20 m/30 m USB 3.0 Type-B to Type-A Mini Din 6 to RS-232 Audio-out Converter TV VESA Mount Cable (3 m) Adapter Cable Bluetooth Dongle * Optional accessories may vary based on the country or region where sold. -
Page 9: Parts Info
(TRS female to TRRS male) from AVer. **The HDMI output port supports USB display. ***Do not use a USB extender cable when connecting your Mac computer to the VB342 Pro via the USB 2.0 port. Your Mac computer may not detect the VB342 Pro. -
Page 10: Led Indicator
LED Indicator Color Status Solid red Start-up Solid orange Standby Solid white Normal Solid blue Streaming over USB on PTZApp 2 Solid red Microphone muted Solid white Call on hold Solid purple Active call Blinking white or blue Incoming call (based on previous status) Blinking white, blue or purple Call waiting... -
Page 11: Remote Control
Remote Control Your device may come with one of the following remote controls. Name Function 1. Power 2. Camera Select No selection is required by default to operate the camera. To assign a number to a camera, go to Setting > Camera •... -
Page 12: Shortcuts And Compound Keys
6. Pan-Tilt Control Pan and tilt direction control. 7. Back 8. Zoom In/Out Zoom in or out. 9. Function Buttons Call/Answer: Start or answer a call. • Pairing: Turn Bluetooth on or off. Refer to <Bluetooth Dongle • Connection> for details. Manual Framing: N/A •... -
Page 13: Connection
Connection Device Connection 1. Connect your VB342 Pro to a computer using the included USB 2.0 cable, and to a power outlet using the included power cord. Use the cable management slot to secure and manage cables. 2. Connect your VB342 Pro to a TV or monitor using an HDMI cable. -
Page 14: Bluetooth Dongle Connection
1. Plug the Bluetooth dongle into the USB 2.0 Type-A port before connecting to power. 2. Press the Pair button on the remote control or turn on Bluetooth in PTZApp 2. 3. Open the Bluetooth setting on your phone and select VB342 Pro to connect. -
Page 15: Ethernet Connection
Ethernet Connection Connect to Ethernet and access your camera’s web interface. Ethernet Cable Router / Switch Expansion Speakerphone Connection (Optional) Connect the expansion audio port (red) on your camera to the expansion port (yellow) on the expansion speakerphone using the included RJ-45 cable. The expansion speakerphone comes with a 10 m or 20 m cable. -
Page 16: Expansion Microphone Connection (Optional)
Expansion Microphone Connection (Optional) Connect the expansion audio port (red) on your camera to the mic out port (yellow) on the expansion microphone using the included RJ-45 cable. • The expansion microphone comes with a 10 m or 20 m cable. •... -
Page 17: Rs-232 Connection
RS-232 Connection RS-232 Port Pin Definition Mini Din 6 to D-Sub 9 Cable Pin Definition... -
Page 18: Connect Vb342 Pro To A Camera Controller Or Computer
Connect VB342 Pro to a Camera Controller or Computer Connection using AVer mini din 6 to RS-232 adapter cable • Pin connection without using AVer Mini Din 6 to RS-232 adapter cable • Mini DIN6 Camera Camera controller, PC 1. DTR 6. -
Page 19: Installation
Installation Wall Mount Installation 1. Level and tape the drill template to the wall. Drill pilot holes through the template and into the wall. 2. Remove the template and Insert anchors. Cement wall: M4 x 20 mm self-tapping screws (x2) + plastic conical anchors Wooden wall: M4 x 20 mm self-tapping screws (x2) 3. -
Page 20: Tv Vesa Mount Installation (Optional)
TV VESA Mount Installation (Optional) Package Contents: Fixture x 2 Screw(M5*10) x 2 Silicone washer x 2 Screw(M6*15) x 4 Metal washer x 2 Screw(M6*20) x 4 Washer(M6) x 4 Screw(M8*20) x 4 Washer(M8) x 4 Screw(M8*30) x 4 Fix the screw (M5*10) with silicone washer in suitable holes (1~5). Fixture Silicon washer Screw(M5*10) - Page 21 Secure the fixture on the rear side panel of the camera. Don’t screw tight at this stage. You can select among the twoscrew holes for screwing the fixtures. Place the metal washers on the mount holes of TV. [Note] If users do not need to install the mount rack of TV, just skip step 3 to 5 and go to step 6. Place mount rack of TV on top of fixture.
- Page 22 Secure the mount rack and fixture on the TV. Please do not screw tight at this stage. Then, adjust the mount rack and fixture to an appropriate position if needed. Finally, tightly screw all screws. If users don’t need to install mount rack of TV, then, secure the fixture on the TV. Then, adjust the fixture to an appropriate position if needed.
-
Page 23: Get Started
Get Started Make a Video Call The VB342 Pro is a plug-n-play video bar. Open your video conferencing software and select the VB342 Pro for Video and Audio. Access the Web Interface To access the web interface of the video bar, you can use any of the following software to find its IP... - Page 24 To access the web interface: 1. Download and install AVer IP Finder to your computer from AVer Download Center (https://www.aver.com/download-center) and launch the software. 2. Click Search to see available devices on the same local area network (LAN). Note: Make sure your video bar has internet.
-
Page 25: Ptzapp 2
PTZApp 2 1. Download and install PTZApp 2 to your computer from AVer Download Center. (https://www.aver.com/download-center) and launch the software. Note: Make sure your video bar has internet. • • PTZApp 2 and video bar must be on the same LAN. - Page 26 5. Click the link icon on the device card to access the web interface. When you log in for the first time: Enter the default password aver4321. You will be prompted to set up a new account name and password. •...
-
Page 27: Web Interface
Web Interface PTZ Control Overview of PTZ Control 1. Presets 0-9 8. Log Out Log out of your account and close the web 2. Preset Function Buttons interface. Save, load and clear a preset. 9. Live View 3. Add Available Presets 10. -
Page 28: Save, Load And Clear A Preset
13. One-Touch Focus Click to autofocus once. Save, Load and Clear a Preset 1. Use the pan, tilt and zoom controls to position your camera. To save a preset: 2. Select Set, then a preset number to save that position. 3. -
Page 29: Setting
Setting Camera Item Description Tracking Mode Select a tracking mode. Refer to <Tracking Mode> for details. Framing Speed Select a duration before auto frame. Slow: 5 seconds before auto frame. • Middle: 3 seconds before auto frame. • High: 1 second before auto frame. •... - Page 30 Audio Fence When Audio Fence is turned on: Select a narrow or wide audio fence to capture only the • voices within it. You won’t be able to use pan, tilt, zoom controls, • SmartFrame.and tracking modes. Audio Fence Mode Autofocus Automatically focus after each pan, tilt and zoom, or automatically focus continually.
- Page 31 Image Item Description Image Flip Flip the image vertically. Image Mirror Flip the image horizontally. True WDR Turn True Wide Dynamic Range (WDR) on or off. Flicker Decrease on IFP / Monitor Turn Flicker Decrease on IFP / Monitor on or off. Frequency Select a frequency.
-
Page 32: Overview Of The Floating Live View
Overview of the Floating Live View The floating live views opens automatically in the Setting, Video Format, Network and System • tabs. To open the floating live view again after closing, click on the camera icon on top of Setting, Video •... -
Page 33: Tracking Mode
Tracking Mode Frames manually using the SmartFrame button Manual Frame to frame entire group on screen once. Frames entire group on screen automatically using Auto Frame true pan, tilt and zoom (True PTZ) or electronic pan, tilt and zoom (ePTZ). If no one is in view, the camera will default to preset The camera auto frames every time a subject •... - Page 34 Frames active speaker on screen. Audio Frame (ePTZ) If no one is speaking, the camera will stay at the last position or default to group framing after your selected Audio Tracking Idle Interval. You can set a duration before the camera default •...
-
Page 35: Gesture Control
Gesture Control Turn on Gesture Control in the Setting tab > Gesture Control. • • The effective distance is up to 5 meters. Gesture Description Place your hand next to your face with your palm open and facing the camera for 2-3 seconds to turn Auto Frame on or off. Keep your hand 10cm away from your face. - Page 36 switch between tracking modes. 3. Web interface: go to the Setting tab > Tracking Mode. 4. PTZApp 2: go to the Setting tab > Tracking Mode.
-
Page 37: Video Format
Video Format Item Description H.264 Profile Select a profile for streaming live. IP Stream Resolution Select a resolution for streaming over IP. Frame Rate Select a frame rate. Bit Rate Select a bit rate. • To live stream on Facebook, we recommend a bit rate under 4Mbps. -
Page 38: Network
Network Item Description Hostname Click the pencil icon to edit a hostname. Use upper and lowercase letters and numbers. Static IP, DHCP Set up static IP or DHCP. If Static IP is selected, enter your network settings to set up a static IP connection and click Confirm. -
Page 39: System
System Item Description Language Select a language for the web interface. Firmware Update Update your camera’s firmware. Auto Update: Checks and updates online. • Manual Update: Update the firmware using a file offline. • Note: The camera will reboot and the connection will be lost. Please wait a few minutes and keep the power cable connected. - Page 40 Time Correction Mode Select a time correction mode. Auto: Enter your Network Time Protocol (NTP) server URL to • synchronize the clock. The default NTP server is located in the Manual: Click the pencil icon to set up the clock. •...
-
Page 41: Audio
Line Out: Designed for hearing augmentation system. • Please purchase an audio-out adapter (TRS female to TRRS male) from AVer. Do not connect external speakers. Doing so may interfere with the built-in speakes and microphones. -
Page 42: Ptzapp 2
1. Download PTZApp 2 from AVer Download Center to your computer and launch the application. 2. Connect the VB342 Pro to your computer with the included USB cable. You device should appear under the USB Devices page. 3. Click the Setting button to control audio settings. -
Page 43: Configure Preset Link For Voice Tracking
Configure Preset Link for Voice Tracking Frame the active talker with voice-tracking functionality by linking AVer cameras with third-party microphone systems (supported models). 1. Go to Preset Link tab, then enter Set Name and Microphone IP for your microphone. 2. Turn on Link > select Model. - Page 44 4. Set up Reaction Time: • Time to trigger Preset: Select an interval for the camera to go to a preset after sound detection. • Time to go back to Preset 0: Select an interval for the camera to go to preset 0 after no sound detection.
-
Page 45: Ezlive
EZLive Please go to https://www.aver.com/download-center to download the AVer EZLive software. After downloading, double-click on the file and follow the on-screen instructions to complete the installation. During a video call, EZLive can help user to do: (1) Camera ePTZ (2) Volume control for the speaker connected (3) Capture camera’s still images...
Need help?
Do you have a question about the VB342 Pro and is the answer not in the manual?
Questions and answers